
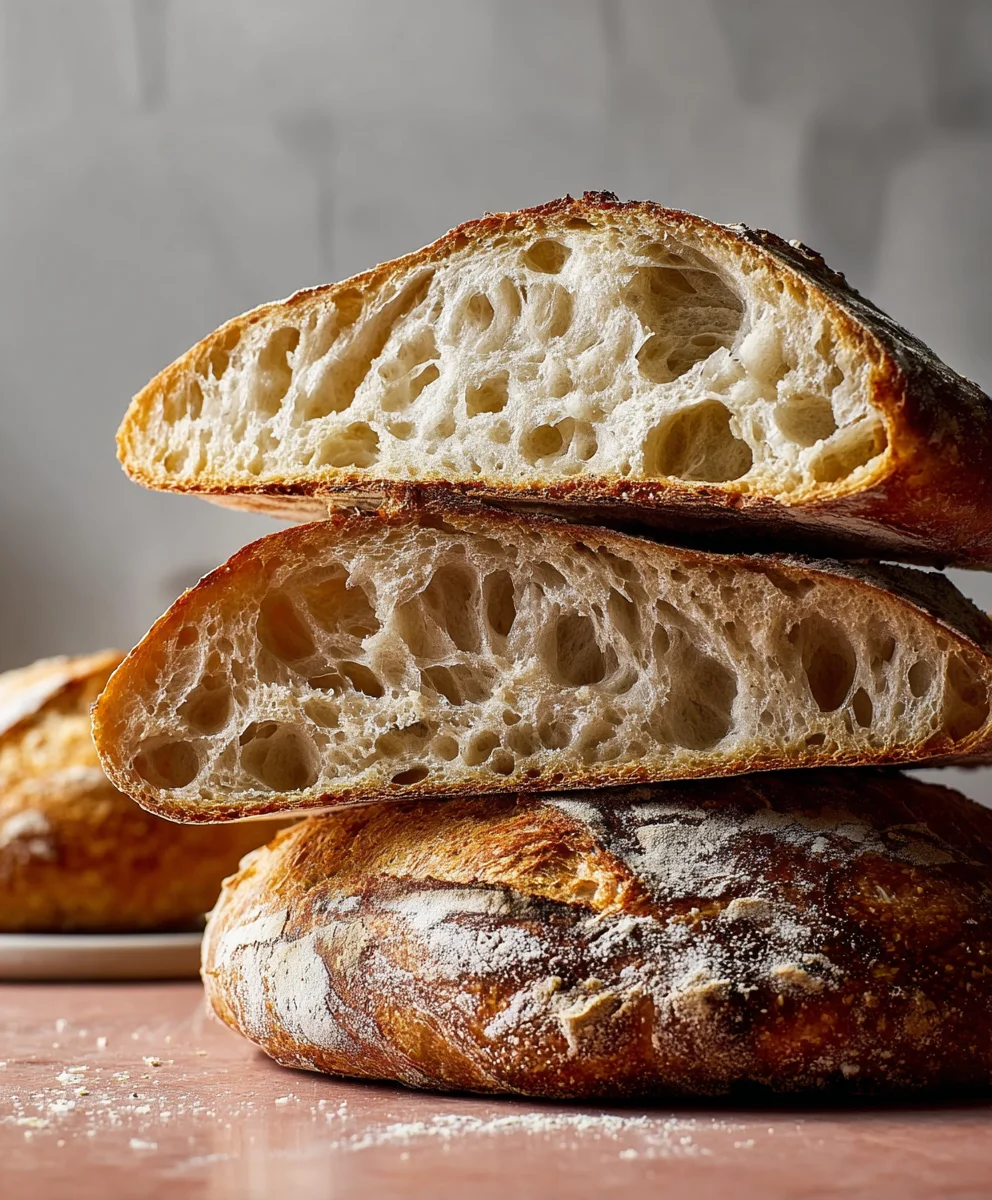
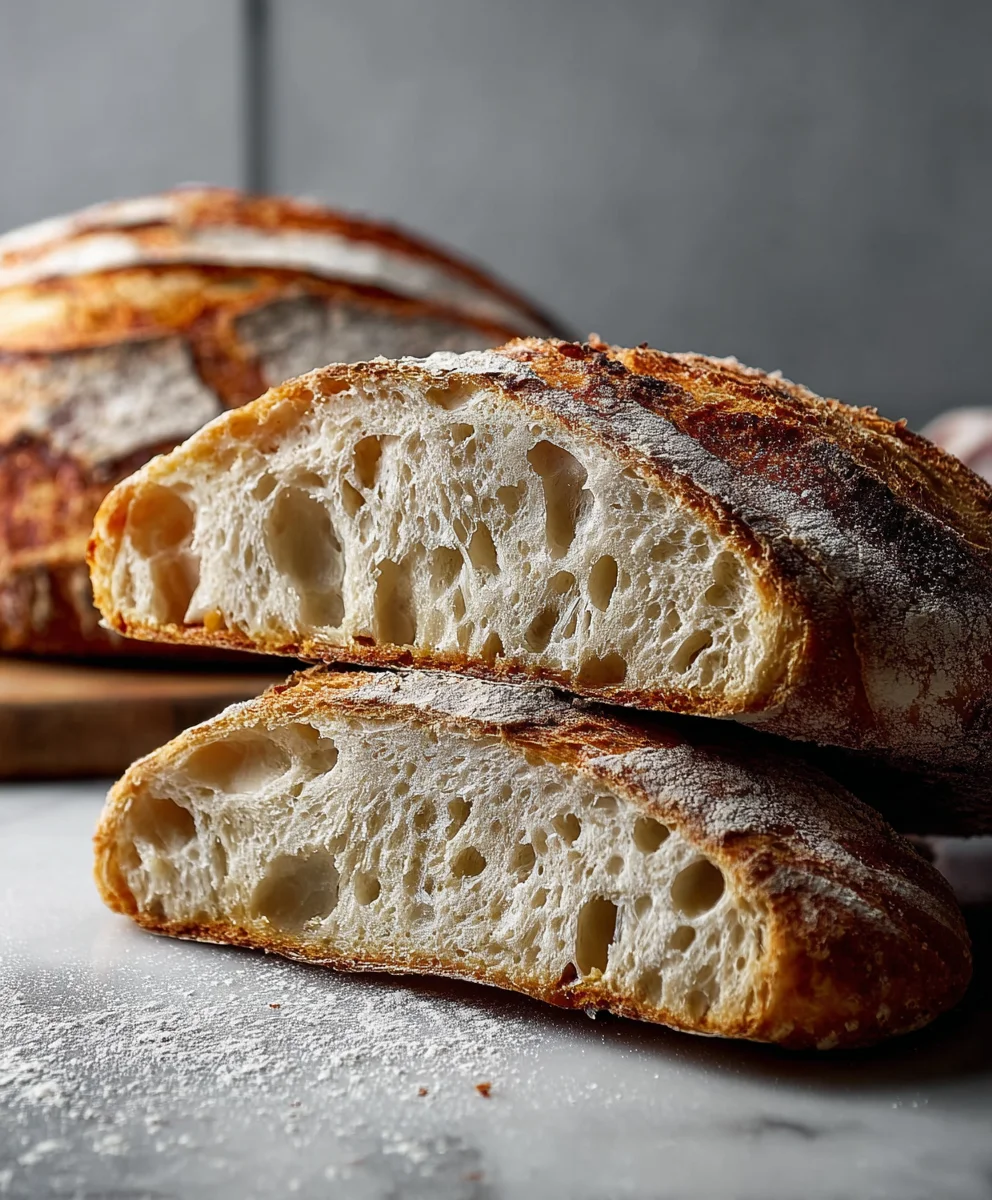
Sourdough Bread is more than just a baked good; it’s an art form, a journey, and for many of us, a deeply satisfying ritual. There’s something inherently comforting and primal about crafting a loaf of Sourdough Bread from scratch. The gentle tang, the chewy interior, and that irresistible crispy crust – it’s a symphony of textures and flavors that keeps us coming back for more. What truly elevates this beloved bread is the magic of wild yeast and fermentation, a process that not only imparts its distinctive character but also unlocks a complex flavor profile that mass-produced loaves simply cannot replicate. It’s this unique, almost alive quality that makes each homemade batch a triumph, a testament to patience and the simple beauty of natural ingredients. Get ready to embark on your own sourdough adventure and create a loaf that will make your kitchen smell like pure happiness.

Ingredients:
- 4 cups (500g) bread flour or all-purpose flour
- 1⅔ cups (375g) warm water
- 1 cup (200g) active sourdough starter
- 2 teaspoons (10g) salt
Mixing the Dough
Let’s get started by combining our basic ingredients. In a large mixing bowl, I like to start by adding the warm water. The warmth is important; it should feel comfortably warm to the touch, not hot, which could kill the yeast in your sourdough starter. Think bathwater temperature. Next, I gently pour in the active sourdough starter. You want to see bubbles and a pleasant, tangy aroma. If your starter looks sluggish, it might need a little more feeding before you start, but assuming it’s active and bubbly, it will work beautifully here.
Now, it’s time to add the flour. I usually add about half of the flour first and give it a good mix with a wooden spoon or a Danish dough whisk. This helps to start hydrating the flour and incorporates the starter and water more easily. Once that initial flour is mostly absorbed, I add the remaining flour. At this stage, the dough will be quite shaggy and might seem very wet. Don’t worry; this is perfectly normal for a high-hydration sourdough. Resist the urge to add more flour at this point, as it can make the final bread dense. Finally, I sprinkle in the salt. Salt is crucial for flavor, but it also plays a vital role in strengthening the gluten structure of the dough, which will give our sourdough that wonderful chewy texture and good crum extractb.
Developing the Dough (Autolyse and Stretch and Folds)
Once all the ingredients are combined into a shaggy mass, we’ll let the dough rest. This resting period is called an autolyse. I cover the bowl with a damp tea towel or plastic wrap and let it sit for about 20 to 30 minutes. During this time, the flour will absorb the water, gluten development will begin extract naturally, and the dough will become smoother and more cohesive. This initial rest makes the subsequent kneading or folding process much easier and more effective.
After the autolyse, it’s time to build strength in the dough using a technique called “stretch and folds.” I like to do this in a series of intervals over a few hours. To perform a stretch and fold, wet your hands slightly to prevent sticking. Reach into the bowl, grab one edge of the dough, and gently stretch it upwards. Then, fold it over itself towards the center of the bowl. Rotate the bowl a quarter turn and repeat this process, stretching and folding all four sides of the dough. You’ll do about 4-6 folds in each set. I typically perform a set of stretch and folds every 30 minutes for the first 2 hours, and then maybe once an hour for another hour or two, depending on how the dough is feeling. You’ll notice the dough becoming progressively smoother, more elastic, and stronger with each set of folds. It will start to pull away from the sides of the bowl and feel less sticky.
Bulk Fermentation and Shaping
Once the dough has developed sufficient strength and elasticity from the stretch and folds, it’s time for bulk fermentation. This is where the magic happens, and the sourdough starter really gets to work, producing gas and flavor. I keep the dough covered in its bowl and let it rest in a warm spot. The ideal temperature for bulk fermentation is around 75-80°F (24-27°C). The dough should increase in volume by about 30-50% and show signs of aeration, like visible bubbles on the surface. The exact time this takes can vary greatly depending on the ambient temperature and the activity of your starter, but it can range from 3 to 6 hours, or even longer in cooler environments.
Once bulk fermentation is complete, gently turn the dough out onto a lightly floured surface. Be careful not to deflate it too much. The dough should feel airy and lively. Now, we’ll pre-shape the dough. I like to gently form it into a round shape (a boule) by pulling the edges towards the center and then flipping it seam-side down. Let it rest, uncovered, for about 20-30 minutes. This brief rest allows the gluten to relax, making the final shaping easier. After the rest, perform your final shape. Whether you’re making a boule or a batard (an oblong loaf), the goal is to create tension on the surface of the dough by tucking and folding it onto itself. Once shaped, I carefully place the dough, seam-side up, into a floured banneton (a proofing basket) or a bowl lined with a floured tea towel. This basket will help the loaf hold its shape during its final proof.
Final Proofing and Baking
Now, the shaped dough needs its final proof. You have two main options here: room temperature proofing or a cold proof in the refrigerator. For a quicker bake, you can proof the dough at room temperature for another 1-3 hours, until it looks visibly puffy and springs back slowly when gently poked. However, I often prefer a cold proof in the refrigerator for 12-24 hours. This slow, cold fermentation develops even more complex flavors and makes the dough easier to score and handle. During this cold proof, the dough will continue to rise, but at a much slower pace.
When you’re ready to bake, preheat your oven with a Dutch oven (or baking vessel with a lid) inside to 475°F (245°C) for at least 30 minutes. A preheated Dutch oven is key to achieving that beautiful, crispy crust and oven spring. Carefully take the hot Dutch oven out of the oven. Gently invert your proofed dough from the banneton onto a piece of parchment paper. Now comes the exciting part: scoring the dough. Using a lame or a very sharp knife, make a few swift cuts on the surface of the dough. A simple cross or a more decorative pattern works well. This scoring allows the bread to expand evenly in the oven. Carefully lift the parchment paper with the dough and lower it into the preheated Dutch oven. Place the lid back on and bake for 20 minutes. After 20 minutes, remove the lid from the Dutch oven. This allows the crust to brown and crisp up. Reduce the oven temperature to 450°F (230°C) and continue baking for another 20-25 minutes, or until the crust is a deep golden brown and the internal temperature of the loaf reaches about 205-210°F (96-99°C). Once baked, carefully remove the bread from the Dutch oven and let it cool completely on a wire rack before slicing. This cooling period is essential frum extractthe crumb to set properly.
Conclusion:
We hope you’ve enjoyed exploring the rewarding process of baking your very own Sourdough Bread! From its tangy aroma to its satisfyingly chewy crust and airy interior, this recipe delivers a truly authentic experience. Remember, the journey to perfect Sourdough Bread is often one of patience and practice, so don’t be discouraged if your first loaf isn’t exactly as you envisioned. Each bake offers a learning opportunity, and you’ll soon discover the nuances of your starter and your own oven.
This versatile Sourdough Bread is fantastic on its own, simply toasted with a smear of butter. It also makes an incredible base for avocado toast, the perfect companion to hearty soups and stews, or the star of your next gourmet grilled cheese sandwich. Don’t hesitate to experiment with additions like herbs, seeds, or cheese baked directly into the dough for even more flavor dimensions. Embrace the magic of fermentation and enjoy every delicious slice!
Frequently Asked Questions about Sourdough Bread:
Q: My sourdough starter isn’t very active. What can I do?
A: A sluggish starter often needs a little TLC. Try feeding it more frequently, ensuring you’re using fresh, unbleached flour and room temperature, filtered water. Some bakers find that giving their starter a slightly warmer environment (around 75-80°F or 24-27°C) can also boost its activity. Regular feeding, discarding, and observation are key!
Q: Why did my Sourdough Bread come out dense?
A: Density in sourdough can be caused by several factors. It might be an underdeveloped starter, insufficient proofing time (either the bulk ferment or the final proof), or shaping techniques that didn’t create enough surface tension. Over-handling the dough during shaping can also deflate the air pockets. Be patient with the fermentation and proofing stages, and focus on gentle handling.
Artisan Sourdough Bread – Easy Homemade Recipe
A simple and delicious recipe for homemade artisan sourdough bread, perfect for beginners.
Ingredients
-
4 cups (500g) bread flour or all-purpose flour
-
1⅔ cups (375g) warm water
-
1 cup (200g) active sourdough starter
-
2 teaspoons (10g) salt
-
A pinch of sugar (optional, for enhanced browning)
Instructions
-
Step 1
Combine warm water and active sourdough starter in a large bowl. Add half the flour and mix until combined. Add the remaining flour and salt, mixing until a shaggy dough forms. -
Step 2
Cover the bowl and let the dough rest for 20-30 minutes (autolyse). Wet your hands and perform 4-6 stretch and folds. Repeat stretch and folds every 30-60 minutes for 2-3 hours until the dough is smooth and elastic. -
Step 3
Allow the dough to bulk ferment in a warm spot for 3-6 hours, or until it has increased in volume by 30-50% and shows signs of aeration. -
Step 4
Gently turn the dough onto a lightly floured surface. Pre-shape into a round and let rest for 20-30 minutes. Perform the final shape, creating surface tension, and place seam-side up in a floured banneton or lined bowl. -
Step 5
Proof the dough at room temperature for 1-3 hours or in the refrigerator for 12-24 hours. -
Step 6
Preheat oven with a Dutch oven to 475°F (245°C) for at least 30 minutes. Invert the proofed dough onto parchment paper, score it, and carefully transfer to the hot Dutch oven. Bake covered for 20 minutes, then uncovered at 450°F (230°C) for another 20-25 minutes until deep golden brown. -
Step 7
Remove bread from Dutch oven and cool completely on a wire rack before slicing.
Important Information
Nutrition Facts (Per Serving)
It is important to consider this information as approximate and not to use it as definitive health advice.
Allergy Information
Please check ingredients for potential allergens and consult a health professional if in doubt.


Leave a Comment