
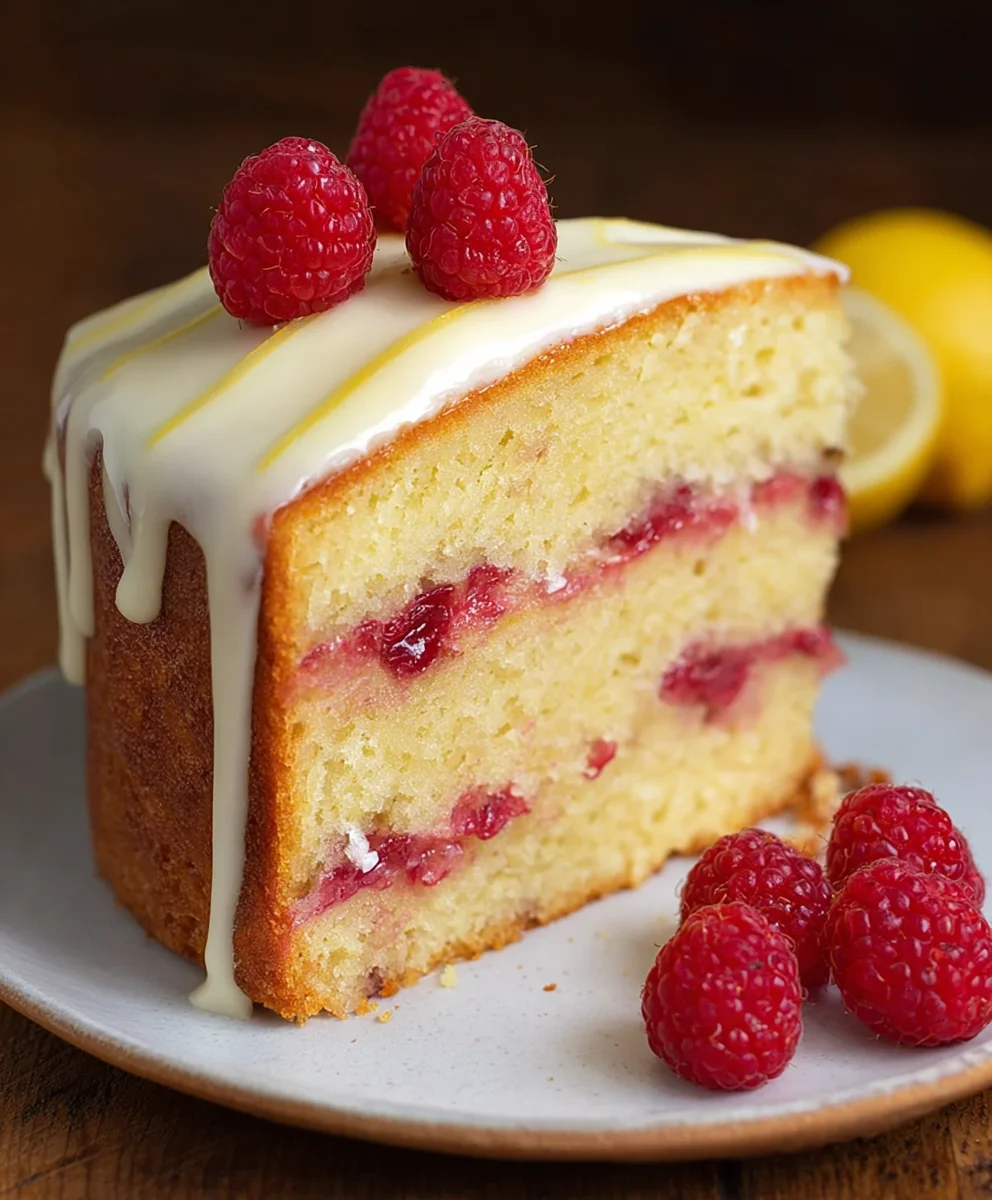
Raspberry Lemon Cake is more than just a dessert; it’s a vibrant celebration of flavors, a true testament to the delightful harmony achieved when two beloved ingredients unite. Imagine a slice that instantly transports you to a sun-drenched afternoon, offering a perfect balance of zesty brightness and sweet-tart indulgence.
I’ve always found immense joy in baking, and certain combinations just sing. The marriage of bright, zesty lemon and sweet-tart raspberries has long been a cherished duo in patisserie worldwide, evoking feelings of warmth, freshness, and pure indulgence. While a specific historical document might not pinpoint the very first creation of this exact cake, the essence of these refreshing flavors together has graced tables for centuries, from simple fruit tarts to elaborate layered creations, always symbolizing a sophisticated yet comforting treat.
Why This Raspberry Lemon Cake Steals Hearts
What truly makes this cake a perennial favorite is its exquisite balance. Each forkful offers a burst of tangy lemon, perfectly complemented by the juicy, sweet notes of raspberries, all enveloped in a beautifully moist and tender crumb. It’s a sensory experience that brightens any day, making it an ideal choice for everything from a casual afternoon tea to a special gathering. I promise you, mastering this delightful Raspberry Lemon Cake will bring immense satisfaction and quickly become an instant classic in your baking repertoire.

Ingredients:
- For the Raspberry Lemon Cake Layers:
- 2 ½ cups (300g) all-purpose flour, sifted
- 2 teaspoons baking powder
- ½ teaspoon baking soda
- ½ teaspoon salt
- 1 cup (226g) unsalted butter, softened to room temperature
- 2 cups (400g) granulated sugar
- 4 large eggs, at room temperature
- 1 tablespoon vanilla extract
- 1 tablespoon fresh lemon zest (from about 2 large lemons)
- ¾ cup (180ml) buttermilk, at room temperature
- ¼ cup (60ml) fresh lemon juice
- For the Raspberry Filling:
- 2 cups (250g) fresh or frozen raspberries (do not thaw if frozen)
- ½ cup (100g) granulated sugar
- 2 tablespoons fresh lemon juice
- 2 tablespoons cornstarch (cornflour)
- ¼ cup (60ml) cold water
- For the Lemon Buttercream Frosting:
- 2 ½ cups (565g) unsalted butter, softened to room temperature
- 8 cups (960g) powdered sugar (confectioners’ sugar), sifted
- ½ cup (120ml) fresh lemon juice (from about 3-4 lemons)
- 2 tablespoons fresh lemon zest (from about 4 large lemons)
- 1 teaspoon vanilla extract
- ¼ teaspoon salt
- 1-3 tablespoons heavy cream or milk (optional, for consistency)
- For Garnish (Optional):
- Fresh raspberries
- Additional lemon zest
For the Raspberry Lemon Cake Layers:
- Prepare Your Oven and Pans: First things first, let’s get that oven ready! Preheat your oven to 350°F (175°C). Grease and flour three 8-inch round cake pans, or line them with parchment paper circles at the bottom and grease the sides. I always find a little extra parchment insurance goes a long long way to prevent sticking.
- Combine Dry Ingredients: In a medium bowl, whisk together the sifted all-purpose flour, baking powder, baking soda, and salt. Sifting the flour is a crucial step for a light and airy cake, so don’t skip it! Set this aside for a moment.
- Cream Butter and Sugar: In a large bowl, using an electric mixer fitted with a paddle attachment, beat the softened unsalted butter on medium speed for about 2 minutes until it’s light and creamy. Gradually add the granulated sugar, beating for another 3-5 minutes until the mixture is truly light, fluffy, and pale in color. This creaming process incorporates air, which is essential for a tender cake. Don’t rush this step; it’s key to the cake’s texture!
- Add Eggs and Flavorings: Add the large eggs one at a time, beating well after each addition until fully incorporated. Scrape down the sides of the bowl as needed to ensure everything is evenly mixed. Once the eggs are in, stir in the vanilla extract and that gorgeous fresh lemon zest. Oh, the aroma already!
- Alternate Wet and Dry: Now, we’re going to add our dry ingredient mixture alternately with the buttermilk and fresh lemon juice. Begin by adding about one-third of the dry ingredients to the butter mixture, mixing on low speed until just combined. Next, pour in half of the buttermilk and lemon juice mixture, again mixing until just incorporated. Repeat with another third of the dry ingredients, followed by the remaining buttermilk and lemon juice, and finally, the last of the dry ingredients. Be careful not to overmix! Overmixing can lead to a tough cake, and we want our Raspberry Lemon Cake to be beautifully tender.
- Divide and Bake: Divide the cake batter evenly among your three prepared 8-inch cake pans. I like to use a kitchen scale for this to ensure my layers are perfectly even, but you can eyeball it if you prefer. Bake for 25-30 minutes, or until a wooden skewer or toothpick inserted into the center of a cake comes out clean.
- Cooling the Layers: Once baked, let the cake layers cool in their pans on a wire rack for about 10-15 minutes. This allows them to firm up slightly before you attempt to remove them. After this initial cooling, carefully invert the cakes onto the wire rack and remove the pans. Allow them to cool completely before frosting. Working with warm cakes will melt your frosting, so patience is a virtue here!
For the Raspberry Filling:
- Combine Ingredients: In a medium saucepan, combine the fresh or frozen raspberries, granulated sugar, and fresh lemon juice. If you’re using frozen raspberries, there’s no need to thaw them; they’ll release their juices as they cook.
- Cook the Mixture: Bring the mixture to a simmer over medium heat, stirring occasionally. The raspberries will start to break down and release their juices. Cook for about 5-7 minutes, until the mixture is bubbling gently and the raspberries are soft.
- Prepare Cornstarch Slurry: In a small bowl, whisk together the cornstarch and cold water until smooth. This creates a “slurry” which will thicken our filling.
- Thicken the Filling: Pour the cornstarch slurry into the simmering raspberry mixture, whisking constantly to prevent lumps. Continue to cook and stir for another 1-2 minutes, until the filling has thickened to a jam-like consistency. It should coat the back of a spoon.
- Cool Completely: Remove the raspberry filling from the heat and transfer it to a heatproof bowl. Cover it directly with plastic wrap (to prevent a skin from forming) and let it cool completely to room temperature. You can also pop it in the refrigerator to speed up the cooling process, which is often what I do to ensure it’s firm enough for filling the cake. A well-chilled filling is essential for easy assembly and to prevent it from oozing out of your beautiful Raspberry Lemon Cake!
For the Lemon Buttercream Frosting:
- Cream the Butter: In the bowl of a stand mixer fitted with the paddle attachment (or using a hand mixer in a large bowl), beat the softened unsalted butter on medium-high speed for about 5 minutes until it’s very light, fluffy, and pale. This step is crucial for achieving a super smooth and airy buttercream.
- Gradually Add Powdered Sugar: With the mixer on low speed, gradually add the sifted powdered sugar, one cup at a time. Beat until each addition is fully incorporated before adding more. Once all the sugar is added, increase the speed to medium-high and beat for another 3-5 minutes. The mixture should be thick and creamy.
- Introduce Lemon and Vanilla: Reduce the mixer speed to low. Pour in the fresh lemon juice, add the lemon zest, vanilla extract, and salt. Slowly mix until everything is combined.
- Whip to Perfection: Increase the mixer speed to medium-high and beat for an additional 2-3 minutes. This final whip will make your buttercream incredibly light, fluffy, and spreadable. Taste and adjust for sweetness or lemon flavor if desired; you might want a little more zest for an extra kick!
- Adjust Consistency (Optional): If the frosting seems too thick, add heavy cream or milk one tablespoon at a time until you reach your desired consistency. If it’s too thin, you can add a little more sifted powdered sugar. The perfect consistency is creamy and spreadable, but firm enough to hold its shape for decorating your gorgeous Raspberry Lemon Cake.
Assembling Your Raspberry Lemon Cake:
- Level the Cakes: Once your cake layers are completely cool, use a serrated knife or a cake leveler to gently level the tops of each cake layer. This ensures a stable and professional-looking cake. I sometimes snack on the trimmed bits – don’t tell anyone!
- First Layer and Frosting Dam: Place one leveled cake layer on your serving plate or cake stand. Spread about ¾ cup of the lemon buttercream evenly over the top of this layer, leaving about a ½-inch border around the edge. Using a piping bag or a spoon, pipe or spread a “dam” (a thick border) of buttercream around the perimeter of the cake layer. This acts as a barrier to hold in our delicious raspberry filling.
- Add Raspberry Filling: Spoon about ½ to ¾ cup of the cooled raspberry filling inside the buttercream dam. Gently spread it out evenly, but try not to overfill, as we don’t want it to ooze out when we add the next layer.
- Second Layer and Repeat: Carefully place the second cake layer on top of the first, pressing down gently to ensure it’s level. Repeat the process: spread ¾ cup of lemon buttercream, create your dam, and fill with another ½ to ¾ cup of raspberry filling.
- Top with Third Layer: Place the final cake layer on top. Now, you should have a beautiful stack of layers and filling, ready for its full buttercream coat.
- The Crumb Coat: Apply a thin layer of lemon buttercream all over the top and sides of the entire cake. This is called a “crumb coat” and its purpose is to trap any loose crumbs, preventing them from mixing into your final, pristine layer of frosting. This step is vital for a clean finish!
- Chill the Crumb Coat: Transfer the crumb-coated cake to the refrigerator and chill for about 20-30 minutes, or until the crumb coat is firm to the touch. This really sets everything in place.
- Final Frosting Layer: Once the crumb coat is firm, remove the cake from the refrigerator. Apply the remaining lemon buttercream, spreading it evenly over the top and sides of the cake. Use an offset spatula or a bench scraper to smooth out the frosting for a clean, professional look. You can create swoops, swirls, or a perfectly smooth finish – whatever makes your heart sing!
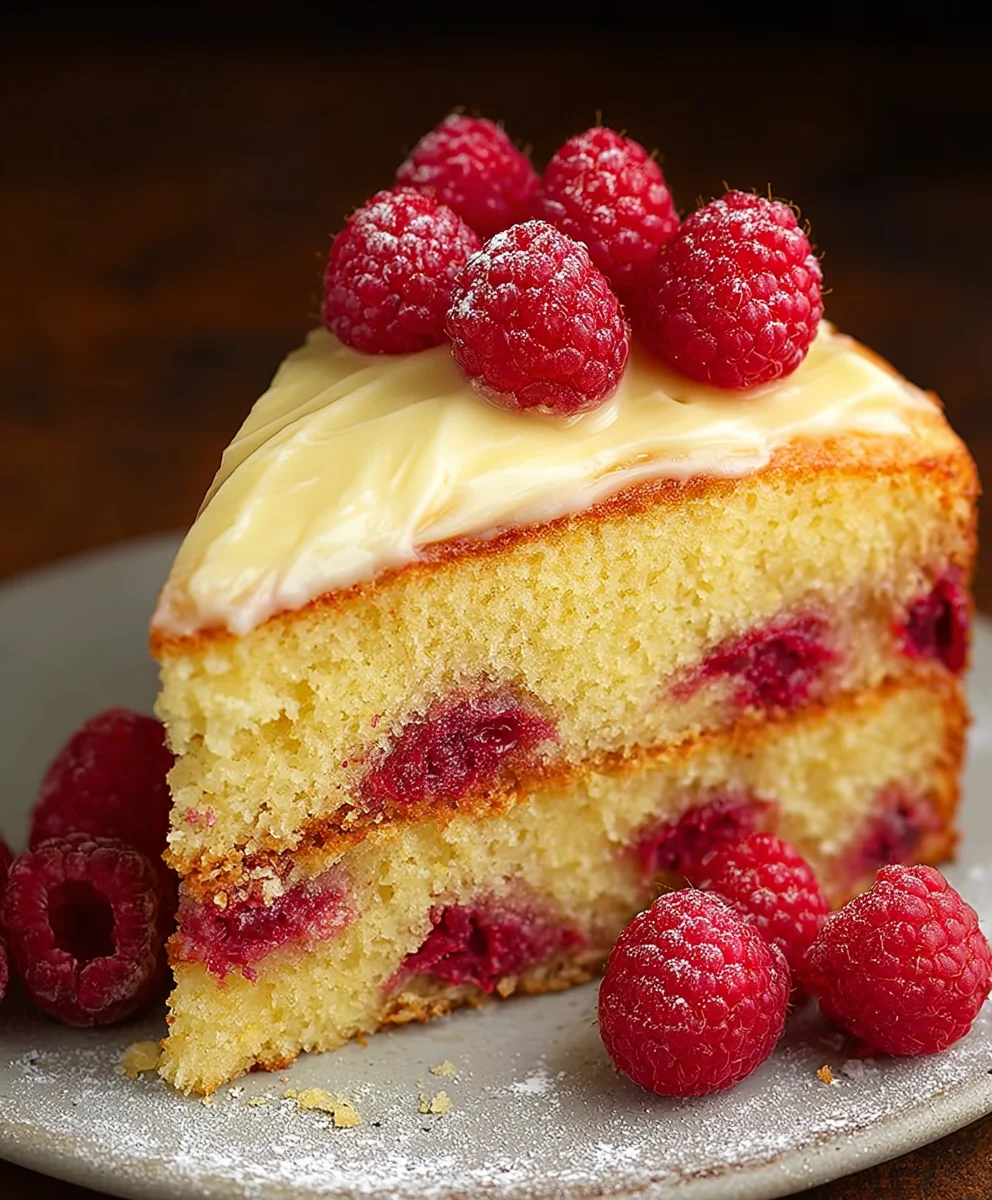
- Decorate and Serve: If desired, garnish your stunning Raspberry Lemon Cake with fresh raspberries and extra lemon zest for a pop of color and an even fresher aroma.
- Chill Before Serving (Optional, but Recommended): For the cleanest slices and to allow the flavors to meld beautifully, I highly recommend chilling the decorated cake for at least 30 minutes before serving.
Enjoy Your Homemade Raspberry Lemon Cake!
There you have it! A truly magnificent Raspberry Lemon Cake, ready to impress with its vibrant flavors and beautiful appearance. This cake is a labor of love, but every single bite is worth the effort, I promise!
Conclusion:
Well, my fellow bakers and dessert enthusiasts, we’ve come to the grand finale of our journey with this incredible recipe, and I truly hope you’re feeling as excited as I am about what you’ve learned. This isn’t just another cake recipe; it’s an invitation to experience pure, unadulterated joy in every single bite. I wholeheartedly believe this Raspberry Lemon Cake is an absolute must-try for anyone who appreciates the perfect harmony of vibrant flavors and a wonderfully tender texture. It’s a masterful blend of sweet and tart, a symphony on the palate that manages to be both refreshing and deeply comforting all at once. The zingy lemon cuts beautifully through the sweetness, while the bursting raspberries add a delightful fruitiness and a lovely moistness that makes each slice simply irresistible. Imagine the aroma filling your kitchen – that alone is worth the effort, but the taste, my friends, is truly something special. It’s the kind of dessert that elicits gasps of delight and requests for second slices, often before the first is even finished! It’s surprisingly straightforward to prepare, making it a fantastic choice whether you’re a seasoned baker looking for a new favorite or a beginner eager to impress.
Now, let’s talk about how to make this delightful creation even more spectacular, or how to put your own unique spin on it. While this cake is absolutely divine on its own, a simple dusting of powdered sugar adds an elegant touch without overpowering its delicate flavors. For a truly indulgent experience, I highly recommend serving a slice warmed ever so slightly, alongside a generous dollop of freshly whipped cream, perhaps infused with a hint of vanilla or even a tiny splash of limoncello for an extra zing. A scoop of high-quality vanilla bean ice cream or a bright, tangy lemon sorbet would also be a magnificent accompaniment, creating a delightful contrast of temperatures and textures. If you’re feeling adventurous, a small berry compote, made by simmering a handful of fresh or frozen raspberries with a touch of sugar, could be drizzled over the top, enhancing the fruitiness and adding another layer of sophistication. Don’t be afraid to experiment with the fresh fruit garnish either; a few extra fresh raspberries, a sprig of mint, or even some delicate edible flowers can transform your presentation into a work of art.
Beyond the serving suggestions, this recipe is incredibly versatile if you want to explore variations. While the classic combination of raspberry and lemon is undeniably brilliant, you could easily swap out the raspberries for other berries like blueberries, blackberries, or even a mix of summer fruits for a mixed berry lemon cake. Imagine the beautiful purple hues with blueberries! You could also play with the citrus element, perhaps using lime for a slightly more exotic and sharper flavor, or even orange for a sweeter, more mellow note. For those who love a richer finish, a simple cream cheese frosting could replace the glaze, though I personally adore the lightness the lemon glaze provides. If you’re baking for a different occasion or simply want a different shape, this batter works beautifully in a Bundt pan (just adjust the baking time), or even as individual cupcakes, which are perfect for parties and picnics. Remember to always keep an eye on your oven and adjust baking times accordingly for different pan sizes and types.
So, what are you waiting for? I truly hope I’ve managed to convey just how special this Raspberry Lemon Cake truly is. It’s more than just a recipe; it’s an opportunity to create something beautiful and delicious, to bring joy to your kitchen, and to share a truly memorable dessert with your loved ones. Don’t let the idea of baking intimidate you; this recipe is designed for success, and the rewards are absolutely magnificent. Imagine that first forkful: the tender crumb, the burst of sweet-tart raspberry, the bright zing of lemon – pure bliss, I promise you. I’ve poured my heart into crafting these instructions to be as clear and helpful as possible, guiding you every step of the way to ensure your baking adventure is a resounding success. I genuinely encourage you to grab your apron, preheat your oven, and embark on this delightful culinary journey. And once you’ve pulled your masterpiece from the oven, once you’ve taken that triumphant first bite, I would absolutely love, love, love to hear all about your experience! Did you stick to the original recipe, or did you try one of the variations? What was your favorite part of the process? Did you share it, and what did your tasters think? Please, share your stories, your photos, and your feedback with me. Your enthusiasm is what keeps me inspired, and your creations will undoubtedly inspire others too. Happy baking, my friends – I can’t wait to hear how your cake turns out!
Zesty Raspberry Lemon Cake
A vibrant and delightful Raspberry Lemon Cake recipe, offering a perfect balance of zesty brightness and sweet-tart indulgence. This layered cake, with its moist crumb, tangy lemon buttercream, and juicy raspberry filling, promises a sensory experience that brightens any day and is perfect for any occasion.
Ingredients
-
2 ½ cups (300g) all-purpose flour
-
2 teaspoons baking powder
-
½ teaspoon baking soda
-
½ teaspoon salt
-
1 cup (226g) unsalted butter, softened
-
2 cups (400g) granulated sugar
-
4 large eggs
-
1 tablespoon vanilla extract
-
1 tablespoon fresh lemon zest
-
¾ cup (180ml) buttermilk
-
¼ cup (60ml) fresh lemon juice
-
2 cups (250g) raspberries (fresh or frozen)
-
½ cup (100g) granulated sugar
-
2 tablespoons fresh lemon juice
-
2 tablespoons cornstarch
-
¼ cup (60ml) cold water
-
2 ½ cups (565g) unsalted butter, softened
-
8 cups (960g) powdered sugar, sifted
-
½ cup (120ml) fresh lemon juice
-
2 tablespoons fresh lemon zest
-
1 teaspoon vanilla extract
-
¼ teaspoon salt
-
1-3 tablespoons heavy cream or milk (optional)
-
Fresh raspberries (for garnish)
-
Additional lemon zest (for garnish)
Instructions
-
Step 1
Preheat oven to 350°F (175°C). Grease and flour three 8-inch round cake pans. In a medium bowl, whisk together flour, baking powder, baking soda, and salt. In a large bowl, cream softened butter and 2 cups granulated sugar until light and fluffy (3-5 minutes). Beat in eggs one at a time, then stir in vanilla extract and 1 tablespoon lemon zest. Alternately add dry ingredients with buttermilk and ¼ cup lemon juice, mixing on low speed until just combined; do not overmix. Divide batter among pans and bake for 25-30 minutes, or until a toothpick comes out clean. Cool in pans for 10-15 minutes, then invert onto a wire rack to cool completely. -
Step 2
In a medium saucepan, combine raspberries (do not thaw if frozen), ½ cup granulated sugar, and 2 tablespoons lemon juice. Bring to a simmer over medium heat, stirring occasionally, and cook for 5-7 minutes until raspberries are soft. In a small bowl, whisk cornstarch and cold water to create a slurry. Pour slurry into simmering raspberry mixture, whisking constantly, and cook for 1-2 minutes until thickened to a jam-like consistency. Transfer to a heatproof bowl, cover directly with plastic wrap, and cool completely to room temperature or chill. -
Step 3
In a stand mixer, beat softened butter on medium-high speed for 5 minutes until very light and fluffy. Gradually add sifted powdered sugar on low speed, one cup at a time. Once all sugar is incorporated, beat on medium-high for 3-5 minutes until thick and creamy. Reduce speed to low, then add ½ cup lemon juice, 2 tablespoons lemon zest, vanilla extract, and salt; mix until combined. Increase speed to medium-high and beat for an additional 2-3 minutes until incredibly light and fluffy. Adjust consistency with heavy cream or milk if needed. -
Step 4
Once cake layers are completely cool, level the tops with a serrated knife. Place one leveled cake layer on your serving plate. Spread about ¾ cup of lemon buttercream, leaving a ½-inch border around the edge. Using a piping bag or spoon, create a buttercream ‘dam’ around the perimeter. Spoon about ½ to ¾ cup of the cooled raspberry filling inside the dam. Carefully place the second cake layer on top and repeat the frosting and filling steps. Place the final cake layer on top. -
Step 5
Apply a thin layer of lemon buttercream all over the top and sides of the entire cake. This ‘crumb coat’ traps any loose crumbs. Transfer the crumb-coated cake to the refrigerator and chill for about 20-30 minutes, or until the crumb coat is firm to the touch. -
Step 6
Once the crumb coat is firm, remove the cake from the refrigerator. Apply the remaining lemon buttercream, spreading it evenly over the top and sides of the cake. Smooth the frosting with an offset spatula or bench scraper. Garnish with fresh raspberries and additional lemon zest, if desired. For the cleanest slices and best flavor melding, chill the decorated cake for at least 30 minutes before serving.
Important Information
Nutrition Facts (Per Serving)
It is important to consider this information as approximate and not to use it as definitive health advice.
Allergy Information
Please check ingredients for potential allergens and consult a health professional if in doubt.


Leave a Comment