
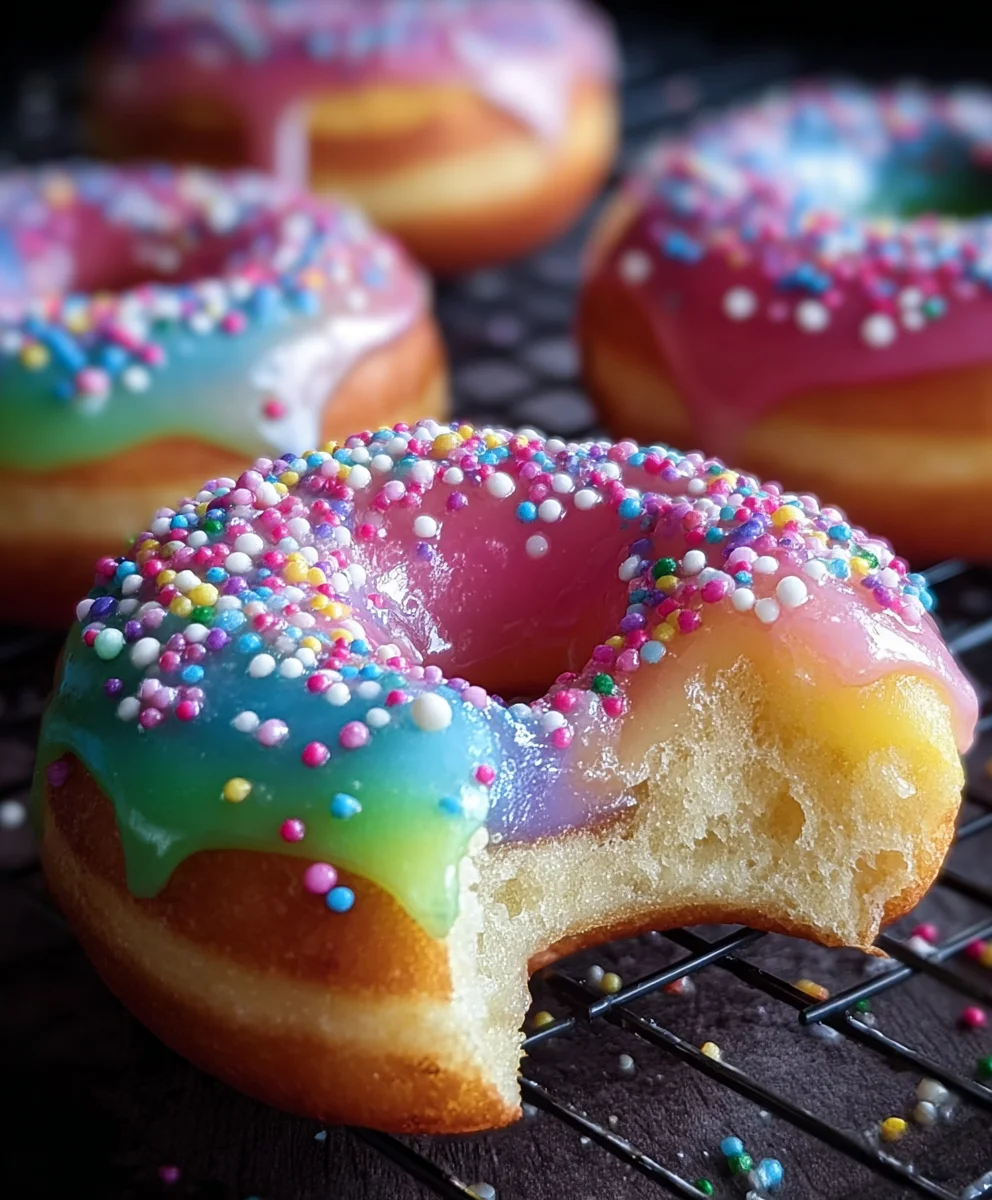
Rainbow Filled Doughnuts are not just a treat; they are a delightful explosion of color and flavor, promising a moment of pure joy with every bite. Imagine sinking your teeth into a wonderfully soft, pillowy doughnut, only to discover a vibrant, creamy filling that paints a rainbow across your palate. It’s an experience that transcends the ordinary, transforming a simple indulgence into a spectacular celebration.
The beloved doughnut, with its rich history tracing back to Dutch “olykoeks” (oily cakes) and evolving into the diverse forms we cherish today, has always been a comfort food. However, the modern innovation of filling these golden circles with a spectrum of colors elevates them beyond mere confectionery. I find that people absolutely adore Rainbow Filled Doughnuts for their incredible visual appeal – they are undeniably Instagram-worthy! Beyond their stunning appearance, the combination of the light, airy dough and the sweet, smooth filling creates a textural harmony that is simply irresistible. They are the perfect way to brighten a gloomy day, add a festive touch to any gathering, or simply treat yourself to a whimsical, delicious escape. Get ready to create some magic in your kitchen!

Ingredients:
-
For the Doughnuts:
- 1 cup (240ml) warm whole milk (around 105-115°F / 40-46°C)
- 2 ¼ teaspoons (1 packet) active dry yeast
- ½ cup (100g) granulated sugar, divided
- 1 teaspoon pure vanilla extract
- 2 large eggs, at room temperature
- 4 ½ cups (540g) all-purpose flour, plus extra for dusting
- ½ teaspoon salt
- ½ cup (113g) unsalted butter, softened
- Vegetable oil, canola oil, or peanut oil for frying (about 6-8 cups)
-
For the Rainbow Filling (Pastry Cream Base):
- 2 cups (480ml) whole milk
- ½ cup (100g) granulated sugar, divided
- ¼ cup (30g) cornstarch
- ¼ teaspoon salt
- 4 large egg yolks
- 2 tablespoons unsalted butter, cut into small pieces
- 1 ½ teaspoons pure vanilla extract
- Gel food coloring: red, orange, yellow, green, blue, purple (or your desired rainbow shades)
- Optional flavorings: lemon zest, raspberry extract, a touch of almond extract, etc.
-
For the Simple Vanilla Glaze (Optional, but delightful!):
- 2 cups (240g) powdered sugar, sifted
- 3-4 tablespoons whole milk or cream
- ½ teaspoon pure vanilla extract
Preparing the Doughnut Dough: The Foundation of Your Rainbow Filled Doughnuts
- Activate the Yeast: In a large mixing bowl (or the bowl of a stand mixer fitted with the dough hook attachment), pour in your warm milk. It’s crucial that the milk is warm enough to wake up the yeast but not so hot that it kills it – think bathwater temperature. Sprinkle the active dry yeast over the milk, along with 1 tablespoon of the granulated sugar. Give it a gentle stir and let it sit for about 5-10 minutes. You’ll know it’s ready when the mixture becomes frothy and bubbly, indicating that your yeast is alive and ready to work its magic. If it doesn’t foam, your yeast might be old, or your milk was too hot or cold, and it’s best to start over. This initial step is vital for light and airy homemade doughnuts.
- Combine Wet Ingredients: Once your yeast is active, add the remaining granulated sugar (minus the 1 tablespoon you already used), vanilla extract, and two large eggs to the yeast mixture. Whisk everything together until it’s well combined and the eggs are fully incorporated. I find it’s easiest if my eggs are at room temperature, as they mix in more smoothly.
- Add Dry Ingredients (First Batch): In a separate bowl, whisk together about 2 cups (240g) of the all-purpose flour with the salt. Gradually add this flour mixture to the wet ingredients, mixing on low speed with a stand mixer or with a sturdy wooden spoon until just combined. The mixture will be shaggy at this point, and that’s perfectly normal.
- Incorporate Butter and Remaining Flour: Now, add the softened unsalted butter, piece by piece, mixing it in until it’s mostly incorporated. Then, gradually add the remaining 2 ½ cups (300g) of flour, about ½ cup at a time, mixing after each addition. The dough will become quite sticky at first, but keep going!
- Knead the Dough: If using a stand mixer, increase the speed to medium-low and knead for 8-10 minutes. The dough should become smooth, elastic, and pull away from the sides of the bowl. If kneading by hand, turn the dough out onto a lightly floured surface and knead vigorously for 10-15 minutes until it reaches the same smooth, elastic consistency. A good test for readiness is the “windowpane test”: take a small piece of dough and gently stretch it. If you can stretch it thin enough to see light through it without it tearing, your dough is perfectly kneaded and ready for the next step. Proper kneading is key to achieving that wonderfully chewy texture in your Rainbow Filled Doughnuts!
First Proofing: Letting the Dough Rest and Rise
- Prepare for Proofing: Lightly grease a large clean bowl with a little bit of vegetable oil or cooking spray. Place your freshly kneaded dough into the greased bowl, turning it once to ensure the top is also lightly coated in oil. This prevents a dry skin from forming on the dough.
- Cover and Rise: Cover the bowl tightly with plastic wrap or a clean kitchen towel. Place the bowl in a warm, draft-free place to rise. My favorite spot is often a slightly warmed oven (turned off!) or near a sunny window.
- First Rise: Let the dough rise for 1 to 1 ½ hours, or until it has doubled in size. The exact time will depend on the warmth of your kitchen. Don’t rush this step; a slow, steady rise yields the best flavor and texture. You can gently poke the dough with two fingers; if the indentations remain, it’s ready. This first proof builds incredible flavor and a beautiful light structure for your homemade Rainbow Filled Doughnuts.
Shaping and Second Proofing: Getting Those Perfect Doughnut Shapes
- Punch Down the Dough: Once the dough has doubled in size, gently punch it down to release the air. Turn the dough out onto a lightly floured surface. Avoid adding too much flour here, as it can make the doughnuts tough.
- Roll the Dough: Using a rolling pin, roll the dough out evenly to about ½ inch thickness. You want consistent thickness so all your doughnuts cook evenly.
- Cut Out Doughnuts: Using a 2 ½ to 3-inch round cutter (or even the rim of a glass if you don’t have a cutter), cut out your doughnut shapes. Try to get as many doughnuts as possible from the first roll to minimize re-rolling scraps.
- Prepare for Second Proof: Gently transfer the cut doughnuts to lightly floured baking sheets or parchment paper squares. Leaving them on individual parchment squares can make transferring them to the hot oil much easier later. Make sure to leave ample space between each doughnut, as they will expand significantly during this second rise.
- Second Rise: Loosely cover the baking sheets with plastic wrap or a clean kitchen towel. Let the doughnuts rise again in a warm, draft-free place for another 30-45 minutes, or until they are visibly puffy and have nearly doubled in size. This second proof is crucial for achieving that light, airy texture and helps ensure your Rainbow Filled Doughnuts are incredibly soft. They should feel very light when you pick them up.
- Handle Dough Scraps: Gather any dough scraps, gently knead them together a couple of times to form a ball, let them rest for 5-10 minutes to relax the gluten, and then re-roll and cut out more doughnuts. Be mindful that doughnuts made from re-rolled dough might be slightly tougher than the first batch, but they will still be delicious.
Frying the Doughnuts: Golden Perfection
- Set Up Your Frying Station: Pour about 6-8 cups of vegetable, canola, or peanut oil into a large, heavy-bottomed pot or Dutch oven. The oil should be at least 3-4 inches deep. Attach a deep-fry thermometer to the side of the pot. Prepare a cooling rack set over a baking sheet lined with several layers of paper towels. This will be where your freshly fried doughnuts will drain.
- Heat the Oil: Heat the oil over medium heat until it reaches a consistent temperature of 350°F (175°C). Maintaining the correct oil temperature is absolutely critical for perfect doughnuts. If the oil is too hot, the doughnuts will brown too quickly on the outside and remain raw on the inside. If it’s too cool, they’ll absorb too much oil and become greasy.
- Fry the Doughnuts: Carefully lower 2-3 doughnuts into the hot oil using a slotted spoon or the parchment paper squares. Do not overcrowd the pot, as this will lower the oil temperature and prevent even cooking. Fry for 1-2 minutes per side, or until they are beautifully golden brown. Use a slotted spoon or tongs to flip them gently.
- Drain Excess Oil: Once golden brown on both sides, carefully remove the doughnuts from the oil, allowing any excess oil to drip off for a moment. Transfer them immediately to the prepared cooling rack over paper towels to drain further.
- Repeat and Adjust: Continue frying the remaining doughnuts in batches, making sure to monitor and adjust the oil temperature between batches. It’s normal for the temperature to fluctuate; don’t hesitate to turn the heat up or down slightly to keep it consistent. Allow the fried doughnuts to cool completely before filling them. Patience here ensures the integrity of your Rainbow Filled Doughnuts when you introduce the vibrant filling.
For the Rainbow Filling (Pastry Cream Base): Silky Smooth Goodness
- Heat the Milk: In a medium saucepan, gently heat the 2 cups of whole milk over medium heat until it just begins to simmer around the edges. Do not let it boil vigorously.
- Prepare the Egg Yolk Mixture: While the milk is heating, whisk together ½ cup of granulated sugar, cornstarch, and salt in a separate medium bowl. Add the 4 large egg yolks and whisk vigorously until the mixture is pale yellow and thick, resembling a smooth paste. This is the crucial stage where you create the thickening agent for your pastry cream.
- Temper the Egg Yolks: This is an important step to prevent scrambling your eggs. Once the milk is simmering, slowly and gradually ladle about half of the hot milk into the egg yolk mixture, whisking constantly and vigorously. This slowly brings up the temperature of the egg yolks without cooking them.
- Combine and Thicken: Pour the tempered egg yolk mixture back into the saucepan with the remaining hot milk. Return the saucepan to medium heat and continue to whisk constantly. The mixture will begin to thicken quite quickly, within 1-3 minutes. Keep whisking until it becomes very thick, bubbly, and resembles a custard. It should be thick enough to coat the back of a spoon. Don’t stop whisking, especially at the bottom of the pan, to prevent scorching.
- Finish the Pastry Cream: Remove the saucepan from the heat. Immediately whisk in the 2 tablespoons of cold unsalted butter, piece by piece, until it’s fully melted and incorporated, giving the pastry cream a lovely shine and smooth texture. Stir in the 1 ½ teaspoons of pure vanilla extract.
- Chill the Pastry Cream: Pour the hot pastry cream into a clean, shallow bowl. Press a piece of plastic wrap directly onto the surface of the cream to prevent a skin from forming as it cools. Place the bowl in the refrigerator for at least 2-3 hours, or preferably overnight, until thoroughly chilled and firm. This chill time is essential for the pastry cream to set properly and be ready for your vibrant Rainbow Filled Doughnuts.
Coloring and Flavoring the Rainbow Filling: Unleashing the Rainbow!
- Divide the Pastry Cream: Once your pastry cream is completely chilled and firm, divide it into as many separate bowls as you plan to have colors for your rainbow. For a true rainbow, aim for at least six bowls (red, orange, yellow, green, blue, purple). If you prefer, you can do fewer, like three vibrant colors.
- Color Each Section: Add a small amount of gel food coloring to each bowl. Start with just a tiny drop and mix thoroughly with a spoon or spatula. Gel food colorings are highly concentrated, so a little goes a long way. Continue to add more coloring, drop by drop, until you achieve your desired vibrant shade for each segment of your Rainbow Filled Doughnuts.
-
Add Optional Flavorings: This is where you can truly personalize your Rainbow Filled Doughnuts!
- For red: A tiny drop of raspberry extract or a bit of finely grated freeze-dried raspberry powder for a natural berry kick.
- For orange: A little fresh orange zest or a tiny drop of orange extract.
- For yellow: Lemon zest for a bright, tangy note.
- For green: A hint of mint extract (be careful, it’s strong!) or a very subtle lime zest.
- For blue: Perhaps a subtle blueberry extract, or just let the color speak for itself with a pure vanilla flavor.
- For purple: A touch of almond extract pairs wonderfully with grape or blackberry notes, or a little lavender extract for something unique.
Mix each flavoring well into its respective colored pastry cream. The combination of vivid colors and subtle flavors will make your Rainbow Filled Doughnuts an unforgettable treat!
- Prepare Piping Bags: Spoon each colored pastry cream into a separate piping bag fitted with a medium-sized round tip (or simply snip off the corner of the bag if you don’t have tips).
Assembling and Filling Your Rainbow Filled Doughnuts: The Grand Finale!
- Prepare Doughnuts for Filling: Ensure your fried doughnuts are completely cool. If they are still warm, the pastry cream will melt, which we definitely don’t want!
- Make a Hole: Using a small, sharp knife or a skewer, gently poke a hole into the side of each doughnut, going about halfway into the center. Wiggle the knife slightly to create a small cavity inside the doughnut, making space for your luscious rainbow filling. Be careful not to go all the way through to the other side.
- Pipe the Filling: Take one of your piping bags with a colored pastry cream. Insert the tip into the hole you just made in a doughnut. Gently squeeze the piping bag, filling the doughnut until it feels plump and slightly heavy. You’ll see the doughnut expand slightly, indicating it’s filling up. Be careful not to overfill, as the cream will start to burst out.
- Create the Rainbow Effect: To achieve the “rainbow filled” effect, you can either fill each doughnut with a single color, alternating colors for each doughnut, or, for an even more impressive visual, try to layer colors within a single doughnut. To layer, gently pipe a little of one color, then pull out the tip slightly and pipe a little of the next color, and so on. This takes a bit more practice but creates a beautiful cross-section when bitten into. For true Rainbow Filled Doughnuts, this layering technique is fantastic! Alternatively, for a simpler approach, fill 1/6th of your doughnuts with red, 1/6th with orange, and so on.
- Continue Filling: Repeat this process with all your doughnuts and colored pastry creams until all your glorious Rainbow Filled Doughnuts are complete!
For the Glaze (Optional, but highly recommended!): The Sweet Finish
- Mix the Glaze: In a medium bowl, whisk together the sifted powdered sugar, 3 tablespoons of whole milk or cream, and the vanilla extract until smooth. The consistency should be thick but pourable. If it’s too thick, add more milk, a tiny drop at a time, until you reach your desired consistency. If it’s too thin, add a little more sifted powdered sugar.
- Dip the Doughnuts: One by one, gently dip the top of each filled doughnut into the glaze. Let any excess drip off.
- Set the Glaze: Place the glazed doughnuts back on the cooling rack to allow the glaze to set. If you like, you can sprinkle them with rainbow sprinkles immediately after glazing for an extra festive touch that perfectly complements your vibrant Rainbow Filled Doughnuts.
- Serve and Store: These homemade Rainbow Filled Doughnuts are best enjoyed fresh, ideally within a day or two of making them. Store any leftovers in an airtight container in the refrigerator due to the pastry cream filling. Bring them to room temperature before serving for the best flavor and texture. Enjoy the delightful surprise of each colorful bite!
Conclusion:
And there you have it, my dear fellow bakers! We’ve journeyed through the steps, mixed the ingredients, and witnessed the transformation of simple dough into something truly spectacular. As we wrap up this culinary adventure, I want to take a moment to truly articulate why I believe these doughnuts are not just a recipe but an experience—a vibrant, joyful, and utterly delicious experience that you simply must bring into your own kitchen. This isn’t merely about frying dough; it’s about crafting edible happiness, a burst of color and flavor that brightens any day and makes every bite a celebration.
Why are these a must-try? Because they defy the ordinary. While a classic doughnut is undeniably wonderful, these take that comfort to a whole new level. Imagine the collective “oohs” and “aahs” when you present a platter of these beauties. The sheer visual impact of the vibrant hues peeking from within, coupled with the fluffy texture and sweet, delectable filling, makes them utterly irresistible. They’re a testament to the idea that food can be art, a delightful surprise that ignites a child-like wonder in everyone who sees, and then tastes, them. I promise you, the effort is incredibly rewarding, and the memories you’ll create by sharing these are absolutely priceless. They are the perfect centerpiece for a birthday bash, a sunny brunch, or simply to add a splash of much-needed cheer to a grey afternoon. The satisfaction of pulling off such a visually stunning and equally delicious treat is immense, and you’ll find yourself beaming with pride.
Serving Up Your Masterpiece: Ideas & Variations
Once your beautiful batch is ready, the serving possibilities are endless! I love serving these fresh, perhaps still slightly warm from their glaze, alongside a robust cup of coffee or a tall glass of cold milk. For a special occasion, arrange them artfully on a tiered stand amidst fresh berries or a sprinkle of edible flowers – they’re guaranteed to steal the show. Consider preparing a small assortment of different fillings for your Rainbow Filled Doughnuts to offer a delightful tasting experience. Imagine a batch with vibrant lemon curd for a tangy zest, another with rich chocolate ganache for the chocoholics, and perhaps a delicate strawberry jam for a classic fruit-filled treat. Each bite could be a new adventure!
And speaking of variations, don’t be afraid to let your creativity soar! While the rainbow filling is undoubtedly magical, you can easily adapt this recipe to suit any theme or season. For a festive holiday spread, try using red and green food coloring for your filling, or orange and black for a fun Halloween twist. The glaze can also be customized: a simple vanilla bean glaze is always a winner, but a citrus glaze (lemon, lime, or orange!) can add a refreshing zing. For an extra touch of sparkle, a dusting of edible glitter or a cascade of colorful sprinkles over the glaze will elevate them further. You could even experiment with different flavor extracts in your dough or glaze – almond, coconut, or even a hint of rosewater could add an unexpected and delightful complexity. Don’t be shy about making them truly your own!
Your Turn to Create and Share!
Now, it’s your turn. I’ve shared my passion for these incredible doughnuts, and I truly hope I’ve inspired you to roll up your sleeves and give this recipe a try. Don’t be intimidated by the steps; I’ve broken them down to be as straightforward as possible, and the reward for your efforts is truly magnificent. The joy of baking, especially when the end result is this stunning, is a unique kind of happiness. So, gather your ingredients, put on some cheerful music, and dive into the wonderful world of homemade doughnuts. I promise you, the aroma filling your kitchen will be intoxicating, and the taste will be utterly divine.
Once you’ve created your own batch of these edible works of art, I would absolutely love to hear about your experience! What fillings did you choose? Did you experiment with different glazes? Did they bring smiles to the faces of your family and friends? Please, share your stories, your triumphs, and even any little tweaks you made to make them uniquely yours. There’s nothing I love more than seeing what amazing things you create in your own kitchens. Happy baking, my friends, and get ready to spread some serious culinary joy!
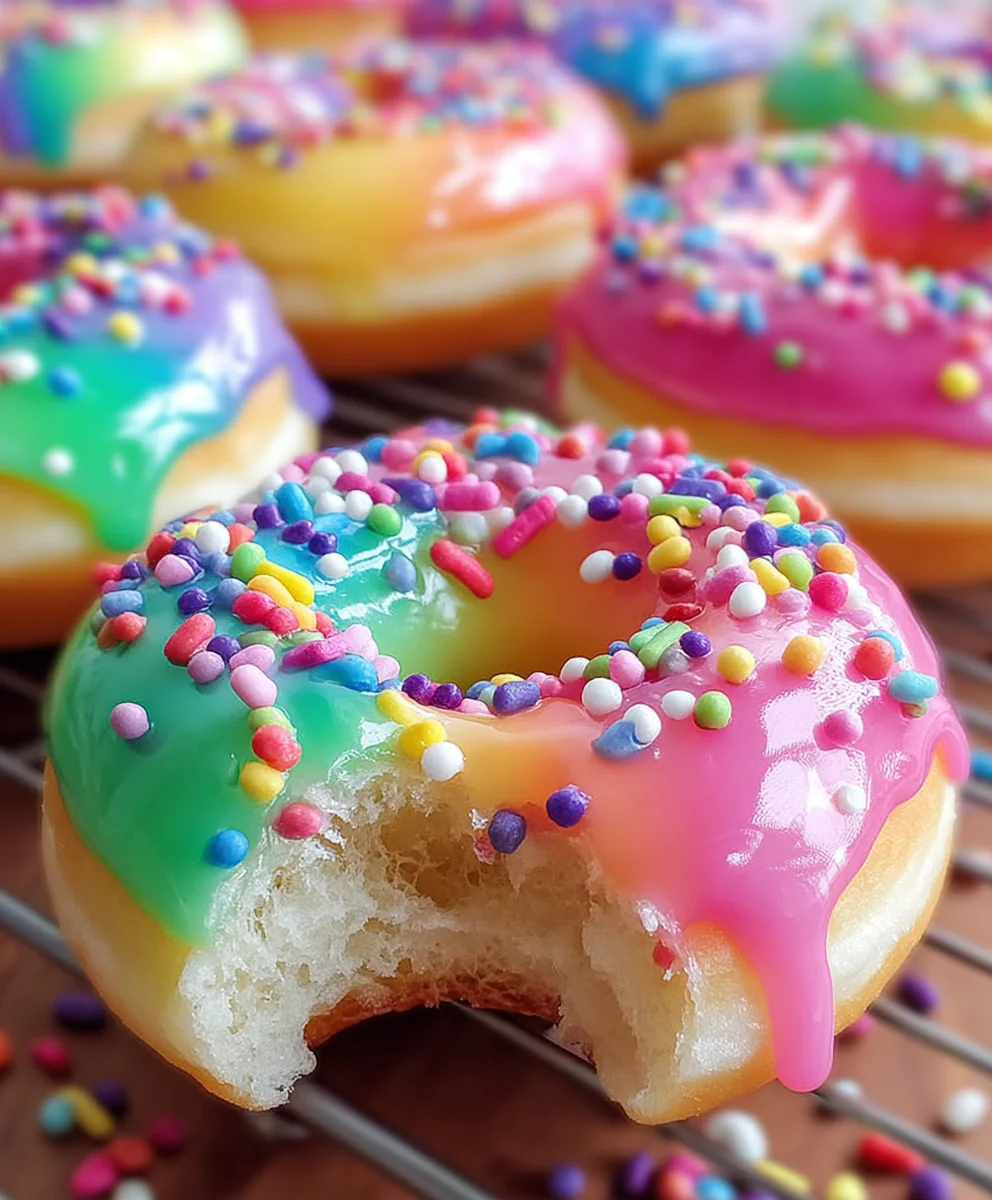
Vibrant Rainbow Filled Doughnuts
Biting into a soft, freshly glazed doughnut only to discover a vibrant rainbow of colors swirled inside? Pure magic. I stumbled upon this recipe idea after a rainy Saturday morning spent scrolling through Instagram left my kids begging for something ‘amazing’ to bake. These rainbow-filled doughnuts combine the comforting familiarity of homemade fried dough with a whimsical surprise that makes breakfast feel like a celebration. They’ve become our special occasion breakfast tradition, appearing for birthdays, report card days, and those random Sundays when we all need a little extra joy.
Ingredients
-
1 cup (240ml) warm whole milk
-
2 ¼ tsp active dry yeast
-
½ cup (100g) granulated sugar, divided
-
1 tsp pure vanilla extract
-
2 large eggs, room temperature
-
4 ½ cups (540g) all-purpose flour
-
½ tsp salt
-
½ cup (113g) unsalted butter, softened
-
6-8 cups vegetable oil for frying
-
2 cups (480ml) whole milk (for filling)
-
½ cup (100g) granulated sugar, divided (for filling)
-
¼ cup (30g) cornstarch
-
¼ tsp salt (for filling)
-
4 large egg yolks
-
2 tbsp unsalted butter, diced (for filling)
-
1 ½ tsp pure vanilla extract (for filling)
-
Gel food coloring: red, orange, yellow, green, blue, purple
-
Optional flavorings (e.g., lemon zest, raspberry extract)
-
2 cups (240g) powdered sugar, sifted
-
3-4 tbsp whole milk or cream
-
½ tsp pure vanilla extract (for glaze)
Instructions
-
Step 1
In a large bowl, combine 1 cup warm whole milk, 2 ¼ tsp active dry yeast, and 1 tbsp granulated sugar. Let sit 5-10 minutes until frothy. -
Step 2
Add remaining granulated sugar, 1 tsp vanilla extract, and 2 room temperature eggs to the yeast mixture. Whisk well. Gradually add 2 cups all-purpose flour and ½ tsp salt, mixing until combined. Incorporate ½ cup softened unsalted butter, then gradually add the remaining 2 ½ cups flour. -
Step 3
Knead the dough for 8-10 minutes with a stand mixer or 10-15 minutes by hand until it is smooth, elastic, and passes the ‘windowpane test’. -
Step 4
Lightly grease a large bowl, place the dough inside, turning once. Cover with plastic wrap and let rise in a warm, draft-free place for 1 to 1 ½ hours, or until doubled in size. -
Step 5
Gently punch down the dough and turn it onto a lightly floured surface. Roll the dough to about ½ inch thickness. Use a 2 ½ to 3-inch round cutter to cut out doughnut shapes. Transfer cut doughnuts to lightly floured baking sheets, leaving space between them. -
Step 6
Loosely cover the doughnuts with plastic wrap and let them rise again in a warm, draft-free place for 30-45 minutes, or until visibly puffy and nearly doubled. Re-roll dough scraps and cut additional doughnuts if desired. -
Step 7
Heat 6-8 cups vegetable oil in a large, heavy-bottomed pot to 350°F (175°C). Carefully lower 2-3 doughnuts into the hot oil. Fry for 1-2 minutes per side until beautifully golden brown. Remove with a slotted spoon. -
Step 8
Transfer fried doughnuts to a cooling rack set over paper towels to drain excess oil. Allow them to cool completely before filling. -
Step 9
In a saucepan, heat 2 cups whole milk until simmering. In a separate bowl, whisk ½ cup granulated sugar, ¼ cup cornstarch, ¼ tsp salt, and 4 egg yolks until pale. Slowly temper the egg yolk mixture by whisking in about half of the hot milk. -
Step 10
Pour the tempered egg yolk mixture back into the saucepan with the remaining hot milk. Whisk constantly over medium heat until the mixture thickens significantly (1-3 minutes) and coats the back of a spoon. Remove from heat, then whisk in 2 tbsp diced unsalted butter and 1 ½ tsp pure vanilla extract. -
Step 11
Pour the hot pastry cream into a shallow bowl. Press plastic wrap directly onto the surface to prevent a skin. Refrigerate for at least 2-3 hours, or preferably overnight, until thoroughly chilled and firm. -
Step 12
Once chilled, divide the pastry cream into separate bowls for each desired rainbow color (e.g., 6 bowls for red, orange, yellow, green, blue, purple). Add a small amount of gel food coloring and optional flavorings (e.g., raspberry extract for red, lemon zest for yellow) to each bowl, mixing until vibrant. Spoon each colored cream into a separate piping bag fitted with a medium-sized round tip. -
Step 13
Ensure doughnuts are completely cool. Using a small, sharp knife, poke a hole into the side of each doughnut, wiggling to create a cavity. Insert a piping bag tip into the hole and gently squeeze to fill the doughnut until it feels plump. For a layered rainbow effect, pipe a little of each color sequentially into the same doughnut. Alternatively, fill separate doughnuts with single colors. -
Step 14
In a medium bowl, whisk together 2 cups sifted powdered sugar, 3-4 tbsp whole milk or cream, and ½ tsp pure vanilla extract until smooth and pourable. Adjust consistency with more milk or powdered sugar if needed. -
Step 15
Gently dip the top of each filled doughnut into the glaze. Let any excess drip off, then place on a cooling rack to set. Sprinkle with rainbow sprinkles immediately after glazing for an extra festive touch. These doughnuts are best enjoyed fresh; store any leftovers in an airtight container in the refrigerator and bring to room temperature before serving.
Important Information
Nutrition Facts (Per Serving)
It is important to consider this information as approximate and not to use it as definitive health advice.
Allergy Information
Please check ingredients for potential allergens and consult a health professional if in doubt.
Leave a Comment