
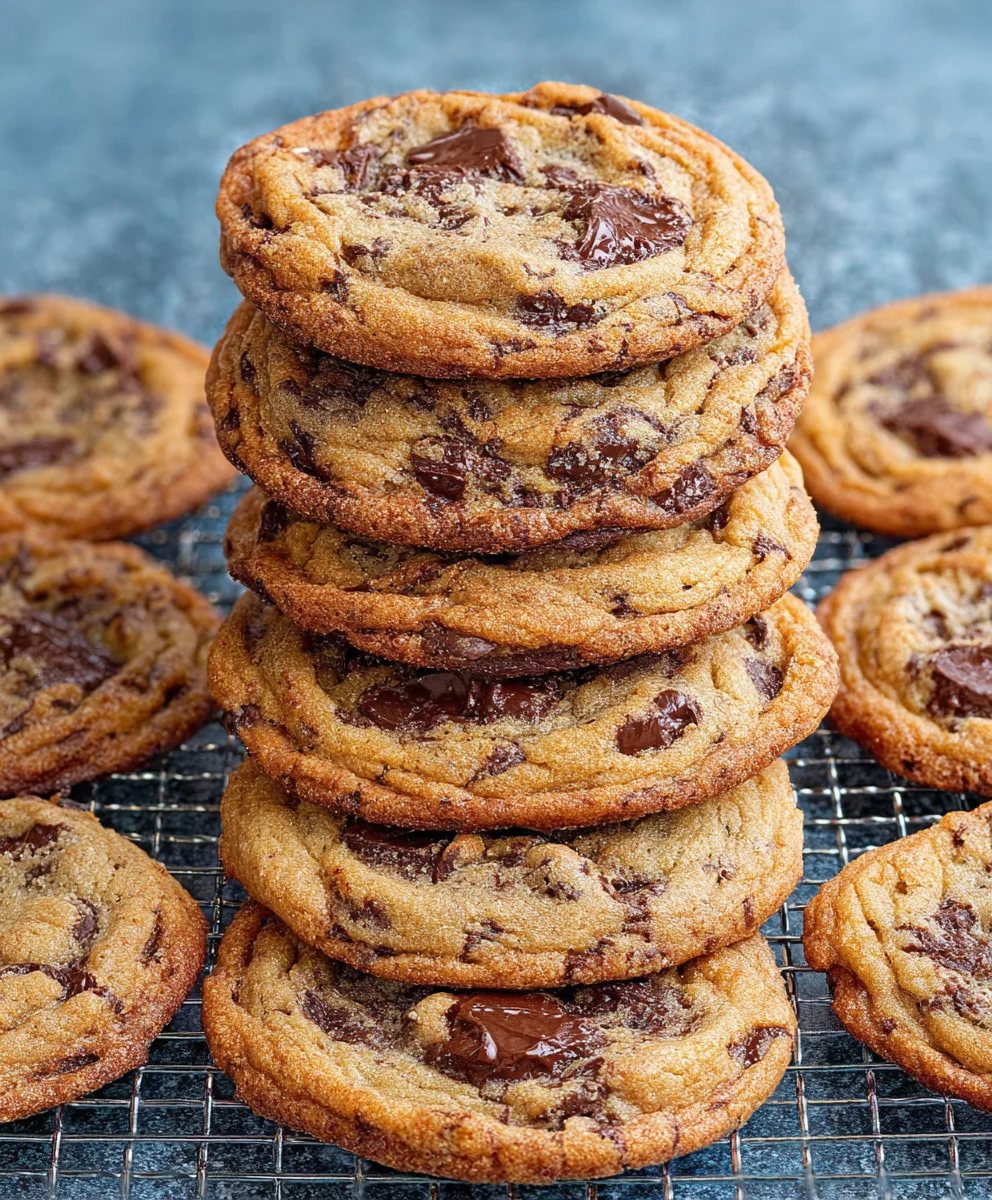
Crispy Chewy Chocolate Chip Cookies. There are few treats in the culinary world that evoke such universal joy and comfort as a perfectly baked chocolate chip cookie. That first bite, where the edges snap just so, giving way to a soft, gooey center studded with pockets of melted chocolate – it’s an experience many of us chase with every batch we bake. This iconic dessert, famously born from an accidental stroke of genius by Ruth Graves Wakefield in the 1930s, quickly became a staple in American homes and eventually, around the globe.
The Enduring Allure of the Perfect Chocolate Chip Cookie
Its enduring popularity lies in its unparalleled balance of textures and flavors; the rich, buttery dough complementing the sweet, sometimes slightly bitter, chocolate. It’s a simple pleasure, yet incredibly sophisticated in its execution when done right. Today, I am thrilled to guide you through achieving what I believe is the ultimate version: the quintessential Crispy Chewy Chocolate Chip Cookies, promising golden, crisp edges and an irresistibly soft, chewy core, guaranteed to become your new go-to recipe.

Ingredients:
- 2 ½ sticks (280g) unsalted butter, softened to room temperature. This is crucial for a smooth, homogenous dough that emulsifies properly.
- 1 ½ cups (300g) granulated sugar.
- 1 ¾ cups (350g) packed light brown sugar. The blend of sugars is key to achieving both the crispy edges and the wonderfully chewy centers of these Crispy Chewy Chocolate Chip Cookies.
- 2 large eggs, at room temperature.
- 1 large egg yolk, at room temperature. The extra yolk adds richness, chewiness, and helps with the structure.
- 2 teaspoons pure vanilla extract. A generous amount enhances the overall flavor significantly.
- 4 cups (500g) all-purpose flour.
- 1 ½ teaspoons baking soda. This leavening agent contributes to the cookies’ lift and spread.
- 1 ½ teaspoons sea salt. Salt balances the sweetness and brings out the depth of the chocolate and butter flavors.
- 2 cups (340g) semi-sweet chocolate chips. I love a good quality brand for the best melt.
- 1 cup (170g) milk chocolate chips. Adding milk chocolate chips creates a lovely creaminess and a slightly different sweetness.
- ½ cup (85g) chocolate chunks or chopped chocolate bar (optional, but highly recommended for varied chocolate pockets).
- Flaky sea salt, for sprinkling (optional, but fantastic for finishing your Crispy Chewy Chocolate Chip Cookies).
Equipment You’ll Need:
- Large mixing bowl(s)
- Electric mixer (stand mixer with paddle attachment or hand mixer)
- Whisk
- Rubber spatula
- Measuring cups and spoons
- Baking sheets
- Parchment paper or silicone baking mats
- Wire cooling rack
- Cookie scoop (2-tablespoon size is ideal)
Phase 1: Crafting the Perfect Crispy Chewy Chocolate Chip Cookie Dough
This is where the magic begins! The way you combine your ingredients greatly impacts the final texture of your Crispy Chewy Chocolate Chip Cookies. Take your time with each step to ensure maximum deliciousness.
- Prepare Your Dry Ingredients: In a medium-sized bowl, whisk together the 4 cups of all-purpose flour, 1 ½ teaspoons of baking soda, and 1 ½ teaspoons of sea salt. Make sure these are thoroughly combined. This step ensures that the leavening agent and salt are evenly distributed throughout the dough, preventing pockets of unmixed ingredients and promoting uniform baking. Set this aside for now.
- Cream the Butter and Sugars: In the large bowl of your electric mixer, fitted with the paddle attachment, or using a hand mixer, add your 2 ½ sticks of softened unsalted butter, 1 ½ cups of granulated sugar, and 1 ¾ cups of packed light brown sugar. Beat these ingredients together on medium speed for a good 3 to 5 minutes. You’re looking for a mixture that is light, fluffy, and significantly paler in color. This creaming process incorporates air into the butter and sugar, which is fundamental for the tender, open crumb structure of your Crispy Chewy Chocolate Chip Cookies. It also helps to fully dissolve the sugar crystals, contributing to that desirable chewy texture.
- Incorporate Eggs and Vanilla: Scrape down the sides of your bowl with a rubber spatula to ensure everything is well combined. Then, add your 2 large eggs, one at a time, beating well after each addition until just incorporated. Follow this with the additional large egg yolk and the 2 teaspoons of pure vanilla extract. Beat on medium speed for another 1 to 2 minutes until the mixture is light and well emulsified. It should look creamy and slightly voluminous. The eggs add moisture, richness, and act as a binder, while the extra yolk boosts chewiness and helps create a more robust texture. The vanilla extract is, of course, essential for that classic, comforting flavor profile of chocolate chip cookies.
- Combine Wet and Dry Ingredients: With your mixer on low speed, gradually add your whisked dry ingredients to the wet mixture, about a third at a time. Mix only until just combined and no streaks of flour remain. Be careful not to overmix! Overmixing develops the gluten in the flour, which can lead to tough, dense cookies rather than the desired Crispy Chewy Chocolate Chip Cookies you’re aiming for. Stop the mixer as soon as the last bit of flour disappears.
- Fold in the Chocolate: Remove the bowl from the mixer and, using your sturdy rubber spatula, gently fold in the 2 cups of semi-sweet chocolate chips, 1 cup of milk chocolate chips, and the optional ½ cup of chocolate chunks or chopped chocolate bar. Distribute the chocolate evenly throughout the dough. I love using a mix of chocolate types and sizes because it creates incredible flavor and texture variety in every bite – some pieces will be melty, some gooey, and some will offer a satisfying bite of pure chocolate.
Phase 2: Chilling for Superior Texture and Flavor
I know, I know, waiting is hard! But this step is absolutely non-negotiable for achieving truly remarkable Crispy Chewy Chocolate Chip Cookies. Chilling the dough does wonders for both flavor and texture.
- Prepare for Chilling: Cover the bowl containing your cookie dough tightly with plastic wrap. You can also divide the dough into two smaller portions and wrap them individually if your fridge space is limited.
- Chill Thoroughly: Place the covered dough in the refrigerator for at least 24 hours. Yes, a full day! For the absolute best results, I often chill mine for up to 48 or even 72 hours. Here’s why this step is so important:
- Flavor Development: Chilling allows the flour to fully hydrate, intensifying the butterscotch notes from the brown sugar and deepening the overall flavor profile of your Crispy Chewy Chocolate Chip Cookies. The flavors meld and become more complex.
- Texture Improvement: Chilling solidifies the butter in the dough. When the cold dough hits the hot oven, the butter takes longer to melt, preventing the cookies from spreading too quickly and becoming thin and brittle. This extended melting time gives the edges a chance to crisp up while the center remains delightfully chewy. It’s the secret to that perfect balance.
Phase 3: Baking Your Perfect Crispy Chewy Chocolate Chip Cookies
The moment of truth! Baking these cookies requires a bit of attention to detail to get that ideal crispy edge and soft, chewy center. Get ready for your kitchen to smell absolutely incredible!
- Preheat Your Oven: About 20-30 minutes before you plan to bake, preheat your oven to 375°F (190°C). This ensures the oven is thoroughly heated and maintains a consistent temperature when you introduce the cold dough.
- Prepare Your Baking Sheets: Line two or three large baking sheets with parchment paper or silicone baking mats. This prevents sticking and promotes even browning, making for easy cleanup too.
- Scoop the Dough: Remove your chilled cookie dough from the refrigerator. If it’s very firm, let it sit at room temperature for 10-15 minutes to make scooping easier, but don’t let it get too warm. Use a 2-tablespoon sized cookie scoop (a standard ice cream scoop works well) to portion out the dough. Roll each scoop into a neat ball with your hands.
- Space Them Out: Place the cookie dough balls about 2-3 inches apart on your prepared baking sheets. Give them plenty of room to spread. Typically, I bake about 6-8 cookies per standard baking sheet, depending on its size. Overcrowding can lead to uneven baking and prevent air circulation, which is vital for those Crispy Chewy Chocolate Chip Cookies.
- Optional: Flaky Sea Salt Sprinkle: If desired, gently press a few flakes of flaky sea salt onto the top of each cookie dough ball. This adds a fantastic contrast to the sweetness and truly elevates the flavor experience.
- Bake to Perfection: Place one baking sheet at a time in the preheated oven. Bake for 10 to 12 minutes.
- Around the 7-8 minute mark, consider the “cookie banging” technique: Carefully remove the baking sheet from the oven and lift it about 4-5 inches, then gently but firmly drop it back down onto the oven rack or a heat-safe surface. This deflates the cookies slightly, encouraging the edges to crinkle and creating more wrinkles, which leads to a more defined texture and those beautiful crispy edges. Repeat this process once or twice more during the last few minutes of baking if you desire even more crinkles.
- Look for the right cues: The cookies should have golden-brown edges with centers that still look slightly soft and puffed. They will continue to set as they cool, so resist the urge to overbake. An underbaked cookie often yields a chewier result.
- Rotate if Necessary: If your oven has hot spots, you might want to rotate the baking sheet halfway through baking to ensure even browning.
Phase 4: Cooling and Enjoying Your Crispy Chewy Chocolate Chip Cookies
The final steps are just as important for setting that perfect texture and ensuring your Crispy Chewy Chocolate Chip Cookies are ready for their grand debut!
- Cool on the Baking Sheet: Once baked, remove the baking sheet from the oven. Leave the cookies on the hot baking sheet for 5-10 minutes. This crucial cooling time allows the cookies to continue cooking slightly from the residual heat of the pan, firming up their structure and preventing them from breaking apart when transferred. It also contributes to that delightful chewiness in the center while maintaining those crisp edges.
- Transfer to a Wire Rack: After the initial cooling period on the baking sheet, carefully transfer the Crispy Chewy Chocolate Chip Cookies to a wire cooling rack to cool completely. Cooling on a wire rack allows air to circulate around all sides of the cookie, preventing sogginess on the bottom and ensuring both the tops and bottoms achieve that perfect texture.
- Reshape if Desired (the ‘Round’ Trick): While the cookies are still very warm and pliable on the baking sheet (within the first minute or two after coming out of the oven), you can use a large round cookie cutter or a bowl that’s slightly larger than your cookie to gently swirl around the cookie. This pushes the edges in and creates a perfectly round shape, making your cookies look even more professional and appealing. This is a purely aesthetic step, but one I love for presentation!
- Serve and Store: Once cooled, these Crispy Chewy Chocolate Chip Cookies are ready to be devoured! They are absolutely irresistible when still slightly warm, perhaps with a glass of cold milk or a scoop of vanilla ice cream. Store any leftover cookies in an airtight container at room temperature for up to 3-4 days. While they are best enjoyed fresh, they will retain their wonderful flavor and texture for several days. If you want to refresh them, a quick 5-10 second zap in the microwave can bring back some of that fresh-baked warmth and chewiness. You can also freeze baked cookies for longer storage; just thaw them at room temperature or warm gently in the oven.
I genuinely believe these Crispy Chewy Chocolate Chip Cookies will become a staple in your baking repertoire. The combination of the different sugars, the precise creaming and mixing, the extended chilling time, and the careful baking process all contribute to a cookie that is truly exceptional – perfectly crispy on the edges, wonderfully chewy in the center, and bursting with rich chocolate flavor. Enjoy every single bite!
Remember, patience and attention to detail are your best friends when making these ultimate Crispy Chewy Chocolate Chip Cookies. Happy baking!
Ingredients:
- 2 ½ sticks (280g) unsalted butter, softened to room temperature. This is absolutely critical for achieving a light, fluffy creamed mixture and contributes significantly to the spread and texture of your Crispy Chewy Chocolate Chip Cookies. If it’s too cold, it won’t cream properly; too warm, and your dough will be greasy.
- 1 ½ cups (300g) granulated sugar. This sugar contributes to the crispness of the cookie edges and adds a foundational sweetness.
- 1 ¾ cups (350g) packed light brown sugar. The brown sugar is the secret weapon for chewiness! Its molasses content provides moisture and creates that wonderful soft, bendy center that defines a truly chewy chocolate chip cookie.
- 2 large eggs, at room temperature. Room temperature eggs emulsify better with the butter and sugar, resulting in a more cohesive dough.
- 1 large egg yolk, at room temperature. The addition of an extra yolk boosts richness, chewiness, and helps create a more tender crumb. It’s a small detail that makes a big difference in these ultimate Crispy Chewy Chocolate Chip Cookies.
- 2 teaspoons pure vanilla extract. Use good quality vanilla! It’s a prominent flavor, and a generous amount truly enhances the overall aroma and taste.
- 4 cups (500g) all-purpose flour. Precisely measured flour is key. Too much and your cookies will be dry and crumbly; too little and they’ll spread too much.
- 1 ½ teaspoons baking soda. This leavening agent reacts with the acidic brown sugar to create carbon dioxide bubbles, contributing to the cookie’s lift and spread.
- 1 ½ teaspoons sea salt. Don’t skip the salt! It balances the sweetness, amplifies the chocolate flavor, and brightens the overall profile. I prefer fine sea salt for even distribution.
- 2 cups (340g) semi-sweet chocolate chips. A classic choice, providing a balanced sweetness and delightful melt.
- 1 cup (170g) milk chocolate chips. Adding milk chocolate introduces a creamy, sweeter note that beautifully complements the semi-sweet, creating a more complex chocolate experience in your Crispy Chewy Chocolate Chip Cookies.
- ½ cup (85g) chocolate chunks or chopped chocolate bar (optional, but highly recommended). Using varied sizes of chocolate creates pockets of intense melt and different textures throughout the cookie.
- Flaky sea salt, for sprinkling (optional, but absolutely fantastic for finishing and enhancing the flavors).
Equipment You’ll Need:
- Large mixing bowl(s) – at least one very large one for the main dough.
- Electric mixer (a stand mixer with the paddle attachment is ideal, but a good hand mixer will also work well).
- Whisk – for dry ingredients.
- Rubber spatula – essential for scraping down bowls and folding.
- Measuring cups and spoons – accurate measurements are vital in baking.
- Baking sheets – at least two, preferably three, to keep the baking process efficient.
- Parchment paper or silicone baking mats – for non-stick baking and easy cleanup.
- Wire cooling rack – allows air circulation to cool cookies evenly.
- Cookie scoop (a 2-tablespoon size, often labeled as #40 or #30, is perfect for consistent cookie size).
Phase 1: Crafting the Perfect Crispy Chewy Chocolate Chip Cookie Dough
This initial phase is where the fundamental structure and flavor profile of your Crispy Chewy Chocolate Chip Cookies are established. Precision and attention to detail here will pay off immensely in the final product.
- Prepare Your Dry Ingredients: In a medium-sized bowl, take your 4 cups of all-purpose flour, 1 ½ teaspoons of baking soda, and 1 ½ teaspoons of sea salt. Using a whisk, vigorously combine these ingredients until they are thoroughly mixed. This step, often overlooked, is crucial because it ensures that the leavening agent and salt are evenly distributed throughout the dough, preventing random pockets of concentrated flavor or inconsistent rise. Set this perfectly blended dry mixture aside for later.
- Cream the Butter and Sugars: Now, in the large bowl of your electric mixer, fitted with the paddle attachment, or using your trusty hand mixer, add the 2 ½ sticks of softened unsalted butter, the 1 ½ cups of granulated sugar, and the 1 ¾ cups of packed light brown sugar. Turn your mixer to medium speed and beat these ingredients together for a generous 3 to 5 minutes. What you’re looking for is a transformation: the mixture should become noticeably light in color, incredibly fluffy, and almost doubled in volume. This creaming process isn’t just mixing; it’s incorporating air into the butter and sugar, which creates tiny air pockets that expand during baking, contributing to the cookies’ tenderness and preventing them from becoming too dense. It also helps dissolve the sugar crystals, which is vital for that signature chewy texture.
- Incorporate Eggs and Vanilla: After the creaming, pause to scrape down the sides of your bowl with a rubber spatula. This ensures all the buttery-sugary goodness is fully incorporated. Now, add your 2 large room-temperature eggs, one at a time. After each egg, beat on medium speed just until it’s fully incorporated before adding the next. Overmixing at this stage can be detrimental. Once both eggs are in, add the single large egg yolk and the 2 teaspoons of pure vanilla extract. Beat for another 1 to 2 minutes on medium speed until the mixture is beautifully light, well emulsified, and appears almost custard-like. The eggs bind the dough and add richness, while the extra yolk significantly boosts chewiness, making these Crispy Chewy Chocolate Chip Cookies truly special. The vanilla, of course, infuses that comforting, classic bakery aroma and flavor.
- Combine Wet and Dry Ingredients: With your mixer set to its lowest speed, begin to gradually add your whisked dry ingredients to the wet mixture. Do this in about three separate additions. Mix only until the flour has just disappeared and no dry streaks remain. This is a critical moment: do not overmix! Overmixing develops the gluten in the flour excessively, which can lead to tough, dense, and less tender cookies – the opposite of the glorious Crispy Chewy Chocolate Chip Cookies we’re striving for. As soon as the last speck of flour vanishes, turn off your mixer.
- Fold in the Chocolate: Remove the bowl from the mixer. Now, using your sturdy rubber spatula, gently but thoroughly fold in your 2 cups of semi-sweet chocolate chips, 1 cup of milk chocolate chips, and the optional ½ cup of chocolate chunks or chopped chocolate bar. Distribute the chocolate evenly throughout the dough. I love using a medley of chocolate types and sizes because it guarantees varied pockets of melty, gooey, and firm chocolate in every single bite, creating a much more exciting and delicious experience.
Phase 2: Chilling for Superior Texture and Flavor
I know, the waiting game is tough, especially when the aroma of cookie dough fills your kitchen! But believe me, this chilling step is not just recommended; it is absolutely essential for achieving the profound depth of flavor and that coveted Crispy Chewy Chocolate Chip Cookie texture.
- Prepare for Chilling: Transfer your beautifully crafted cookie dough to an airtight container or, if using the mixing bowl, cover it tightly with plastic wrap. For easier handling later or if fridge space is an issue, you can divide the dough into two smaller portions and wrap them individually.
- Chill Thoroughly: Place the covered dough in the refrigerator for a minimum of 24 hours. While 24 hours will yield great results, for the truly ultimate Crispy Chewy Chocolate Chip Cookies, I often extend this chilling period to 48, or even 72 hours. Allow me to explain why this extended chill is a game-changer:
- Intensified Flavor Development: Over time, the flour fully hydrates, absorbing moisture from the other ingredients. This process allows the complex sugars, especially the molasses in the brown sugar, to deepen and caramelize, resulting in a richer, more butterscotch-like flavor. The vanilla and chocolate notes also become more pronounced and melded, creating a much more sophisticated taste profile.
- Unparalleled Texture Improvement: Chilling solidifies the butter in the dough. When this cold, firm dough hits the hot oven, the butter takes longer to melt and spread. This extended melting time means the edges of the cookie have more time to crisp up and achieve that beautiful golden-brown color, while the center remains delightfully thick, soft, and chewy. Without chilling, cookies tend to spread too quickly, resulting in thin, greasy, and uniformly crisp (but not chewy!) cookies. This controlled spread is the secret to that perfect balance of crispy edges and a wonderfully chewy interior.
Phase 3: Baking Your Perfect Crispy Chewy Chocolate Chip Cookies
This is the moment your patience pays off! Baking these cookies requires careful timing and observation to ensure you get that desired crispy edge and soft, perfectly chewy center. Get ready for your kitchen to be enveloped in the most heavenly scent imaginable!
- Preheat Your Oven: Approximately 20-30 minutes before you plan to bake, preheat your oven to a precise 375°F (190°C). A properly preheated oven is non-negotiable; it ensures the oven is thoroughly heated and maintains a consistent temperature from the moment you introduce the cold dough, which is vital for an even bake and good spread.
- Prepare Your Baking Sheets: Line two or three large baking sheets with parchment paper or silicone baking mats. This prevents your precious Crispy Chewy Chocolate Chip Cookies from sticking, promotes even browning on the bottom, and makes cleanup incredibly easy.
- Scoop the Dough: Remove your thoroughly chilled cookie dough from the refrigerator. If it feels extremely firm, allow it to sit at room temperature for about 10-15 minutes to soften just enough for easier scooping, but don’t let it get warm. Use a 2-tablespoon sized cookie scoop to portion out the dough. For perfectly round cookies, gently roll each scooped portion into a neat ball between your palms.
- Space Them Out Generously: Place the cookie dough balls about 2-3 inches apart on your prepared baking sheets. Remember, these cookies will spread, and giving them ample space prevents them from merging into one giant cookie blob and ensures proper air circulation around each cookie for even baking. Typically, I bake about 6-8 cookies per standard baking sheet.
- Optional: Flaky Sea Salt Sprinkle: If desired, gently press a few flakes of flaky sea salt onto the top of each cookie dough ball. This simple addition is a game-changer, adding a fantastic textural contrast and a pop of briny flavor that beautifully complements the sweetness of the chocolate and cookie dough.
- Bake to Perfection: Place one baking sheet at a time in the preheated oven, ideally on the middle rack. Bake for 10 to 12 minutes.
- Around the 7-8 minute mark, I highly recommend trying the “cookie banging” technique: Carefully remove the baking sheet from the oven. Lift it about 4-5 inches off the oven rack (or a heat-safe surface like your stovetop) and then gently but firmly drop it back down. This deflates the cookies slightly, encourages the edges to crinkle and wrinkle, which leads to that visually appealing, beautifully defined texture and contributes to those delightful crispy edges. Repeat this process once or twice more during the last few minutes of baking if you desire even more crinkles and a flatter, more substantial cookie.
- Look for the right cues: Your Crispy Chewy Chocolate Chip Cookies are ready when their edges are beautifully golden-brown, but their centers still look slightly soft, puffy, and perhaps even a tiny bit underbaked. They will continue to set and firm up as they cool on the hot baking sheet. Resist the strong urge to overbake, as this is the enemy of chewiness! An underbaked cookie will almost always yield a chewier, more desirable result than an overbaked one.
- Rotate if Necessary: If you know your oven has hot spots or you notice uneven browning, rotate the baking sheet halfway through the baking time to ensure all your Crispy Chewy Chocolate Chip Cookies bake uniformly.
Phase 4: Cooling and Enjoying Your Crispy Chewy Chocolate Chip Cookies
The final steps are just as crucial for setting that perfect texture and ensuring your Crispy Chewy Chocolate Chip Cookies are in their prime for enjoyment. Patience just a little longer, and your reward will be immense!
- Cool on the Baking Sheet: Once your cookies are baked to perfection, remove the baking sheet from the oven. Crucially, leave the cookies on the hot baking sheet for 5-10 minutes. This initial cooling period on the pan is vital! The residual heat of the baking sheet allows the cookies to continue cooking ever so slightly, firming up their delicate structure. This prevents them from breaking apart when you transfer them and helps to develop that incredible chewiness in the center while maintaining those perfectly crisp edges.
- Transfer to a Wire Rack: After the essential cooling period on the baking sheet, carefully transfer your Crispy Chewy Chocolate Chip Cookies to a wire cooling rack using a thin, wide spatula. Allow them to cool completely on the rack. Cooling on a wire rack ensures air circulates around all sides of the cookie, preventing any condensation that could make the bottoms soggy and guaranteeing that both the tops and bottoms achieve that ideal texture.
- Optional: Reshape for Aesthetics (The ‘Round’ Trick): While your cookies are still very warm and pliable on the baking sheet (within the first minute or two after coming out of the oven), you can employ a little trick for perfect aesthetics. Take a large round cookie cutter or a bowl that’s slightly larger than your cookie. Place it over the hot cookie and gently swirl it around the cookie. This simple motion pushes the edges in and coaxes the cookie into a perfectly round shape, making your Crispy Chewy Chocolate Chip Cookies look incredibly professional and appealing. This is purely for presentation, but it’s a fun trick!
- Serve and Store: Once cooled (or even slightly warm, if you can’t resist!), your magnificent Crispy Chewy Chocolate Chip Cookies are ready to be savored! There’s truly nothing better than one of these warm, melty-chocolate masterpieces with a tall glass of cold milk, or perhaps alongside a scoop of your favorite vanilla bean ice cream. For storage, place any leftover cookies in an airtight container at room temperature for up to 3-4 days. While they are undoubtedly at their peak freshness the day they are baked, they will retain their wonderful flavor and texture for several days. If you wish to recapture that fresh-baked warmth and chewiness, a quick 5-10 second zap in the microwave will do the trick. You can also freeze baked cookies in an airtight container or freezer bag for longer storage (up to 2 months); simply thaw them at room temperature or gently warm them in a low oven for a few minutes.
I am genuinely excited for you to experience these Crispy Chewy Chocolate Chip Cookies. The blend of sugars, the meticulous creaming, the crucial chilling period, and the careful baking process all converge to create a cookie that is truly exceptional – flawlessly crispy on the edges, wonderfully chewy in the center, and absolutely bursting with rich, complex chocolate flavor. Each bite is a testament to the magic of home baking. Enjoy every single one!
Remember, patience and a little bit of love are your secret ingredients when making these ultimate Crispy Chewy Chocolate Chip Cookies. Happy baking!
Conclusion:
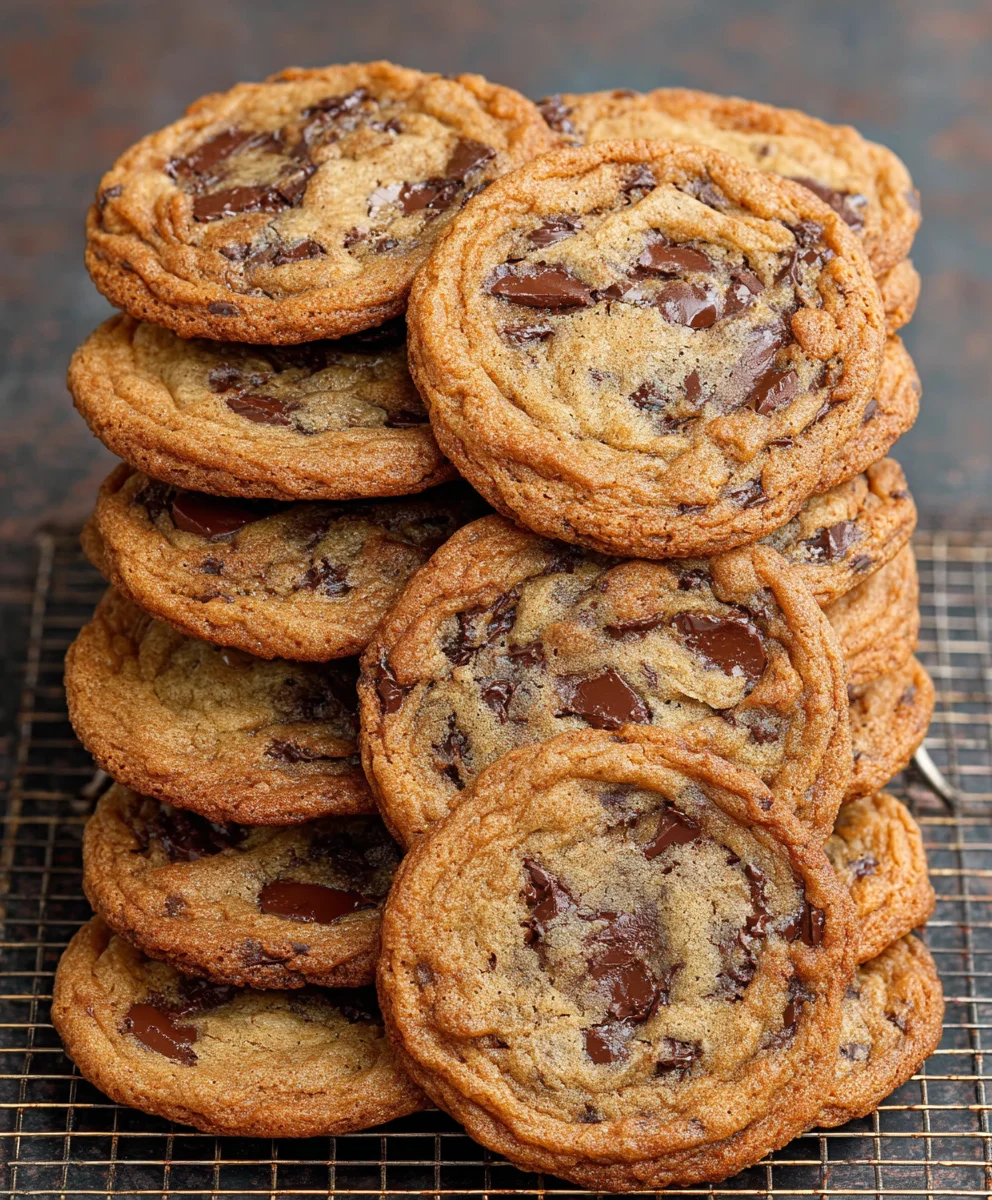
What truly sets this recipe apart, and why I genuinely believe it’s a non-negotiable addition to your baking repertoire, is the masterful blend of textures and flavors it consistently delivers. Imagine: that perfect golden-brown edge that shatters delicately with a satisfying crunch, yielding instantly to a molten, soft, and deeply satisfyingly chewy interior. Each bite is a symphony of sensations, from the slight crisp of the exterior to the gooey, rich chocolate pockets melting on your tongue, all underpinned by that unmistakable, comforting brown sugar warmth. This isn’t just any cookie; it’s an experience, a moment of pure, unadulterated bliss that will transport you straight back to the most comforting memories of childhood. These are, without a doubt, the Crispy Chewy Chocolate Chip Cookies you’ve always dreamed of baking, and dare I say, the ones you’ll forever be asked to bring to every gathering. I pour my heart into developing recipes that truly shine, and this one, with its impeccable balance of crispness and chewiness, is one I am particularly proud to share with you. It’s a timeless classic, perfected, ensuring every single cookie is a miniature marvel of texture and taste.
Beyond simply enjoying them straight from the cooling rack – which, let’s be honest, is a divine experience in itself – these cookies offer a world of delightful possibilities. Picture them warm, nestled alongside a frosty glass of milk, or perhaps a steaming mug of your favorite coffee or chai on a chilly afternoon. The way the warmth of the cookie gently softens the chocolate, creating a delightful contrast with the cool beverage, is pure magic. For an elevated treat, consider creating magnificent ice cream sandwiches by pressing two cookies around a generous scoop of vanilla bean, salted caramel, or even mint chip ice cream; the contrast of warm, soft cookie and cold, creamy ice cream is simply out of this world. You could even get creative and crumble a few over a bowl of Greek yogurt and fresh berries for a surprisingly decadent breakfast, or use them as a whimsical, buttery topping for a homemade trifle or a fruit crisp. They also make fantastic additions to a dessert charcuterie board, surrounded by fresh fruit, artisanal cheeses, and other sweet delights, adding that homemade touch that everyone appreciates.
Creative Serving Ideas & Flavor Variations
And if you’re feeling adventurous, these Crispy Chewy Chocolate Chip Cookies are incredibly versatile, ready for your personal touch! Feel free to experiment with different types of chocolate – a mix of dark and milk chocolate chips, or even chopped chocolate bars (especially a high-quality baking bar), can add extra depth and a more complex chocolate profile. A generous sprinkle of flaky sea salt on top before baking is a game-changer; it enhances the chocolate flavor beautifully and adds another delightful textural dimension that really makes the cookie pop. For a subtle, sophisticated twist, a teaspoon of instant espresso powder can intensify the chocolate notes without making the cookie taste overtly like coffee, while a dash of almond or hazelnut extract could add a nuanced, gourmet flair. Classic additions like toasted pecans or walnuts also offer another layer of crunch and richness, transforming the cookie into a heartier, more substantial treat. Don’t be afraid to make this recipe truly your own, adapting it to suit your cravings and the ingredients you have on hand. The beauty of a foundational recipe like this is its ability to be a blank canvas for your culinary imagination.
Now that you’re armed with the secrets to baking what I truly believe are the best Crispy Chewy Chocolate Chip Cookies you’ll ever make, I implore you: go forth and bake! There’s an unparalleled joy in creating something delicious from scratch, and even more so in sharing that warmth and effort with others. I promise you, the aroma alone as they bake will fill your home with an undeniable sense of comfort and happiness, a fragrant invitation to pure bliss. And once you take that first glorious bite, with its perfect balance of crispness and chewiness, you’ll understand exactly what I mean. But don’t just take my word for it; experience it for yourself! I am absolutely thrilled for you to try this recipe, and more than anything, I would love to hear all about your baking adventures. Did you add a secret ingredient? Did you share them with loved ones, or perhaps hoard them all to yourself (no judgment here!)? What was your favorite part of the process, or what creative twist did you add? Please, don’t hesitate to share your thoughts, your photos, and your triumphs! Your experiences inspire me and the entire baking community. Happy baking, my friends; may your cookie jars always be full!
Ultimate Crispy Chewy Chocolate Chip Cookies
Achieve the ultimate balance of crispy golden edges and an irresistibly soft, gooey center with this meticulously crafted chocolate chip cookie recipe. Featuring a crucial chilling step, these cookies promise deep flavor and perfect texture.
Ingredients
-
1/2 cup unsalted butter, softened
-
1/2 cup granulated white sugar
-
3/4 cup packed light brown sugar
-
1 large egg
-
1 tsp vanilla extract
-
1 1/4 cups all-purpose flour
-
1/2 tsp baking soda
-
1/2 tsp table salt
-
1 1/2 cups chopped large semisweet chocolate chunks, divided
Instructions
-
Step 1
In a medium bowl, whisk together the all-purpose flour, baking soda, and table salt until thoroughly combined. Set aside. -
Step 2
In a large mixer bowl, cream the softened unsalted butter, granulated sugar, and packed light brown sugar on medium speed for 3-5 minutes until the mixture is light, fluffy, and significantly paler. -
Step 3
Scrape down the bowl. Add the large egg and vanilla extract. Beat on medium speed for 1-2 minutes until the mixture is light and well emulsified. -
Step 4
With the mixer on low speed, gradually add the whisked dry ingredients to the wet mixture in thirds. Mix only until just combined and no streaks of flour remain. Do not overmix. -
Step 5
Remove the bowl from the mixer. Using a rubber spatula, gently fold in 1 1/4 cups of the chopped large semisweet chocolate chunks until evenly distributed throughout the dough. -
Step 6
Cover the bowl tightly with plastic wrap and refrigerate the cookie dough for a minimum of 24 hours. For best results, chill for up to 48-72 hours to allow flavors to develop and butter to solidify. -
Step 7
About 20-30 minutes before baking, preheat your oven to 375°F (190°C). Line two large baking sheets with parchment paper or silicone baking mats. -
Step 8
Remove chilled dough from the refrigerator. Use a 2-tablespoon cookie scoop to portion out the dough, rolling each scoop into a neat ball. Place dough balls 2-3 inches apart on prepared baking sheets. Top with remaining 1/4 cup chopped chocolate chunks. -
Step 9
Bake one baking sheet at a time for 10-12 minutes, until the edges are golden-brown and the centers still look slightly soft. For crinkly edges, carefully lift and gently drop the baking sheet onto the oven rack around the 7-8 minute mark (cookie banging technique), repeating once more if desired. -
Step 10
Remove from oven and let cookies cool on the hot baking sheet for 5-10 minutes. Then, carefully transfer to a wire cooling rack to cool completely. Serve warm or store in an airtight container at room temperature for up to 3-4 days. Enjoy!
Important Information
Nutrition Facts (Per Serving)
It is important to consider this information as approximate and not to use it as definitive health advice.
Allergy Information
Please check ingredients for potential allergens and consult a health professional if in doubt.

Leave a Comment