
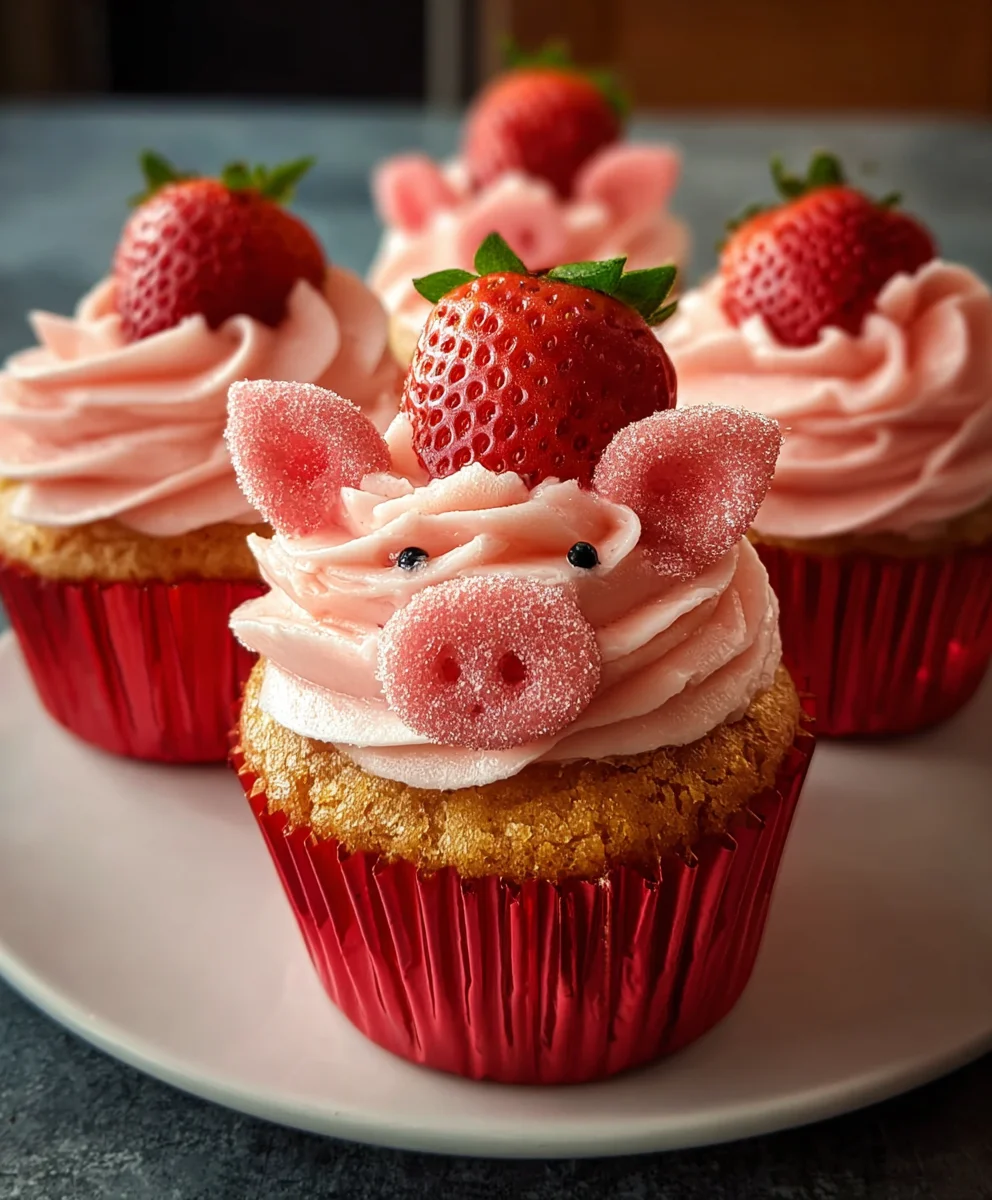
Strawberry Piggy Cupcakes are more than just a delightful dessert; they are a charming invitation to a world where sweetness meets playful imagination.
I find that few treats capture hearts quite like these adorable creations. With their vibrant strawberry flavor and irresistibly cute piggy faces, these cupcakes promise to be the star of any gathering, bringing smiles and a touch of whimsy to both young and old alike. While perhaps not steeped in ancient culinary lore, the concept of such creatively decorated desserts reflects a beautiful modern baking tradition—transforming simple ingredients into edible art that celebrates joy and festivity. These delightful confections likely emerged from a desire to combine the fresh, summery essence of strawberries with an engaging, memorable presentation, quickly becoming a beloved staple at children’s parties, family celebrations, and whenever a little extra cheer is needed.
What makes people utterly fall in love with these treats? It’s a delightful blend of sensory experiences. The light, moist cupcake base, infused with the natural sweetness of ripe strawberries, provides a burst of refreshing flavor. This is perfectly complemented by a smooth, creamy frosting that lends itself beautifully to shaping those endearing piggy features. The visual appeal is undeniably captivating, but it’s the harmonious balance of fruity taste and tender texture that ensures every bite is pure bliss. Baking these Strawberry Piggy Cupcakes isn’t just about following a recipe; it’s about crafting an experience, a little moment of happiness that’s both delicious and wonderfully fun to create and share.

Ingredients:
-
For the Moist Strawberry Cupcakes:
- 1 ½ cups (190g) all-purpose flour
- 1 ½ teaspoons baking powder
- ¼ teaspoon salt
- ½ cup (113g) unsalted butter, softened to room temperature
- 1 cup (200g) granulated sugar
- 2 large eggs, at room temperature
- 1 teaspoon pure vanilla extract
- ½ cup (120ml) whole milk, at room temperature
- ¼ cup (about 60g) fresh strawberries, finely diced (pat dry with paper towel)
- Optional: A few drops of pink gel food coloring (for a more vibrant pink cupcake)
-
For the Sweet Strawberry Filling:
- 1 cup (150g) fresh strawberries, hulled and diced into small pieces
- 2 tablespoons granulated sugar
- 1 tablespoon fresh lemon juice
- 1 teaspoon cornstarch
- 1 tablespoon water
-
For the Silky Vanilla Buttercream Frosting:
- 1 cup (226g) unsalted butter, softened to room temperature
- 3-4 cups (360-480g) powdered sugar, sifted
- 2-3 tablespoons whole milk or heavy cream, at room temperature
- 1 ½ teaspoons pure vanilla extract
- Pinch of salt
- Pink gel food coloring (optional, for pink frosting)
-
For the Adorable Piggy Decorations:
- 4-6 ounces (113-170g) light pink fondant
- Small amount of black edible food marker or black gel food coloring with a fine brush
- A tiny bit of cornstarch or powdered sugar for dusting (for rolling fondant)
Phase 1: Preparing the Strawberry Piggy Cupcake Batter
My journey to creating the most adorable and delicious Strawberry Piggy Cupcakes always begins with the foundation: a perfectly moist and flavorful strawberry cupcake. Achieving that balance of light texture and rich flavor is key, so let’s dive in with precision!
- Preheat and Prepare: First things first, let’s get our oven ready. Preheat your oven to 350°F (175°C). While the oven is warming up, line a 12-cup muffin pan with paper liners. I always find that a good quality liner makes for easier removal and a prettier cupcake, essential for our lovely Strawberry Piggy Cupcakes!
- Whisk Dry Ingredients: In a medium bowl, whisk together the all-purpose flour, baking powder, and salt. I always take a moment to really whisk these well; it ensures that the leavening agents are evenly distributed throughout the batter, which means a beautifully risen cupcake every time. Set this bowl aside for now.
- Cream Butter and Sugar: In a large mixing bowl, using an electric mixer fitted with a paddle attachment (or a hand mixer), beat the softened unsalted butter on medium speed until creamy, about 1-2 minutes. Now, gradually add the granulated sugar and continue beating for another 2-3 minutes, or until the mixture is light in color and fluffy. This creaming process is crucial as it incorporates air into the butter, contributing to the light and airy texture of our Strawberry Piggy Cupcakes. Make sure to scrape down the sides of the bowl periodically to ensure everything is well combined.
- Incorporate Eggs and Vanilla: Add the eggs, one at a time, beating well after each addition until fully incorporated. Don’t rush this step! Each egg needs to be fully integrated into the butter-sugar mixture before the next one goes in. After the eggs, stir in the pure vanilla extract. At this point, the mixture might look slightly curdled; don’t worry, that’s completely normal and will resolve as we add the dry ingredients.
- Alternate Dry and Wet Ingredients: With the mixer on low speed, gradually add the dry ingredients mixture to the wet ingredients, alternating with the whole milk. Begin and end with the dry ingredients. This means you’ll add about a third of the flour mixture, mix until just combined, then half of the milk, mix, then another third of the flour, mix, the remaining milk, mix, and finally the last third of the flour mixture. Mix until just combined after each addition. The key here is not to overmix! Overmixing develops the gluten in the flour too much, leading to tough cupcakes. We want tender, moist Strawberry Piggy Cupcakes!
- Fold in Strawberries and Color: Gently fold in the finely diced fresh strawberries. If you desire a more vibrant pink color for your Strawberry Piggy Cupcakes, now is the time to add a few drops of pink gel food coloring. Mix just until the color is evenly distributed and the strawberries are incorporated. A rubber spatula is perfect for this gentle folding.
- Fill Cupcake Liners: Divide the batter evenly among the 12 prepared cupcake liners, filling each about two-thirds full. I often use an ice cream scoop for this to ensure consistent sizing, which helps them bake evenly.
Phase 2: Baking Your Delicious Strawberry Piggy Cupcakes
Now that our batter is perfectly mixed, it’s time for the magical transformation in the oven. Baking is an art, and getting these Strawberry Piggy Cupcakes just right ensures they’re ready for their adorable piggy makeovers.
- Bake to Perfection: Place the muffin pan into the preheated oven. Bake for 18-22 minutes, or until a wooden skewer or toothpick inserted into the center of a cupcake comes out clean. Baking times can vary depending on your oven, so keep an eye on them. You’re looking for a lovely golden-brown top and a springy texture when gently pressed.
- Cool in Pan: Once baked, remove the pan from the oven. Let the Strawberry Piggy Cupcakes cool in the muffin pan for about 5-10 minutes. This allows them to firm up slightly before you move them, preventing breakage.
- Transfer to Wire Rack: After the initial cooling, carefully transfer the cupcakes from the muffin pan to a wire cooling rack to cool completely. This step is super important! Do not try to frost warm cupcakes! Warm cupcakes will melt your beautiful buttercream, turning your carefully crafted Strawberry Piggy Cupcakes into a runny mess. They need to be completely cool, usually about an hour or more, before we proceed to filling and frosting.
Phase 3: Crafting the Homemade Strawberry Filling
A secret weapon for these Strawberry Piggy Cupcakes is the burst of fresh strawberry flavor hidden inside. This homemade filling is simple to make but adds an incredible depth of fruitiness that complements the cake perfectly.
- Combine Ingredients: In a small saucepan, combine the diced fresh strawberries, granulated sugar, and fresh lemon juice. The lemon juice isn’t just for flavor; it also brightens the strawberries and helps cut through the sweetness.
- Simmer and Thicken: Place the saucepan over medium heat. Bring the mixture to a gentle simmer, stirring occasionally. The strawberries will start to break down and release their juices. While this is simmering, in a tiny bowl, whisk together the cornstarch and water to create a slurry. Once the strawberries have softened and are bubbly, pour the cornstarch slurry into the saucepan, stirring constantly. Continue to cook for another 1-2 minutes, stirring, until the mixture has thickened to a jam-like consistency. It should coat the back of a spoon.
- Cool Completely: Remove the saucepan from the heat. Transfer the strawberry filling to a small bowl or container and allow it to cool completely to room temperature. You can even pop it in the refrigerator to speed up the process. Just like our cupcakes, the filling needs to be cool before it can be used, otherwise, it will create issues when we fill our Strawberry Piggy Cupcakes.
Phase 4: Whipping Up the Silky Vanilla Buttercream Frosting
Every delicious cupcake needs a luscious frosting, and for our Strawberry Piggy Cupcakes, we’re making a classic vanilla buttercream. This frosting is not only incredibly tasty but also sturdy enough to hold our adorable piggy decorations.
- Beat Softened Butter: In a large mixing bowl, using an electric mixer fitted with a paddle attachment, beat the softened unsalted butter on medium speed for 3-5 minutes until it is very light and fluffy. This extended beating time is crucial for achieving a super creamy and airy buttercream. It really transforms the butter into a pale, cloud-like consistency.
- Gradually Add Powdered Sugar: With the mixer on low speed, gradually add the sifted powdered sugar, one cup at a time. I always recommend sifting powdered sugar to avoid lumps, which can ruin the smooth texture of your frosting. Once all the sugar is added, increase the speed to medium-high and beat for another 2-3 minutes until the mixture is well combined.
- Add Liquid and Flavoring: Reduce the speed to low. Add 2 tablespoons of milk or cream, the pure vanilla extract, and a pinch of salt. Beat until just combined. Now, increase the speed to medium-high and beat for another 2-3 minutes. This final beating helps to aerate the frosting further, making it wonderfully light and fluffy.
- Adjust Consistency: Check the consistency of your buttercream. If it’s too thick, add the remaining tablespoon of milk or cream, one teaspoon at a time, until you reach your desired piping consistency. If it’s too thin, you can add a little more sifted powdered sugar. The ideal consistency for piping decorations is firm enough to hold its shape but soft enough to flow smoothly through a piping bag.
- Color the Frosting (Optional): If you want to give your Strawberry Piggy Cupcakes a pink hue, add a few drops of pink gel food coloring to the buttercream and mix until the color is evenly distributed. Gel food coloring is best as it doesn’t thin out the frosting like liquid coloring can. For a classic white buttercream against the pink piggies, you can skip this step.
Phase 5: Assembling and Filling Your Strawberry Piggy Cupcakes
Now for the exciting part – bringing all the components together! Filling these Strawberry Piggy Cupcakes with our homemade strawberry goodness is what makes them truly special and adds that delightful surprise with every bite.
- Core the Cupcakes: Once your cupcakes are completely cool, it’s time to core them. Using a small paring knife, a cupcake corer, or even the back of a large piping tip, cut a cone shape out of the center of each cupcake. Be careful not to go all the way through the bottom. You want to create a nice little well for our filling. You can discard the removed cake pieces or, if you’re like me, snack on them!
- Fill with Strawberry Goodness: Spoon a generous amount of the cooled strawberry filling into the hole of each cupcake. I usually fill it right up to the top of the cupcake. This ensures a delightful burst of strawberry flavor when you bite into your Strawberry Piggy Cupcakes.
- Prepare for Frosting: If you’re going to use a piping bag for frosting, now is a good time to prepare it. Fit a piping bag with your preferred large round or star tip (I love a large round tip for a smooth, domed look, or a star tip for a more elaborate swirl). Fill the piping bag with your vanilla buttercream.
- Frost the Cupcakes: Pipe a generous swirl or dome of buttercream frosting onto each filled cupcake. Start from the outer edge and work your way inwards, or create a lovely high swirl. This will form the base for our adorable piggy faces and needs to be a nice, smooth canvas. Aim for a consistent amount of frosting on each cupcake to make the subsequent decorating steps easier and more uniform for your Strawberry Piggy Cupcakes.
Phase 6: Decorating Your Adorable Strawberry Piggy Cupcakes (The Piggy Faces!)
This is where the magic truly happens! Transforming your delicious Strawberry Piggy Cupcakes into charming little pigs is the most fun and creative part. Get ready to make some incredibly cute edible art!
- Prepare the Fondant: Lightly dust your work surface with a tiny bit of cornstarch or powdered sugar to prevent sticking. Take your light pink fondant and knead it for a minute or two until it’s pliable and smooth. This makes it much easier to work with.
- Create the Piggy Snouts: Roll out a portion of the pink fondant to about ⅛ inch thickness. Using a small round cutter (about ¾ to 1 inch in diameter, depending on the size of your cupcakes), cut out 12 circles for the piggy snouts. If you don’t have a small cutter, you can use the wide end of a piping tip or even a clean thimble. Take a toothpick or the blunt end of a skewer and gently poke two small holes into the center of each circle to create the nostrils. This simple detail instantly makes them recognizable as pig snouts.
- Form the Piggy Ears: Roll out another portion of the pink fondant to the same ⅛ inch thickness. For the ears, you’ll want to cut small triangles. You can do this freehand with a small knife or a pizza cutter, or if you have a tiny heart-shaped cutter, you can cut hearts and then snip off the bottom point to make two ear shapes from one heart. You’ll need two ears per cupcake, so a total of 24 ears. For a more realistic look, you can gently pinch the base of each ear to give it a slight curve.
- Attach the Snouts and Ears: Gently place one fondant snout slightly off-center on the front of each frosted cupcake. The stickiness of the buttercream should be enough to hold it in place. Then, place two fondant ears at the top of the cupcake, positioning them slightly behind the snout and pushing them gently into the frosting so they stand upright. The fresh, creamy frosting acts as a perfect adhesive for our little piggy features!
- Add the Eyes: Now for the adorable eyes! Take your black edible food marker (this is the easiest and neatest way to do it) or dip a very fine, clean food-safe paintbrush into a tiny bit of black gel food coloring. Carefully draw two small dots above the snout for the eyes on each piggy face. You can make them wide open, or give them a slightly sleepy look – it’s all part of the charm of these Strawberry Piggy Cupcakes. Take your time here! A steady hand makes a big difference in giving each pig its personality.
- Final Touches: Step back and admire your incredibly cute Strawberry Piggy Cupcakes! You can optionally add a tiny blush to their cheeks by gently dusting a small amount of pink edible glitter or using a dry brush with a tiny bit of pink food coloring on either side of the snout, though this is purely optional and the cupcakes are already adorable as is. These delightful treats are now ready to be shared and enjoyed!
Conclusion:
So, there you have it, my friends! We’ve journeyed through the steps to create something truly special, something that brings a smile to every face it graces. If you’ve followed along, you already know that these aren’t just any ordinary cupcakes; they are little bundles of joy, a testament to how much fun baking can be. I genuinely believe this recipe is a must-try for everyone, from seasoned bakers looking for a charming new project to complete novices eager to make a statement. What makes them so irresistible? It’s that perfect harmony of a light, fluffy vanilla cake, the rich, creamy strawberry frosting bursting with fresh fruit flavor, and of course, those utterly adorable piggy faces that are just too cute to resist. Every single bite is a delightful combination of sweet, fruity, and wonderfully comforting. They’re surprisingly simple to put together, making them a fantastic project for a lazy afternoon, a joyful activity with kids, or a thoughtful handmade gift for someone special. Trust me, the sheer “aww” factor alone makes the effort completely worthwhile. These Strawberry Piggy Cupcakes are more than just a dessert; they’re an experience, a conversation starter, and a guaranteed mood-lifter that will charm anyone who sees or tastes them.
Elevate Your Experience: Serving Suggestions & Creative Variations
Once your charming little piggies are out of the oven and beautifully decorated, the fun doesn’t have to stop there! How you choose to serve them can add another delightful layer to the experience. Imagine a platter of these endearing treats as the captivating centerpiece of a birthday party, a festive baby shower, a whimsical garden tea party, or even just a joyful gathering with friends and family. They’re absolutely perfect alongside a tall glass of cold milk, a warm cup of coffee, or a refreshing iced tea, making them suitable for any time of day. For a truly indulgent experience, consider serving them with a scoop of premium vanilla bean ice cream, a dollop of fresh whipped cream, or a delicate drizzle of melted white chocolate ganache. They also make an incredibly thoughtful and visually appealing gift – arrange a few in a pretty box with some decorative tissue paper, and you’ll instantly brighten someone’s day with a homemade touch.
But why stop at the original design? This recipe is incredibly versatile, inviting you to put your own creative spin on things and truly make it your own. It’s a fantastic base for experimentation!
Flavourful Fruit Twists:
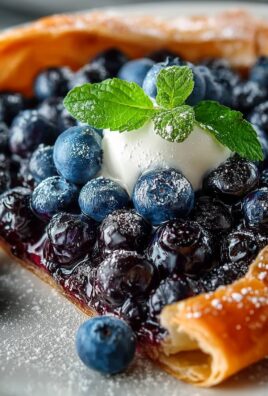
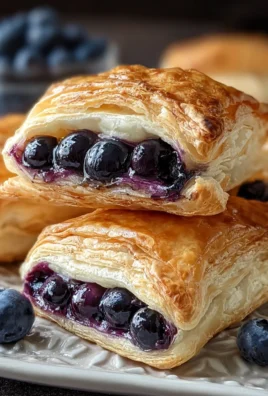
Instead of strawberries, you could easily swap in other fresh berries like ripe raspberries or plump blueberries for a different yet equally delicious flavor profile. Finely diced peaches or even grated apple, perhaps with a touch of cinnamon, could also work wonderfully in both the cake and frosting, especially if you adjust the moisture content slightly for the latter. Imagine a “blueberry bear” or a “peach kitten” using the same basic structure!
Cake Base Creativity:
While our vanilla cake is a beloved classic for its simplicity and versatility, don’t hesitate to experiment with different cake flavors to match your mood or occasion. A burst of lemon zest infused into the batter would complement the fruit beautifully, offering a bright and tangy contrast. Alternatively, a hint of almond extract could add a sophisticated and nutty undertone, elevating the entire experience. You could even try a chocolate cake base for an ultimate chocolate-strawberry combination.
Frosting Fantasies:
For the frosting, your options are only limited by your imagination. Imagine a luscious cream cheese frosting, perhaps even flavored with a touch of fresh mint or a zest of orange for a refreshing contrast. A chocolate ganache drizzle over the strawberry frosting would also be absolutely divine, adding another layer of rich indulgence. Or, for a tropical twist, a coconut cream frosting could be heavenly.
Decorative Diversions:
Beyond the classic wafer cookie ears, you could try using mini chocolate cookies, or even tiny marzipan cut-outs for the ears to change up the texture and look. Sprinkles in various colors, edible glitter, or even a dusting of cocoa powder for “mud puddles” around the piggies could add extra charm and whimsy. For an “adults-only” version, a tiny splash of a complementary liqueur, like strawberry schnapps or a raspberry liqueur, could be incorporated into the frosting for a truly sophisticated treat. The possibilities are truly endless, limited only by your imagination and what you have in your pantry!
Your Turn to Shine!
Now that you have all the tools, tips, and inspiration, it’s truly your turn to get into the kitchen and bring these adorable confections to life. Don’t be shy; embrace the joy of baking and the satisfaction of creating something beautiful and delicious with your own hands! I promise you, the moment you pull your first batch of these charming treats from the oven, you’ll feel an immense sense of accomplishment and delight. There’s nothing quite like the inviting aroma of freshly baked cupcakes filling your home, especially when they’re as irresistibly cute as these. I’m so excited for you to experience the fun, the flavor, and the sheer adoration these Strawberry Piggy Cupcakes will bring to your next gathering. Please, when you make them, don’t keep them a secret! I absolutely adore seeing your creations and hearing about your baking journey. Share your photos, tell me about your baking adventures, any clever variations you tried, or the wonderful reactions you got from your family and friends. You can post them on social media and tag me, or simply leave a comment below right here on the article. Your stories and pictures inspire not only me but countless other aspiring bakers in our community, fostering a wonderful shared passion for delicious, homemade treats. Let’s celebrate the magic of baking together. Happy baking, and I can’t wait to hear all about your piggy parade!
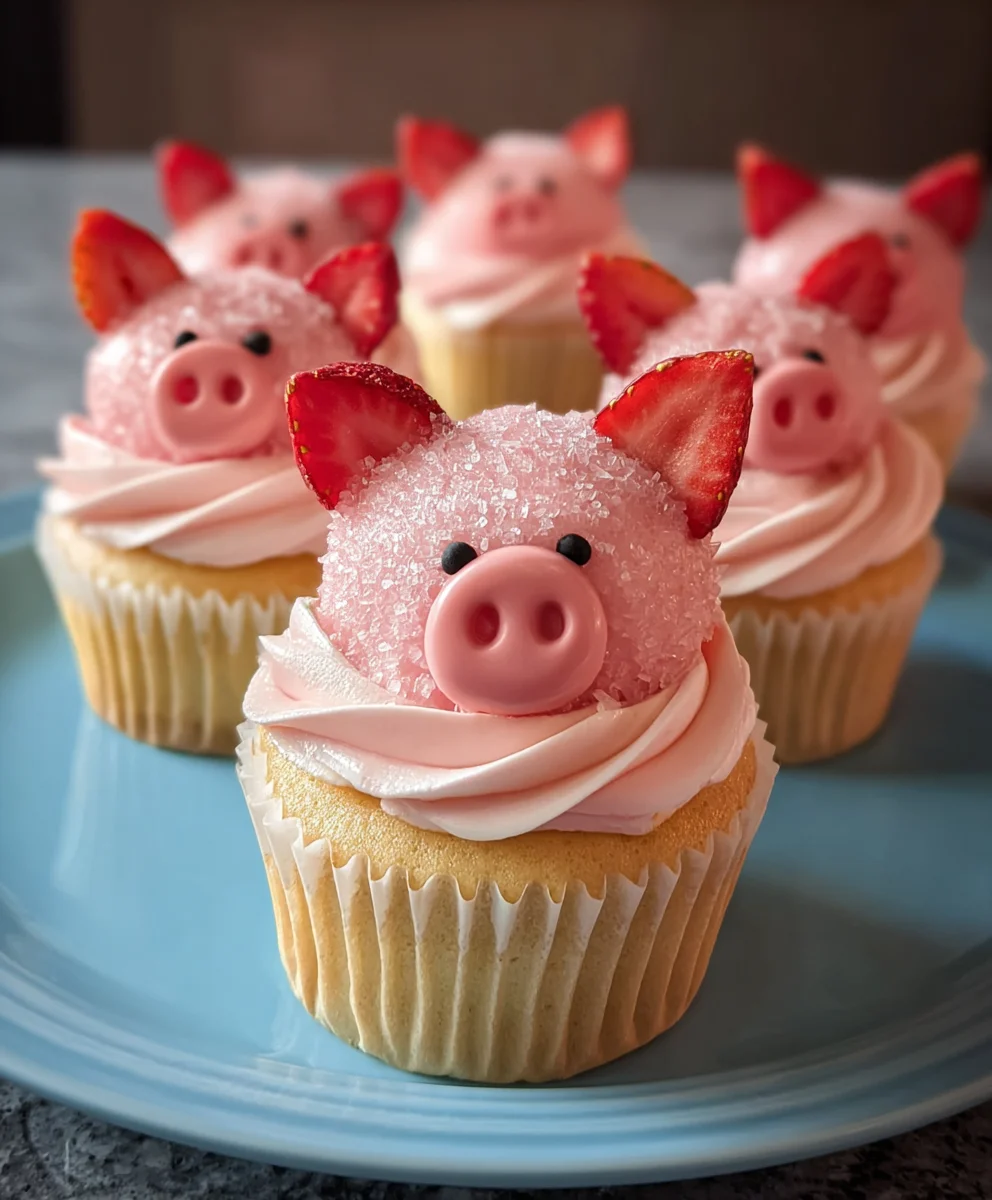
Strawberry Piggy Cupcakes
Strawberry Piggy Cupcakes are adorable and delicious treats, perfect for any gathering. These charming cupcakes feature a light, moist strawberry base, a sweet homemade strawberry filling, and a silky vanilla buttercream, all adorned with irresistibly cute fondant piggy faces. A delightful blend of fruity taste and tender texture, they’re sure to bring smiles and a touch of whimsy to both young and old.
Ingredients
-
1 ½ cups (190g) all-purpose flour
-
1 ½ tsp baking powder
-
¼ tsp salt
-
½ cup (113g) unsalted butter, softened
-
1 cup (200g) granulated sugar
-
2 large eggs, room temp
-
1 tsp pure vanilla extract
-
½ cup (120ml) whole milk, room temp
-
¼ cup (60g) fresh strawberries, finely diced, patted dry
-
Optional: Pink gel food coloring (for cupcakes)
-
1 cup (150g) fresh strawberries, hulled & diced (for filling)
-
2 tbsp granulated sugar (for filling)
-
1 tbsp fresh lemon juice (for filling)
-
1 tsp cornstarch (for filling)
-
1 tbsp water (for filling)
-
1 cup (226g) unsalted butter, softened (for buttercream)
-
3-4 cups (360-480g) powdered sugar, sifted (for buttercream)
-
2-3 tbsp whole milk or heavy cream, room temp (for buttercream)
-
1 ½ tsp pure vanilla extract (for buttercream)
-
Pinch of salt (for buttercream)
-
Optional: Pink gel food coloring (for buttercream)
-
4-6 oz (113-170g) light pink fondant
-
Black edible food marker or black gel food coloring
-
Cornstarch or powdered sugar for dusting
Instructions
-
Step 1
Preheat oven to 350°F (175°C). Line a 12-cup muffin pan. In a medium bowl, whisk together flour, baking powder, and salt; set aside. In a large bowl, cream softened butter until smooth, then gradually add granulated sugar, beating until light and fluffy (2-3 min). Add eggs one at a time, beating well after each, then stir in vanilla extract. -
Step 2
On low speed, alternately add the dry ingredients and whole milk to the wet ingredients, beginning and ending with dry. Mix until just combined, do not overmix. Gently fold in finely diced strawberries and optional pink gel food coloring. Divide batter evenly among the 12 prepared liners, filling each two-thirds full. -
Step 3
Bake for 18-22 minutes, or until a wooden skewer inserted into the center of a cupcake comes out clean. Let cool in the muffin pan for 5-10 minutes, then transfer to a wire rack to cool completely (approx. 1 hour). -
Step 4
In a small saucepan, combine diced fresh strawberries, granulated sugar, and lemon juice. Bring to a gentle simmer over medium heat, stirring until strawberries break down. In a tiny bowl, whisk cornstarch and water to create a slurry. Pour slurry into the simmering strawberries, stirring constantly, and cook for 1-2 minutes until thickened to a jam-like consistency. Transfer filling to a small bowl and cool completely. -
Step 5
In a large mixing bowl, beat softened unsalted butter on medium speed for 3-5 minutes until very light and fluffy. Gradually add sifted powdered sugar, one cup at a time, on low speed. Once all sugar is added, increase speed to medium-high and beat for 2-3 minutes. Add 2 tbsp milk/cream, vanilla extract, and pinch of salt; beat on medium-high for another 2-3 minutes until light and fluffy. Adjust consistency with remaining milk/cream or more powdered sugar as needed. Optional: Add pink gel food coloring. -
Step 6
Once cupcakes are completely cool, use a small paring knife or cupcake corer to cut a cone shape out of the center of each cupcake, creating a well. Spoon a generous amount of the cooled strawberry filling into each well. Fit a piping bag with your preferred large round or star tip and fill with vanilla buttercream. Pipe a generous swirl or dome of buttercream frosting onto each filled cupcake. -
Step 7
Lightly dust your work surface with cornstarch or powdered sugar. Knead light pink fondant until pliable. Roll out a portion of fondant to about ⅛-inch thickness. Using a small round cutter (¾-1 inch diameter), cut out 12 circles for snouts. Poke two small holes in the center of each circle with a toothpick for nostrils. Roll out another portion of fondant to ⅛-inch thickness. Cut 24 small triangles for ears, gently pinching the base of each for a slight curve. -
Step 8
Gently place one fondant snout slightly off-center on the front of each frosted cupcake. Position two fondant ears at the top of each cupcake, pushing them gently into the frosting so they stand upright. Using a black edible food marker or a fine brush with black gel food coloring, carefully draw two small dots above the snout for the eyes on each piggy face. -
Step 9
Optionally, add a tiny blush to their cheeks by gently dusting a small amount of pink edible glitter or using a dry brush with a tiny bit of pink food coloring on either side of the snout. Your adorable Strawberry Piggy Cupcakes are now ready to be shared and enjoyed!
Important Information
Nutrition Facts (Per Serving)
It is important to consider this information as approximate and not to use it as definitive health advice.
Allergy Information
Please check ingredients for potential allergens and consult a health professional if in doubt.
Leave a Comment