
16 Stunning Springtime Baked Goods Scroll Stoppers are here to banish the last whispers of winter and usher in a season of vibrant flavors and delightful indulgence! As the days grow longer and the world bursts into color, our kitchens start to crave the sweet, comforting embrace of freshly baked treats. There’s something inherently joyful about springtime baking – a chance to play with fresh fruits, delicate floral notes, and lighter, airier textures. These stunning springtime baked goods are designed to do more than just satisfy your sweet tooth; they are visual masterpieces, crafted to capture the very essence of the season. From the soft pastel hues of frosted cupcakes to the rustic charm of berry-filled tarts, each creation is a little edible work of art. Get ready to be inspired and to fill your home with the irresistible aroma of spring’s finest flavors!
Discover the magic of stunning springtime baked goods with these irresistible recipes!
Prepare to be amazed by these show-stopping creations!

16 Stunning Springtime Baked Goods Scroll Stoppers
Spring has officially sprung, and you know what that means! It’s time to lighten up our baking, embrace vibrant colors, and welcome the freshest flavors into our kitchens. I’ve been dreaming of all things floral, fruity, and delightfully airy, and I’ve curated a list of 16 absolutely stunning springtime baked goods that are guaranteed to stop your scroll and inspire your next baking adventure. From delicate pastries to show-stopping cakes, these treats capture the essence of the season perfectly. Let’s get baking and bring a burst of sunshine to our tables!
Lemon Lavender Scones with Honey Glaze
These scones are like a little bite of a spring garden. The subtle floral notes of lavender pair beautifully with the bright tang of lemon, all brought together with a sweet, sticky honey glaze. They’re perfect for a leisurely brunch or an afternoon tea.
Ingredients:
Instructions:
1. Prepare the Dry Ingredients: In a large mixing bowl, whisk together the all-purpose flour, granulated sugar, baking powder, and salt. Add the dried culinary lavender and lemon zest, stirring to distribute them evenly throughout the dry mixture. It’s crucial that your butter is very cold at this stage. Keeping it cold ensures that when it melts in the oven, it creates steam pockets, resulting in flaky, tender scones.
2. Cut in the Butter: Add the cold, cubed unsalted butter to the dry ingredients. Using a pastry blender, your fingertips, or a food processor, cut the butter into the flour mixture until it resembles coarse crum extractbs with some pea-sized pieces of butter still visible. These little butter pieces are the key to achieving that desirable flaky texture in your scones. Don’t overmix at this stage; a little bit of visible butter is a good thing!
3. Add Wet Ingredients: In a separate small bowl, whisk together the cold heavy cream and the beaten egg. Pour this wet mixture into the dry ingredients. Gently stir with a fork or spatula until just combined. Be careful not to overmix the dough; a slightly shaggy dough is perfect. Overmixing will develop the gluten too much, leading to tough scones.
4. Form and Bake the Scones: Turn the dough out onto a lightly floured surface. Gently knead it a few times until it just comes together – about 5-6 turns. Pat the dough into a circle about 3/4-inch thick. You can either cut it into 8 wedges like a pizza or use a biscuit cutter to create individual rounds. Place the scones onto a baking sheet lined with parchment paper. For an extra golden touch, you can brush the tops with a little extra cream or an egg wash before baking.
5. Bake and Glaze: Bake in a preheated oven at 400°F (200°C) for 15-18 minutes, or until the scones are golden brown and a toothpick inserted into the center comes out clean. While the scones are cooling slightly on a wire rack, prepare the glaze. In a small bowl, whisk together the powdered sugar, honey, and 1-2 tablespoons of milk or cream until smooth and pourable. Drizzle the glaze generously over the warm scones. Let the glaze set before serving. Enjoy the delightful aroma and taste of spring!
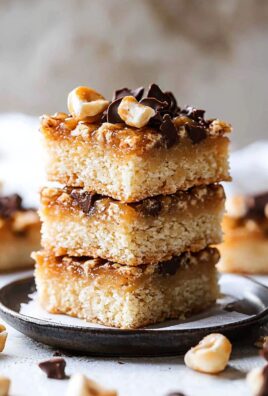
Strawberry Rhubarb Crum extractble Bars
The classic pairing of sweet strawberries and tart rhubarb is a springtime staple for a reason. These bars offer that delightful flavor combination in an easy-to-handle, portable format. The buttery crum extractble topping adds a wonderful texture.
Ingredients:
Instructions:
1. Prepare the Crum extractble Mixture: Preheat your oven to 375°F (190°C). Grease and flour an 8×8 inch baking pan or line it with parchment paper, leaving an overhang for easy lifting. In a medium bowl, combine the all-purpose flour, rolled oats, packed light brown sugar, baking soda, and salt. Whisk these dry ingredients together until well combined.
2. Add Melted Butter: Pour the melted unsalted butter over the dry ingredients. Stir with a fork or spatula until the mixture is crum extractbly and resembles wet sand. This mixture will form both the base of your bars and the delicious crum extractble topping. Make sure all the dry ingredients are moistened by the butter for the best texture.
3. Form the Base: Take about two-thirds of the crum extractble mixture and press it firmly and evenly into the bottom of the prepared baking pan. This will create the sturdy base for your bars. Ensure it’s packed down well so it doesn’t crum extractble apart when you cut the bars later.
4. Prepare the Filling: In a separate bowl, gently toss together the strawberries and chopped rhubarb. In a small bowl, whisk together the granulated sugar and cornstarch. This slurry will help thicken the fruit juices as they cook, preventing a soggy filling. Sprinkle the sugar and cornstarch mixture over the fruit and toss to coat evenly. Stir in the fresh lemon juice, which will enhance the fruit flavors and add a touch of brightness.
5. Assemble and Bake: Pour the fruit filling evenly over the pressed base in the baking pan. Sprinkle the remaining one-third of the crum extractble mixture evenly over the top of the fruit filling. Bake for 35-45 minutes, or until the topping is golden brown and the fruit filling is bubbly.
6. Cool and Cut: Let the bars cool completely in the pan on a wire rack. This is a crucial step for them to set properly. Once fully cooled, use the parchment paper overhang to lift the entire slab out of the pan. Cut into bars using a sharp knife. Enjoy these delightful sweet and tart treasures!
Elderflower and White Chocolate Cupcakes
These cupcakes are the epitome of spring elegance. The delicate, slightly sweet floral notes of elderflower are beautifully complemented by creamy white chocolate, creating a sophisticated and utterly delicious treat. They’re light, airy, and perfect for any spring celebration.
Ingredients:
Instructions:
1. Prepare the Dry Ingredients: Preheat your oven to 350°F (175°C) and line a muffin tin with 12 cupcake liners. In a medium bowl, whisk together the all-purpose flour, baking powder, baking soda, and salt. Set aside. This ensures all the leavening agents are evenly distributed for a consistent rise.
2. Cream Butter and Sugar: In a large mixing bowl, cream together the softened unsalted butter and granulated sugar until light and fluffy, about 3-5 minutes with an electric mixer. This process incorporates air, which contributes to the light texture of the cupcakes.
3. Add Eggs and Vanilla: Beat in the eggs one at a time, mixing well after each addition. Stir in the vanilla extract. Make sure each egg is fully incorporated before adding the next to prevent the batter from separating.
4. Combine Wet and Dry: In a small jug or bowl, whisk together the milk and elderflower cordial. Gradually add the dry ingredients to the wet ingredients, alternating with the milk and cordial mixture, begin extractning and ending with the dry ingredients. Mix on low speed until just combined. Be careful not to overmix the batter at this stage; a few small lumps are acceptable. Overmixing will result in tough cupcakes. Gently fold in the white chocolate chips.
5. Bake the Cupcakes: Divide the batter evenly among the prepared cupcake liners, filling each about two-thirds full. Bake for 18-22 minutes, or until a toothpick inserted into the center of a cupcake comes out clean. Let the cupcakes cool in the muffin tin for a few minutes before transferring them to a wire rack to cool completely.
6. Prepare the Frosting: While the cupcakes cool, make the frosting. In a large bowl, beat the softened butter until creamy. Gradually add the powdered sugar, alternating with the milk or cream, until smooth and spreadable. Stir in the elderflower cordial. If the frosting is too thick, add a little more milk or cream; if it’s too thin, add a bit more powdered sugar.
7. Frost and Garnish: Once the cupcakes are completely cool, frost them generously. You can use a piping bag with a decorative tip or simply spread the frosting with an offset spatula. For an extra touch of elegance, garnish with white chocolate shavings. These elderflower white chocolate cupcakes are a truly delightful taste of spring!
This collection offers a variety of flavors and styles to suit every baker’s preference. Whether you’re looking for something light and fruity, delicately floral, or simply comforting and delicious, these springtime baked goods are sure to impress. Happy baking, and enjoy the sweet bounty of the season!
Conclusion:
I hope you’ve enjoyed this delightful journey through 16 stunning springtime baked goods that are sure to be scroll stoppers! Each recipe has been chosen for its ability to capture the essence of spring – fresh flavors, vibrant colors, and that irresistible homemade charm. These creations are not just beautiful; they’re also incredibly delicious and surprisingly achievable for bakers of all levels. Whether you’re looking for a show-stopping dessert for a special occasion or a simple treat to brighten your afternoon, there’s something here for everyone.
Imagin extracte serving a slice of our lemon-lavender cake at a garden party, or a basket of fluffy strawberry scones alongside a steaming cup of tea. These baked goods are perfect for Easter brunch, Mother’s Day celebrations, or simply as a way to welcome the warmer weather. Feel free to experiment with different fruits, spices, and decorations to make each recipe uniquely your own. I truly encourage you to dive in and try at least one, if not all, of these fantastic springtime baked goods. Happy baking!
Frequently Asked Questions:
Q1: Can I make these baked goods ahead of time?
Many of these springtime baked goods can be made ahead! For cakes and cookies, it’s often best to bake them a day or two in advance and store them properly in airtight containers. Muffins and scones are also excellent when made the day before. Some items, like those with fresh glazes or delicate toppings, are best assembled closer to serving time to maintain their pristine appearance and texture. Always check individual recipe notes for specific storage recommendations.
Q2: What if I don’t have a specific spring fruit mentioned? Can I substitute?
Absolutely! The beauty of baking is in its adaptability. For instance, if a recipe calls for strawberries but they’re not in season or readily available, you can often substitute with raspberries, blueberries, or even finely chopped rhubarb. Ensure the fruit you choose has a similar moisture content and tartness level for the best results. Don’t be afraid to get creative and experiment with flavors that resonate with you!
16 Stunning Springtime Baked Goods Scroll Stoppers
A collection of beautiful and delicious baked goods perfect for celebrating springtime. From light and fruity tarts to decadent cakes adorned with floral motifs, these recipes are sure to impress and delight.
Ingredients
-
all-purpose flour
-
granulated sugar
-
unsalted butter
-
eggs
-
vanilla extract
-
fresh strawberries
-
lemon zest
Instructions
-
Step 1
Preheat your oven to 350°F (175°C) and prepare your baking pans by greasing and flouring them. -
Step 2
In a large bowl, cream together the unsalted butter and granulated sugar until light and fluffy. -
Step 3
Beat in the eggs one at a time, then stir in the vanilla extract and lemon zest. -
Step 4
Gradually add the all-purpose flour to the wet ingredients, mixing until just combined. Do not overmix. -
Step 5
Gently fold in the fresh strawberries. -
Step 6
Pour the batter into the prepared baking pans and bake for the time specified in individual recipes, or until a wooden skewer inserted into the center comes out clean. -
Step 7
Allow the baked goods to cool in the pans for 10-15 minutes before inverting them onto a wire rack to cool completely.
Important Information
Nutrition Facts (Per Serving)
It is important to consider this information as approximate and not to use it as definitive health advice.
Allergy Information
Please check ingredients for potential allergens and consult a health professional if in doubt.
Leave a Comment