
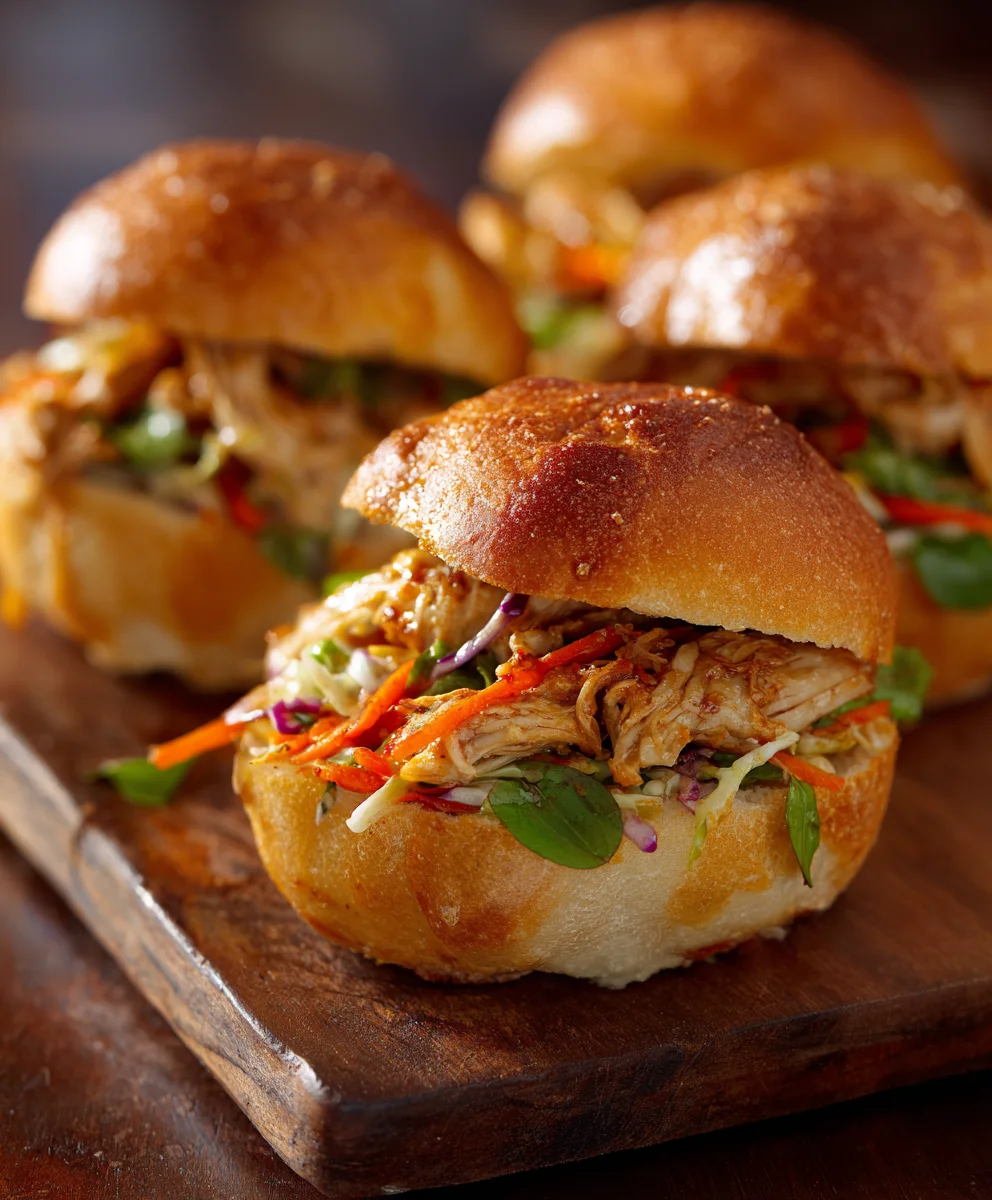
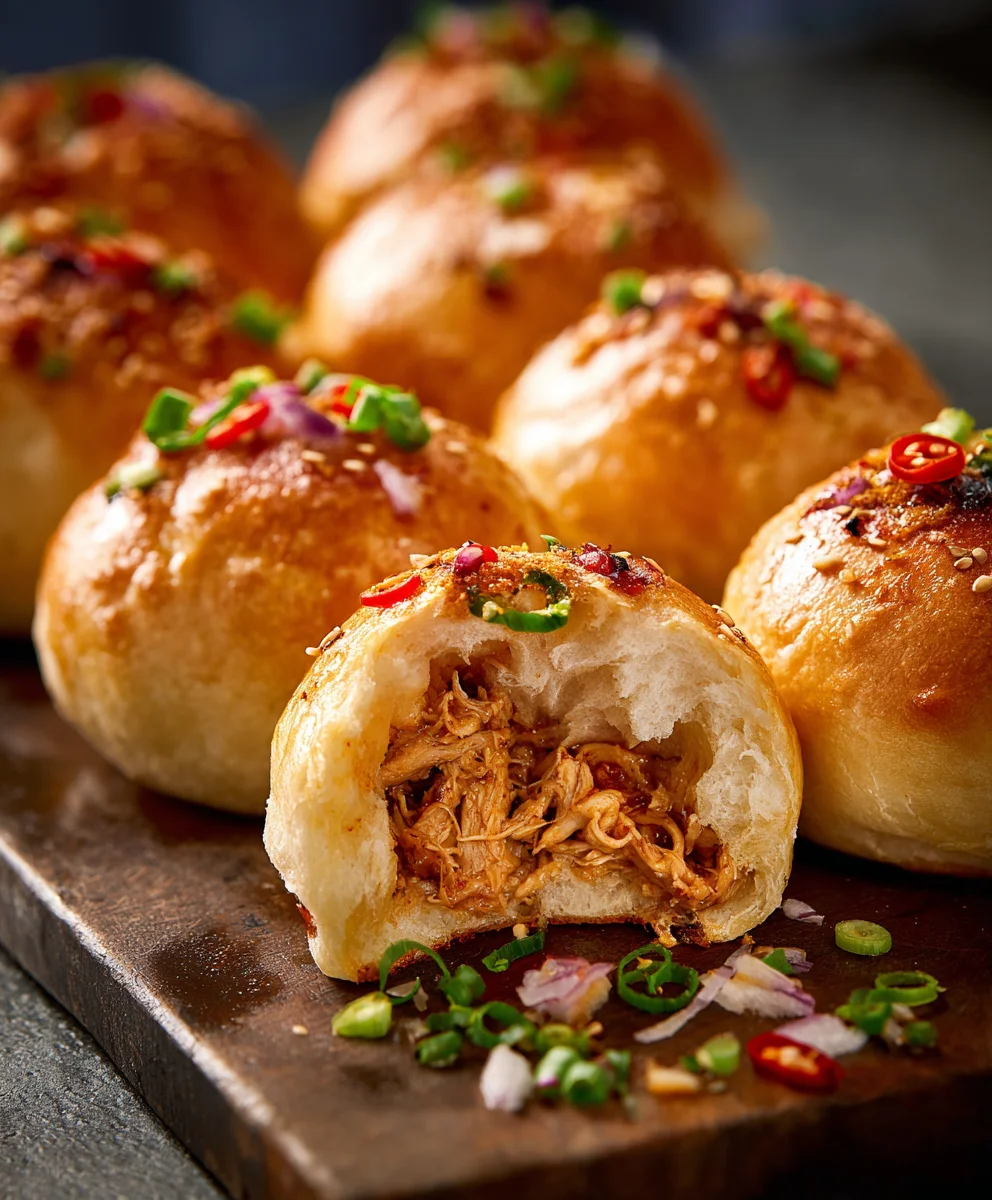
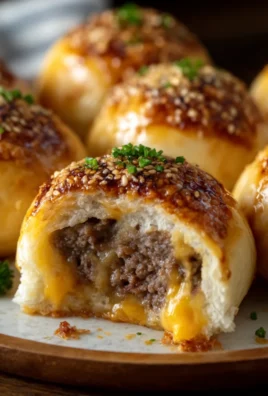
Cheesy Dynamite Chicken Buns are not just a recipe; they are an explosion of flavor waiting to ignite your taste buds and become your new favorite comfort food obsession. Imagine sinking your teeth into a perfectly golden, pillowy-soft bun, only to discover a secret treasure within: tender, succulent chicken bathed in a subtly spicy, “dynamite” sauce, all enveloped by a generous, gooey blanket of melted cheese. It’s a culinary adventure that delivers a delightful kick without overwhelming your palate, ensuring every bite is a harmonious blend of savory, creamy, and just a touch of heat.
The concept of savory stuffed breads is a global culinary delight, transcending cultures from Asian bao to European calzones, each offering a comforting parcel of deliciousness. Our modern take, these Cheesy Dynamite Chicken Buns, taps into this universal love for handheld delights, elevating it with contemporary flavors that resonate with today’s food enthusiasts. People absolutely adore this dish not only for its incredible taste and captivating textures – the crisp exterior yielding to a soft interior, the juicy chicken, and the irresistible stretch of cheese – but also for its sheer versatility. They make the perfect party appetizer, a satisfying lunch, or a fantastic, fun dinner option that kids and adults alike will eagerly devour. Prepare to discover a recipe that’s guaranteed to become a cherished staple in your kitchen!

Ingredients:
-
For the Enriched Dough:
- All-Purpose Flour: 4 ½ cups (about 540g), plus extra for dusting. I prefer using a good quality unbleached flour for the best texture.
- Active Dry Yeast: 2 ¼ teaspoons (one standard packet). Make sure your yeast is fresh!
- Granulated Sugar: ½ cup (about 100g). This not only feeds the yeast but also contributes to the beautiful golden-brown crust.
- Salt: 1 teaspoon. Don’t skip this; it balances the sweetness and enhances flavor.
- Warm Milk: 1 cup (about 240ml), whole milk is best, warmed to 105-115°F (40-46°C). It should feel pleasantly warm, not hot, to the touch.
- Large Eggs: 2, at room temperature. One for the dough, one for an egg wash.
- Unsalted Butter: ½ cup (113g or 1 stick), melted and cooled slightly.
- Vegetable Oil: 1 tablespoon, for greasing the bowl.
-
For the Cheesy Dynamite Chicken Filling:
- Boneless, Skinless Chicken Breast or Thighs: 1 ½ pounds (about 680g), finely diced into ¼-inch pieces. Thighs will offer more moisture, but breasts work beautifully too.
- Olive Oil: 2 tablespoons.
- Yellow Onion: 1 medium, finely minced.
- Garlic: 3 cloves, minced.
- Red Bell Pepper: 1 medium, finely diced.
- Cream Cheese: 4 ounces (about 113g), softened, full-fat for the best creaminess.
- Shredded Mozzarella Cheese: 1 cup (about 113g).
- Shredded Cheddar Cheese: ½ cup (about 56g).
- Mayonnaise: 2 tablespoons. I find this adds an extra layer of richness and helps bind the filling.
- Sweet Chili Sauce: 2 tablespoons. For that delightful balance of sweet and mild heat.
- Sriracha (or your favorite hot sauce): 1-2 teaspoons, or to taste. Adjust this to your preferred spice level for these Cheesy Dynamite Chicken Buns!
- Smoked Paprika: 1 teaspoon.
- Chili Powder: 1 teaspoon.
- Cumin Powder: ½ teaspoon.
- Salt: 1 teaspoon, or to taste.
- Black Pepper: ½ teaspoon, freshly ground.
- Fresh Cilantro: ¼ cup, chopped (optional, for garnish in the filling).
-
For the Dynamite Topping & Garnish:
- Mayonnaise: ½ cup.
- Sriracha: 2-3 tablespoons, or more if you like extra kick.
- Sweet Chili Sauce: 2 tablespoons.
- Lime Juice: 1 tablespoon, freshly squeezed.
- Sesame Oil: ½ teaspoon (optional, for added depth).
- Shredded Mozzarella Cheese: ½ cup, for sprinkling on top.
- Green Onions: 3-4, thinly sliced, for garnish.
- Black and White Sesame Seeds: 1 tablespoon, for sprinkling.
Phase 1: Preparing the Enriched Dough for Your Cheesy Dynamite Chicken Buns
- Activate the Yeast: In a large mixing bowl (or the bowl of a stand mixer), combine the warm milk (ensure it’s not too hot, as this can kill the yeast, and not too cold, which won’t activate it), 1 teaspoon of the granulated sugar, and the active dry yeast. Give it a gentle stir and let it sit for 5-10 minutes. You’re looking for a foamy, frothy layer to form on top; this tells you your yeast is alive and ready to work its magic. If no foam appears, your yeast might be expired, and it’s best to start over.
- Combine Wet Ingredients: Once the yeast is active, add the remaining granulated sugar, 1 room temperature egg, and the melted and cooled butter to the yeast mixture. Whisk everything together until well combined. The butter should be cooled enough so it doesn’t scramble the egg or kill the yeast.
- Add Dry Ingredients: Gradually add the all-purpose flour and salt to the wet ingredients. If you’re using a stand mixer, attach the dough hook. Start mixing on low speed until a shaggy dough forms, then increase the speed to medium-low. If mixing by hand, incorporate the flour with a sturdy spoon or spatula until it comes together, then turn it out onto a lightly floured surface.
- Knead the Dough: Knead the dough for 8-10 minutes using a stand mixer, or 12-15 minutes by hand. The goal here is to develop the gluten, which gives our Cheesy Dynamite Chicken Buns their wonderful structure and chew. You’ll know the dough is ready when it’s smooth, elastic, and no longer sticky. It should pass the “windowpane test” – you can gently stretch a small piece of dough thin enough to see light through it without tearing. This indicates excellent gluten development.
- First Rise (Bulk Fermentation): Lightly grease a large bowl with vegetable oil. Transfer the kneaded dough to the bowl, turning it once to coat all sides with oil. Cover the bowl tightly with plastic wrap or a clean kitchen towel. Place it in a warm, draft-free spot for 1 to 1.5 hours, or until the dough has doubled in size. A slightly warm oven (turned off, with just the light on) can be an ideal spot. This bulk fermentation is crucial for flavor development.
- Prepare for Shaping: Once the dough has doubled, gently punch it down to release the air. This step helps redistribute the yeast and creates a finer crumb. Turn the dough out onto a lightly floured surface. Divide the dough into 12-14 equal pieces. I usually aim for pieces weighing about 60-70g each to ensure uniformly sized buns. Roll each piece into a smooth ball and cover them loosely with plastic wrap or a kitchen towel to prevent them from drying out while you prepare the filling.
Phase 2: Crafting the Cheesy Dynamite Chicken Filling
- Cook the Chicken: Heat the olive oil in a large skillet or pan over medium-high heat. Add the finely diced chicken and season generously with salt, black pepper, smoked paprika, chili powder, and cumin powder. Cook, stirring occasionally, until the chicken is fully cooked through and lightly browned, about 5-7 minutes. Make sure there’s no pink left.
- Sauté Aromatics: Push the cooked chicken to one side of the pan. Add the minced yellow onion to the empty side and cook until softened and translucent, about 3-4 minutes. Then, add the minced garlic and diced red bell pepper, cooking for another 2-3 minutes until fragrant and slightly tender-crisp.
- Combine and Cool: Stir the cooked chicken, onion, garlic, and bell pepper together. Remove the skillet from the heat. This step is important because we don’t want to melt the cheeses prematurely.
- Create the Creamy Cheesy Core: Add the softened cream cheese, shredded mozzarella, shredded cheddar cheese, mayonnaise, sweet chili sauce, and sriracha to the chicken mixture. Stir everything together until the cheeses are partially melted from the residual heat and the filling is well combined and creamy. The heat from the chicken will help the cream cheese incorporate beautifully. Taste and adjust seasonings as needed – perhaps a pinch more salt or a dash more sriracha for extra zing in your Cheesy Dynamite Chicken Buns filling. If using, stir in the fresh cilantro.
- Cool the Filling: Transfer the filling to a separate bowl and allow it to cool completely before using. You can speed this up by placing it in the refrigerator for about 20-30 minutes. A cooled filling is much easier to work with when stuffing the dough and prevents the dough from becoming greasy or tearing.
Phase 3: The Dynamite Sauce and Assembly of Your Cheesy Dynamite Chicken Buns
- Prepare the Dynamite Topping: In a small bowl, whisk together the mayonnaise, sriracha (adjust to your heat preference!), sweet chili sauce, lime juice, and optional sesame oil until smooth and well combined. This is the “dynamite” component that gives these Cheesy Dynamite Chicken Buns their name and signature flavor. Cover and set aside.
- Preheat Oven & Prepare Baking Sheet: Preheat your oven to 375°F (190°C). Line a large baking sheet with parchment paper. This will prevent sticking and make cleanup a breeze.
- Stuff the Buns: Take one dough ball and flatten it into a 4-5 inch circle on a lightly floured surface. I usually use my hands to gently press it out, making the edges slightly thinner than the center. Place a generous tablespoon or two of the cooled chicken filling in the center of the dough circle.
- Seal the Buns: Carefully gather the edges of the dough up and over the filling, pinching them together firmly at the top to seal the bun completely. It’s crucial to seal them well to prevent the filling from oozing out during baking. Gently roll the sealed bun between your palms to smooth out the seams and create a neat, round shape.
- Arrange on Baking Sheet: Place the sealed buns seam-side down on the prepared baking sheet, leaving about 1 ½ to 2 inches between each bun to allow for expansion during the final proof and baking.
- Second Rise (Proofing): Loosely cover the shaped buns with plastic wrap or a light kitchen towel. Let them rise in a warm place for another 30-45 minutes, or until they look visibly puffy and slightly larger. This final proof ensures light and airy Cheesy Dynamite Chicken Buns.
- Egg Wash: In a small bowl, whisk the remaining room temperature egg with 1 teaspoon of water to create an egg wash. Gently brush the tops of the proofed buns with this egg wash. This gives them that beautiful golden-brown, shiny crust we all adore.
- Add Dynamite Topping & Cheese: Now for the “dynamite” finish! Spoon a generous dollop of the prepared dynamite sauce on top of each bun, spreading it slightly. Don’t be shy here; this is a key flavor component for our Cheesy Dynamite Chicken Buns. Then, sprinkle a small amount of the extra shredded mozzarella cheese over the sauce on each bun.
- Bake: Bake the Cheesy Dynamite Chicken Buns in the preheated oven for 20-25 minutes, or until they are golden brown on top and the cheese is bubbly and slightly caramelized. The exact time may vary depending on your oven, so keep an eye on them. They should sound hollow when tapped on the bottom if perfectly cooked.
- Cool and Garnish: Once baked, remove the buns from the oven and let them cool on the baking sheet for a few minutes before transferring them to a wire rack to cool slightly more. This allows the filling to set. While still warm, garnish generously with sliced green onions and a sprinkle of black and white sesame seeds.
- Serve Warm: These Cheesy Dynamite Chicken Buns are best served warm, straight from the oven. The combination of the soft, enriched dough, the savory, cheesy chicken filling, and the tangy, spicy dynamite topping is absolutely irresistible. Enjoy the fruit of your labor!
<h2>Conclusion:</h2>
<p>Well, my friends, we’ve reached the exciting culmination of our culinary journey! I genuinely hope you’ve enjoyed delving into the delicious potential of these incredible <strong>Cheesy Dynamite Chicken Buns</strong>. What makes this recipe an absolute must-try, in my humble opinion, is its perfect trifecta of comfort, excitement, and sheer satisfaction. Imagine sinking your teeth into a perfectly soft, golden-brown bun, only to be met with a creamy, spicy, and savory chicken filling that bursts with flavor, all encapsulated by gooey, melted cheese. It’s not just a snack; it’s an experience, a moment of pure culinary bliss that’s guaranteed to put a smile on your face and warmth in your belly. This recipe has a way of becoming an instant favorite, whether you’re serving it to a crowd or simply treating yourself to something truly special after a long day. The dynamic flavor profile, combining a gentle warmth with rich chicken and tangy cheese, makes it utterly irresistible and profoundly addictive. I promise you, once you try these, you’ll find yourself craving them again and again.</p>
<h4>Serving Suggestions & Creative Variations</h4>
<p>Now, while these <strong>Cheesy Dynamite Chicken Buns</strong> are spectacular on their own, a true masterpiece of standalone deliciousness, I love exploring ways to elevate the experience even further or adapt them to different occasions. For a simple yet satisfying meal, try serving them alongside a crisp, fresh green salad tossed in a light vinaigrette. The bright, tangy notes of the salad will beautifully cut through the richness of the buns, creating a harmonious balance. A bowl of warm tomato soup or a creamy bisque also makes an excellent companion, perfect for a cozy evening in. For dipping enthusiasts, a side of ranch dressing, blue cheese dip, or even a homemade sriracha mayo can add another layer of flavor and fun. Don’t be afraid to experiment!</p>
<p>The beauty of this recipe also lies in its incredible versatility. Let’s talk variations! If you’re looking to kick up the heat a notch (or two!), consider adding finely diced jalapeños or serrano peppers to your chicken mixture, or even a dash of your favorite super-hot sauce. For those who prefer a milder warmth, simply reduce the amount of chili flakes. Different cheeses can also transform the experience; a blend of Monterey Jack and sharp cheddar offers a delightful contrast, while pepper jack will certainly amplify the “dynamite” factor. You could also experiment with different proteins. Ground turkey or even a plant-based chicken substitute could work wonderfully, adjusting cooking times as needed. Don’s shy away from adding finely diced vegetables like bell peppers, corn, or green onions to the chicken filling for added color, texture, and nutritional value. For a truly indulgent twist, consider using a brioche bun dough for an even softer, richer texture.</p>
<h5>Make It Your Own!</h5>
<p>I encourage you not only to follow this recipe but to truly make it your own. Think of it as a canvas for your culinary creativity! Perhaps you’ll discover a new favorite spice combination, or a unique dipping sauce that becomes your signature pairing. These buns are also fantastic for meal prep; you can assemble them ahead of time and bake when ready, or even bake them all and freeze any leftovers for a quick, convenient snack later. Simply reheat them gently in the oven or air fryer until warmed through and the cheese is delightfully bubbly again. They maintain their fantastic flavor and texture wonderfully, making them perfect for those busy weekdays when you need something delicious without much fuss.</p>
<p>So, what are you waiting for? Take the plunge and whip up a batch of these glorious <strong>Cheesy Dynamite Chicken Buns</strong>. I have an unwavering feeling that they will quickly become a cherished staple in your kitchen. There’s something immensely satisfying about creating such a flavorful dish from scratch, and I guarantee the aroma filling your home will be enough to get everyone excited. Once you’ve had a chance to try this recipe, please, please come back and share your experience with me! I absolutely adore hearing about your kitchen adventures, your successes, and any fun twists you’ve added. Did you make them extra spicy? Did you find the perfect dipping sauce? Did your family rave about them? Your feedback and stories inspire me and our entire cooking community. Happy baking, and get ready for some serious deliciousness!</p>
Spicy Cheesy Dynamite Chicken Buns
An explosion of flavor, these Cheesy Dynamite Chicken Buns feature tender chicken in a subtly spicy ‘dynamite’ sauce, enveloped by gooey melted cheese inside a golden, pillowy-soft bun. Perfect as an appetizer, lunch, or fun dinner option.
Ingredients
-
4 ½ cups (540g) All-Purpose Flour, plus extra
-
2 ¼ teaspoons Active Dry Yeast (1 packet)
-
½ cup (100g) Granulated Sugar
-
1 teaspoon Salt
-
1 cup (240ml) Warm Whole Milk (105-115°F/40-46°C)
-
2 Large Eggs (1 for dough, 1 for wash), at room temperature
-
½ cup (113g) Unsalted Butter, melted and cooled
-
1 tablespoon Vegetable Oil, for greasing
-
1 ½ pounds (680g) Boneless, Skinless Chicken Breast or Thighs, finely diced
-
2 tablespoons Olive Oil
-
1 medium Yellow Onion, finely minced
-
3 cloves Garlic, minced
-
1 medium Red Bell Pepper, finely diced
-
4 ounces (113g) Cream Cheese, softened, full-fat
-
1 cup (113g) Shredded Mozzarella Cheese
-
½ cup (56g) Shredded Cheddar Cheese
-
2 tablespoons Mayonnaise
-
2 tablespoons Sweet Chili Sauce
-
1-2 teaspoons Sriracha (or hot sauce), or to taste
-
1 teaspoon Smoked Paprika
-
1 teaspoon Chili Powder
-
½ teaspoon Cumin Powder
-
1 teaspoon Salt, or to taste
-
½ teaspoon Black Pepper, freshly ground
-
¼ cup Fresh Cilantro, chopped (optional)
-
½ cup Mayonnaise (for topping)
-
2-3 tablespoons Sriracha (for topping), or more
-
2 tablespoons Sweet Chili Sauce (for topping)
-
1 tablespoon Lime Juice, freshly squeezed
-
½ teaspoon Sesame Oil (optional, for topping)
-
½ cup Shredded Mozzarella Cheese (for sprinkling on top)
-
3-4 Green Onions, thinly sliced (for garnish)
-
1 tablespoon Black and White Sesame Seeds (for sprinkling)
Instructions
-
Step 1
1. Activate Yeast: In a large bowl, combine 1 cup warm milk (105-115°F), 1 tsp granulated sugar, and 2 ¼ tsp active dry yeast. Let sit 5-10 minutes until foamy. \n2. Mix Dough: Add remaining ½ cup granulated sugar, 1 room temperature egg, and ½ cup melted, cooled butter to the yeast mixture; whisk. Gradually add 4 ½ cups all-purpose flour and 1 tsp salt. Knead with a stand mixer (8-10 min) or by hand (12-15 min) until smooth and elastic. \n3. First Rise: Lightly grease a large bowl with 1 tbsp vegetable oil. Transfer dough, turning to coat. Cover and let rise in a warm, draft-free spot for 1-1.5 hours until doubled in size. \n4. Prepare for Shaping: Gently punch down dough. Divide into 12-14 equal pieces (about 60-70g each). Roll each piece into a smooth ball and cover loosely. -
Step 2
1. Cook Chicken: Heat 2 tbsp olive oil in a large skillet over medium-high heat. Add 1 ½ lbs finely diced chicken, 1 tsp salt, ½ tsp black pepper, 1 tsp smoked paprika, 1 tsp chili powder, and ½ tsp cumin. Cook 5-7 min, stirring, until browned and cooked through. \n2. Sauté Aromatics: Push chicken aside. Add 1 finely minced yellow onion; cook 3-4 min until softened. Add 3 minced garlic cloves and 1 finely diced red bell pepper; cook another 2-3 min until fragrant. Stir all ingredients together. \n3. Create Creamy Core: Remove skillet from heat. Add 4 oz softened cream cheese, 1 cup shredded mozzarella, ½ cup shredded cheddar, 2 tbsp mayonnaise, 2 tbsp sweet chili sauce, and 1-2 tsp sriracha to the chicken mixture. Stir until creamy and well combined. Taste and adjust seasonings. Stir in ¼ cup chopped fresh cilantro (optional). \n4. Cool Filling: Transfer filling to a separate bowl and allow it to cool completely (refrigerate for 20-30 min to speed up). -
Step 3
1. Prepare Dynamite Topping: In a small bowl, whisk together ½ cup mayonnaise, 2-3 tbsp sriracha, 2 tbsp sweet chili sauce, 1 tbsp freshly squeezed lime juice, and ½ tsp optional sesame oil until smooth. Set aside. \n2. Preheat Oven & Prep Sheet: Preheat oven to 375°F (190°C). Line a large baking sheet with parchment paper. \n3. Stuff Buns: Flatten one dough ball into a 4-5 inch circle. Place 1-2 tbsp of the cooled chicken filling in the center. \n4. Seal & Shape: Carefully gather the edges of the dough up and over the filling, pinching them firmly at the top to seal. Gently roll the sealed bun between your palms to smooth it into a neat, round shape. Place seam-side down on the prepared baking sheet, leaving space between buns. \n5. Second Rise: Loosely cover the shaped buns and let them rise in a warm place for 30-45 minutes until visibly puffy. \n6. Egg Wash & Topping: Whisk the remaining 1 room temperature egg with 1 tsp water to create an egg wash. Gently brush the tops of the proofed buns with this wash. Spoon a generous dollop of the prepared dynamite sauce on top of each bun, spreading slightly. Then, sprinkle ½ cup extra shredded mozzarella cheese over the sauce. \n7. Bake: Bake in the preheated oven for 20-25 minutes, or until golden brown and the cheese is bubbly and slightly caramelized. \n8. Garnish & Serve: Remove buns from oven. Let cool on the baking sheet for a few minutes before transferring to a wire rack. While still warm, garnish generously with 3-4 thinly sliced green onions and 1 tbsp black and white sesame seeds. Serve warm.
Important Information
Nutrition Facts (Per Serving)
It is important to consider this information as approximate and not to use it as definitive health advice.
Allergy Information
Please check ingredients for potential allergens and consult a health professional if in doubt.
Leave a Comment