
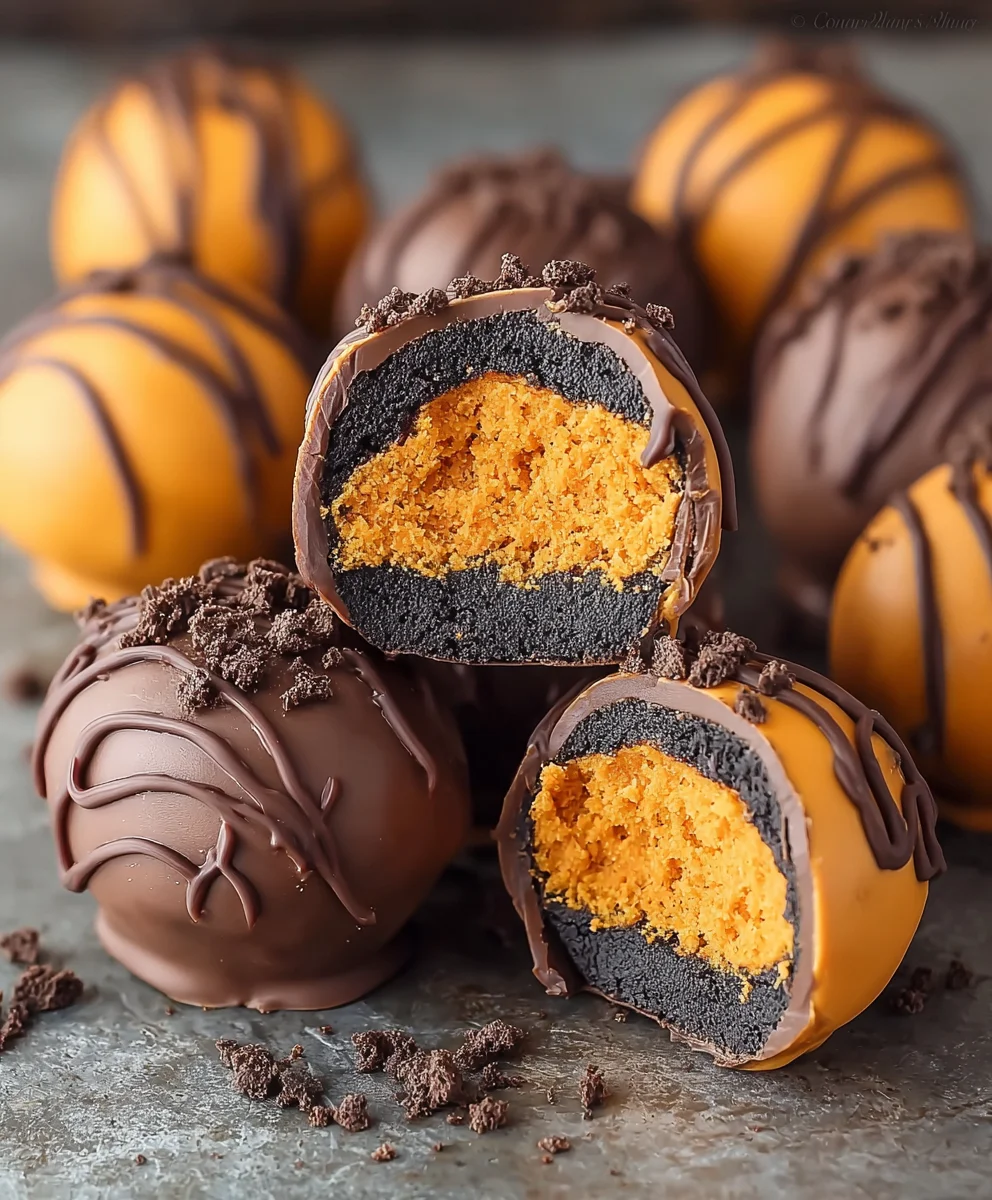
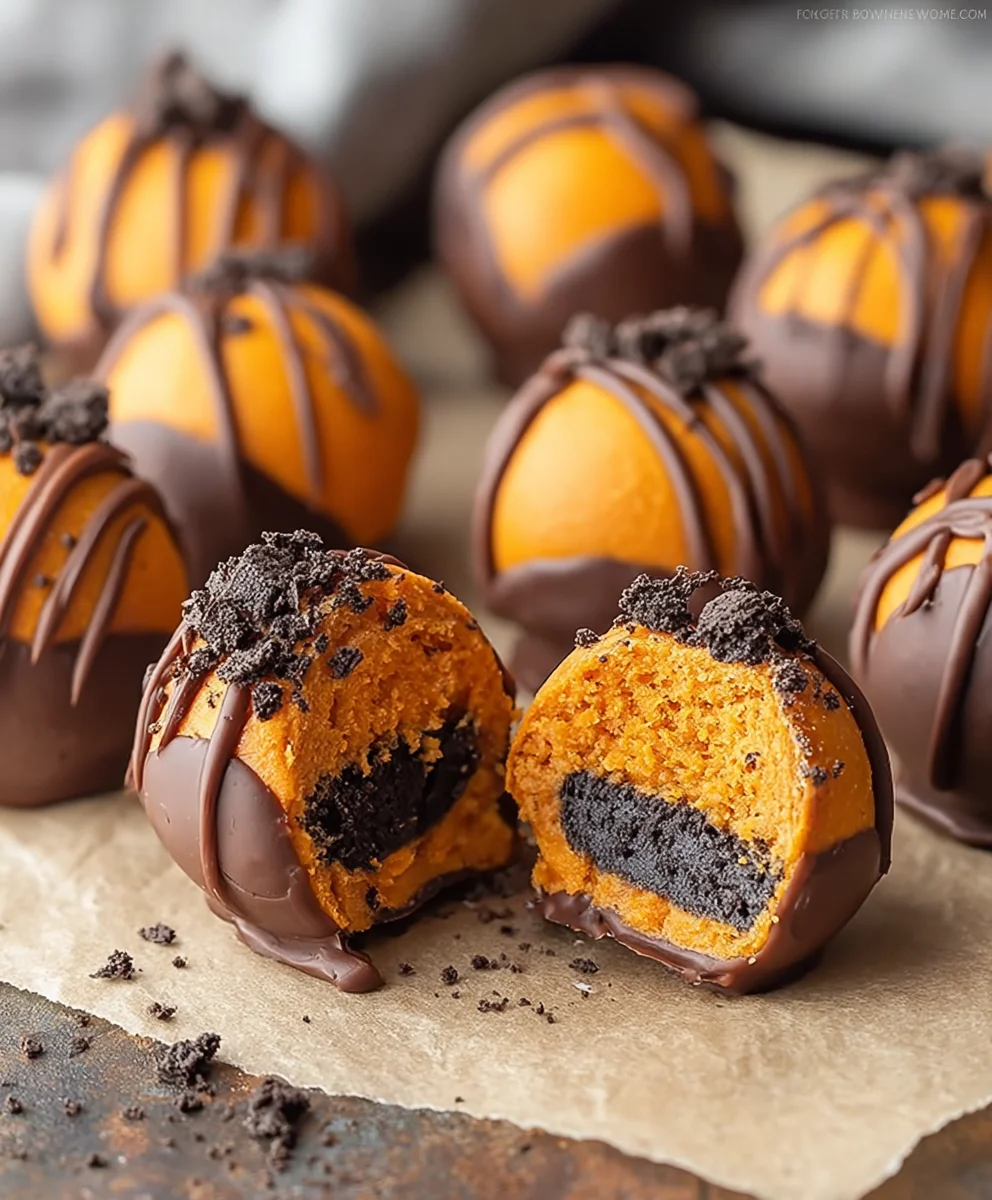
Pumpkin Oreo Balls, oh, how we adore them! If you’ve ever found yourself craving that perfect blend of autumnal spice and irresistible chocolatey crunch, then you’ve likely succumbed to the siren song of these delightful treats. It’s no wonder why Pumpkin Oreo Balls have become an absolute sensation, a beloved staple for fall gatherings, holiday parties, and even those quiet afternoons when a little sweet indulgence is just what the doctor ordered. What truly sets these apart is the magical alchemy that happens when the classic, familiar comfort of a Chocolate Oreo cookie meets the warm, inviting hug of pumpkin spice. It’s a flavor combination that just works, creating a dessert that’s both sophisticated enough for guests and comforting enough for a solo snack session. Get ready to discover the simple joy of creating these no-bake wonders that are sure to disappear faster than leaves on a windy day.

Ingredients:
- 1 package (15 oz) Oreo cookies
- 8 oz cream cheese, softened
- 1 cup pumpkin puree
- 1 teaspoon pumpkin pie spice
- 2 cups white chocolate chips
- 1 tablespoon coconut oil
Preparing the Pumpkin Oreo Balls Base
Crushing the Oreos
The first step to creating these delightful Pumpkin Oreo Balls is to thoroughly crush the Oreo cookies. You want to achieve a fine crumb consistency, similar to breadcrumbs. A food processor is your best friend here; it will make this task quick and easy. Simply place the entire package of Oreo cookies (about 36 cookies) into the food processor and pulse until they are finely ground. If you don’t have a food processor, you can place the Oreos in a large zip-top bag, seal it tightly, and then use a rolling pin or a heavy pan to crush them. Just be sure to get them as fine as possible, as any large chunks can create an uneven texture in your finished balls. You should aim for about 2.5 to 3 cups of Oreo crumbs.
Mixing the Base
Once your Oreos are crushed, it’s time to bring everything together for the base of our Pumpkin Oreo Balls. In a large mixing bowl, combine the finely crushed Oreo cookies with the softened cream cheese. Softened cream cheese is crucial here; it should be yielding to the touch but not melted. If your cream cheese is too cold, it will be difficult to incorporate smoothly, leading to lumps. You can soften it by leaving it on the counter for about an hour, or for a quicker method, remove the foil wrapper and microwave it on 50% power in 15-second intervals until it’s soft. Add the pumpkin puree and the pumpkin pie spice to the bowl. The pumpkin puree adds moisture and a subtle earthy flavor, while the pumpkin pie spice brings those warm, autumnal notes that are essential for this treat. Mix all these ingredients together thoroughly until they are well combined and form a cohesive dough. It might seem a bit wet initially due to the pumpkin puree, but keep mixing until everything is uniformly incorporated.
Forming the Balls
Now it’s time to shape your Pumpkin Oreo Balls. You can use a small cookie scoop or a tablespoon to portion the dough. Roll each portion into a smooth ball, about 1-inch in diameter. Aim for consistent sizing so that they all bake (or set, in this case) and look uniform. As you roll the balls, you might notice the mixture is a bit sticky. This is perfectly normal. You can lightly grease your hands with a little bit of cooking spray or even a tiny bit of vegetable oil to prevent the dough from sticking too much. Place the formed balls onto a baking sheet lined with parchment paper. This will prevent them from sticking to the sheet and make them easier to handle later. Make sure the balls aren’t touching each other on the baking sheet.
Setting and Dipping the Pumpkin Oreo Balls
Chilling the Balls
Before we dip these delightful Pumpkin Oreo Balls into their creamy white chocolate coating, they need to firm up. Place the baking sheet with the formed balls into the refrigerator for at least 30 minutes, or into the freezer for about 15-20 minutes. This chilling step is vital. It helps the balls hold their shape during the dipping process and prevents them from falling apart when you handle them. Cold balls will also absorb the melted chocolate more evenly and set up nicely. While the balls are chilling, you can prepare your white chocolate for dipping.
Melting the White Chocolate
In a microwave-safe bowl, combine the white chocolate chips and the coconut oil. The coconut oil is a secret ingredient that helps the white chocolate melt smoothly and gives it a beautiful sheen, preventing it from becoming too thick or seizing. Microwave the chips and oil in 30-second intervals, stirring well after each interval. Continue this process until the chocolate is completely melted and smooth. Be careful not to overheat the white chocolate, as it can burn and become grainy. If you don’t have a microwave, you can melt the chocolate using a double boiler method on the stovetop. Once melted, stir the chocolate until it’s glossy and free of any lumps.
Dipping and Decorating
Once the Pumpkin Oreo Balls are chilled and firm, and the white chocolate is melted and smooth, it’s time for the final, most satisfying step. Using a fork or a toothpick, dip each chilled ball into the melted white chocolate, ensuring it is fully coated. Lift the ball out of the chocolate and gently tap the fork or toothpick on the side of the bowl to allow any excess chocolate to drip back in. This ensures a nice, thin coating rather than a thick, clunky one. Place the dipped balls back onto the parchment-lined baking sheet. If you like, you can immediately add some festive sprinkles or a drizzle of contrasting chocolate (like milk or dark chocolate) before the white chocolate sets. For an extra autumn flair, you could even sprinkle a tiny pinch of extra pumpkin pie spice on top of a few before they harden. Allow the dipped Pumpkin Oreo Balls to set completely at room temperature, or you can speed up the process by placing them back in the refrigerator for about 10-15 minutes. Once set, they are ready to be enjoyed!
Conclusion:
And there you have it – your guide to creating incredibly delicious Pumpkin Oreo Balls! We’ve walked through each step, from crushing those iconic cookies to rolling them into perfect spheres and coating them in luscious chocolate. These no-bake treats are incredibly satisfying to make and even more rewarding to share (if you can resist eating them all yourself!).
These delightful morsels are perfect for any occasion, from casual get-togethers and holiday parties to a sweet afternoon pick-me-up. For serving suggestions, consider arranging them artfully on a platter with a sprinkle of sea salt for a salty-sweet contrast, or alongside a warm mug of apple cider for a truly autumnal experience. You can also get creative with variations! Try drizzling them with contrasting colored chocolate, dusting them with edible glitter for extra sparkle, or even adding a pinch of cinnamon to the cream cheese mixture for an intensified spice profile. Don’t be afraid to experiment and make these Pumpkin Oreo Balls your own!
I truly hope you enjoy making and devouring these festive treats as much as I do. Happy baking (or, in this case, no-baking)!
Frequently Asked Questions:
Can I make Pumpkin Oreo Balls ahead of time?
Absolutely! Pumpkin Oreo Balls can be made up to a week in advance and stored in an airtight container in the refrigerator. This makes them a fantastic option for party planning, allowing you to get a head start on your dessert preparations.
What kind of chocolate is best for coating?
For the best results, I recommend using good quality melting chocolate wafers or chocolate chips. Dark, milk, or white chocolate all work wonderfully and offer different flavor profiles. Ensure you temper your chocolate properly for a smooth, glossy finish that sets beautifully.
Pumpkin Oreo Balls-Decadent No-Bake Dessert
A delicious and easy no-bake dessert featuring pumpkin-spiced Oreo cookie balls coated in white chocolate.
Ingredients
-
1 package (15 oz) Oreo cookies
-
8 oz cream cheese, softened
-
1 cup pumpkin puree
-
1 teaspoon pumpkin pie spice
-
2 cups white chocolate chips
-
1 tablespoon coconut oil
Instructions
-
Step 1
Crush the entire package of Oreo cookies into fine crumbs, aiming for about 2.5 to 3 cups. A food processor is recommended, but a zip-top bag and rolling pin can also be used. -
Step 2
In a large bowl, combine the crushed Oreos, softened cream cheese, pumpkin puree, and pumpkin pie spice. Mix thoroughly until a cohesive dough forms. -
Step 3
Roll the mixture into 1-inch balls. Lightly grease your hands with cooking spray or oil if the dough is sticky. Place the balls on a parchment-lined baking sheet. -
Step 4
Chill the balls in the refrigerator for at least 30 minutes or in the freezer for 15-20 minutes until firm. -
Step 5
While the balls are chilling, melt the white chocolate chips and coconut oil together in a microwave-safe bowl, stirring every 30 seconds until smooth. Avoid overheating. -
Step 6
Dip each chilled ball into the melted white chocolate using a fork or toothpick, allowing excess to drip off. Return the dipped balls to the parchment-lined baking sheet. -
Step 7
Decorate with sprinkles or a drizzle of contrasting chocolate, if desired, before the white chocolate sets. Allow the balls to set completely at room temperature or in the refrigerator.
Important Information
Nutrition Facts (Per Serving)
It is important to consider this information as approximate and not to use it as definitive health advice.
Allergy Information
Please check ingredients for potential allergens and consult a health professional if in doubt.
Leave a Comment