
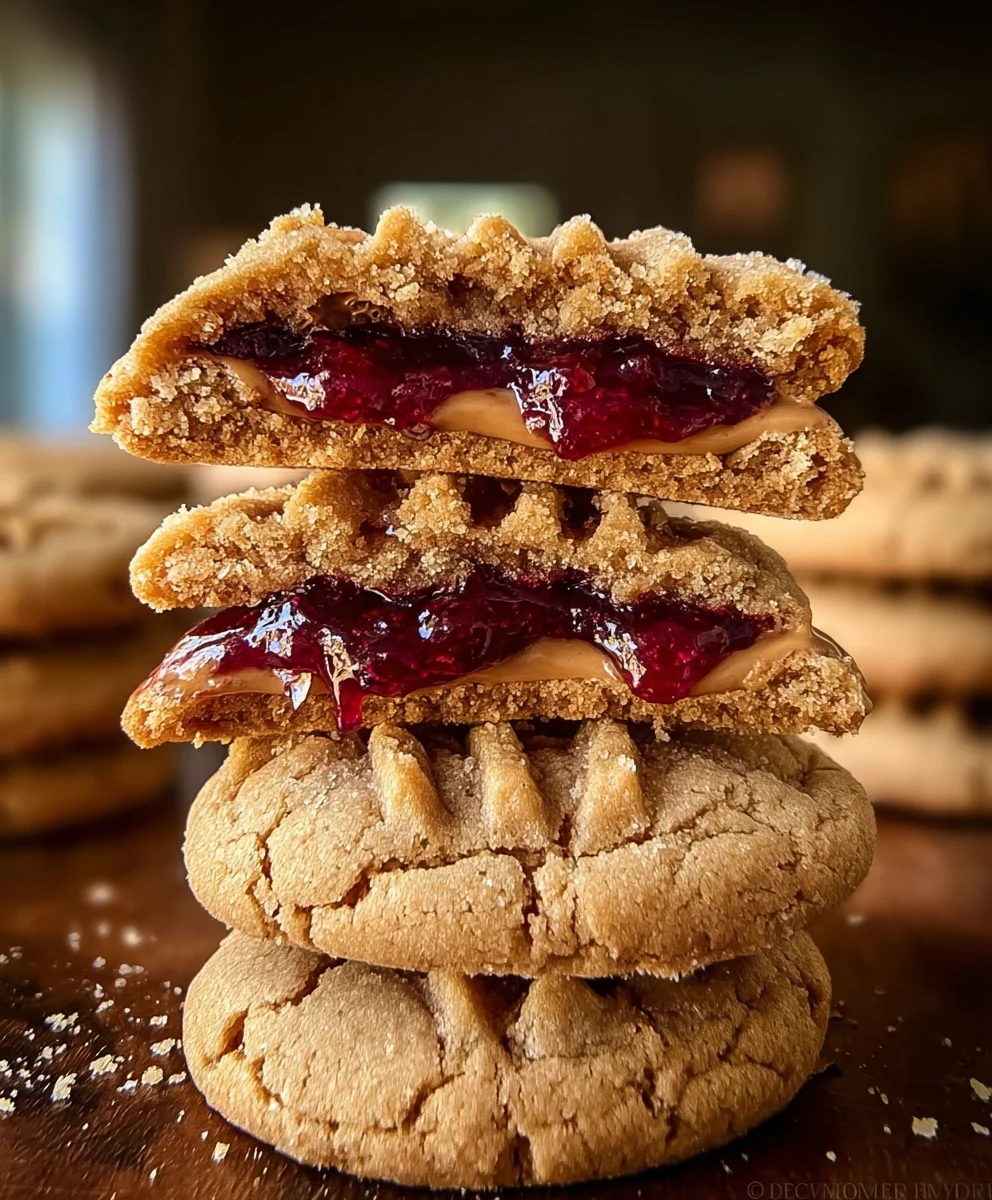
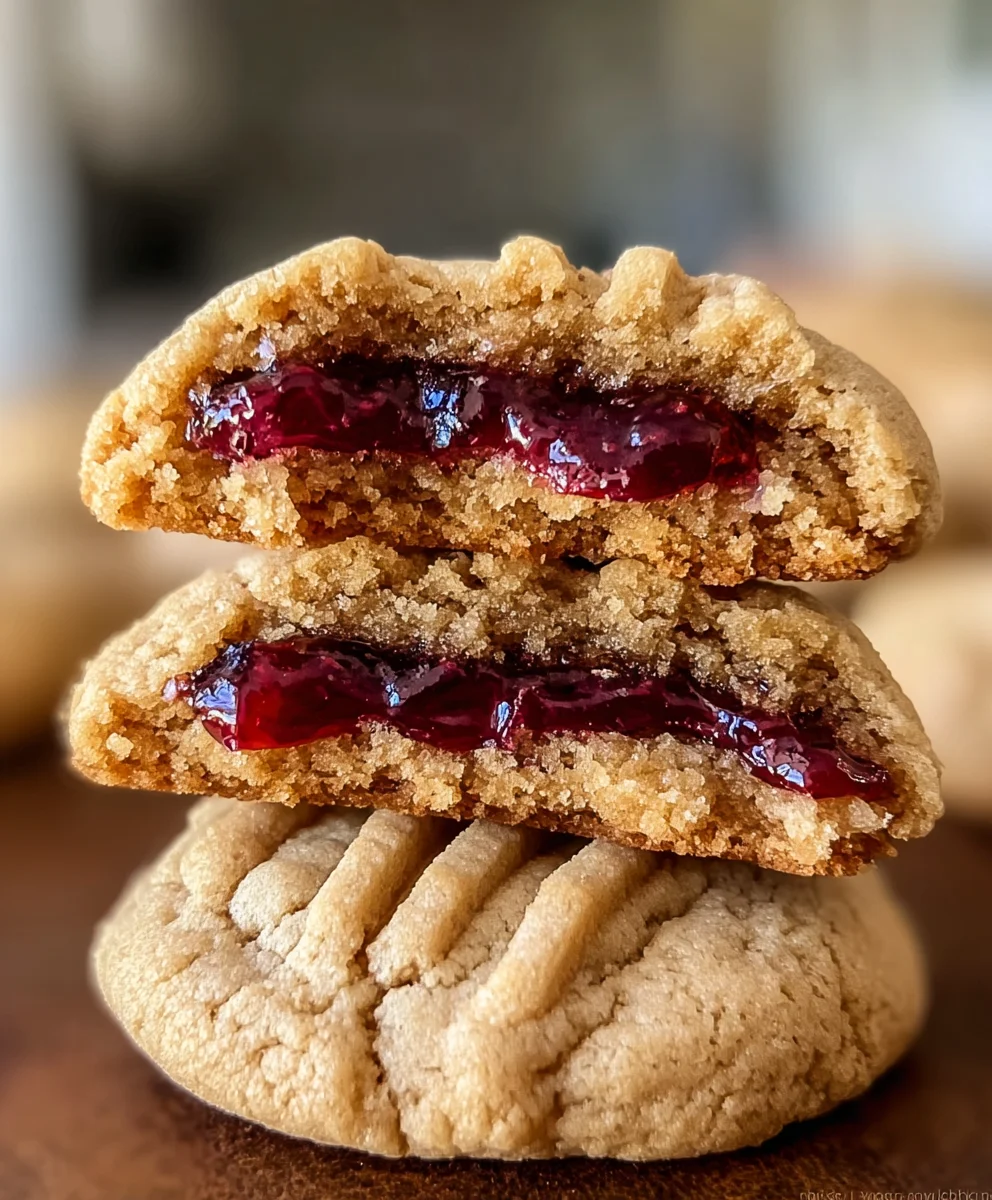
Peanut Butter Jelly Stuffed Cookies are truly a revelation, taking a beloved classic and transforming it into an unforgettable dessert experience. Imagine biting into a perfectly baked, chewy cookie, only to discover a delightful, gooey center that perfectly mimics the comfort of your favorite childhood sandwich. It’s a moment of pure culinary magic, a surprise in every bite that brings a smile to any face!
The peanut butter and jelly sandwich holds a special, nostalgic place in the hearts of many, a simple yet profoundly satisfying combination that has graced lunchboxes and kitchens for generations across America. This recipe isn’t just about baking; it’s about celebrating that iconic duo in a completely new, incredibly delicious form. We’re not just making cookies; we’re crafting an edible trip down memory lane, offering a sophisticated twist on a timeless classic that appeals to every palate.
Why You’ll Fall in Love with These Peanut Butter Jelly Stuffed Cookies
People adore this dish for its exquisite blend of textures and flavors: the rich, nutty notes of peanut butter, the sweet, fruity burst of jelly, all enveloped in a tender, golden-brown cookie. It’s a harmonious symphony for your taste buds, providing a satisfying chewiness with every bite. The convenience of having this ultimate flavor pairing in one delightful treat is simply irresistible, making it perfect for parties, after-school snacks, or a cozy evening indulgence. I promise, these will become a new favorite in your baking repertoire!

Ingredients:
-
For the Peanut Butter Cookie Dough:
- 1 cup (2 sticks or 226g) unsalted butter, softened to room temperature
- 1 cup (200g) granulated sugar, plus extra for rolling
- 1 cup (200g) packed light brown sugar
- 1 cup (250g) creamy peanut butter (I prefer natural, no-stir, but any creamy works)
- 2 large eggs, at room temperature
- 2 teaspoons pure vanilla extract
- 2 ½ cups (300g) all-purpose flour
- 1 teaspoon baking soda
- ½ teaspoon baking powder
- ½ teaspoon salt
-
For the Jelly Filling:
- ½ cup (about 120g) your favorite fruit jelly or jam (strawberry or grape are classic for Peanut Butter Jelly Stuffed Cookies)
-
For the Peanut Butter Stuffing (Optional, but highly recommended for an extra punch of peanut butter goodness and stability):
- ½ cup (about 125g) creamy peanut butter
- ¼ cup (30g) powdered sugar (confectioners’ sugar)
- 1 tablespoon unsalted butter, softened
- 1-2 tablespoons milk (dairy or non-dairy), if needed for consistency
Phase 1: Preparing the Peanut Butter Dough
This first phase is all about creating that perfectly tender, chewy, and undeniably peanut buttery base for our incredible Peanut Butter Jelly Stuffed Cookies. Taking your time here will truly pay off in the final product!
- Soften Your Butter: First things first, ensure your butter is genuinely at room temperature. This means it should be soft enough to make an indentation with your finger without melting. If it’s too cold, it won’t cream properly with the sugars, leading to a denser cookie. If it’s too warm, your dough might be greasy.
- Cream Butter and Sugars: In a large mixing bowl, using an electric mixer (stand mixer with paddle attachment or a hand mixer), cream together the softened unsalted butter, granulated sugar, and light brown sugar. Beat on medium-high speed for about 3-4 minutes, or until the mixture is light, fluffy, and noticeably paler in color. This step is crucial for incorporating air into your dough, which contributes to the cookies’ texture. I love seeing it transform into that beautiful, airy consistency!
- Incorporate Peanut Butter: Add the creamy peanut butter to the butter-sugar mixture. Continue beating on medium speed for another 1-2 minutes until it’s fully combined and smooth. Make sure to scrape down the sides of the bowl often with a rubber spatula to ensure everything is evenly incorporated.
- Add Eggs and Vanilla: Crack in the large eggs, one at a time, beating well after each addition until just combined. Don’t overmix here; we just want them integrated. Finally, stir in the pure vanilla extract. Vanilla enhances all the other flavors, especially the peanut butter.
- Whisk Dry Ingredients: In a separate medium bowl, whisk together the all-purpose flour, baking soda, baking powder, and salt. Whisking ensures these dry ingredients are evenly distributed, so you don’t end up with pockets of leavening or salt in your cookies.
- Combine Wet and Dry: Gradually add the dry ingredients to the wet ingredients, mixing on low speed until just combined. Be careful not to overmix! Overmixing develops the gluten in the flour too much, which can result in tough, dry cookies. Stop mixing as soon as you no longer see streaks of flour. A few small lumps are perfectly fine.
- Chill the Dough: Cover the bowl with plastic wrap and refrigerate the cookie dough for at least 1 hour, or up to 24 hours. Chilling is a vital step for Peanut Butter Jelly Stuffed Cookies. It firms up the dough, making it much easier to handle and wrap around our fillings, and also allows the flavors to meld, resulting in a richer, more flavorful cookie. It also helps prevent excessive spreading during baking.
Phase 2: Preparing the Jelly and Peanut Butter Stuffing
This is where we get the “jelly stuffed” part ready! Freezing our fillings beforehand is the secret to preventing a messy explosion of deliciousness during baking and ensures a perfectly contained, gooey center.
-
For the Jelly Discs:
This is my favorite trick to get neat jelly centers without them running everywhere!
- Line a small baking sheet or plate with parchment paper or a silicone baking mat.
- Spoon your chosen fruit jelly or jam into a small, microwave-safe bowl. If it’s very stiff, you can warm it slightly in the microwave for 10-15 seconds to make it more pliable, but don’t make it runny.
- Using a small spoon or a piping bag with the tip snipped off, create small, coin-sized dollops of jelly on the prepared parchment paper. Aim for about ½ to ¾ inch in diameter. You’ll need about 20-24 of these, depending on how many cookies you plan to make.
- Carefully transfer the baking sheet to the freezer. Freeze for at least 30-45 minutes, or until the jelly discs are completely solid. They should be firm enough to handle without losing their shape.
-
For the Peanut Butter Stuffing (If Using):
If you’re going all out for the ultimate Peanut Butter Jelly Stuffed Cookies, this step is for you! It adds another layer of peanut butter flavor and a lovely soft texture inside.
- In a small bowl, combine the ½ cup creamy peanut butter, ¼ cup powdered sugar, and 1 tablespoon softened unsalted butter.
- Mix well with a spoon until a thick, pliable paste forms. If the mixture seems too dry or crumbly, add milk one tablespoon at a time until it comes together into a soft, workable dough. It should be firm enough to roll but not sticky.
- Roll this peanut butter mixture into small balls, about ½ inch in diameter. You’ll need as many as you have jelly discs.
- Place these peanut butter balls on a separate small plate or baking sheet lined with parchment paper.
- Transfer the peanut butter balls to the freezer and freeze for at least 20-30 minutes, or until firm. Freezing these makes them much easier to handle and prevents them from melting into your cookie dough during assembly.
Phase 3: Assembling the Peanut Butter Jelly Stuffed Cookies
This is the fun part where our Peanut Butter Jelly Stuffed Cookies truly come to life! It requires a little patience and a gentle touch, but the result is a perfectly sealed, surprising center.
- Preheat Oven and Prepare Sheets: Preheat your oven to 375°F (190°C). Line two large baking sheets with parchment paper or silicone baking mats. This helps prevent sticking and makes for easier cleanup.
- Retrieve Dough and Fillings: Take the chilled cookie dough out of the refrigerator. Also, retrieve your frozen jelly discs and, if using, your frozen peanut butter stuffing balls from the freezer. Work quickly, as you want these fillings to stay frozen for as long as possible during assembly.
- Portion the Dough: Scoop about 2 tablespoons (roughly 40-45g) of cookie dough for each cookie. I like to use a cookie scoop for consistent sizing. Roll each portion into a smooth ball.
-
Flatten and Fill:
- Take one ball of cookie dough and flatten it into a disc about 3 inches in diameter in the palm of your hand. Aim for the edges to be slightly thinner than the center.
- If using the peanut butter stuffing, place one frozen peanut butter ball directly in the center of the flattened cookie dough.
- Then, place one frozen jelly disc directly on top of the peanut butter ball (or directly in the center of the dough if you’re not using the PB stuffing).
- Seal the Cookie: Carefully gather the edges of the cookie dough up and around the peanut butter and jelly fillings, pinching and sealing them tightly at the top. This is the most critical step for preventing leaks! Make sure there are no gaps or cracks where the jelly could escape during baking. Gently roll the sealed dough into a smooth ball again in your hands.
- Roll in Sugar (Optional): If you want that classic crinkly, sugary finish on your Peanut Butter Jelly Stuffed Cookies, pour some granulated sugar into a shallow bowl. Roll each sealed cookie dough ball thoroughly in the sugar until it’s completely coated. You can also roll them in chopped peanuts for extra crunch and peanut flavor!
- Arrange on Baking Sheets: Place the assembled cookies on the prepared baking sheets, leaving about 2 inches of space between each one to allow for spreading. You should get about 18-24 cookies, depending on the exact size.
Phase 4: Baking the Peanut Butter Jelly Stuffed Cookies
The moment of truth! Baking these Peanut Butter Jelly Stuffed Cookies to perfection will give you a soft, chewy exterior and a wonderfully warm, gooey center.
- Bake in Batches: Place one baking sheet into the preheated 375°F (190°C) oven at a time, if your oven tends to bake unevenly, or both if your oven has good circulation.
- Bake Until Golden: Bake for 10-14 minutes, or until the edges are lightly golden and set, but the centers still look slightly soft and puffed. Don’t overbake! The cookies will continue to set as they cool. Overbaking will result in a dry cookie and a less gooey jelly center.
- Cool on Baking Sheet: Once baked, remove the baking sheet from the oven. Let the cookies cool on the baking sheet for about 5-7 minutes. They will be very delicate and soft right out of the oven, and this cooling time allows them to firm up slightly.
- Transfer to Wire Rack: After the initial cooling period on the baking sheet, carefully transfer the Peanut Butter Jelly Stuffed Cookies to a wire cooling rack to cool completely. This ensures air circulation all around the cookie, preventing a soggy bottom and allowing them to cool evenly.
Phase 5: Storage and Enjoyment
You’ve put in all that effort, now let’s make sure these delightful Peanut Butter Jelly Stuffed Cookies stay fresh and delicious!
- Cool Completely: It’s tempting, I know, but for optimal storage and to prevent condensation, allow your Peanut Butter Jelly Stuffed Cookies to cool completely to room temperature before storing them.
- Airtight Container: Store the cooled cookies in an airtight container at room temperature for up to 3-4 days. I find that they remain wonderfully soft and chewy.
- Freezing for Longer: If you want to enjoy these delicious Peanut Butter Jelly Stuffed Cookies for longer, they freeze beautifully! Once completely cooled, place them in a single layer on a baking sheet and freeze until solid. Then, transfer them to a freezer-safe bag or container, separating layers with parchment paper. They can be frozen for up to 2-3 months.
- Reheating (Optional): To enjoy a warm, gooey jelly center again, you can gently reheat a frozen or room-temperature cookie. Pop it in the microwave for 10-15 seconds (for room temp) or 20-30 seconds (for frozen), or warm it in a preheated oven at 275°F (135°C) for 5-10 minutes. Be careful not to overheat, as the jelly can become extremely hot!
- Serving Suggestions: These Peanut Butter Jelly Stuffed Cookies are perfect on their own with a glass of milk, but they also make a fantastic addition to a dessert platter. Imagine serving these at a picnic or a potluck – they’re always a huge hit!
Conclusion:
If there’s one recipe I absolutely implore you to try from my kitchen, it’s this one. What makes these cookies truly exceptional, a non-negotiable bake for anyone who appreciates the finer things in life (especially when those things involve warm, gooey centers), is their sheer brilliance in combining comfort with an unexpected gourmet twist. We all cherish the nostalgic embrace of a peanut butter and jelly sandwich, right? Well, imagine that beloved childhood classic transformed into a sophisticated, utterly irresistible dessert that will make your taste buds sing with delight. This isn’t just another cookie; it’s an experience, a moment of pure culinary bliss that effortlessly bridges the gap between simple pleasure and impressive indulgence.
Why These Cookies Are an Absolute Must-Bake!
Imagine biting into a perfectly golden, slightly crisp-edged cookie, yielding to a wonderfully soft and chewy interior. But then, the magic truly begins as you hit that glorious, molten core: a swirl of rich, salty peanut butter perfectly complemented by a sweet, vibrant dollop of fruity jelly. The texture contrast alone is enough to swoon over – the tender cookie giving way to the smooth, creamy peanut butter and the slightly jammy, sweet jelly. It’s a symphony of flavors and textures that dance on your palate, offering a perfect balance of sweet and salty, nutty and fruity. Every single bite is a delightful surprise, an explosion of familiar yet elevated tastes. These aren’t just cookies; they are an ingenious reinvention, and I genuinely believe that once you try these Peanut Butter Jelly Stuffed Cookies, your cookie game will be forever changed. They possess an undeniable ‘wow’ factor that makes them perfect for impressing guests, delighting your family, or simply treating yourself to something truly special after a long day. The ease with which such an impressive treat comes together is another reason why this recipe is a consistent favorite in my home.
Serving Suggestions & Creative Variations to Elevate Your Cookie Experience
Once these beauties emerge from your oven, the aroma alone is intoxicating, a promise of the deliciousness to come. While they are undeniably divine cooled, I highly recommend enjoying them slightly warm, allowing that peanut butter and jelly filling to remain wonderfully gooey and molten. A warm cookie pairs exquisitely with a tall, frosty glass of milk – a classic combination that never disappoints. For a more decadent dessert, serve a warm cookie with a scoop of premium vanilla bean ice cream, allowing the melting ice cream to mingle with the warm, stuffed center. A sprinkle of flaky sea salt on top right after baking can further enhance the flavors, adding another layer of complexity. They also make a fantastic, comforting addition to a lunchbox (though they might cause a stir of envy amongst colleagues or classmates!) or a charming centerpiece for a casual potluck.
Get Creative: Customizing Your Stuffed Cookies!
The beauty of this recipe lies in its versatility. Don’t be afraid to experiment with different nut butters! Almond butter with a delicate apricot preserve creates a more sophisticated profile, while cashew butter paired with a tart cherry jam offers a wonderfully rich and fruity alternative. For those who dare to venture beyond the traditional, try swirling a bit of marshmallow fluff into the peanut butter before stuffing, or even a tiny cube of dark chocolate for an unexpected delight. You could also mix in mini chocolate chips or finely chopped peanuts into the cookie dough itself for added texture. If you’re looking for a seasonal twist, consider using a spiced apple butter in the fall or a tropical mango jam in the summer. For my gluten-free friends, many high-quality gluten-free all-purpose flour blends work beautifully in this recipe, allowing everyone to partake in this delightful creation. The possibilities are truly endless, limited only by your imagination, making these cookies a canvas for your culinary creativity.
Your Turn to Bake and Share the Joy!
I promise you, these Peanut Butter Jelly Stuffed Cookies are destined to become a staple in your baking repertoire. They are the perfect blend of simplicity and sophistication, comfort and surprise. So, don’t just dream about them – gather your ingredients, preheat your oven, and prepare to embark on a delightful baking adventure. I am so incredibly excited for you to experience the sheer joy of pulling these magnificent cookies from your oven and taking that first, magical bite. Once you’ve made them (and inevitably fallen in love), please come back and share your experience! I absolutely adore hearing about your triumphs, your clever variations, and seeing your beautiful creations. Tag me in your photos, leave a comment below with your favorite jam pairing, or simply tell me how much you enjoyed them. Let’s spread the cookie love and make some delicious memories together! Happy baking, my friends!
Peanut Butter Jelly Stuffed Cookies
These Peanut Butter Jelly Stuffed Cookies are a delightful transformation of the classic PB&J sandwich into a chewy, perfectly baked cookie with a gooey, fruity center. This recipe offers a nostalgic yet sophisticated twist on a timeless favorite.
Ingredients
-
1 cup (226g) unsalted butter, softened
-
1 cup (200g) granulated sugar
-
1 cup (200g) packed light brown sugar
-
1 cup (250g) creamy peanut butter
-
2 large eggs
-
2 tsp vanilla extract
-
2 ½ cups (300g) all-purpose flour
-
1 tsp baking soda
-
½ tsp baking powder
-
½ tsp salt
-
½ cup (120g) fruit jelly or jam
-
½ cup (125g) creamy peanut butter (optional, for stuffing)
-
¼ cup (30g) powdered sugar (optional, for stuffing)
-
1 Tbsp unsalted butter, softened (optional, for stuffing)
-
1-2 Tbsp milk (if needed, for stuffing)
Instructions
-
Step 1
Ensure butter is at room temperature. In a large bowl, cream softened butter, granulated sugar, and light brown sugar for 3-4 minutes until light and fluffy. Add 1 cup creamy peanut butter; beat for 1-2 minutes until combined. Beat in eggs one at a time, then stir in vanilla extract. In a separate bowl, whisk together flour, baking soda, baking powder, and salt. Gradually add dry ingredients to wet, mixing on low speed until just combined (do not overmix). Cover and refrigerate dough for at least 1 hour, or up to 24 hours. -
Step 2
Line a small baking sheet with parchment paper. Spoon ½ to ¾ inch coin-sized dollops of fruit jelly onto the paper (approx. 20-24 discs). Warm jelly slightly if too stiff. Freeze for 30-45 minutes until solid. -
Step 3
In a small bowl, combine ½ cup creamy peanut butter, ¼ cup powdered sugar, and 1 Tbsp softened unsalted butter. Mix into a thick, pliable paste, adding 1-2 Tbsp milk if too dry. Roll mixture into ½ inch balls (as many as jelly discs). Freeze for 20-30 minutes until firm. -
Step 4
Preheat oven to 375°F (190°C). Line two baking sheets with parchment paper. Retrieve chilled dough, frozen jelly discs, and frozen peanut butter balls. Scoop 2 Tbsp (40-45g) of dough per cookie; roll into a smooth ball. Flatten a dough ball into a 3-inch disc. If using, place a frozen peanut butter ball in the center, then a frozen jelly disc on top (or jelly directly on dough). Carefully gather dough edges around fillings, pinching tightly to seal. Roll into a smooth ball, ensuring no cracks. Optionally, roll each sealed cookie ball in granulated sugar (plus extra) or chopped peanuts. Place cookies 2 inches apart on prepared sheets. -
Step 5
Bake one sheet at a time in the preheated oven for 10-14 minutes, or until edges are lightly golden and centers look slightly soft. Do not overbake. Remove from oven and cool on the baking sheet for 5-7 minutes. Transfer to a wire rack to cool completely. -
Step 6
Allow cookies to cool completely before storing. Store cooled cookies in an airtight container at room temperature for 3-4 days. For longer storage, freeze completely cooled cookies in a freezer-safe bag for up to 2-3 months. To reheat, microwave a room temp cookie for 10-15 seconds (frozen for 20-30 seconds), or warm in an oven at 275°F (135°C) for 5-10 minutes (jelly can be very hot). Serve with milk or as part of a dessert platter.
Important Information
Nutrition Facts (Per Serving)
It is important to consider this information as approximate and not to use it as definitive health advice.
Allergy Information
Please check ingredients for potential allergens and consult a health professional if in doubt.


Leave a Comment