
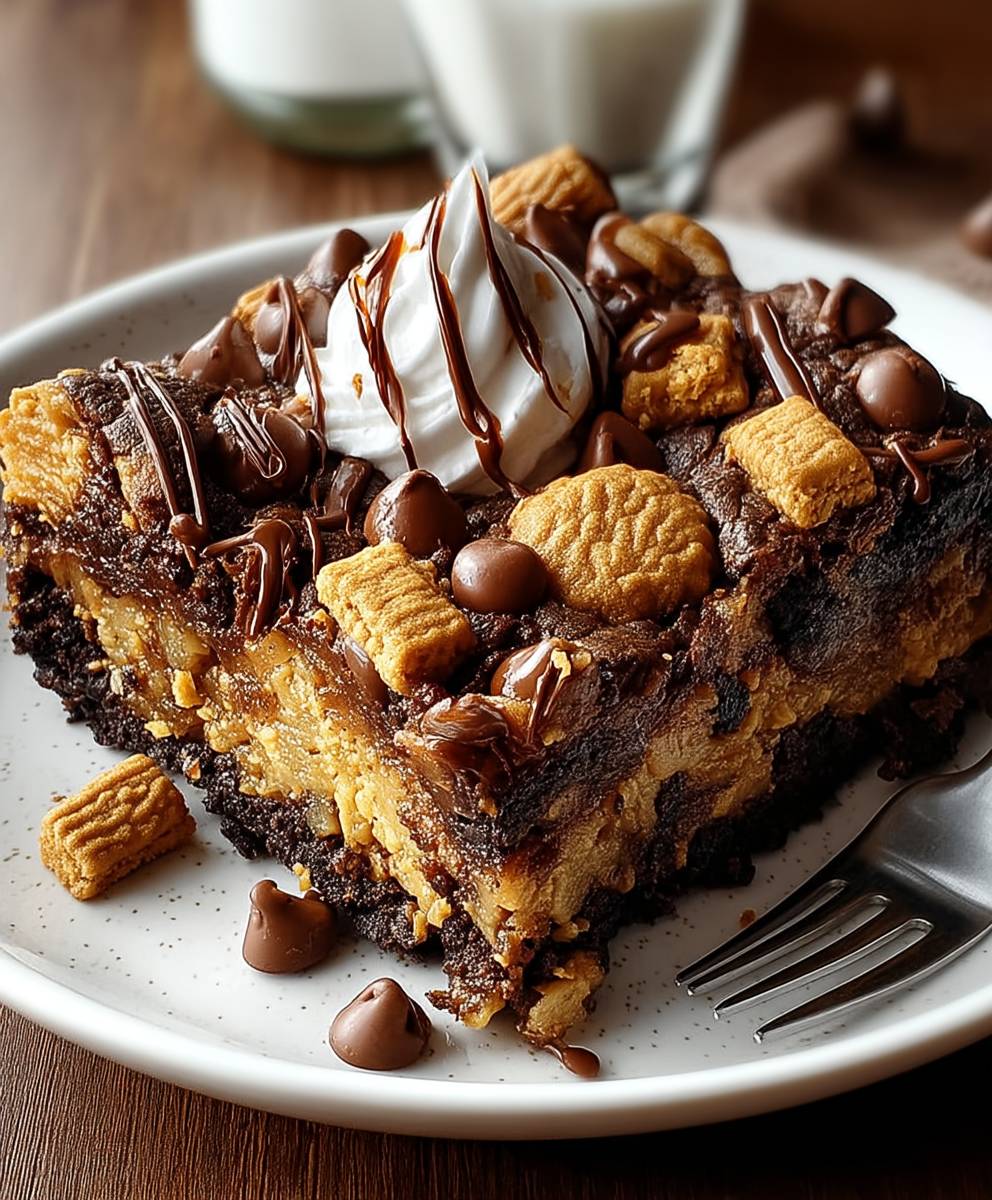
Peanut Butter Cup Cake: Just the name alone conjures up images of rich, decadent chocolate and creamy, nutty peanut butter, doesn’t it? This isn’t just any cake; it’s a symphony of flavors that dance on your tongue, a delightful indulgence that’s surprisingly easy to create. Prepare to be amazed by how simple it is to bake a cake that tastes like it came straight from a gourmet bakery!
While the exact origins of combining peanut butter and chocolate in a cake format are a bit hazy, the love affair between these two ingredients is undeniable and deeply rooted in American culinary culture. Think about it: peanut butter cups have been a beloved treat for generations, and this cake takes that classic combination to a whole new level. It’s a celebration of that perfect pairing, transformed into a show-stopping dessert.
What makes a Peanut Butter Cup Cake so irresistible? It’s the perfect balance of textures the moist, tender crumb of the cake itself, the smooth, melt-in-your-mouth peanut butter frosting, and the satisfying crunch of chopped peanut butter cups sprinkled on top. Beyond the taste and texture, this cake is also incredibly convenient. Whether you’re baking for a birthday, a holiday gathering, or simply a weekend treat, this recipe is sure to impress without requiring hours in the kitchen. Get ready to experience peanut butter and chocolate bliss!

Ingredients:
- For the Chocolate Cake:
- 2 cups all-purpose flour
- 2 cups granulated sugar
- ¾ cup unsweetened cocoa powder
- 1 ½ teaspoons baking powder
- 1 ½ teaspoons baking soda
- 1 teaspoon salt
- 1 cup buttermilk
- ½ cup vegetable oil
- 2 large eggs
- 2 teaspoons vanilla extract
- 1 cup boiling water
- For the Peanut Butter Filling:
- 1 cup (2 sticks) unsalted butter, softened
- 3 cups powdered sugar
- 1 cup creamy peanut butter
- ¼ cup heavy cream
- 1 teaspoon vanilla extract
- Pinch of salt
- For the Chocolate Ganache:
- 1 cup heavy cream
- 12 ounces semi-sweet chocolate chips
- 2 tablespoons unsalted butter
- For Decoration (Optional):
- Mini peanut butter cups, halved or quartered
- Chopped peanuts
- Chocolate shavings
Preparing the Chocolate Cake:
Okay, let’s get started with the foundation of our masterpiece the chocolate cake! This recipe makes a super moist and delicious cake that perfectly complements the peanut butter and chocolate flavors to come.
- Preheat and Prep: First things first, preheat your oven to 350°F (175°C). Grease and flour two 9-inch round cake pans. You can also line the bottoms with parchment paper circles for extra insurance against sticking. I find this makes removing the cakes a breeze!
- Combine Dry Ingredients: In a large bowl, whisk together the flour, sugar, cocoa powder, baking powder, baking soda, and salt. Make sure everything is evenly distributed. This step is important for a consistent texture.
- Combine Wet Ingredients: In a separate bowl, whisk together the buttermilk, vegetable oil, eggs, and vanilla extract. Whisk until well combined.
- Combine Wet and Dry: Gradually add the wet ingredients to the dry ingredients, mixing on low speed until just combined. Be careful not to overmix! Overmixing can lead to a tough cake.
- Add Boiling Water: Slowly pour in the boiling water while mixing on low speed. The batter will be thin, but don’t worry, that’s exactly what we want! The hot water helps to bloom the cocoa powder and creates a super moist cake.
- Divide and Bake: Divide the batter evenly between the prepared cake pans. Bake for 30-35 minutes, or until a wooden skewer inserted into the center comes out clean.
- Cool the Cakes: Let the cakes cool in the pans for 10 minutes before inverting them onto a wire rack to cool completely. This prevents them from sticking and allows them to cool evenly. Make sure they are completely cool before frosting!
Making the Peanut Butter Filling:
Now for the star of the show the peanut butter filling! This filling is creamy, dreamy, and packed with peanut butter flavor. It’s the perfect complement to the rich chocolate cake.
- Cream the Butter: In a large bowl (or the bowl of a stand mixer), beat the softened butter until light and fluffy. This usually takes about 3-5 minutes.
- Add Powdered Sugar: Gradually add the powdered sugar, one cup at a time, beating on low speed until combined. Be sure to scrape down the sides of the bowl occasionally to ensure everything is evenly mixed.
- Add Peanut Butter: Add the peanut butter and beat until well combined.
- Add Heavy Cream and Vanilla: Add the heavy cream and vanilla extract and beat until the frosting is smooth and creamy. If the frosting is too thick, add a little more heavy cream, one tablespoon at a time, until you reach your desired consistency.
- Add Salt: Add a pinch of salt to balance the sweetness and enhance the peanut butter flavor.
Preparing the Chocolate Ganache:
Let’s move on to the decadent chocolate ganache! This ganache is rich, glossy, and adds a touch of elegance to our cake. It’s surprisingly easy to make, too!
- Heat the Cream: In a saucepan, heat the heavy cream over medium heat until it just begins to simmer. Do not boil!
- Pour Over Chocolate: Remove the saucepan from the heat and pour the hot cream over the chocolate chips in a heatproof bowl.
- Let it Sit: Let the mixture sit for 1 minute to allow the heat to melt the chocolate.
- Stir Until Smooth: Gently stir the mixture until the chocolate is completely melted and the ganache is smooth and glossy.
- Add Butter: Stir in the butter until it is melted and incorporated into the ganache. This adds extra shine and richness.
- Cool Slightly: Let the ganache cool slightly before pouring it over the cake. This will help it to thicken and prevent it from running off the sides too quickly.
Assembling the Peanut Butter Cup Cake:
Finally, the moment we’ve all been waiting for assembling our Peanut Butter Cup Cake! This is where all our hard work comes together to create a truly stunning and delicious dessert.
- Level the Cakes (Optional): If your cakes are uneven, use a serrated knife to level the tops. This will ensure that your cake is stable and looks professional.
- Place First Layer: Place one cake layer on a serving plate or cake stand.
- Add Peanut Butter Filling: Spread an even layer of the peanut butter filling over the first cake layer.
- Place Second Layer: Carefully place the second cake layer on top of the peanut butter filling.
- Pour Ganache: Pour the slightly cooled chocolate ganache over the top of the cake, allowing it to drip down the sides. You can use an offset spatula to help spread the ganache evenly.
- Decorate (Optional): Decorate the cake with halved or quartered mini peanut butter cups, chopped peanuts, and chocolate shavings. Get creative and have fun with it!
- Chill (Optional): Chill the cake in the refrigerator for at least 30 minutes to allow the ganache to set. This will make it easier to slice and serve.
- Serve and Enjoy!: Slice and serve your Peanut Butter Cup Cake. Prepare for rave reviews!
Tips for Success:
Here are a few extra tips to help you make the perfect Peanut Butter Cup Cake:
- Use Room Temperature Ingredients: Using room temperature ingredients, especially the butter and eggs, will help them to emulsify properly and create a smoother batter.
- Don’t Overmix: Overmixing the cake batter can lead to a tough cake. Mix until just combined.
- Cool Cakes Completely: Make sure the cakes are completely cool before frosting. Otherwise, the frosting will melt.
- Adjust Sweetness: If you prefer a less sweet cake, you can reduce the amount of sugar in the cake batter or the peanut butter filling.
- Make Ahead: The cake layers and peanut butter filling can be made ahead of time and stored separately. The ganache is best made fresh.
- Storage: Store the cake in an airtight container in the refrigerator for up to 3 days.
Variations:
Want to put your own spin on this recipe? Here are a few ideas:
- Add Chocolate Chips: Add chocolate chips to the cake batter or the peanut butter filling for extra chocolatey goodness.
- Use Different Peanut Butter: Try using crunchy peanut butter for a bit of texture in the filling.
- Add a Peanut Butter Drizzle: Drizzle melted peanut butter over the top of the ganache for an extra peanut butter boost.
- Make it Gluten-Free: Use a gluten-free flour blend to make this cake gluten-free.
- Add a Layer of Peanut Butter Cups: Before adding the second cake layer, arrange a layer of mini peanut butter cups on top of the peanut butter filling.
I hope you enjoy making and eating this Peanut Butter Cup Cake as much as I do! It’s a guaranteed crowd-pleaser and perfect for any occasion. Happy baking!
Conclusion:
Well, there you have it! I truly believe this Peanut Butter Cup Cake recipe is a game-changer. It’s not just a cake; it’s an experience, a symphony of flavors that will have everyone begging for seconds. The rich, moist chocolate cake perfectly complements the creamy, decadent peanut butter frosting, and the chopped peanut butter cups scattered throughout add that irresistible textural element that elevates it to a whole new level.
Why is this a must-try? Because it’s surprisingly easy to make! Don’t let the impressive results fool you; this recipe is designed for bakers of all skill levels. Plus, it’s a guaranteed crowd-pleaser. Whether you’re baking for a birthday party, a holiday gathering, or simply a weeknight treat, this cake is sure to be the star of the show. It’s the perfect balance of indulgence and comfort, a slice of happiness that will brighten anyone’s day.
But the fun doesn’t stop there! Feel free to get creative with your serving suggestions and variations. For a truly decadent experience, try serving each slice with a scoop of vanilla ice cream and a drizzle of hot fudge sauce. Or, if you’re feeling adventurous, you could add a layer of salted caramel between the cake and the frosting for an extra touch of sweetness and complexity.
Here are a few more ideas to spark your imagination:
Serving Suggestions:
- Warm it up: Gently warm a slice in the microwave for a few seconds to enhance the gooeyness of the peanut butter cups.
- Coffee pairing: Serve with a strong cup of coffee or espresso to balance the sweetness.
- Berry garnish: Add fresh raspberries or strawberries for a pop of color and a touch of tartness.
Variations to Explore:
- Chocolate overload: Use a dark chocolate cake mix and add chocolate chips to the frosting for an even richer chocolate experience.
- Peanut butter swirl: Swirl melted peanut butter into the cake batter before baking for a marbled effect.
- Mini cupcakes: Bake the batter in cupcake tins for individual servings that are perfect for parties.
- Vegan option: Substitute the eggs and dairy with vegan alternatives to create a delicious vegan peanut butter cup cake.
I’m so excited for you to try this recipe! I know you’re going to love it as much as I do. The combination of chocolate and peanut butter is simply irresistible, and this cake truly captures the essence of that classic flavor pairing.
So, what are you waiting for? Grab your ingredients, preheat your oven, and get ready to bake the most amazing Peanut Butter Cup Cake you’ve ever tasted. And most importantly, don’t forget to share your experience! I’d love to hear how it turned out, what variations you tried, and what your friends and family thought. Tag me in your photos on social media I can’t wait to see your creations! Happy baking!
Peanut Butter Cup Cake: The Ultimate Recipe and Baking Guide
Decadent chocolate cake layered with creamy peanut butter filling and topped with a rich chocolate ganache. A peanut butter cup lover's dream!
Ingredients
- 2 cups all-purpose flour
- 2 cups granulated sugar
- ¾ cup unsweetened cocoa powder
- 1 ½ teaspoons baking powder
- 1 ½ teaspoons baking soda
- 1 teaspoon salt
- 1 cup buttermilk
- ½ cup vegetable oil
- 2 large eggs
- 2 teaspoons vanilla extract
- 1 cup boiling water
- 1 cup (2 sticks) unsalted butter, softened
- 3 cups powdered sugar
- 1 cup creamy peanut butter
- ¼ cup heavy cream
- 1 teaspoon vanilla extract
- Pinch of salt
- 1 cup heavy cream
- 12 ounces semi-sweet chocolate chips
- 2 tablespoons unsalted butter
- Mini peanut butter cups, halved or quartered
- Chopped peanuts
- Chocolate shavings
Instructions
- Preheat and Prep: Preheat oven to 350°F (175°C). Grease and flour two 9-inch round cake pans, lining the bottoms with parchment paper circles.
- Combine Dry Ingredients: In a large bowl, whisk together the flour, sugar, cocoa powder, baking powder, baking soda, and salt.
- Combine Wet Ingredients: In a separate bowl, whisk together the buttermilk, vegetable oil, eggs, and vanilla extract.
- Combine Wet and Dry: Gradually add the wet ingredients to the dry ingredients, mixing on low speed until just combined. Do not overmix.
- Add Boiling Water: Slowly pour in the boiling water while mixing on low speed. The batter will be thin.
- Divide and Bake: Divide the batter evenly between the prepared cake pans. Bake for 30-35 minutes, or until a wooden skewer inserted into the center comes out clean.
- Cool the Cakes: Let the cakes cool in the pans for 10 minutes before inverting them onto a wire rack to cool completely.
- Cream the Butter: In a large bowl (or stand mixer), beat the softened butter until light and fluffy (3-5 minutes).
- Add Powdered Sugar: Gradually add the powdered sugar, one cup at a time, beating on low speed until combined. Scrape down the sides of the bowl.
- Add Peanut Butter: Add the peanut butter and beat until well combined.
- Add Heavy Cream and Vanilla: Add the heavy cream and vanilla extract and beat until smooth and creamy. Add more heavy cream, 1 tablespoon at a time, if needed to reach desired consistency.
- Add Salt: Add a pinch of salt.
- Heat the Cream: In a saucepan, heat the heavy cream over medium heat until it just begins to simmer. Do not boil.
- Pour Over Chocolate: Remove from heat and pour the hot cream over the chocolate chips in a heatproof bowl.
- Let it Sit: Let the mixture sit for 1 minute.
- Stir Until Smooth: Gently stir until the chocolate is completely melted and the ganache is smooth and glossy.
- Add Butter: Stir in the butter until melted and incorporated.
- Cool Slightly: Let the ganache cool slightly before pouring it over the cake.
- Level the Cakes (Optional): Level the tops of the cakes with a serrated knife if needed.
- Place First Layer: Place one cake layer on a serving plate or cake stand.
- Add Peanut Butter Filling: Spread an even layer of the peanut butter filling over the first cake layer.
- Place Second Layer: Carefully place the second cake layer on top of the peanut butter filling.
- Pour Ganache: Pour the slightly cooled chocolate ganache over the top of the cake, allowing it to drip down the sides. Use an offset spatula to spread evenly.
- Decorate (Optional): Decorate with halved or quartered mini peanut butter cups, chopped peanuts, and chocolate shavings.
- Chill (Optional): Chill in the refrigerator for at least 30 minutes to allow the ganache to set.
- Serve and Enjoy!
Notes
- Use room temperature ingredients for the cake and frosting.
- Don’t overmix the cake batter.
- Cool cakes completely before frosting.
- Adjust sweetness to your preference by reducing sugar in the cake or filling.
- Cake layers and peanut butter filling can be made ahead of time. Ganache is best made fresh.
- Store the cake in an airtight container in the refrigerator for up to 3 days.
Leave a Comment