
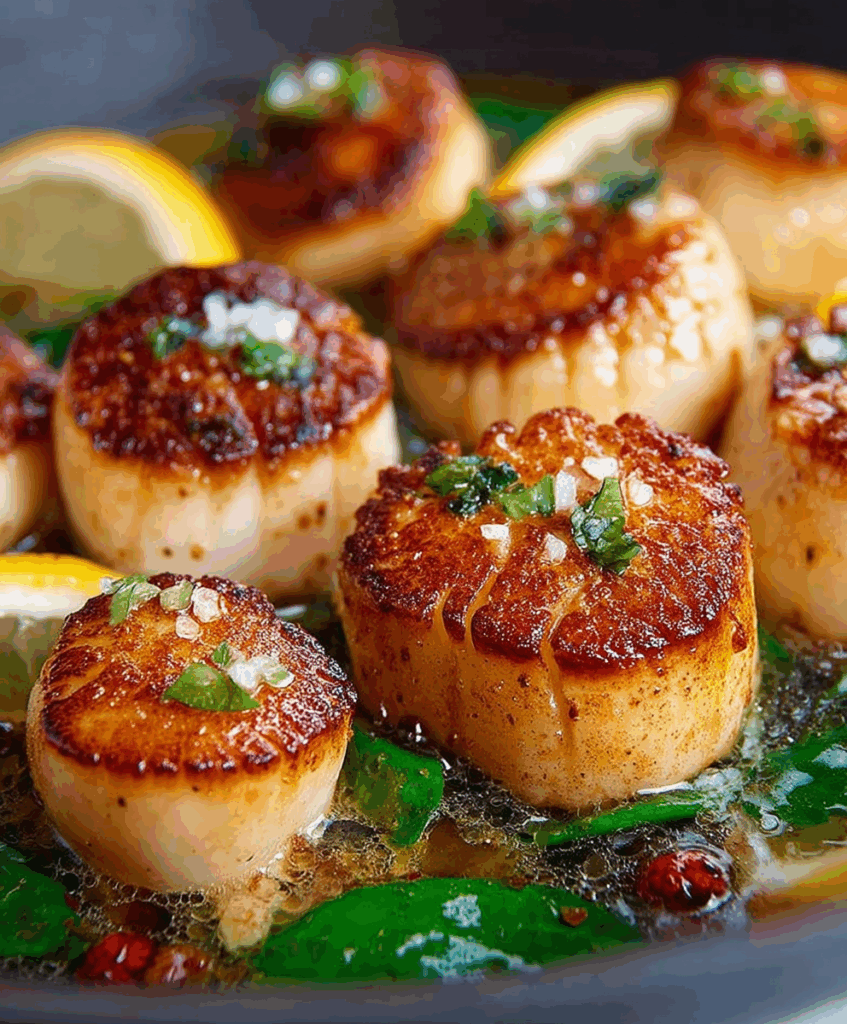
Pan Seared Scallops: Just the name evokes images of elegant dinners and sophisticated palates, doesn’t it? But what if I told you that achieving restaurant-quality, perfectly seared scallops at home is not only possible, but surprisingly easy? Forget the intimidation factor; with a few simple techniques, you can transform these ocean gems into a culinary masterpiece in your own kitchen.
Scallops have been a delicacy enjoyed for centuries, gracing tables from ancient Rome to modern-day bistros. Their delicate, slightly sweet flavor and tender texture have made them a prized ingredient in cuisines around the world. In many cultures, scallops are even considered symbols of good luck and prosperity. But beyond their historical significance, the real magic of pan seared scallops lies in their versatility and the sheer delight they bring to the taste buds.
People adore scallops for their melt-in-your-mouth texture and subtle sweetness, which pairs beautifully with a wide range of flavors. Whether you’re craving a light and refreshing appetizer or a decadent main course, pan seared scallops deliver. And the best part? They cook in mere minutes, making them a perfect choice for a quick yet impressive meal. So, are you ready to unlock the secrets to perfectly seared scallops? Let’s dive in!

Ingredients:
- 1 pound large sea scallops (about 16-20 scallops), patted very dry
- 2 tablespoons olive oil
- 2 tablespoons butter, unsalted
- 2 cloves garlic, minced
- 1 tablespoon fresh lemon juice
- 1/4 cup dry white wine (such as Sauvignon Blanc or Pinot Grigio)
- 2 tablespoons chopped fresh parsley
- Salt and freshly ground black pepper to taste
- Optional: Pinch of red pepper flakes for a little heat
- Optional: Lemon wedges for serving
Preparing the Scallops: The Key to a Perfect Sear
Before we even think about turning on the stove, let’s talk about the scallops themselves. The most crucial step for achieving that beautiful, golden-brown crust is ensuring your scallops are completely dry. Excess moisture is the enemy of a good sear. Think of it like trying to fry something wet it steams instead of browns. So, grab those scallops and let’s get them ready!
- Pat Dry: Remove the scallops from their packaging and place them on a plate lined with several layers of paper towels. Gently pat them dry with more paper towels, pressing down to absorb as much moisture as possible. Flip them over and repeat on the other side. You might need to use several paper towels to get them really dry. Don’t be shy!
- Remove the Side Muscle (Optional but Recommended): Look closely at each scallop. You might notice a small, tough side muscle attached to the side. This muscle can become chewy when cooked, so I recommend removing it. It’s easy to do just gently pull it off with your fingers. It should detach easily.
- Season Generously: Now that your scallops are dry and prepped, it’s time to season them. Sprinkle them generously with salt and freshly ground black pepper on both sides. Don’t be afraid to season them well this is your chance to build flavor! If you’re feeling adventurous, add a tiny pinch of red pepper flakes for a subtle kick.
The Searing Process: High Heat is Your Friend
Now for the fun part searing! This is where the magic happens. We’re aiming for a deep golden-brown crust on the outside while keeping the inside tender and juicy. The key is high heat and a hot pan. Let’s get started!
- Heat the Pan: Place a large, heavy-bottomed skillet (cast iron is ideal, but stainless steel will also work) over medium-high heat. Allow the pan to heat up for several minutes until it’s very hot. You should be able to feel the heat radiating from the pan when you hold your hand a few inches above it.
- Add the Oil and Butter: Once the pan is hot, add the olive oil and butter. The butter will add richness and flavor, while the olive oil will help prevent the butter from burning. Let the butter melt completely and swirl the pan to coat the bottom evenly. The mixture should be shimmering and just starting to smoke slightly.
- Sear the Scallops: Carefully place the scallops in the hot pan, making sure not to overcrowd them. Overcrowding will lower the temperature of the pan and cause the scallops to steam instead of sear. If necessary, sear the scallops in batches. Leave about an inch of space between each scallop.
- Resist the Urge to Move Them: This is crucial! Once the scallops are in the pan, do not touch them for at least 2-3 minutes. Let them sear undisturbed. This is what allows them to develop that beautiful golden-brown crust.
- Flip and Sear the Other Side: After 2-3 minutes, carefully flip the scallops with tongs. They should release easily from the pan if they’ve developed a good sear. If they’re sticking, they’re not ready yet give them another minute or so. Sear the other side for another 2-3 minutes, or until they are cooked through and opaque. The internal temperature should reach 120-125°F (49-52°C).
- Check for Doneness: To check for doneness, gently press on the scallops with your finger. They should feel firm but still have a slight give. Avoid overcooking them, as they will become tough and rubbery.
- Remove from Pan: Once the scallops are cooked through, immediately remove them from the pan and place them on a clean plate.
Making the Pan Sauce: A Burst of Flavor
Don’t discard that delicious pan drippings! We’re going to use them to create a simple but flavorful pan sauce that will complement the scallops perfectly. This sauce is quick, easy, and adds a wonderful depth of flavor to the dish.
- Add Garlic: Reduce the heat to medium. Add the minced garlic to the pan and cook for about 30 seconds, or until fragrant. Be careful not to burn the garlic, as it will become bitter.
- Deglaze with White Wine: Pour in the dry white wine and scrape up any browned bits from the bottom of the pan. These browned bits, called fond, are packed with flavor. Let the wine simmer for 1-2 minutes, or until it has reduced slightly.
- Add Lemon Juice: Stir in the fresh lemon juice. This will add a bright, acidic note to the sauce.
- Finish with Parsley: Remove the pan from the heat and stir in the chopped fresh parsley.
- Season to Taste: Taste the sauce and adjust the seasoning as needed. Add salt and pepper to taste.
Serving: The Final Touch
Now that the scallops are seared to perfection and the pan sauce is ready, it’s time to plate and serve! Here are a few suggestions for serving your pan-seared scallops:
- Plate the Scallops: Arrange the seared scallops on a plate.
- Drizzle with Sauce: Spoon the pan sauce over the scallops. Make sure each scallop gets a generous coating of the flavorful sauce.
- Garnish (Optional): Garnish with a sprinkle of fresh parsley and a lemon wedge.
- Serve Immediately: Serve the scallops immediately while they are still hot and juicy.
Serving Suggestions:
- Serve over pasta: Toss cooked pasta with the pan sauce and top with the seared scallops.
- Serve with risotto: Creamy risotto is a perfect accompaniment to the delicate flavor of the scallops.
- Serve with mashed potatoes: Fluffy mashed potatoes provide a comforting base for the scallops and sauce.
- Serve with a salad: A simple green salad with a light vinaigrette provides a refreshing contrast to the richness of the scallops.
- Serve as an appetizer: Serve the scallops on small plates as an elegant appetizer.
Tips for Success:
- Don’t Overcrowd the Pan: Sear the scallops in batches to ensure they brown properly.
- Use High Heat: High heat is essential for achieving a good sear.
- Don’t Overcook: Overcooked scallops are tough and rubbery. Cook them just until they are opaque and firm.
- Use Fresh Scallops: Fresh scallops will have the best flavor and texture.
- Pat Dry Thoroughly: This is the most important step for achieving a good sear.
Enjoy your delicious pan-seared scallops! I hope you found this recipe helpful and that you’re able to create a restaurant-quality dish in your own kitchen. Happy cooking!
Conclusion:
So there you have it! This Pan Seared Scallops recipe is truly a must-try for anyone looking to impress with minimal effort. The delicate sweetness of the scallops, perfectly caramelized and boasting a beautiful golden crust, is an experience you won’t soon forget. It’s quick enough for a weeknight dinner but elegant enough to serve at a special occasion. What more could you ask for?
But why is this recipe so special? It’s all about the simplicity. We’re not hiding the natural flavor of the scallops behind a mountain of ingredients. Instead, we’re enhancing it with just a few key elements: high heat, a touch of butter, and a sprinkle of fresh herbs. The result is a dish that’s both sophisticated and incredibly satisfying. Plus, the entire process, from prep to plate, takes less than 30 minutes! That’s a win in my book.
Now, let’s talk about serving suggestions. These Pan Seared Scallops are incredibly versatile. For a light and refreshing meal, serve them atop a bed of vibrant arugula salad with a lemon vinaigrette. The peppery arugula and zesty lemon perfectly complement the sweetness of the scallops. Alternatively, you could pair them with a creamy risotto for a more indulgent experience. A simple parmesan risotto would work beautifully, or you could get a little more adventurous with a mushroom or asparagus risotto.
Looking for variations? Feel free to experiment with different herbs. Thyme, rosemary, or even a pinch of red pepper flakes can add a unique twist to the flavor profile. You could also try searing the scallops in brown butter for an even richer, nuttier flavor. Just be careful not to burn the butter! Another fun variation is to add a splash of white wine to the pan after searing the scallops. Let it reduce slightly to create a delicious pan sauce.
And don’t forget the sides! Roasted vegetables like asparagus, Brussels sprouts, or sweet potatoes are all excellent choices. A crusty baguette for soaking up any leftover sauce is also a must. Honestly, the possibilities are endless!
But the most important thing is to have fun and make this recipe your own. Don’t be afraid to experiment with different flavors and techniques until you find what works best for you. Cooking should be an enjoyable experience, so relax, put on some music, and get ready to create something delicious.
I truly believe that this Pan Seared Scallops recipe will become a staple in your kitchen. It’s easy, elegant, and incredibly flavorful. So, what are you waiting for? Grab some fresh scallops and give it a try!
I’m so excited to hear about your experience. Once you’ve made this recipe, please come back and share your thoughts in the comments below. Did you try any of the variations? What did you serve it with? I’m always looking for new ideas and inspiration. And don’t forget to share your photos on social media using #PanSearedScallops! I can’t wait to see what you create. Happy cooking!
Pan Seared Scallops: The Ultimate Guide to Perfect Scallops
Perfectly seared scallops with a flavorful lemon-garlic pan sauce. A quick and easy restaurant-quality dish you can make at home.
Ingredients
- 1 pound large sea scallops (about 16-20 scallops), patted very dry
- 2 tablespoons olive oil
- 2 tablespoons butter, unsalted
- 2 cloves garlic, minced
- 1 tablespoon fresh lemon juice
- 1/4 cup dry white wine (such as Sauvignon Blanc or Pinot Grigio)
- 2 tablespoons chopped fresh parsley
- Salt and freshly ground black pepper to taste
- Pinch of red pepper flakes for a little heat
- Lemon wedges for serving
Instructions
- Pat the scallops dry with paper towels, pressing down to absorb as much moisture as possible. Flip and repeat.
- (Optional) Remove the small, tough side muscle from each scallop.
- Season generously with salt, pepper, and a pinch of red pepper flakes (optional) on both sides.
- Heat a large, heavy-bottomed skillet (cast iron or stainless steel) over medium-high heat until very hot.
- Add olive oil and butter. Let the butter melt completely and swirl to coat the pan. The mixture should be shimmering.
- Carefully place the scallops in the hot pan, making sure not to overcrowd them. Sear in batches if necessary, leaving about an inch of space between each scallop.
- Do not touch the scallops for at least 2-3 minutes.
- Flip the scallops with tongs and sear the other side for another 2-3 minutes, or until cooked through and opaque (internal temperature of 120-125°F/49-52°C).
- Remove from the pan and place on a clean plate.
- Reduce the heat to medium. Add the minced garlic to the pan and cook for about 30 seconds, or until fragrant.
- Pour in the dry white wine and scrape up any browned bits from the bottom of the pan. Let the wine simmer for 1-2 minutes, or until it has reduced slightly.
- Stir in the fresh lemon juice.
- Remove the pan from the heat and stir in the chopped fresh parsley.
- Taste the sauce and adjust the seasoning as needed. Add salt and pepper to taste.
- Arrange the seared scallops on a plate.
- Spoon the pan sauce over the scallops.
- Garnish with a sprinkle of fresh parsley and a lemon wedge (optional).
- Serve immediately.
Notes
- Patting the scallops completely dry is crucial for achieving a good sear.
- High heat is essential for searing.
- Don’t overcrowd the pan; sear in batches if necessary.
- Don’t overcook the scallops; they should be firm but still have a slight give.
- Use fresh scallops for the best flavor and texture.
- Serving Suggestions: Serve over pasta, risotto, mashed potatoes, or a salad. Can also be served as an appetizer.

Leave a Comment