
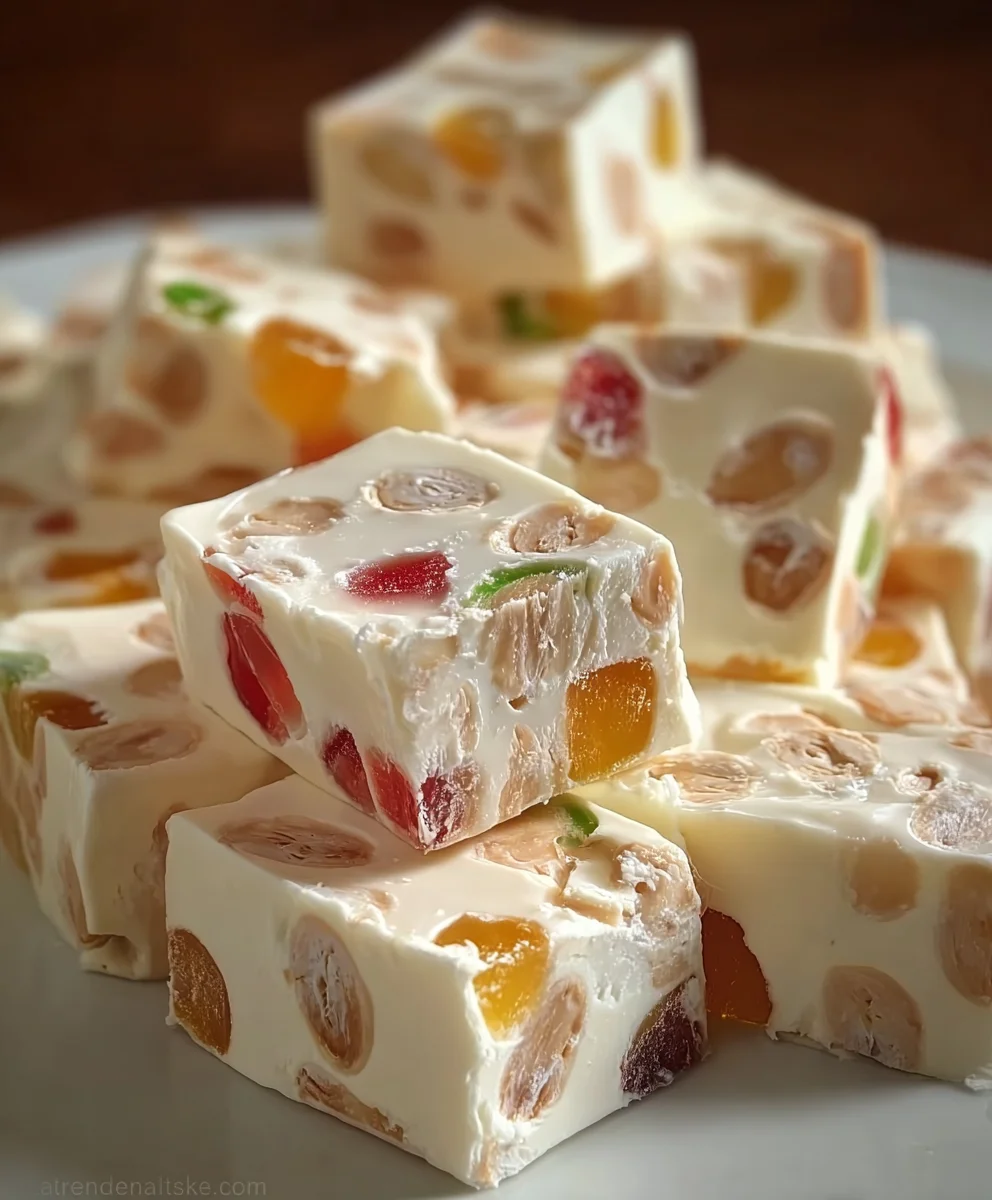
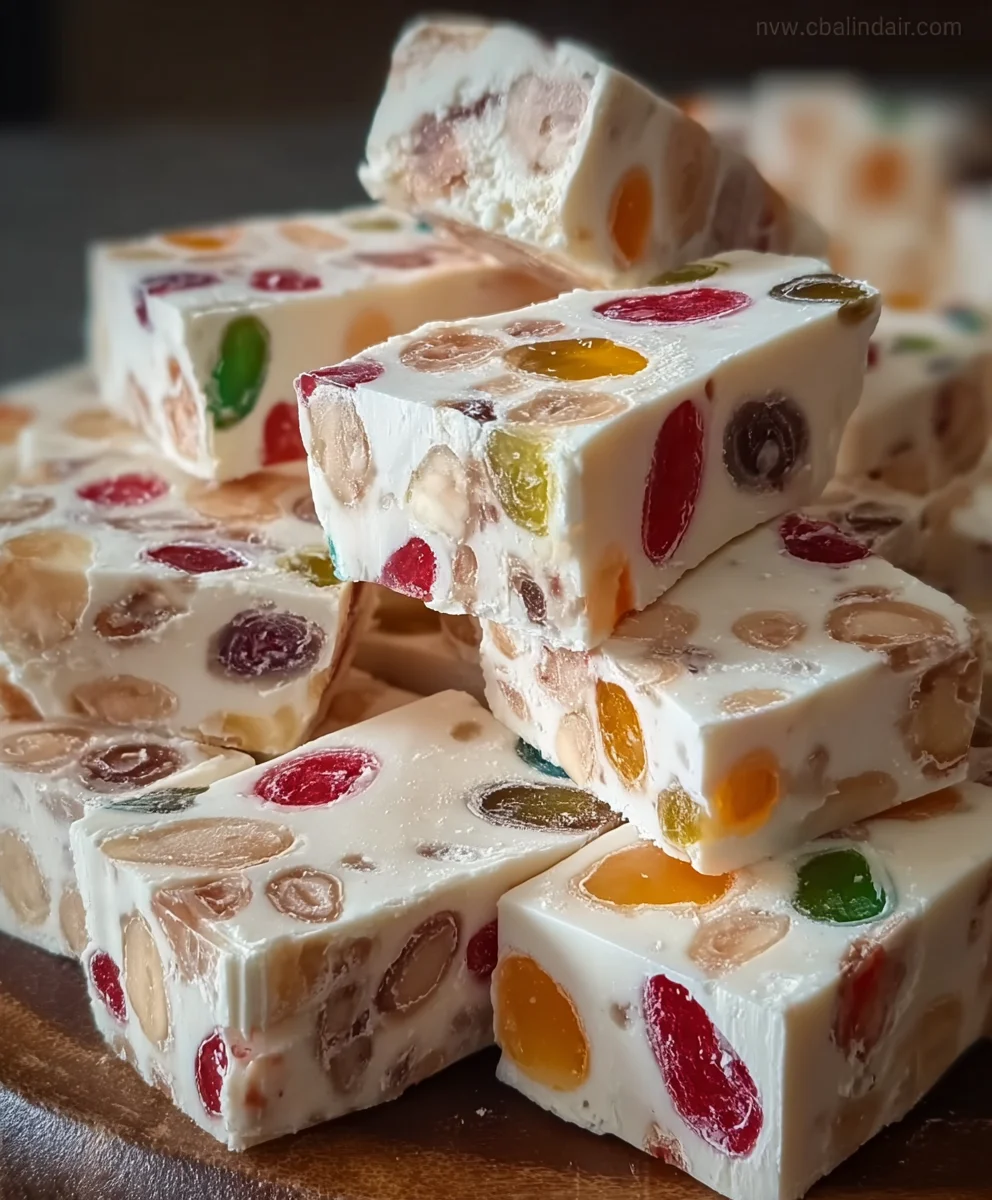
Old Fashioned Jelly Nougat Candy is more than just a sweet treat; I find it’s a delightful journey back to simpler times, where homemade confections brought immense joy. Imagine biting into a cloud-like, chewy nougat, delicately sweet and studded with vibrant, fruit-flavored jelly pieces. This exquisite candy offers a unique textural symphony that captivates from the very first bite – a perfect blend of airy chewiness and a soft, yielding fruity center. It’s a truly enchanting experience that stands apart from modern sweets.
While nougat itself boasts a rich history spanning centuries, often associated with Mediterranean and Middle Eastern traditions and festive celebrations, this particular “old fashioned” rendition carries with it a comforting sense of nostalgia. I believe people adore this dish not only for its incredible taste and captivating texture – that distinct, satisfying chew paired with the burst of fruitiness – but also for the memories it evokes. Whether it’s a cherished family recipe passed down through generations or a discovery of a classic confection, crafting your own Old Fashioned Jelly Nougat Candy is a rewarding endeavor that promises to impress. It’s perfect for gifting, holiday platters, or simply a luxurious personal indulgence.

Ingredients:
- For the Nougat Base:
- 2 ¾ cups granulated sugar
- 1 cup light corn syrup
- ½ cup water
- ¼ teaspoon salt
- 3 large egg whites, at room temperature
- ½ teaspoon pure vanilla extract
- Pinch of cream of tartar (optional, but recommended for stability)
- For the Jelly and Add-ins:
- 1 cup firm fruit jelly (such as quince, apple, or currant jelly), cut into ¼-inch cubes. Ensure it’s a very firm jelly that holds its shape.
- 1 ½ cups toasted nuts (almonds, pistachios, or hazelnuts work wonderfully), coarsely chopped
- ½ cup dried fruit (cranberries, apricots, or candied orange peel), finely diced (optional, for extra texture and flavor)
- For Coating/Dusting:
- ¼ cup cornstarch
- ¼ cup confectioners’ sugar
Preparation and Mise en Place
- Gather Your Tools: Before we even think about turning on the heat, I strongly recommend gathering all your equipment and ingredients. Candy making is precise, and you won’t have time to search for a spatula once the syrup is cooking! You’ll need a heavy-bottomed saucepan (preferably 3-4 quart), a reliable candy thermometer, a stand mixer with a whisk attachment, parchment paper, a 9×13 inch baking pan, a pastry brush, and heat-resistant spatulas.
- Prepare Your Pan: Line your 9×13 inch baking pan with parchment paper, leaving an overhang on all sides. This overhang will act as handles later, making it much easier to lift the sticky nougat out of the pan. Lightly grease the parchment paper with a neutral oil or non-stick spray. You can also lightly dust it with a mixture of confectioners’ sugar and cornstarch, which we’ll prepare in a moment.
- Prepare the Jelly and Add-ins: Take your firm fruit jelly and cut it into ¼-inch cubes. It’s crucial that the jelly is firm enough to maintain its shape when cut. If your jelly is too soft, it will melt into the nougat, affecting the texture. Set these aside. Toast your chosen nuts (almonds, pistachios, or hazelnuts work beautifully) in a dry pan over medium heat until fragrant, then let them cool and coarsely chop them. If using dried fruit, finely dice it. Keep these ready to go.
- Prepare the Dusting Mixture: In a small bowl, whisk together the ¼ cup cornstarch and ¼ cup confectioners’ sugar. This mixture will be used to dust your nougat later, preventing stickiness.
- Set Up Your Mixer: Have your stand mixer bowl fitted with the whisk attachment ready. Make sure it’s completely clean and dry. Separate your egg whites into this bowl, ensuring no yolk whatsoever gets into the whites, as this can prevent them from whipping up properly. Allow the egg whites to come to room temperature, which helps them achieve maximum volume.
Making the Sugar Syrup
- Combine Sugar Syrup Ingredients: In your heavy-bottomed saucepan, combine the granulated sugar, light corn syrup, ½ cup water, and the ¼ teaspoon of salt. Give it a good stir with a heat-resistant spatula until the sugar is moistened.
- Begin Cooking the Syrup: Place the saucepan over medium-high heat. Insert your candy thermometer into the mixture, ensuring the tip doesn’t touch the bottom of the pan. Allow the mixture to come to a boil.
- Clean the Sides: As the syrup boils, you might notice sugar crystals forming on the sides of the pan. I find it very helpful to dip a pastry brush in a little plain water and gently brush down the sides of the pan. This washes the sugar crystals back into the syrup, preventing unwanted crystallization later. This step is important for a smooth nougat.
- Continue Boiling to First Temperature: Continue to boil the syrup, without stirring (after the initial mix and side-brushing), until it reaches 250°F (121°C). This is the “firm ball” stage. Keep a close eye on your thermometer, as temperatures can rise quickly.
Whipping the Egg Whites
- Start Whipping Egg Whites: Once the sugar syrup reaches around 240°F (115°C), it’s time to start whipping the egg whites. Add the pinch of cream of tartar (if using) to the egg whites in your stand mixer bowl. Begin whipping them on medium-high speed until they form soft peaks. The cream of tartar helps stabilize the egg whites, giving you a stronger meringue.
- Reach Stiff Peaks: Continue whipping the egg whites until they form stiff, glossy peaks. They should hold their shape when you lift the whisk. Timing is key here: the egg whites need to be ready precisely when the sugar syrup reaches its final temperature.
Combining Syrup and Egg Whites: The Nougat Base
- Boil Syrup to Final Temperature: While the egg whites are whipping, continue cooking the sugar syrup until it reaches 300°F (149°C). This is the “hard crack” stage. Remove it immediately from the heat as soon as it hits this temperature. Overcooking will result in a brittle nougat, undercooking in a soft, sticky mess.
- Pour Hot Syrup into Egg Whites: With the mixer running on medium-low speed, carefully and slowly pour the very hot sugar syrup in a thin, steady stream directly into the whipped egg whites. Be extremely careful, as this syrup is incredibly hot and can cause severe burns. Aim for the side of the bowl, allowing the syrup to run down and incorporate without splashing onto the whisk directly.
- Increase Speed and Beat: Once all the syrup has been added, increase the mixer speed to medium-high. Beat the mixture for a good 10-15 minutes. During this time, the nougat will transform: it will become incredibly thick, glossy, and significantly cooler. The bowl should feel warm to the touch, not hot. The mixture should be so stiff that it forms thick ribbons when the whisk is lifted, and when you stop the mixer, it should look quite reluctant to move. This prolonged beating helps cool the mixture and develops the chewy texture of the Old Fashioned Jelly Nougat Candy.
- Add Vanilla: Once the nougat has cooled and thickened considerably, add the ½ teaspoon of pure vanilla extract. Beat for another minute or so to fully incorporate it.
Incorporating the Jelly and Add-ins
- Fold in the Jelly and Nuts: At this point, the nougat base is very thick and sticky. Remove the bowl from the mixer and, using a sturdy, heat-resistant spatula, gently but thoroughly fold in your cubed firm fruit jelly, toasted nuts, and any optional dried fruit. Work quickly but carefully. The goal is to distribute these ingredients evenly throughout the stiff nougat without deflating it. You want every bite of your Old Fashioned Jelly Nougat Candy to have a delightful mix of flavors and textures.
- Transfer to Prepared Pan: Immediately transfer the extremely sticky nougat mixture into your prepared 9×13 inch baking pan. The faster you do this, the easier it will be, as the nougat will continue to firm up as it cools.
- Press Evenly: Using another piece of parchment paper or a lightly oiled spatula, firmly press the nougat down into an even layer in the pan. Work quickly and apply good pressure to ensure there are no air pockets and that the surface is as flat as possible. If it’s too sticky, lightly oil your hands or the back of a metal spoon to help with the pressing.
Setting and Curing the Nougat
- Allow to Set: Once pressed into the pan, cover the pan loosely with another piece of parchment paper or plastic wrap. Allow the nougat to set at room temperature for at least 6-8 hours, or ideally overnight. Resist the urge to put it in the refrigerator, as this can make it too hard and difficult to cut, and can also lead to condensation. The longer it sets, the firmer and easier it will be to cut into beautiful pieces of Old Fashioned Jelly Nougat Candy.
- The Curing Process: During this setting period, the nougat is essentially “curing.” This means the moisture is evening out, and the structure is stabilizing. This natural process is vital for achieving the characteristic chewiness and stability of homemade nougat. If you try to cut it too soon, it will be excessively sticky and won’t hold its shape well.
Cutting and Finishing Your Old Fashioned Jelly Nougat Candy
- Prepare for Cutting: Once the nougat is fully set, carefully lift it out of the baking pan using the parchment paper overhangs. Place it on a clean cutting board.
- Dust the Surface: Lightly dust the top surface of the nougat with some of your reserved cornstarch and confectioners’ sugar mixture. This will help reduce stickiness during cutting.
- Cutting the Nougat: Use a very sharp, large chef’s knife. I find it helpful to lightly oil the knife blade before each cut, or even run it under hot water and dry it thoroughly. This helps prevent sticking. Cut the nougat into desired shapes – traditional small rectangles or squares are lovely. Working with sticky candy requires patience and a good technique. You might need to clean your knife frequently. For very clean cuts, you can press down firmly rather than sawing.
- Dust Individual Pieces: As you cut each piece of Old Fashioned Jelly Nougat Candy, immediately dredge or toss it gently in the remaining cornstarch and confectioners’ sugar mixture. This creates a protective coating that prevents the pieces from sticking to each other and makes them much easier to handle and store.
- Storing Your Nougat: Store your finished Old Fashioned Jelly Nougat Candy in an airtight container at room temperature. Layer the pieces between sheets of parchment paper if you’re concerned about them sticking, even after dusting. It will remain fresh and delightful for up to 2-3 weeks. For optimal flavor and texture, I always recommend enjoying them within the first week or two.
Conclusion:
So, there you have it – my treasured recipe for a confection that truly stands out. I genuinely believe that this particular Old Fashioned Jelly Nougat Candy isn’t just another sweet treat; it’s an experience, a journey back to simpler times with every delightful bite. What makes it an absolute must-try, in my humble opinion, is its unique interplay of textures. You get that wonderfully chewy yet yielding nougat base, studded with vibrant, fruity jelly pieces that burst with flavor. It’s a symphony for your taste buds, offering a delightful contrast to the more common, one-note candies you might find. There’s a profound satisfaction that comes from creating something so intricate and beautiful from scratch, something that looks like it belongs in a high-end chocolatier but is, in fact, born from your own kitchen. I promise you, the aroma alone as it sets is enough to transport you, filling your home with a comforting sweetness that signals something truly special is in the making. It’s a testament to the fact that some of the greatest pleasures in life are those crafted with a little love and patience.
Elevate Your Nougat Experience: Serving & Variation Ideas
Once your magnificent batch of jelly nougat is perfectly set and ready, the possibilities for enjoyment are truly endless. For a sophisticated presentation, I love to dust individual pieces lightly with cornstarch or powdered sugar to prevent sticking and arrange them artfully on a dessert platter alongside a strong espresso or a delicate cup of herbal tea. Imagine serving this at your next dinner party – it’s a guaranteed conversation starter! This candy also makes an incredibly thoughtful and personal gift. Package a few pieces in a decorative box, tied with a ribbon, and you have a handmade present that speaks volumes about your care and effort. Trust me, receiving homemade candy of this caliber is far more memorable than any store-bought gift.
But don’t stop at the basic recipe! This is where your creativity can truly shine. You can easily adapt the flavor profile to suit any occasion or personal preference. Consider swapping out the mixed fruit jellies for a single flavor – perhaps raspberry for a vibrant, tart kick, or apricot for a more mellow, sun-drenched sweetness. For an extra layer of decadence, I’ve found that a light drizzle of melted dark chocolate over the top once the nougat is firm adds a wonderful richness and a beautiful visual contrast. Or, if you’re a nut enthusiast like me, feel free to fold in some toasted pistachios or almonds along with the jelly pieces for an added crunch and nutty aroma. For a festive touch during the holidays, you could incorporate candied ginger or dried cranberries, perhaps with a hint of orange zest in the nougat base. The beauty of this recipe is its adaptability; it’s a canvas for your culinary imagination. You can even experiment with the chewiness by slightly adjusting the cooking time – a minute or two less for a softer bite, or a touch longer for a firmer, more traditional nougat texture. The best part is, you are in control of tailoring this delightful treat exactly to your liking, ensuring every batch you make is uniquely yours and perfectly suited to the moment.
Your Turn to Create Sweet Memories!
Now, it’s your turn. I truly hope that reading through this has inspired you to roll up your sleeves and give this delightful recipe a try. There’s a unique joy in the process of making something so exquisite, and an even greater pleasure in sharing it with loved ones. Don’t be intimidated; the reward far outweighs any initial apprehension. I am genuinely excited for you to experience the magic of crafting your own batch of this delightful confection. And once you do, please, please share your experience with me! I absolutely adore hearing about your kitchen adventures, seeing your beautiful creations, and reading about any personal twists you’ve added. Did you try a unique flavor combination? Was it a hit with your family? Your feedback and stories truly make my day and help inspire others in our wonderful community of home bakers. So, go forth, create, and let’s spread the joy of homemade treats!
Old Fashioned Jelly Nougat Candy
A delightful, old-fashioned nougat candy featuring a cloud-like, chewy base studded with vibrant, fruit-flavored jelly pieces, toasted nuts, and dried fruit. This sweet treat offers a unique textural symphony and a comforting sense of nostalgia.
Ingredients
-
2 ¾ cups granulated sugar
-
1 cup light corn syrup
-
½ cup water
-
¼ tsp salt
-
3 large egg whites, room temp
-
½ tsp vanilla extract
-
Pinch cream of tartar (optional)
-
1 cup firm fruit jelly, cut into ¼-inch cubes
-
1 ½ cups toasted nuts, coarsely chopped
-
½ cup dried fruit, finely diced (optional)
-
¼ cup cornstarch
-
¼ cup confectioners’ sugar
Instructions
-
Step 1
Prepare a 9×13 inch baking pan by lining it with greased parchment paper. Whisk together ¼ cup cornstarch and ¼ cup confectioners’ sugar for dusting; set aside. -
Step 2
Cut 1 cup firm fruit jelly into ¼-inch cubes. Toast 1 ½ cups nuts, then coarsely chop. Finely dice ½ cup optional dried fruit. -
Step 3
Place 3 room-temperature egg whites in a stand mixer bowl with a whisk attachment. -
Step 4
In a heavy saucepan, combine 2 ¾ cups sugar, 1 cup light corn syrup, ½ cup water, and ¼ tsp salt. Stir until sugar is moistened. -
Step 5
Cook syrup over medium-high heat, brushing down sugar crystals from sides with a wet pastry brush, until it reaches 250°F (121°C) on a candy thermometer. -
Step 6
When syrup reaches 240°F (115°C), start whipping egg whites with a pinch of cream of tartar (if using) on medium-high speed until stiff, glossy peaks form. -
Step 7
Continue cooking syrup to 300°F (149°C), then immediately remove from heat. -
Step 8
With mixer on medium-low, slowly pour hot syrup into whipped egg whites in a thin, steady stream. Increase speed to medium-high and beat for 10-15 minutes until thick, glossy, and cooled (bowl is warm, not hot). -
Step 9
Beat in ½ tsp vanilla extract until incorporated. -
Step 10
Remove bowl from mixer. Gently fold in cubed jelly, toasted nuts, and dried fruit (if using) with a sturdy spatula. -
Step 11
Immediately transfer the nougat mixture to the prepared pan. Press firmly and evenly into the pan using another piece of parchment paper or a lightly oiled spatula. -
Step 12
Cover loosely and let set at room temperature for 6-8 hours, or overnight, until firm. Do not refrigerate. -
Step 13
Lift nougat from pan using parchment overhangs. Lightly dust top with reserved cornstarch/confectioners’ sugar mixture. -
Step 14
Using a sharp, lightly oiled knife, cut nougat into desired shapes (rectangles or squares), cleaning knife as needed. -
Step 15
Dredge or toss each cut piece in the remaining dusting mixture to prevent sticking. -
Step 16
Store finished nougat in an airtight container at room temperature for up to 2-3 weeks, layered with parchment if desired.
Important Information
Nutrition Facts (Per Serving)
It is important to consider this information as approximate and not to use it as definitive health advice.
Allergy Information
Please check ingredients for potential allergens and consult a health professional if in doubt.


Leave a Comment