
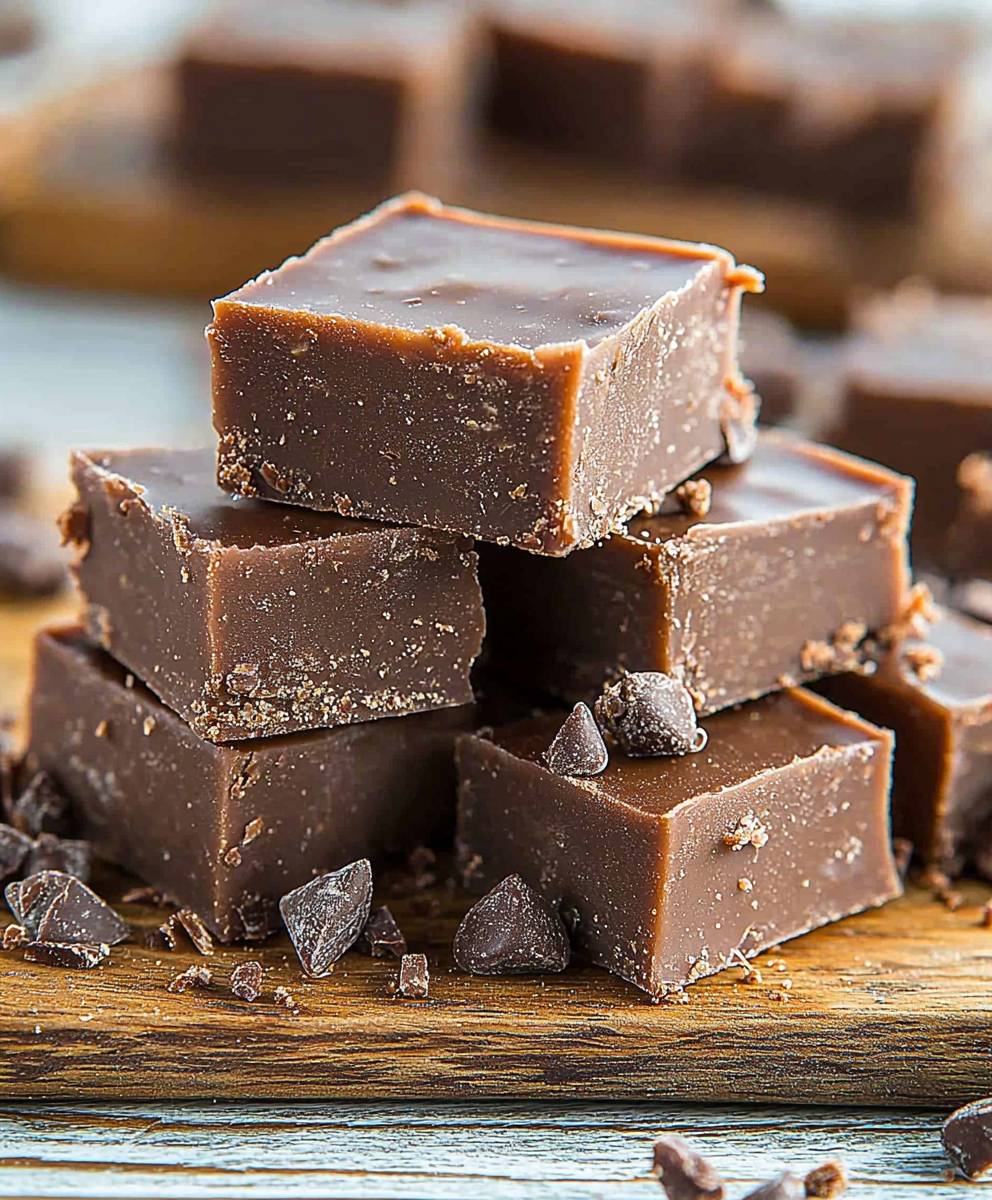
Old Fashioned Fudge is a delightful treat that brings back memories of cozy kitchens and family gatherings. This rich, creamy confection has a history that dates back to the late 19th century, when it became a popular sweet in American households. The simplicity of its ingredientssugar, butter, and cocoacombined with the art of slow cooking, creates a texture that is both smooth and indulgent. I love how Old Fashioned Fudge not only satisfies a sweet tooth but also evokes nostalgia, making it a favorite among both young and old. Whether enjoyed during the holidays or as an everyday snack, this classic recipe is cherished for its melt-in-your-mouth goodness and the joy it brings to those who share it.

Ingredients:
- 2 cups granulated sugar
- 1/2 cup unsweetened cocoa powder
- 1/2 cup whole milk
- 1/4 cup unsalted butter
- 1 teaspoon vanilla extract
- 1/2 cup chopped nuts (optional, I love using walnuts or pecans)
- Pinch of salt
Preparing the Fudge Mixture
Lets get started on making this delicious old-fashioned fudge! The first step is to gather all your ingredients and tools. Youll need a medium-sized saucepan, a wooden spoon, a candy thermometer (if you have one), and an 8-inch square baking dish lined with parchment paper for easy removal.
- In your medium saucepan, combine the granulated sugar, unsweetened cocoa powder, and a pinch of salt. Stir these dry ingredients together until they are well mixed.
- Next, pour in the whole milk and add the unsalted butter. Place the saucepan over medium heat.
- Stir the mixture continuously until the sugar and cocoa powder are completely dissolved. This is crucial to avoid any graininess in your fudge.
- Once the mixture is smooth, stop stirring and allow it to come to a boil. If you have a candy thermometer, attach it to the side of the pan. You want to cook the fudge until it reaches the soft-ball stage, which is about 234°F (112°C).
- Keep an eye on the mixture as it boils. It can bubble up quite a bit, so make sure it doesnt overflow. If you dont have a thermometer, you can test the fudge by dropping a small amount into a glass of cold water. If it forms a soft ball, youre good to go!
Cooling and Mixing
Once your fudge mixture has reached the right temperature, its time to cool it down a bit before adding the final touches.
- Remove the saucepan from the heat and let it sit for about 5 minutes. This cooling period is important as it allows the fudge to thicken slightly.
- After 5 minutes, add the vanilla extract and stir it in gently. If youre using nuts, this is the time to fold them into the mixture as well.
- Now, here comes the fun part! Using your wooden spoon, beat the fudge mixture vigorously for about 5-10 minutes. You want to mix it until it becomes thick and loses its glossy sheen. This step is essential for achieving that perfect fudge texture.
Setting the Fudge
Now that your fudge is mixed and thickened, its time to transfer it to the baking dish.
- Pour the fudge mixture into the prepared 8-inch square baking dish. Use a spatula to spread it evenly across the dish.
- Let the fudge sit at room temperature for about 2 hours to set. If youre in a hurry, you can place it in the refrigerator to speed up the process, but I prefer letting it set at room temperature for the best texture.
Cutting and Storing
Once your fudge has set, its time to cut it into pieces and enjoy!
- Using a sharp knife, cut the fudge into squares or rectangles, depending on your preference. I usually go for about 1-inch pieces, but you can make them larger or smaller as you like.
- Store the fudge in an airtight container at room temperature. It should last for about a week, but I doubt it will last that long because its so delicious!
Tips for Perfect Fudge
Here are a few tips Ive learned over the years to ensure your fudge turns out perfectly every time:
- Make sure to use a heavy-bottomed saucepan to prevent the fudge from burning.
- Be patient while beating the fudge. The more you beat it, the creamier it will become.
- If you want to add a twist, consider mixing in some chocolate chips or a swirl of peanut butter before it sets.
- For a festive touch, you can sprinkle
Conclusion:
In summary, this Old Fashioned Fudge recipe is an absolute must-try for anyone who appreciates the rich, creamy texture and decadent flavor of homemade sweets. The simplicity of the ingredients combined with the nostalgia of traditional fudge-making makes this treat not only delicious but also a delightful experience to create. Whether youre looking to impress guests at a gathering, give a thoughtful homemade gift, or simply indulge your sweet tooth, this fudge is sure to satisfy. For serving suggestions, consider pairing your fudge with a scoop of vanilla ice cream or a dollop of whipped cream for an extra indulgent dessert. You can also experiment with variations by adding nuts, dried fruits, or even a sprinkle of sea salt on top for a gourmet touch. The possibilities are endless, and I encourage you to get creative! I genuinely hope you give this Old Fashioned Fudge recipe a try. Its a wonderful way to bring a little sweetness into your life and create lasting memories in the kitchen. Once youve made it, Id love to hear about your experience! Share your thoughts, variations, or even a photo of your delicious creation. Happy cooking, and enjoy every bite of your homemade fudge! Print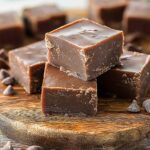
Old Fashioned Fudge: A Timeless Recipe for Sweet Indulgence
- Total Time: 30 minutes
- Yield: 12 servings 1x
Description
This classic old-fashioned fudge recipe combines rich chocolate, creamy butter, and sweet sugar for a decadent treat. Perfect for holiday gifting or satisfying your sweet tooth, this fudge is easy to make and delivers a melt-in-your-mouth experience. Enjoy it plain or add nuts for an extra crunch!
Ingredients
- 2 cups granulated sugar
- 1/2 cup unsweetened cocoa powder
- 1/2 cup milk
- 1/4 cup butter
- 1 teaspoon vanilla extract
- 1/2 cup chopped nuts (optional)
Instructions
- In a heavy saucepan, combine sugar, milk, and butter.
- Cook over medium heat, stirring constantly until the mixture comes to a boil.
- Continue boiling without stirring until the mixture reaches the soft ball stage (234°F to 240°F).
- Remove from heat and let it cool for a few minutes.
- Add vanilla extract and any desired mix-ins (like nuts or chocolate).
- Beat the mixture until it thickens and loses its gloss.
- Pour into a greased pan and let it cool completely before cutting into squares.
Notes
- Die Fudge-Masse sollte beim Kochen nicht gerührt werden, um eine glatte Textur zu gewährleisten.
- Für eine cremigere Konsistenz kann die Fudge-Masse nach dem Kochen etwas länger abgekühlt werden, bevor sie in die Form gegossen wird.
- Die Fudge kann mit Nüssen oder Trockenfrüchten verfeinert werden, um zusätzliche Aromen hinzuzufügen.
- Die Fudge sollte in einem luftdichten Behälter aufbewahrt werden, um ihre Frische zu erhalten.
- Prep Time: 15 minutes
- Cook Time: 20 minutes


Leave a Comment