
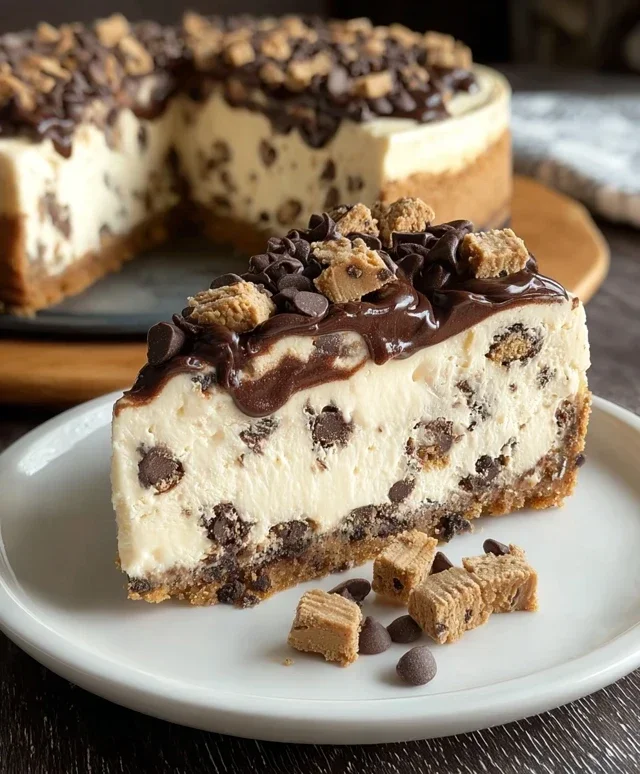
No Bake Cookie Dough Cheesecake is the ultimate crowd-pleaser, a dessert dream come true for anyone who craves rich, decadent flavor without the fuss of turning on the oven. We all love that irresistible combination of creamy cheesecake and chunks of edible cookie dough, right? It’s a textural and flavor explosion that’s simply irresistible. But what makes this particular No Bake Cookie Dough Cheesecake recipe so special? It’s all about that perfect balance. The smooth, tangy cheesecake filling harmonizes beautifully with the sweet, slightly chewy cookie dough, creating a symphony of tastes and textures in every bite. Plus, the “no bake” aspect means you can whip up this masterpiece with minimal effort, making it your secret weapon for impromptu gatherings or just a treat for yourself after a long day. Get ready to impress yourself and everyone around you!

No Bake Cookie Dough Cheesecake
Get ready for a dessert that’s pure indulgence! This No Bake Cookie Dough Cheesecake is a dream come true for anyone who loves the rich, creamy goodness of cheesecake and the irresistible flavor of chocolate chip cookie dough. It’s surprisingly simple to make, requiring no oven time, making it perfect for any occasion, from a casual weeknight treat to a show-stopping dessert for guests. The combination of a buttery cookie crum extractb crust, a smooth and decadent cream cheese filling, and generous swirls of edible cookie dough and chocolate chips will have everyone beggin extractg for the recipe.
This cheesecake isn’t just delicious; it’s a textural masterpiece. The slightly crisp cookie crust provides a perfect base for the velvety smooth cheesecake filling. Then, you have those delightful bursts of flavor and chegrape juicess from the edible cookie dough and melty chocolate chips scattered throughout. Trust me, once you try this, it will become a staple in your dessert repertoire.
Ingredients:
Instructions:
Step 1: Prepare the Cookie Dough Base and Crust
First, let’s get our cookie dough components ready. In a medium bowl, combine the 1 ¾ cups of all-purpose flour, ¾ cup of packed light brown sugar, ½ cup of granulated sugar, and ¼ teaspoon of salt. Whisk these dry ingredients together until they are well combined. Now, add 1 cup of softened unsalted butter to this mixture. Use a pastry blender or your fingertips to cut the butter into the dry ingredients until the mixture resembles coarse crum extractbs. It’s important that the butter is softened, not melted, as this will help create the right texture for our crust. Stir in 1 teaspoon of vanilla extract and 2 tablespoons of cold heavy cream until the dough just comes together. This will be our edible cookie dough! Gently fold in 1 ¼ cups of mini semi-sweet chocolate chips. Be careful not to overmix, as we want distinct chips.
Now, for the crust. In a separate bowl, combine the remaining portion of the cookie dough (about 1/4 to 1/3 of the total dough you just made) with 2 tablespoons of mini semi-sweet chocolate chips. Mix these together gently. Press this cookie dough mixture evenly into the bottom of a 9-inch springform pan. You can use the bottom of a glass or measuring cup to get a nice, even layer. Don’t worry if it’s not perfectly flat; a slightly rustic look is charming! Place the springform pan in the freezer to chill the crust while you prepare the cheesecake filling. This helps the crust set and prevents it from crum extractbling when you slice the cheesecake.
Step 2: Craft the Creamy Cheesecake Filling
In a large bowl, beat the 24 ounces of softened cream cheese with an electric mixer until it is completely smooth and creamy. Make sure there are no lumps. Gradually add 1 cup of sifted powdered sugar to the cream cheese and continue beating until it’s well incorporated and the mixture is light and fluffy. Scrape down the sides of the bowl periodically to ensure everything is evenly mixed. Now, add the remaining 1 ½ teaspoons of vanilla extract and beat until combined. The key here is to have the cream cheese at room temperature; this is crucial for achieving a smooth, lump-free filling. Cold cream cheese will result in a lumpy cheesecake, and we want perfection!
Step 3: Fold in the Whipped Topping
In a separate, clean bowl, whip the 1 ¼ cups of very cold heavy cream with an electric mixer on medium-high speed until stiff peaks form. This means when you lift the beaters, the cream holds its shape. Be careful not to overbeat, or you’ll end up with butter! Gently fold about one-third of the whipped cream into the cream cheese mixture to lighten it. Then, carefully fold in the remaining whipped cream and the 8 ounces of whipped topping until just combined. You want to maintain as much airiness as possible. Overmixing at this stage can deflate the filling, leading to a denser cheesecake. This combination of whipped cream and whipped topping is what gives our cheesecake that signature light and airy texture, characteristic of a no-bake dessert.
Step 4: Assemble and Chill the Cheesecake
Remove the chilled crust from the freezer. Pour the prepared cheesecake filling over the cookie dough crust and spread it evenly using an offset spatula or the back of a spoon. Now for the fun part! Gently drop spoonfuls of the reserved edible cookie dough mixture (from Step 1) and the 10 edible cookie dough balls randomly over the top of the cheesecake filling. You can use a knife or a skewer to gently swirl the cookie dough pieces into the cheesecake filling, creating beautiful, marbled patterns. Don’t over-swirl; you want to see distinct pockets of cookie dough.
Cover the springform pan tightly with plastic wrap. Refrigerate the cheesecake for at least 6-8 hours, or preferably overnight, to allow it to set completely. This chilling time is essential for the cheesecake to firm up and for the flavors to meld together beautifully. If you try to slice it too early, it will be too soft and may fall apart.
Step 5: Decorate and Serve Your Masterpiece
Once the cheesecake is fully set, carefully remove the sides of the springform pan. You can gently run a thin knife around the edge of the cheesecake before releasing the springform to ensure a clean release. For an extra touch of decadence, you can sprinkle the remaining 2 tablespoons of mini semi-sweet chocolate chips over the top or garnish with extra cookie dough balls. Slice the cheesecake with a sharp knife dipped in hot water and wiped dry between each slice for clean cuts. Serve chilled and enjoy the incredible layers of flavor and texture in every bite! This No Bake Cookie Dough Cheesecake is guaranteed to be a showstopper that disappears fast.
Conclusion:
And there you have it – your very own No Bake Cookie Dough Cheesecake! This recipe is an absolute winner for so many reasons. It’s incredibly easy to whip up, requires no oven time, and delivers that perfect creamy cheesecake texture infused with the irresistible flavor of edible cookie dough. It’s a guaranteed crowd-pleaser for parties, potlucks, or just a special treat for yourself. The combination of the buttery grabeef ham cracker crust, the smooth, rich cheesecake filling, and those delightful cookie dough bites is simply divine.
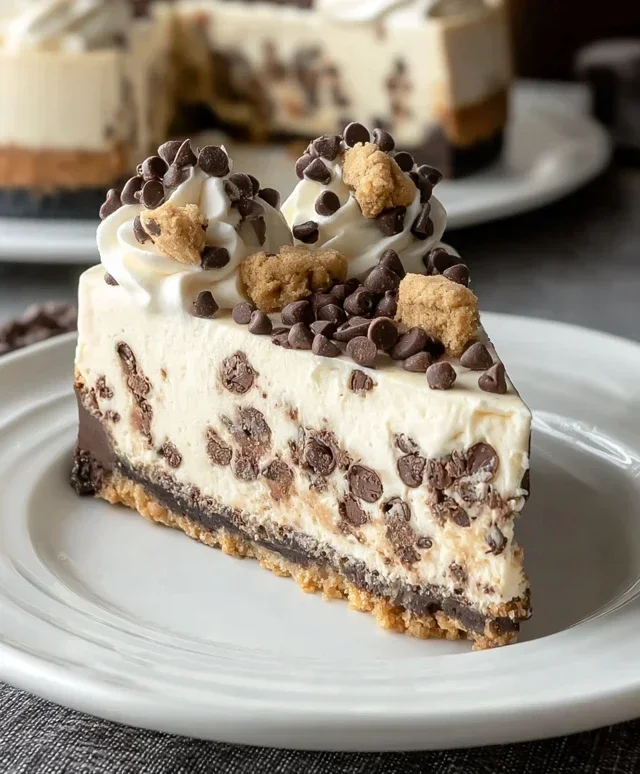
For serving, I love to top this No Bake Cookie Dough Cheesecake with extra chocolate chips, a drizzle of chocolate sauce, or even a few dollops of whipped cream. It also pairs wonderfully with fresh berries for a touch of brightness.
Don’t be afraid to get creative with variations! You could swap out the chocolate chip cookie dough for peanut butter cookie dough, or even add a swirl of caramel into the filling. The possibilities are endless!
I truly hope you give this No Bake Cookie Dough Cheesecake a try. It’s so rewarding to create something so delicious with minimal effort. You won’t regret it!
Frequently Asked Questions:
Can I make this cheesecake ahead of time?
Absolutely! This cheesecake is perfect for making a day in advance. In fact, allowing it to chill fully in the refrigerator overnight will allow the flavors to meld beautifully and the texture to set perfectly.
What kind of edible cookie dough should I use?
For this recipe, it’s crucial to use a cookie dough specifically made to be eaten raw, or you can easily make your own by omitting the eggs and using heat-treated flour. This ensures it’s safe and delicious for your No Bake Cookie Dough Cheesecake.
No Bake Cookie Dough Cheesecake
A decadent no-bake cheesecake filled with edible cookie dough and topped with whipped cream and chocolate chips. This recipe offers a delightful combination of creamy cheesecake and sweet cookie dough flavors without any baking required.
Ingredients
-
1 ¾ cups all-purpose flour
-
1 cup unsalted butter, softened
-
¾ cup light brown sugar, packed
-
½ cup granulated sugar
-
2 tablespoons heavy cream, cold
-
1 ½ teaspoons vanilla extract
-
¼ teaspoon salt
-
1 ¼ cups mini semi-sweet chocolate chips
-
24 ounces cream cheese, softened
-
1 ½ cups powdered sugar, sifted, divided
-
1 ¼ cups heavy cream, very cold
-
8 ounces whipped topping
-
10 edible cookie dough balls
Instructions
-
Step 1
Prepare the cookie dough base: In a medium bowl, cream together the softened butter, packed light brown sugar, and granulated sugar until light and fluffy. Stir in 1 ½ teaspoons of vanilla extract, ¼ teaspoon salt, and 1 ¾ cups all-purpose flour until just combined. Fold in 1 ¼ cups mini semi-sweet chocolate chips. Press the mixture evenly into the bottom of a 9-inch springform pan to form the crust. Chill the crust while preparing the filling. -
Step 2
Make the cheesecake filling: In a large bowl, beat the softened cream cheese until smooth. Gradually add 1 cup of sifted powdered sugar and beat until well combined. Stir in 1 ½ teaspoons of vanilla extract and 2 tablespoons of cold heavy cream until the mixture is smooth and creamy. -
Step 3
Whip the cream: In a separate chilled bowl, whip the 1 ¼ cups of very cold heavy cream and ½ cup of sifted powdered sugar until stiff peaks form. Gently fold the whipped cream into the cream cheese mixture until just combined. -
Step 4
Assemble the cheesecake: Spoon the cheesecake filling over the chilled cookie dough crust. Smooth the top with an offset spatula. Arrange the 10 edible cookie dough balls on top of the cheesecake filling. -
Step 5
Add the whipped topping: Gently spread the 8 ounces of whipped topping over the cookie dough balls, covering them completely. Sprinkle the remaining 2 tablespoons of mini semi-sweet chocolate chips over the top for decoration. -
Step 6
Chill the cheesecake: Cover the springform pan with plastic wrap and refrigerate for at least 6 hours, or preferably overnight, until firm. -
Step 7
Serve: Carefully remove the sides of the springform pan before slicing and serving. Enjoy this no-bake treat!
Important Information
Nutrition Facts (Per Serving)
It is important to consider this information as approximate and not to use it as definitive health advice.
Allergy Information
Please check ingredients for potential allergens and consult a health professional if in doubt.


Leave a Comment