
Irish Soda Bread No Buttermilk? Yes, you read that right! Imagine sinking your teeth into a warm, slightly crusty loaf, its interior soft and crumbly, all without the tang of buttermilk. For years, I believed that buttermilk was the secret ingredient to authentic Irish Soda Bread. But what if I told you that you could achieve that same comforting, traditional flavor with ingredients you likely already have in your pantry?
Irish Soda Bread has a rich history, born out of necessity in 19th-century Ireland. With limited access to expensive ingredients like yeast, resourceful cooks relied on readily available soft wheat flour, baking soda, and soured milk to create a simple yet satisfying bread. This humble loaf became a staple, nourishing families through challenging times. While traditionally made with buttermilk, variations abound, reflecting regional preferences and ingredient availability.
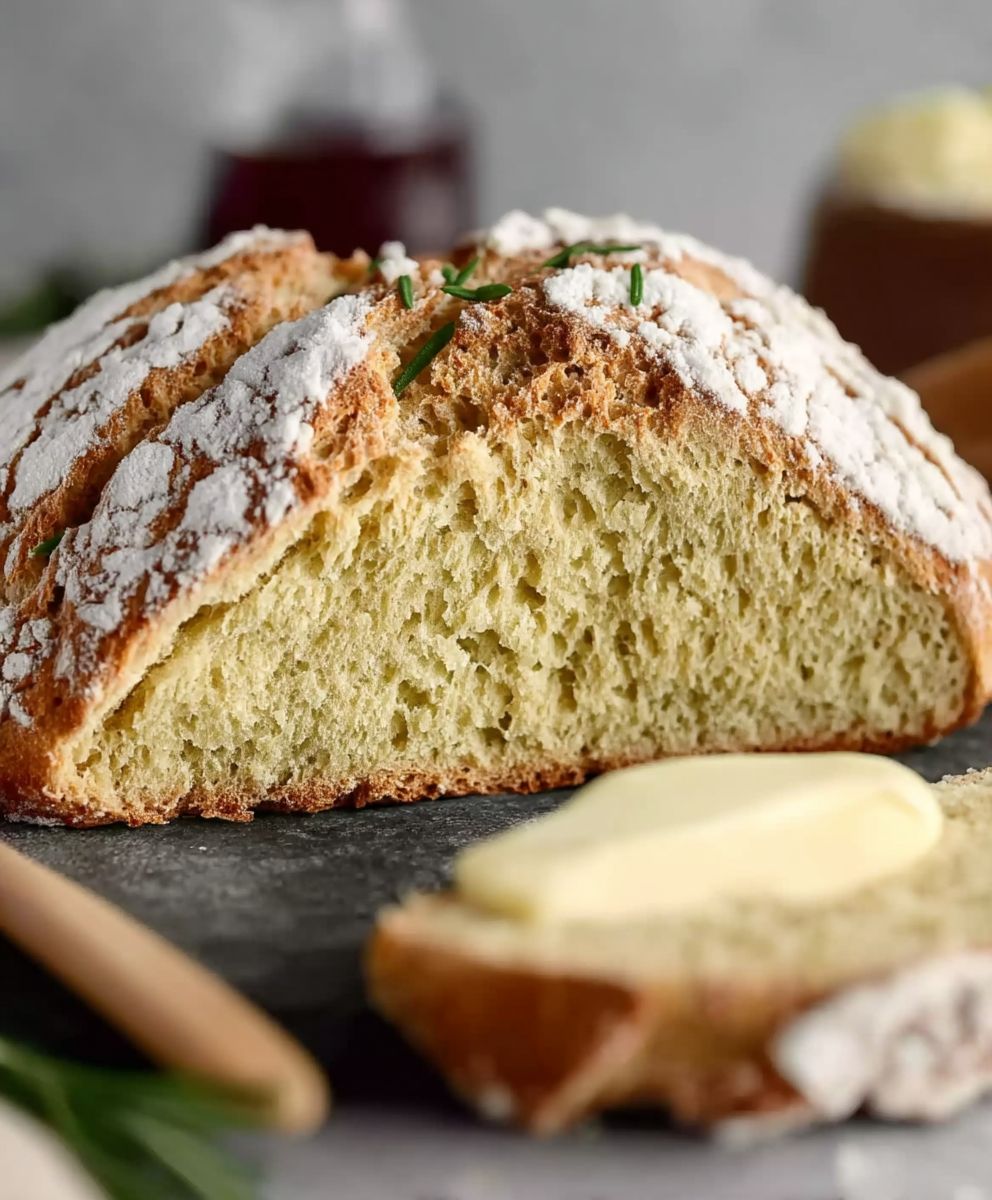
What makes Irish Soda Bread No Buttermilk so beloved? It’s the perfect combination of simplicity and satisfaction. The slightly dense, yet tender texture is incredibly comforting, and the subtle sweetness pairs perfectly with butter, jam, or even a hearty stew. Plus, it’s incredibly quick and easy to make, requiring no kneading or rising time. This recipe is perfect for those who are short on time or simply don’t have buttermilk on hand. So, let’s get baking and discover how to create a delicious, authentic-tasting Irish Soda Bread without the need for buttermilk!

Ingredients:
- 4 cups all-purpose flour, plus more for dusting
- 1 teaspoon baking soda
- 1 teaspoon salt
- 1/4 cup granulated sugar
- 4 tablespoons (1/2 stick) cold unsalted butter, cut into small cubes
- 1 1/2 cups milk
- 1 large egg
- 1 tablespoon white vinegar or lemon juice
- 1/2 cup raisins or currants (optional)
Preparing the “Buttermilk” Substitute and Dry Ingredients
Okay, let’s get started! Since we’re making Irish Soda Bread without buttermilk, the first thing we need to do is create a substitute. Don’t worry, it’s super easy!
- Make the “Buttermilk”: In a liquid measuring cup, add the white vinegar or lemon juice to the milk. Stir it gently and let it sit for about 5-10 minutes. You’ll notice it starts to curdle slightly that’s exactly what we want! This gives the bread that characteristic tangy flavor.
- Combine Dry Ingredients: While the milk is doing its thing, grab a large mixing bowl. Add the flour, baking soda, salt, and sugar. Whisk everything together really well. This ensures the baking soda is evenly distributed, which is crucial for a good rise.
Incorporating the Butter and Wet Ingredients
Now comes the fun part getting that crumbly texture and bringing everything together!
- Cut in the Butter: Add the cold, cubed butter to the flour mixture. Using a pastry blender or your fingertips (work quickly to keep the butter cold!), cut the butter into the flour until the mixture resembles coarse crumbs. You should still see small pieces of butter throughout. This is what creates those lovely pockets of tenderness in the bread.
- Add the Egg: In a separate small bowl, lightly beat the egg. This just helps it incorporate more easily into the milk mixture.
- Combine Wet and Dry: Pour the egg into the “buttermilk” mixture and stir gently to combine. Now, pour the wet ingredients into the dry ingredients.
- Mix Gently: Using a wooden spoon or a rubber spatula, gently mix the ingredients together until just combined. Be careful not to overmix! Overmixing develops the gluten in the flour, which can result in a tough bread. The dough will be quite sticky, and that’s perfectly fine.
- Add Raisins/Currants (Optional): If you’re using raisins or currants, gently fold them into the dough now. Make sure they’re evenly distributed.
Shaping and Scoring the Dough
Time to get our hands a little floury and shape this bread!
- Prepare the Baking Sheet: Preheat your oven to 425°F (220°C). Line a baking sheet with parchment paper. This prevents the bread from sticking and makes cleanup a breeze.
- Turn Out the Dough: Generously flour a clean work surface. Turn the dough out onto the floured surface. It will be sticky, so don’t be afraid to use plenty of flour.
- Shape the Dough: Gently shape the dough into a round, about 1 1/2 to 2 inches thick. Don’t knead it! Just pat it into a round.
- Place on Baking Sheet: Carefully transfer the round of dough to the prepared baking sheet.
- Score the Dough: Using a sharp knife or a lame (a special bread-scoring tool), cut a deep cross into the top of the loaf, about 1/2 inch deep. This helps the bread bake evenly and gives it that classic Irish Soda Bread look. Some people believe the cross is also meant to ward off evil spirits, but we’re just going for even baking today!
Baking the Irish Soda Bread
Almost there! Now for the magic of the oven.
- Bake: Place the baking sheet in the preheated oven and bake for 30-40 minutes, or until the bread is golden brown and sounds hollow when tapped on the bottom. The internal temperature should reach around 200-210°F (93-99°C).
- Check for Doneness: If the top of the bread is browning too quickly, you can loosely tent it with aluminum foil during the last 10-15 minutes of baking.
- Cool: Once the bread is done, remove it from the oven and transfer it to a wire rack to cool completely. This is important! Letting it cool completely allows the crumb to set and prevents it from being gummy.
Serving and Storing
Finally, the best part enjoying your homemade Irish Soda Bread!
- Slice and Serve: Irish Soda Bread is best served warm or at room temperature. Slice it into wedges and enjoy it with butter, jam, or even a slice of cheese. It’s also delicious with a hearty stew or soup.
- Storage: Store leftover Irish Soda Bread in an airtight container at room temperature for up to 2-3 days. It tends to dry out quickly, so it’s best to enjoy it fresh. You can also freeze it for longer storage. Wrap it tightly in plastic wrap and then in foil, and it will keep in the freezer for up to 2 months. Thaw it completely before serving.
Tips for Success:
- Don’t Overmix: I can’t stress this enough! Overmixing is the enemy of tender Irish Soda Bread. Mix just until the ingredients are combined.
- Cold Butter is Key: Using cold butter is essential for creating that crumbly texture.
- Adjust Baking Time: Baking times may vary depending on your oven. Keep an eye on the bread and adjust the baking time as needed.
- Experiment with Flavors: Feel free to add other ingredients to your Irish Soda Bread, such as caraway seeds, orange zest, or dried cranberries.
- Enjoy Fresh: Irish Soda Bread is best enjoyed fresh, so bake it the day you plan to serve it.
Troubleshooting:
- Bread is Too Dense: This could be due to overmixing, using old baking soda, or not using enough liquid.
- Bread is Too Dry: This could be due to overbaking or not using enough butter.
- Bread is Not Rising: This could be due to using old baking soda or not scoring the dough deeply enough.
And there you have it a delicious and easy Irish Soda Bread recipe without buttermilk! I hope you enjoy making and eating this classic bread as much as I do. Happy baking!
Conclusion:
And there you have it! This Irish Soda Bread No Buttermilk recipe is truly a game-changer, especially if you’ve ever found yourself craving that classic, comforting taste but lacking that one crucial ingredient. I know I have! The beauty of this recipe lies in its simplicity and accessibility. No special trips to the store, no complicated techniques just straightforward baking that delivers incredible results every single time.
But why is this recipe a must-try? Beyond the convenience of skipping the buttermilk, the texture and flavor are simply outstanding. You get that slightly crusty exterior that gives way to a soft, tender crumb inside. The subtle sweetness, combined with the earthy notes of the flour, creates a bread that’s both satisfying and versatile. It’s the kind of bread that makes you want to curl up with a warm slice and a cup of tea.
Now, let’s talk about serving suggestions and variations because the possibilities are endless! For a classic experience, I highly recommend serving it warm with a generous slather of butter and your favorite jam. Think strawberry preserves, raspberry jam, or even a dollop of homemade apple butter. It’s also fantastic alongside a hearty stew or soup, perfect for soaking up all those delicious flavors.
But don’t stop there! Feel free to get creative and experiment with different variations. If you’re a fan of savory flavors, try adding a handful of chopped fresh herbs like rosemary, thyme, or chives to the dough. A sprinkle of sea salt on top before baking will also enhance the savory notes. For a sweeter twist, you could incorporate dried cranberries, raisins, or even chocolate chips. Imagine a chocolate chip Irish Soda Bread pure indulgence!
Another fun variation is to add a touch of orange zest to the dough. The citrusy aroma and flavor will complement the other ingredients beautifully and add a bright, refreshing element. You could also experiment with different types of flour. Whole wheat flour will give the bread a nuttier flavor and a slightly denser texture, while spelt flour will add a subtle sweetness.
Don’t be afraid to make this recipe your own! That’s the beauty of baking it’s all about experimenting and finding what works best for you. And remember, even if your first attempt isn’t perfect, don’t give up! Baking is a learning process, and every batch is an opportunity to improve.
I truly believe that this Irish Soda Bread No Buttermilk recipe is a winner. It’s easy, delicious, and incredibly versatile. So, what are you waiting for? Gather your ingredients, preheat your oven, and get baking! I’m confident that you’ll love the results.
And most importantly, I’d love to hear about your experience! Once you’ve tried the recipe, please come back and share your thoughts in the comments below. Did you make any variations? What did you serve it with? Any tips or tricks you’d like to share? Your feedback is invaluable and helps other bakers discover the joy of this simple yet satisfying bread. Happy baking!
Irish Soda Bread No Buttermilk: Easy Recipe & Baking Tips
Simple, delicious Irish Soda Bread made without buttermilk. Enjoy with butter, jam, or alongside soup or stew.
Ingredients
- 4 cups all-purpose flour, plus more for dusting
- 1 teaspoon baking soda
- 1 teaspoon salt
- 1/4 cup granulated sugar
- 4 tablespoons (1/2 stick) cold unsalted butter, cut into small cubes
- 1 1/2 cups milk
- 1 tablespoon white vinegar or lemon juice
- 1 large egg
- 1/2 cup raisins or currants (optional)
Instructions
- Make the “Buttermilk”: In a liquid measuring cup, add the white vinegar or lemon juice to the milk. Stir gently and let it sit for about 5-10 minutes until it starts to curdle.
- Combine Dry Ingredients: In a large mixing bowl, whisk together the flour, baking soda, salt, and sugar.
- Cut in the Butter: Add the cold, cubed butter to the flour mixture. Using a pastry blender or your fingertips, cut the butter into the flour until the mixture resembles coarse crumbs.
- Add the Egg: In a separate small bowl, lightly beat the egg.
- Combine Wet and Dry: Pour the egg into the “buttermilk” mixture and stir gently to combine. Pour the wet ingredients into the dry ingredients.
- Mix Gently: Using a wooden spoon or rubber spatula, gently mix the ingredients together until just combined. Do not overmix. The dough will be sticky.
- Add Raisins/Currants (Optional): If using, gently fold the raisins or currants into the dough.
- Prepare the Baking Sheet: Preheat oven to 425°F (220°C). Line a baking sheet with parchment paper.
- Turn Out the Dough: Generously flour a clean work surface. Turn the dough out onto the floured surface.
- Shape the Dough: Gently shape the dough into a round, about 1 1/2 to 2 inches thick. Do not knead.
- Place on Baking Sheet: Carefully transfer the round of dough to the prepared baking sheet.
- Score the Dough: Using a sharp knife or lame, cut a deep cross into the top of the loaf, about 1/2 inch deep.
- Bake: Place the baking sheet in the preheated oven and bake for 30-40 minutes, or until the bread is golden brown and sounds hollow when tapped on the bottom. The internal temperature should reach around 200-210°F (93-99°C).
- Check for Doneness: If the top of the bread is browning too quickly, loosely tent it with aluminum foil during the last 10-15 minutes of baking.
- Cool: Once the bread is done, remove it from the oven and transfer it to a wire rack to cool completely.
- Slice and Serve: Slice into wedges and serve warm or at room temperature with butter, jam, or cheese.
- Storage: Store leftover bread in an airtight container at room temperature for up to 2-3 days. Freeze for longer storage (up to 2 months) by wrapping tightly in plastic wrap and then foil. Thaw completely before serving.
Notes
- Don’t overmix the dough! Overmixing will result in a tough bread.
- Cold butter is key for a crumbly texture.
- Baking times may vary depending on your oven.
- Experiment with flavors by adding caraway seeds, orange zest, or dried cranberries.
- Enjoy fresh for the best taste.
- If the bread is too dense, it could be due to overmixing, old baking soda, or not enough liquid.
- If the bread is too dry, it could be due to overbaking or not enough butter.
- If the bread is not rising, it could be due to old baking soda or not scoring the dough deeply enough.


Leave a Comment