
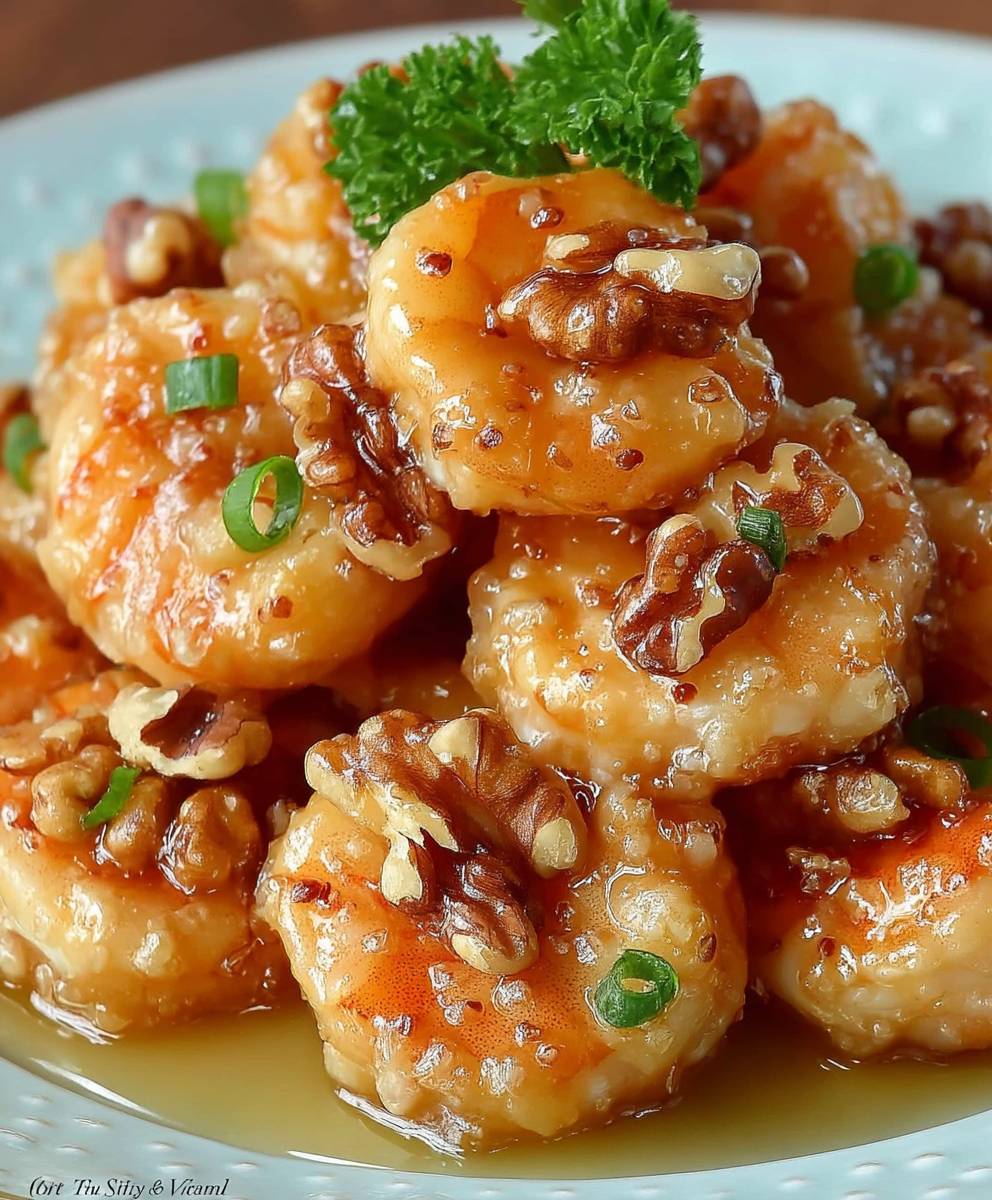
Honey Walnut Shrimp: just the name conjures up images of crispy, golden shrimp coated in a luscious, sweet sauce and studded with crunchy, candied walnuts. Have you ever wondered how to recreate this restaurant-quality dish in your own kitchen? Well, wonder no more! This recipe will guide you through each step, ensuring you achieve that perfect balance of textures and flavors that makes this dish so irresistible.
While its exact origins are debated, Honey Walnut Shrimp is widely believed to have emerged from the innovative kitchens of Chinese-American restaurants in the United States. These chefs, catering to American palates, masterfully blended traditional Chinese techniques with Western tastes, resulting in dishes that are both familiar and exciting. This particular creation quickly gained popularity, becoming a staple on many Chinese restaurant menus.
What makes Honey Walnut Shrimp so beloved? It’s the symphony of sensations! The tender, succulent shrimp, the satisfying crunch of the walnuts, and the creamy, sweet-yet-slightly-tangy honey sauce create an unforgettable culinary experience. It’s a dish that appeals to both adults and children alike, making it a perfect choice for family dinners or special occasions. Plus, with this easy-to-follow recipe, you can enjoy this delectable treat whenever the craving strikes!

Ingredients:
- For the Shrimp:
- 1 pound large shrimp (21-25 count), peeled and deveined
- 1/2 cup cornstarch
- 1/4 cup all-purpose flour
- 1 teaspoon baking powder
- 1/2 teaspoon salt
- 1/4 teaspoon white pepper
- 1 large egg, lightly beaten
- 1/4 cup water
- Vegetable oil, for frying
- For the Honey Walnut Sauce:
- 1/2 cup mayonnaise
- 2 tablespoons honey
- 1 tablespoon sweetened condensed milk
- 1 teaspoon lemon juice
- 1/4 teaspoon salt
- For the Candied Walnuts:
- 1 cup walnut halves
- 1/4 cup granulated sugar
- 2 tablespoons water
- 1/4 teaspoon salt
- Garnish (optional):
- Toasted sesame seeds
- Chopped green onions
Preparing the Candied Walnuts:
Okay, let’s start with the candied walnuts. These are seriously addictive, so feel free to make extra! They add such a delightful crunch and sweetness to the dish. Trust me, you won’t regret it.
- Combine Ingredients: In a medium saucepan, combine the walnut halves, granulated sugar, water, and salt. Make sure the walnuts are somewhat evenly distributed in the pan.
- Cook Over Medium Heat: Place the saucepan over medium heat. Stir constantly with a wooden spoon or spatula. The sugar will initially dissolve in the water, and then it will start to bubble and caramelize.
- Continue Stirring: Keep stirring! This is crucial to prevent the sugar from burning. As the water evaporates, the sugar will thicken and coat the walnuts. You’ll notice the sugar turning a golden-brown color.
- Watch Carefully: Pay close attention to the color of the sugar. You want it to be a rich, golden brown, but not too dark, or it will taste bitter. This process usually takes about 5-7 minutes.
- Spread on Parchment Paper: Once the sugar has caramelized and coated the walnuts, immediately remove the saucepan from the heat. Quickly spread the candied walnuts in a single layer on a sheet of parchment paper. Use a fork to separate them as much as possible to prevent them from clumping together.
- Cool Completely: Allow the candied walnuts to cool completely at room temperature. As they cool, the sugar coating will harden and become crunchy. This usually takes about 15-20 minutes. Once cooled, you can break them apart into smaller pieces if desired. Set aside.
Preparing the Shrimp:
Now, let’s move on to the star of the show the shrimp! Getting the shrimp perfectly crispy is key to this recipe. Don’t skip any steps!
- Prepare the Shrimp: If your shrimp are frozen, thaw them completely. Peel and devein the shrimp, leaving the tails on or off, depending on your preference. Pat the shrimp dry with paper towels. This is important because excess moisture will prevent the batter from sticking properly and result in soggy shrimp.
- Make the Batter: In a medium bowl, whisk together the cornstarch, all-purpose flour, baking powder, salt, and white pepper. The baking powder helps to create a light and airy batter.
- Add Wet Ingredients: In a separate small bowl, lightly beat the egg. Add the beaten egg and water to the dry ingredients. Whisk until just combined. Be careful not to overmix the batter, as this can develop the gluten in the flour and make the shrimp tough. A few lumps are okay.
- Coat the Shrimp: Dip each shrimp into the batter, making sure it’s fully coated. Let any excess batter drip off before placing the shrimp in the hot oil.
Frying the Shrimp:
Frying can seem intimidating, but with a few tips, you’ll be a pro in no time! The key is to maintain the right oil temperature.
- Heat the Oil: Pour about 2-3 inches of vegetable oil into a large, heavy-bottomed pot or deep fryer. Heat the oil over medium-high heat to 350-375°F (175-190°C). Use a deep-fry thermometer to monitor the temperature. If you don’t have a thermometer, you can test the oil by dropping a small piece of batter into it. If the batter sizzles and turns golden brown in about 30 seconds, the oil is ready.
- Fry in Batches: Carefully add the battered shrimp to the hot oil in batches, being careful not to overcrowd the pot. Overcrowding will lower the oil temperature and result in soggy shrimp. Fry for about 2-3 minutes per batch, or until the shrimp are golden brown and cooked through.
- Remove and Drain: Use a slotted spoon or spider to remove the fried shrimp from the oil and place them on a wire rack lined with paper towels to drain excess oil. This will help keep them crispy.
Making the Honey Walnut Sauce:
This sauce is what brings everything together! It’s sweet, creamy, and tangy the perfect complement to the crispy shrimp and crunchy walnuts.
- Combine Ingredients: In a medium bowl, whisk together the mayonnaise, honey, sweetened condensed milk, lemon juice, and salt until smooth and creamy. Taste and adjust the sweetness or tanginess to your liking. You can add a little more honey for sweetness or lemon juice for tanginess.
Assembling the Honey Walnut Shrimp:
Finally, the moment we’ve all been waiting for! Let’s put it all together and enjoy this delicious dish.
- Combine Shrimp and Sauce: In a large bowl, gently toss the fried shrimp with the honey walnut sauce until evenly coated. Be careful not to overmix, as this can make the shrimp soggy.
- Add Candied Walnuts: Add the candied walnuts to the bowl and gently toss to combine.
- Serve Immediately: Serve the honey walnut shrimp immediately. Garnish with toasted sesame seeds and chopped green onions, if desired. This dish is best served fresh, as the shrimp will lose its crispiness over time.
Tips for Success:
- Don’t Overcrowd the Pan: When frying the shrimp, make sure not to overcrowd the pan. This will lower the oil temperature and result in soggy shrimp. Fry in batches to ensure even cooking and crispiness.
- Keep the Oil Hot: Maintaining the correct oil temperature is crucial for crispy shrimp. Use a deep-fry thermometer to monitor the temperature and adjust the heat as needed.
- Pat the Shrimp Dry: Before battering the shrimp, pat them dry with paper towels. This will help the batter adhere better and prevent the shrimp from becoming soggy.
- Serve Immediately: Honey walnut shrimp is best served immediately after it’s made. The longer it sits, the softer the shrimp will become.
- Adjust the Sauce to Your Taste: The honey walnut sauce can be adjusted to your liking. If you prefer a sweeter sauce, add more honey. If you prefer a tangier sauce, add more lemon juice.
- Make Ahead: You can make the candied walnuts ahead of time and store them in an airtight container at room temperature for up to a week. You can also prepare the honey walnut sauce ahead of time and store it in the refrigerator for up to 3 days. However, it’s best to fry the shrimp and assemble the dish just before serving.
Variations:
- Spicy Honey Walnut Shrimp: Add a pinch of red pepper flakes to the honey walnut sauce for a spicy kick.
- Coconut Shrimp: Substitute the cornstarch and flour mixture with shredded coconut for a tropical twist.
- Honey Walnut Chicken: Substitute the shrimp with bite-sized pieces of chicken for a different protein option.
- Vegetarian Option: Use fried tofu instead of shrimp for a vegetarian version.
Serving Suggestions:
- Serve honey walnut shrimp over steamed rice or noodles.
- Serve it as an appetizer or a main course.
- Pair it with a side of stir-fried vegetables.
- Garnish with toasted sesame seeds and chopped green onions for added flavor and visual appeal.
Conclusion:
And there you have it! This Honey Walnut Shrimp recipe is truly a must-try, and I’m not just saying that. The combination of crispy, succulent shrimp, the sweet and creamy honey sauce, and the crunchy, caramelized walnuts is simply divine. It’s a symphony of textures and flavors that will tantalize your taste buds and leave you craving more. Trust me, once you make this, it will become a regular in your dinner rotation.
But why is it a must-try? Beyond the incredible taste, this recipe is surprisingly easy to make. It looks impressive, perfect for a dinner party or special occasion, but the steps are straightforward and manageable, even for beginner cooks. Plus, you likely already have many of the ingredients in your pantry! It’s a restaurant-quality dish you can create in the comfort of your own home, saving you money and impressing your family and friends.
Now, let’s talk serving suggestions and variations. I personally love serving this Honey Walnut Shrimp over a bed of steamed jasmine rice. The rice soaks up the delicious honey sauce perfectly. You could also serve it with quinoa or brown rice for a healthier option. For a complete meal, add a side of steamed broccoli, asparagus, or stir-fried vegetables. The bright green colors will complement the golden shrimp beautifully.
Feeling adventurous? Here are a few variations you might enjoy:
* Spicy Kick: Add a pinch of red pepper flakes to the honey sauce for a touch of heat.
* Citrus Burst: Zest a lemon or orange into the sauce for a brighter, more vibrant flavor.
* Coconut Dream: Sprinkle shredded coconut over the finished dish for added sweetness and texture.
* Ginger Zing: Grate a small amount of fresh ginger into the batter for a warm, aromatic note.
* Shrimp Size: While I prefer using medium-sized shrimp, you can easily adapt this recipe to use larger or smaller shrimp depending on your preference. Just adjust the cooking time accordingly.
Don’t be afraid to experiment and make this recipe your own! That’s the beauty of cooking it’s all about creativity and finding what you love.
I’m so confident that you’ll love this Honey Walnut Shrimp recipe that I urge you to try it as soon as possible. Gather your ingredients, follow the steps, and prepare to be amazed.
And most importantly, I want to hear about your experience! Did you try the recipe? Did you make any variations? What did your family and friends think? Share your photos, comments, and feedback in the comments section below. I’m always eager to learn from your culinary adventures and see how you’ve made this recipe your own. Happy cooking, and enjoy your delicious homemade Honey Walnut Shrimp! I can’t wait to hear all about it!
Honey Walnut Shrimp: The Ultimate Recipe and Guide
Crispy fried shrimp tossed in a creamy honey walnut sauce and topped with candied walnuts. A sweet and savory delight!
Ingredients
- 1 pound large shrimp (21-25 count), peeled and deveined
- 1/2 cup cornstarch
- 1/4 cup all-purpose flour
- 1 teaspoon baking powder
- 1/2 teaspoon salt
- 1/4 teaspoon white pepper
- 1 large egg, lightly beaten
- 1/4 cup water
- Vegetable oil, for frying
- 1/2 cup mayonnaise
- 2 tablespoons honey
- 1 tablespoon sweetened condensed milk
- 1 teaspoon lemon juice
- 1/4 teaspoon salt
- 1 cup walnut halves
- 1/4 cup granulated sugar
- 2 tablespoons water
- 1/4 teaspoon salt
- Toasted sesame seeds
- Chopped green onions
Instructions
- In a medium saucepan, combine the walnut halves, granulated sugar, water, and salt.
- Place the saucepan over medium heat. Stir constantly with a wooden spoon or spatula.
- Continue stirring until the sugar thickens, caramelizes, and coats the walnuts, turning a golden-brown color (about 5-7 minutes).
- Immediately remove from heat and spread the candied walnuts in a single layer on a sheet of parchment paper. Use a fork to separate them.
- Cool completely at room temperature (about 15-20 minutes). Break apart into smaller pieces if desired. Set aside.
- If frozen, thaw shrimp completely. Peel and devein, pat dry with paper towels.
- In a medium bowl, whisk together the cornstarch, all-purpose flour, baking powder, salt, and white pepper.
- In a separate small bowl, lightly beat the egg. Add the beaten egg and water to the dry ingredients. Whisk until just combined (a few lumps are okay).
- Dip each shrimp into the batter, ensuring it’s fully coated. Let any excess batter drip off.
- Pour about 2-3 inches of vegetable oil into a large, heavy-bottomed pot or deep fryer. Heat the oil over medium-high heat to 350-375°F (175-190°C).
- Carefully add the battered shrimp to the hot oil in batches, being careful not to overcrowd the pot.
- Fry for about 2-3 minutes per batch, or until the shrimp are golden brown and cooked through.
- Use a slotted spoon or spider to remove the fried shrimp from the oil and place them on a wire rack lined with paper towels to drain excess oil.
- In a medium bowl, whisk together the mayonnaise, honey, sweetened condensed milk, lemon juice, and salt until smooth and creamy.
- Taste and adjust the sweetness or tanginess to your liking.
- In a large bowl, gently toss the fried shrimp with the honey walnut sauce until evenly coated.
- Add the candied walnuts to the bowl and gently toss to combine.
- Serve immediately. Garnish with toasted sesame seeds and chopped green onions, if desired.
Notes
- Don’t Overcrowd the Pan: When frying the shrimp, make sure not to overcrowd the pan. This will lower the oil temperature and result in soggy shrimp. Fry in batches to ensure even cooking and crispiness.
- Keep the Oil Hot: Maintaining the correct oil temperature is crucial for crispy shrimp. Use a deep-fry thermometer to monitor the temperature and adjust the heat as needed.
- Pat the Shrimp Dry: Before battering the shrimp, pat them dry with paper towels. This will help the batter adhere better and prevent the shrimp from becoming soggy.
- Serve Immediately: Honey walnut shrimp is best served immediately after it’s made. The longer it sits, the softer the shrimp will become.
- Adjust the Sauce to Your Taste: The honey walnut sauce can be adjusted to your liking. If you prefer a sweeter sauce, add more honey. If you prefer a tangier sauce, add more lemon juice.
- Make Ahead: You can make the candied walnuts ahead of time and store them in an airtight container at room temperature for up to a week. You can also prepare the honey walnut sauce ahead of time and store it in the refrigerator for up to 3 days. However, it’s best to fry the shrimp and assemble the dish just before serving.

Leave a Comment