
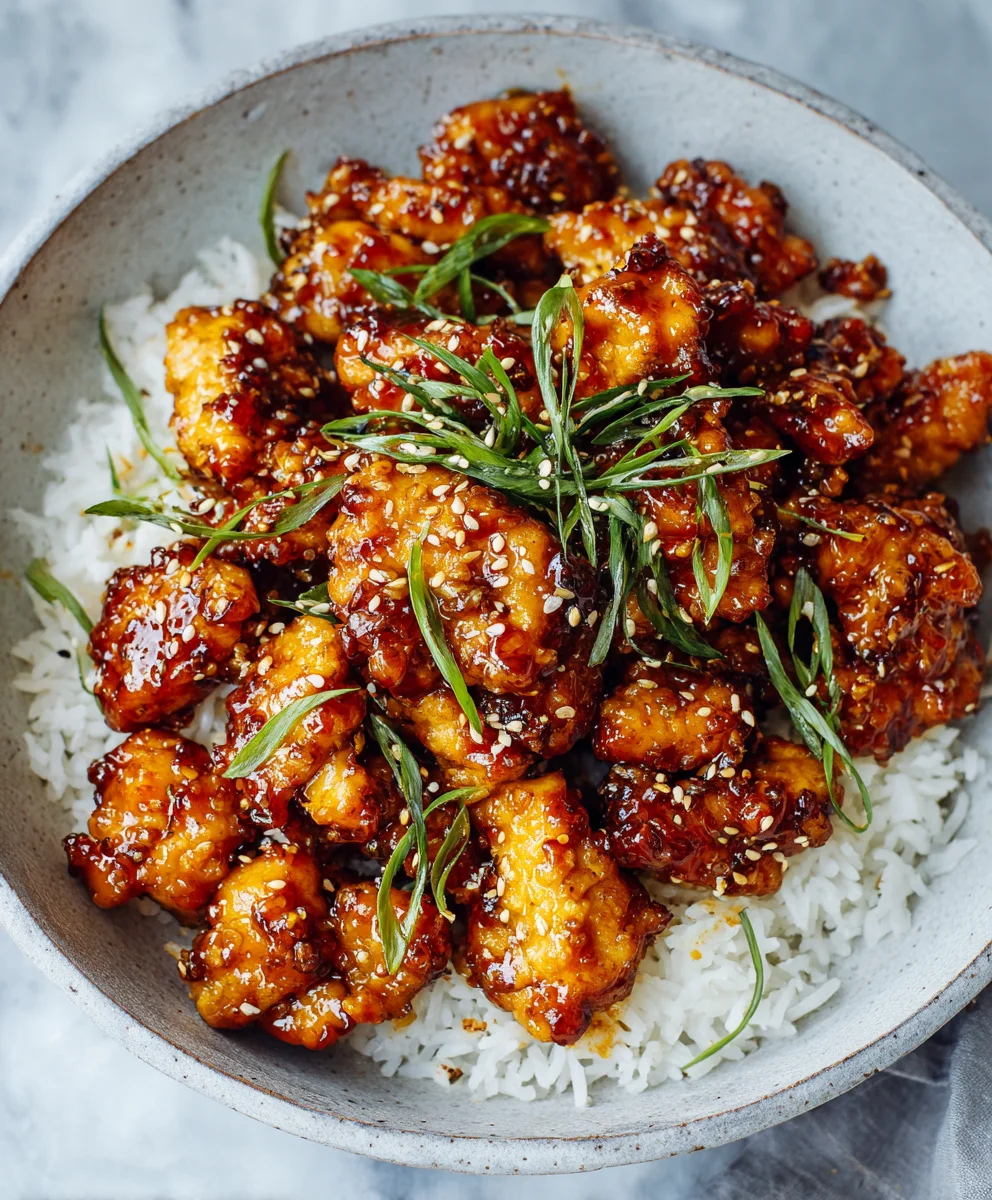
Honey Garlic Chicken is more than just a meal; I believe it’s a culinary hug, a dish that consistently delivers on flavor and comfort. It’s the ultimate crowd-pleaser that manages to be both excitingly exotic and wonderfully familiar, making it a beloved staple in kitchens worldwide.
While this particular flavor profile isn’t ancient, the irresistible combination of sweet honey and pungent garlic has resonated across diverse culinary landscapes, particularly in modern Asian-fusion and Western comfort food. It speaks to a global love for balanced, bold flavors, evolving naturally into a go-to for many households due to its sheer deliciousness and adaptability.
Why Everyone Loves This Flavorful Dish
What makes a well-prepared Honey Garlic Chicken truly special? I find it’s that perfect harmony of a sticky-sweet glaze and savory notes from the fresh garlic and a touch of soy, clinging beautifully to succulent, tender pieces of chicken. The magic lies in its ability to transform simple, accessible ingredients into a gourmet experience with minimal effort. Whether you are a seasoned home cook or a busy parent looking for a quick weeknight solution, the appeal of such a flavorful, tender, and quick-to-prepare meal is undeniable. It’s incredibly versatile, pairing wonderfully with fluffy rice, stir-fried noodles, or steamed green vegetables, making it an ideal choice for any occasion.

Ingredients:
-
For the Honey Garlic Chicken:
- 2 lbs (approx. 900g) boneless, skinless chicken thighs: I find thighs work best for this recipe as they stay incredibly juicy and tender, but you can certainly use boneless, skinless chicken breasts if you prefer, just be mindful of cooking times to prevent them from drying out.
- 1 tablespoon olive oil (or other high smoke point oil like avocado oil): For searing our chicken to a beautiful golden-brown.
- 1 teaspoon salt: Divided for seasoning the chicken and the sauce.
- ½ teaspoon black pepper: Freshly ground makes all the difference!
- ½ teaspoon garlic powder: To give an extra layer of garlicky goodness to the chicken itself.
- ¼ teaspoon onion powder: A little secret ingredient to boost the savory depth.
-
For the Sticky Honey Garlic Sauce:
- ½ cup (120ml) low-sodium chicken broth: The base for our luscious sauce.
- ½ cup (170g) honey: The star of our sticky, sweet glaze. Don’t skimp on quality here!
- ¼ cup (60ml) soy sauce: I usually opt for low-sodium to control the saltiness, but regular works too if you adjust the added salt.
- 2 tablespoons rice vinegar: Adds a lovely tang that balances the sweetness. Apple cider vinegar can be a good substitute.
- 1 tablespoon freshly grated ginger: Fresh ginger is non-negotiable for that vibrant, aromatic punch. Trust me on this one!
- 4-6 cloves garlic, minced: Yes, a generous amount! This is Honey Garlic Chicken, after all, so let that garlic shine.
- 1 tablespoon cornstarch (or arrowroot powder): Our secret weapon for achieving that perfectly thick, glossy sauce.
- 2 tablespoons cold water: To create a cornstarch slurry.
- Optional: ¼ teaspoon red pepper flakes: For a subtle hint of heat that really elevates the flavors.
-
For Garnish and Serving:
- 2 tablespoons fresh chives or green onions (scallions), thinly sliced: For a fresh, oniony finish and a pop of color.
- 1 tablespoon toasted sesame seeds: Adds a wonderful nutty texture and visual appeal.
- Cooked rice or noodles: To soak up all that incredible sauce.
- Steamed or stir-fried vegetables: Broccoli, snap peas, or bell peppers pair wonderfully.
Preparing Our Delicious Honey Garlic Chicken
Creating the ultimate Honey Garlic Chicken begins with a little care in preparing our main ingredient. Trust me, these small steps make a world of difference in the final taste and texture of our amazing dish.
- Pat the Chicken Dry: First things first, take your boneless, skinless chicken thighs and thoroughly pat them dry with paper towels. This is a crucial step that often gets overlooked! Excess moisture on the surface of the chicken prevents it from getting that beautiful, crispy sear we’re looking for, which is key to great Honey Garlic Chicken. The drier the surface, the better the browning, and better browning means more flavor development – it’s called the Maillard reaction, and it’s our best friend in the kitchen!
- Trim and Prepare: Inspect each chicken thigh and trim off any excessive fat or gristle. While chicken fat adds flavor, too much can make the dish greasy. Cut the chicken thighs into roughly 1-inch (2.5 cm) bite-sized pieces. Aim for pieces that are relatively uniform in size. This ensures they cook evenly and makes for easier eating later. If you’re using chicken breasts, I recommend cutting them into slightly larger 1.5-inch pieces as they tend to cook faster and can dry out more easily. Uniformity is key for consistent cooking in our Honey Garlic Chicken.
- Season the Chicken: In a medium bowl, toss the chicken pieces with ½ teaspoon of salt, ½ teaspoon of black pepper, ½ teaspoon of garlic powder, and ¼ teaspoon of onion powder. Use your hands to ensure every piece of chicken is evenly coated with the seasonings. This pre-seasoning step infuses flavor deep into the chicken, rather than just relying on the sauce for all the heavy lifting. It’s a foundational layer of deliciousness for our Honey Garlic Chicken.
- Optional: Marinate for Deeper Flavor (Time Permitting): If you have an extra 15-30 minutes, or even a few hours, you can let the seasoned chicken sit in the refrigerator. This brief “dry brine” helps the salt penetrate the meat, making it even more tender and flavorful. If you’re short on time, don’t worry, the immediate cooking still yields fantastic results, but a little marinating time truly enhances the succulence of your Honey Garlic Chicken.
Crafting the Irresistible Sticky Honey Garlic Sauce
The heart and soul of our dish, the glorious sticky honey garlic sauce, is what truly defines this incredible Honey Garlic Chicken. It’s sweet, savory, tangy, and bursting with aromatic flavors. Let’s get it ready while our chicken patiently waits.
- Combine Wet Ingredients: In a medium bowl or a large liquid measuring cup, whisk together the low-sodium chicken broth, honey, soy sauce, and rice vinegar. Give it a good whisk until the honey is fully dissolved and everything is well combined. This is our liquid base that will transform into a rich, glossy glaze.
- Add Aromatics: To this liquid mixture, add the freshly grated ginger, minced garlic, and the remaining ½ teaspoon of salt. If you’re a fan of a little heat, now is the time to add the optional ¼ teaspoon of red pepper flakes. Whisk everything together thoroughly. Oh, the aroma of fresh ginger and garlic already hints at the amazingness to come in our Honey Garlic Chicken!
- Prepare the Cornstarch Slurry: In a small separate bowl, whisk together the 1 tablespoon of cornstarch with 2 tablespoons of cold water until a smooth slurry forms. Make sure there are no lumps – lumps mean a clumpy sauce, and we definitely don’t want that for our smooth, glossy honey garlic coating. Set this aside; we’ll use it to thicken our sauce later on. This slurry is the secret to achieving that signature sticky texture for our Honey Garlic Chicken.
- Set Aside: Once your sauce ingredients are mixed and your cornstarch slurry is ready, set them aside. We’ll be bringing them together on the stovetop once the chicken is perfectly seared. Having everything prepped makes the cooking process smooth and stress-free.
Cooking the Perfect Honey Garlic Chicken
Now that our chicken is seasoned and our sauce is prepped, it’s time for the magic to happen on the stovetop. This phase is all about achieving beautifully seared chicken and then letting it bathe in that incredible sauce to create the most delicious Honey Garlic Chicken you’ve ever tasted.
- Heat the Pan: Place a large, heavy-bottomed skillet or a cast-iron pan over medium-high heat. Add 1 tablespoon of olive oil. Allow the oil to heat up until it’s shimmering but not smoking. You want the pan to be hot enough to give the chicken a good sear the moment it hits the surface. This high heat is essential for getting that lovely golden crust on our chicken, which adds a lot of flavor to the overall Honey Garlic Chicken dish.
- Sear the Chicken in Batches: Carefully add the seasoned chicken pieces to the hot pan in a single layer, making sure not to overcrowd the pan. Overcrowding will lower the pan’s temperature and cause the chicken to steam instead of sear, resulting in pale, sad chicken. You might need to do this in two or even three batches, depending on the size of your skillet. This step is crucial for building flavor for our Honey Garlic Chicken.
- Brown the Chicken: Cook the chicken for about 3-5 minutes per side, or until it’s beautifully golden brown and caramelized. Once one side is nicely browned, flip the pieces and continue cooking until the other side is also golden. The goal here is not to cook the chicken all the way through, but rather to develop that wonderful exterior crust. As you finish each batch, remove the seared chicken from the pan and set it aside on a clean plate. Don’t worry if there are some browned bits sticking to the bottom of the pan – those are pure flavor and will be lifted when we add our sauce.
- Deglaze and Add the Sauce: Once all the chicken has been seared and removed, reduce the heat to medium-low. If there’s too much excess oil in the pan, carefully pour some out, leaving about a tablespoon. Pour the prepared honey garlic sauce mixture (without the cornstarch slurry yet) into the pan. Bring the sauce to a gentle simmer, stirring constantly, and scrape up all those delicious browned bits from the bottom of the pan with a wooden spoon or spatula. These bits are packed with flavor and will enrich our sauce for the Honey Garlic Chicken.
- Thicken the Sauce: Once the sauce is simmering, give your cornstarch slurry a quick re-whisk (it tends to settle) and slowly pour it into the simmering sauce while continually stirring. Continue to stir as the sauce thickens, which should only take about 1-2 minutes. The sauce will become glossy and cling to the back of a spoon – this is exactly the consistency we want for our sticky Honey Garlic Chicken! If it gets too thick, you can always add a tiny splash more chicken broth or water.
Combining, Finishing, and Serving Our Honey Garlic Chicken
The moment has arrived to bring everything together! This final stage is where our seared chicken pieces get coated in that glorious sticky sauce, transforming them into the mouthwatering Honey Garlic Chicken we’ve been dreaming of.
- Return Chicken to the Pan: Carefully return all the seared chicken pieces back into the skillet with the thickened honey garlic sauce. Toss the chicken gently to ensure every single piece is thoroughly coated in that shiny, delicious glaze. Continue to cook for another 2-3 minutes, stirring occasionally, allowing the chicken to finish cooking through and absorb even more of that amazing flavor. The sauce should adhere beautifully to the chicken, making it wonderfully sticky and glossy. This is where our Honey Garlic Chicken truly comes to life!
- Check for Doneness: The chicken should be cooked through and reach an internal temperature of 165°F (74°C). Since we cut the pieces relatively small, they should cook quite quickly after being returned to the sauce. Ensure they are tender and juicy.
- Taste and Adjust Seasoning: Before serving, always taste your Honey Garlic Chicken. Does it need a tiny pinch more salt? A dash more soy sauce for umami? Or maybe another squeeze of honey if you like it sweeter? This is your chance to customize it to your perfect preference. Remember, flavors can vary slightly based on the specific brands of soy sauce or honey you use.
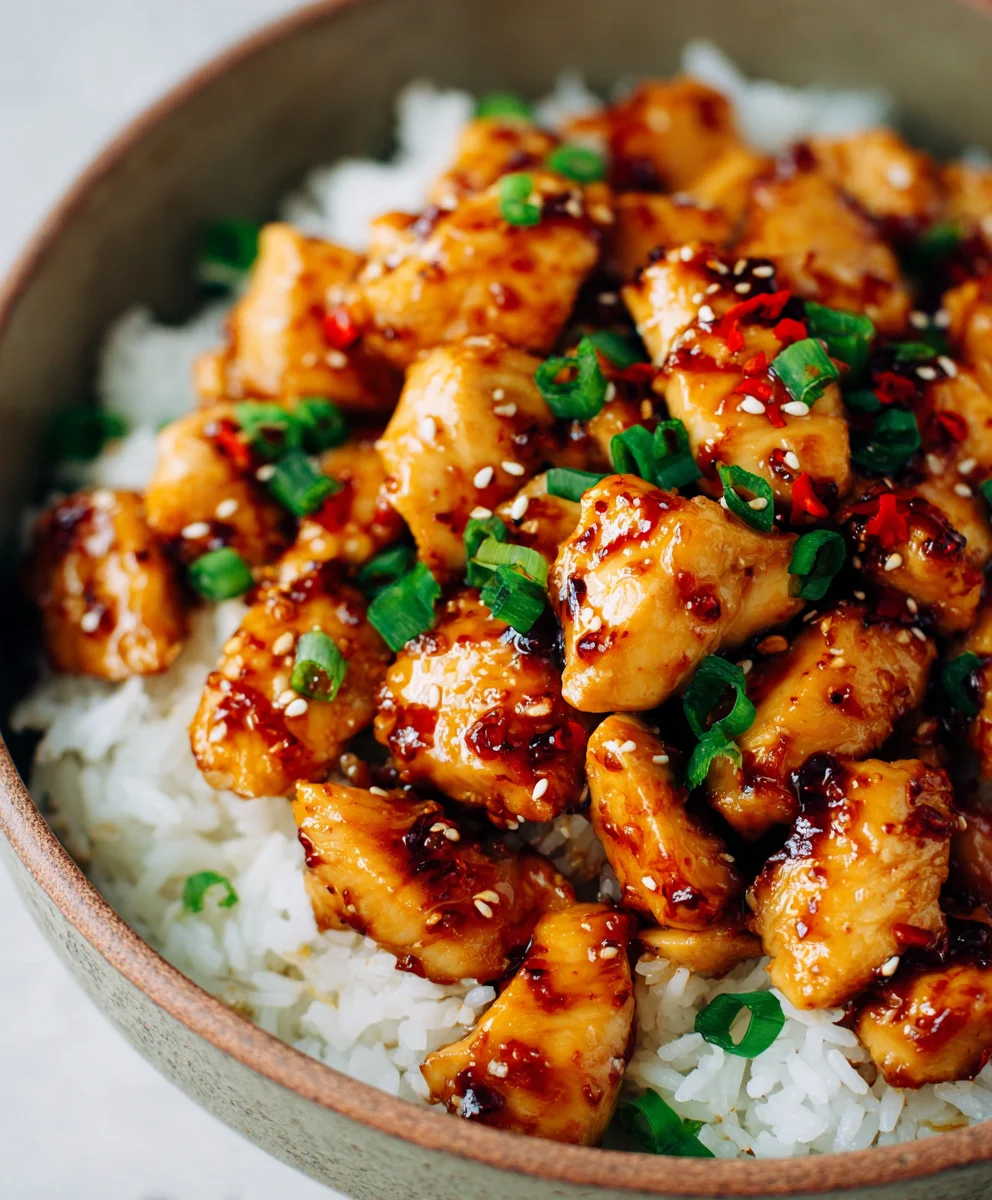
- Garnish for Freshness and Appeal: Once your Honey Garlic Chicken is perfectly glazed and cooked, remove the skillet from the heat. Sprinkle generously with freshly sliced chives or green onions (scallions) and a handful of toasted sesame seeds. These garnishes not only add a beautiful burst of color and a lovely texture, but they also contribute a fresh, aromatic counterpoint to the rich, savory-sweet sauce.
- Serve Immediately: The best way to enjoy this incredible Honey Garlic Chicken is piping hot, right off the stove. I love serving it over fluffy white rice or brown rice, which acts as the perfect canvas to soak up all that extra sticky sauce. It’s also fantastic with plain noodles, such as ramen noodles or egg noodles, or even a healthier option like quinoa.
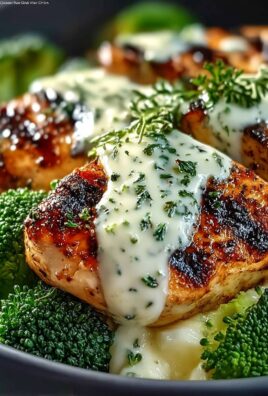
- Pair with Veggies: To make it a complete and balanced meal, consider serving your Honey Garlic Chicken alongside some simple steamed broccoli, roasted asparagus, sautéed green beans, or a vibrant stir-fry of bell peppers and snap peas. The freshness of the vegetables provides a lovely contrast to the richness of the chicken and sauce, making for a truly satisfying and wholesome meal. This dish is designed to be a crowd-pleaser, and I promise you, once you taste your homemade Honey Garlic Chicken, you’ll be adding it to your regular rotation! It’s truly a testament to how simple ingredients can come together to create something absolutely extraordinary. Enjoy every sticky, sweet, savory bite!
Conclusion:
So, there you have it! I truly believe this recipe is more than just another meal; it’s an experience waiting to unfold in your kitchen. What makes it a standout, a definite must-try in your culinary repertoire, is its unparalleled balance of flavors. Imagine that perfect sweet and savory tango, complemented by the aromatic punch of fresh garlic, all caramelizing beautifully around tender, juicy chicken. This isn’t just dinner; it’s a comforting, satisfying journey for your taste buds, accessible even on the busiest weeknights. It’s a dish that consistently delivers, impressing both seasoned foodies and picky eaters alike. The simplicity of preparation belies the complexity of its taste, making it an ideal choice for both novice cooks looking for a foolproof triumph and experienced chefs seeking a reliable crowd-pleaser.
Beyond its incredible flavor profile, the sheer versatility of this dish is another reason it deserves a prime spot in your recipe rotation. I love how effortlessly it transforms to suit any occasion or dietary preference. For a classic, wholesome meal, serve this incredible Honey Garlic Chicken alongside a steaming mound of fluffy jasmine rice or quinoa, allowing the rich, sticky sauce to meld with every grain. If you’re leaning towards a lighter, fresher approach, consider pairing it with a vibrant medley of roasted vegetables – think crisp-tender broccoli, asparagus spears, or colorful bell peppers that have been lightly tossed in olive oil and herbs. These sides don’t just fill out the plate; they actively complement the main dish, adding texture and freshness. You could even go for a simple side salad with a light vinaigrette to cut through the richness of the sauce, creating a beautifully balanced meal that feels both indulgent and wholesome. For a heartier option, especially during colder months, I sometimes like to serve it with creamy mashed potatoes, which become an excellent canvas for soaking up every last drop of that irresistible sauce.
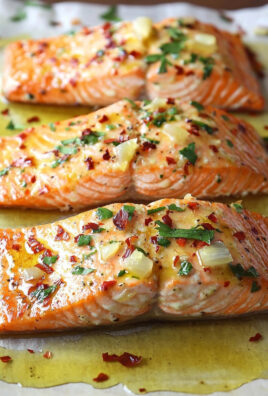
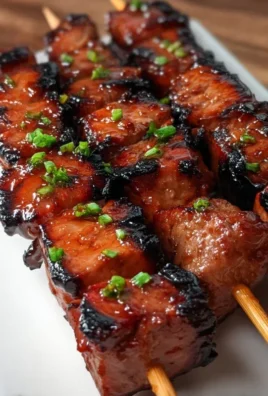
But why stop there? This recipe is a fantastic starting point for your own culinary creativity! Feel free to experiment with variations to truly make it your own. If you enjoy a little heat, a dash of Sriracha or a pinch of red pepper flakes added to the sauce can introduce a delightful kick without overpowering the core flavors. For those looking to explore different proteins, this amazing glaze works wonders on shrimp, pork tenderloin, or even firm tofu and hearty cauliflower florets for a delicious vegetarian alternative. Imagine grilled Honey Garlic Chicken skewers at your next barbecue, or even shredded chicken from this recipe incorporated into a fresh spring roll or a lively stir-fry. A sprinkle of toasted sesame seeds and freshly chopped green onions or cilantro as a garnish not only adds a beautiful visual appeal but also introduces delightful textural and aromatic notes. Don’t be afraid to double the sauce recipe; it’s fantastic for drizzling over your chosen sides or saving for another meal. Marinating the chicken for an hour or even overnight can also intensify the flavors even further, creating an even more profound taste experience.
Now that you’re armed with all the tips, tricks, and inspiration, I truly encourage you to roll up your sleeves and give this recipe a try. I promise you, it’s going to be a rewarding experience. There’s an immense satisfaction that comes from creating something so delicious from scratch, something that brings joy to your table and to those you share it with. Once you’ve whipped up your own batch of this delightful dish, I would absolutely love to hear about your experience! Did you stick to the original recipe, or did you put your own creative spin on it? What were your favorite serving combinations? Please, don’t hesitate to share your thoughts, your successes, and even your questions in the comments below. Snap a picture of your culinary masterpiece and share it with us; it’s always inspiring to see how different people interpret and enjoy the same dish. Your feedback not only helps me but also inspires countless other home cooks in our vibrant community. Happy cooking, and I can’t wait to hear all about your delicious adventure!
Honey Garlic Chicken
Honey Garlic Chicken is a beloved culinary delight, celebrated for its perfect balance of sweet, savory, and tangy flavors. This easy-to-prepare dish features tender chicken coated in a sticky, glossy honey garlic sauce, making it a fantastic weeknight meal that pairs wonderfully with rice or noodles.
Ingredients
-
8 skinless and boneless chicken thighs
-
2 tbsp cornflour (cornstarch)
-
½ tsp salt
-
½ tsp pepper
-
2 tbsp vegetable oil
-
1 tbsp unsalted butter
-
4 cloves minced garlic
-
110g (1/3 cup) honey
-
80ml (1/3 cup) chicken stock
-
1 tbsp rice vinegar
-
1 tbsp light soy sauce
-
1 tbsp finely chopped fresh parsley
-
½ tsp chilli flakes
-
2 tbsp cold water (for cornstarch slurry)
-
Boiled rice, for serving
Instructions
-
Step 1
Pat chicken thighs dry with paper towels. Trim any excess fat and cut into roughly 1-inch (2.5 cm) bite-sized pieces. Season chicken evenly with ½ tsp salt and ½ tsp pepper. -
Step 2
In a medium bowl, whisk together the 80ml chicken stock, 110g honey, 1 tbsp light soy sauce, 1 tbsp rice vinegar, 4 cloves minced garlic, and ½ tsp chilli flakes. In a separate small bowl, whisk 2 tbsp cornflour with 2 tbsp cold water until a smooth slurry forms. Set both aside. -
Step 3
Heat a large, heavy-bottomed skillet over medium-high heat. Add 2 tbsp vegetable oil. Once shimmering, add the seasoned chicken pieces in a single layer, searing in batches if necessary to avoid overcrowding. Cook for 3-5 minutes per side until beautifully golden brown and caramelized. Remove seared chicken from the pan and set aside. -
Step 4
Reduce heat to medium-low. Add 1 tbsp unsalted butter to the pan. Pour in the prepared honey garlic sauce mixture (without the cornflour slurry). Bring to a gentle simmer, stirring constantly and scraping up any browned bits from the bottom of the pan. -
Step 5
Re-whisk the cornflour slurry and slowly pour it into the simmering sauce while continually stirring. Continue to stir for 1-2 minutes until the sauce thickens to a glossy, sticky consistency that coats the back of a spoon. -
Step 6
Return all the seared chicken pieces to the skillet with the thickened sauce. Toss gently to ensure every piece is thoroughly coated. Cook for another 2-3 minutes, stirring occasionally, allowing the chicken to finish cooking through and absorb the flavors (internal temperature 165°F/74°C). -
Step 7
Remove from heat and garnish generously with 1 tbsp finely chopped fresh parsley. Serve immediately over hot boiled rice for a complete and satisfying meal.
Important Information
Nutrition Facts (Per Serving)
It is important to consider this information as approximate and not to use it as definitive health advice.
Allergy Information
Please check ingredients for potential allergens and consult a health professional if in doubt.
Leave a Comment