
Homemade Hummus, a creamy, dreamy dip that’s far easier to make than you might think, is about to become your new kitchen obsession. Forget those store-bought tubs we’re diving headfirst into a world of vibrant flavors and velvety textures that will redefine your hummus experience. Have you ever wondered why this simple blend of chickpeas, tahini, lemon juice, and garlic has captivated taste buds for centuries?
Hummus boasts a rich history, with roots tracing back to ancient Egypt and the Middle East. It’s more than just a dip; it’s a cultural staple, a symbol of hospitality, and a testament to the power of simple, wholesome ingredients. For generations, families have passed down their secret hummus recipes, each variation reflecting regional nuances and personal preferences.
But what is it about homemade hummus that makes it so irresistible? It’s the perfect marriage of creamy and tangy, earthy and bright. The smooth, luxurious texture is incredibly satisfying, while the combination of flavors creates a symphony on your palate. Plus, it’s incredibly versatile! Enjoy it as a dip with warm pita bread and crunchy vegetables, spread it on sandwiches and wraps, or use it as a flavorful base for salads. And the best part? It’s packed with protein and fiber, making it a healthy and delicious choice for any occasion. So, are you ready to ditch the store-bought stuff and embark on a hummus-making adventure with me? Let’s get started!

Ingredients:
- 1 (15-ounce) can chickpeas, drained and rinsed (reserve the aquafaba!)
- 1/4 cup tahini
- 1/4 cup lemon juice, freshly squeezed (about 1-2 lemons)
- 2-3 cloves garlic, minced
- 2-4 tablespoons ice water (start with 2 and add more as needed)
- 2 tablespoons olive oil, plus more for drizzling
- 1/2 teaspoon ground cumin
- 1/4 teaspoon salt, or more to taste
- Pinch of cayenne pepper (optional)
- Optional garnishes: paprika, chopped parsley, whole chickpeas, olive oil
Preparing the Hummus:
- Prepare the Chickpeas: While canned chickpeas are convenient, the key to truly creamy hummus lies in removing the skins. This is a bit tedious, but trust me, it’s worth it! Place the drained and rinsed chickpeas in a bowl. Gently rub them between your hands or use a clean kitchen towel to loosen the skins. The skins will float to the top of the water. Skim them off and discard. Don’t worry about getting every single skin off, but try to remove as many as possible. This step makes a HUGE difference in the final texture.
- Mince the Garlic: Mince the garlic cloves very finely. You can use a garlic press if you have one, or simply chop them as small as you can. The smaller the pieces, the better they will incorporate into the hummus and the less likely you are to have any harsh garlic flavor.
- Juice the Lemons: Freshly squeezed lemon juice is essential for the bright, tangy flavor of hummus. Bottled lemon juice just doesn’t compare. Roll the lemons on the counter before cutting them in half to release more juice. Squeeze the juice into a small bowl, removing any seeds.
- Measure the Tahini: Tahini is a sesame seed paste that is a crucial ingredient in hummus. Make sure to stir the tahini well before measuring it, as the oil tends to separate. You want a smooth, consistent paste.
Blending the Hummus:
- Combine Ingredients in a Food Processor: In the bowl of a food processor, combine the tahini, lemon juice, minced garlic, cumin, salt, and cayenne pepper (if using). Process for 1-2 minutes, scraping down the sides of the bowl occasionally, until the mixture is smooth and creamy. This step is important to properly emulsify the tahini and lemon juice.
- Add the Chickpeas: Add the prepared chickpeas to the food processor. Process for another 2-3 minutes, scraping down the sides of the bowl as needed. The mixture will likely be thick and pasty at this point.
- Add Ice Water: This is the secret to achieving that light and fluffy hummus texture! With the food processor running, slowly drizzle in 2 tablespoons of ice water. Process for another minute or two, until the mixture starts to become smoother and lighter. If the hummus is still too thick, add another tablespoon of ice water and continue processing. You may need up to 4 tablespoons of ice water, depending on the consistency of your tahini and chickpeas. The goal is to achieve a smooth, creamy, and almost whipped texture.
- Add Olive Oil: Add the 2 tablespoons of olive oil to the food processor. Process for another 30 seconds to incorporate the oil. The olive oil adds richness and helps to create a smoother texture.
- Taste and Adjust Seasoning: Taste the hummus and adjust the seasoning as needed. You may want to add more salt, lemon juice, or cumin to suit your taste. If you prefer a spicier hummus, add a pinch more cayenne pepper.
- Process Until Smooth: Continue processing the hummus for another minute or two, until it is completely smooth and creamy. The longer you process it, the smoother it will become. Don’t be afraid to let the food processor run for a while!
Serving the Hummus:
- Transfer to a Serving Bowl: Transfer the hummus to a serving bowl.
- Drizzle with Olive Oil: Drizzle the hummus generously with olive oil. This adds flavor and visual appeal.
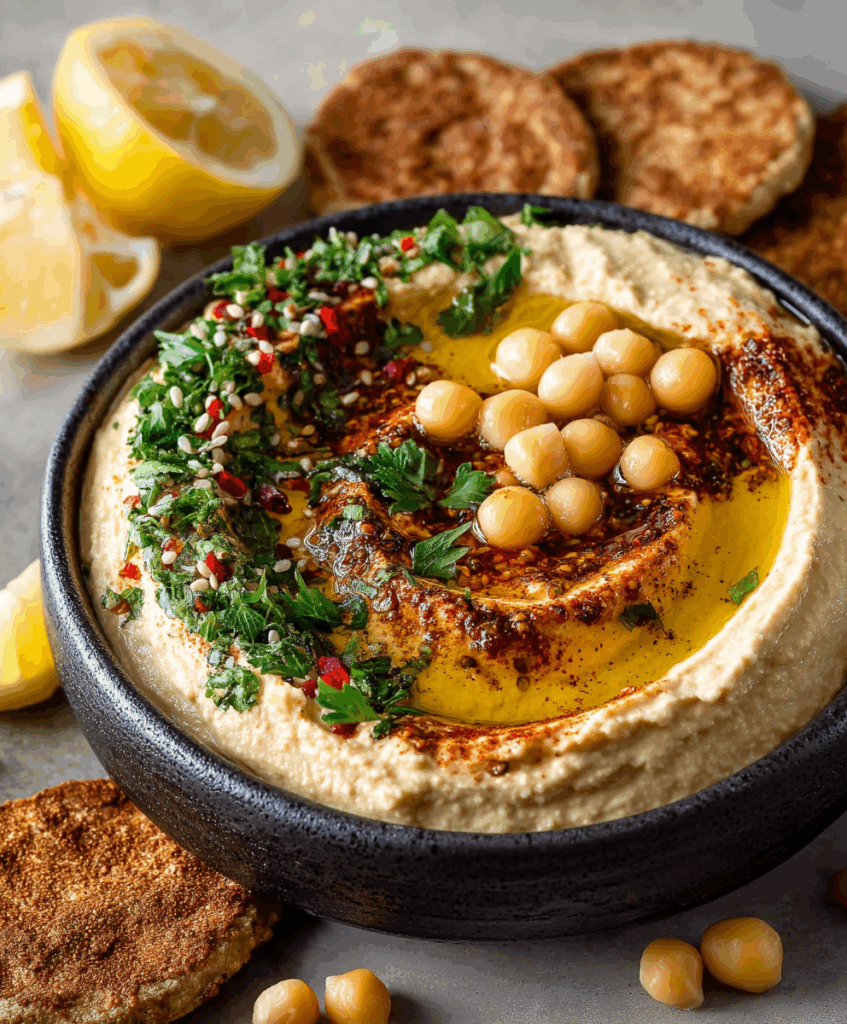
- Garnish (Optional): Garnish the hummus with your favorite toppings. Some popular options include paprika, chopped fresh parsley, whole chickpeas, a sprinkle of cumin, or a drizzle of tahini.
- Serve: Serve the hummus with warm pita bread, vegetables (such as carrots, celery, cucumbers, and bell peppers), or crackers. It’s also delicious as a spread on sandwiches or wraps.
- Storage: Store leftover hummus in an airtight container in the refrigerator for up to 5 days. The flavor may intensify slightly over time.
Tips for the Best Hummus:
- Use High-Quality Tahini: The quality of your tahini will greatly impact the flavor of your hummus. Look for tahini that is made from 100% sesame seeds and has a smooth, creamy texture. Avoid tahini that is bitter or has a grainy texture.
- Don’t Skip the Ice Water: The ice water is essential for achieving a light and fluffy hummus texture. It helps to emulsify the ingredients and create a smooth, creamy consistency.
- Process for a Long Time: Don’t be afraid to let the food processor run for a while. The longer you process the hummus, the smoother it will become.
- Adjust the Seasoning to Your Taste: Hummus is a very versatile dish, so feel free to adjust the seasoning to your liking. If you prefer a more tangy hummus, add more lemon juice. If you prefer a spicier hummus, add more cayenne pepper.
- Experiment with Flavors: Once you’ve mastered the basic hummus recipe, you can start experimenting with different flavors. Try adding roasted red peppers, sun-dried tomatoes, olives, or herbs to create your own unique hummus variations.
- Use Aquafaba: Instead of discarding the liquid from the can of chickpeas (aquafaba), reserve it! You can use aquafaba in place of some of the ice water for an even creamier texture and a subtle chickpea flavor boost. Start by substituting 1-2 tablespoons of aquafaba for the ice water and adjust as needed.
- Warm Chickpeas: For an even smoother hummus, gently warm the chickpeas before blending. You can do this by microwaving them for a minute or two, or by simmering them in a pot of water for a few minutes. Be sure to drain them well before adding them to the food processor.
- Don’t Overload the Food Processor: If you have a small food processor, you may need to make the hummus in batches to avoid overloading the machine. Overloading the food processor can prevent the ingredients from blending properly and result in a chunky hummus.
- Serve at Room Temperature: While hummus can be served cold, it’s best served at room temperature. This allows the flavors to fully develop and makes the hummus easier to spread.
Variations:
- Roasted Red Pepper Hummus: Add 1/2 cup of roasted red peppers to the food processor along with the other ingredients.
- Sun-Dried Tomato Hummus: Add 1/4 cup of sun-dried tomatoes (oil-packed, drained) to the food processor along with the other ingredients.
- Olive Hummus: Add 1/4 cup of pitted Kalamata olives to the food processor along with the other ingredients.
- Spicy Hummus: Add 1/2 teaspoon of chili powder or a pinch of red pepper flakes to the food processor along with the other ingredients.
- Garlic Hummus: Add an extra clove or two of garlic to the food processor along with the other ingredients.
- Herb Hummus: Add 1/4 cup of chopped fresh herbs (such as parsley, cilantro, or dill) to the food processor along with the other ingredients.
Enjoy your delicious homemade hummus! I hope these tips and tricks help you create the perfect batch every time.
Conclusion:
This Homemade Hummus recipe isn’t just another dip; it’s a flavor explosion waiting to happen, and I truly believe you’ll be hooked from the very first bite. We’ve walked through each step, ensuring even the most novice cook can achieve hummus perfection. The creamy texture, the bright lemon notes, the subtle garlic punch it all comes together to create something truly special, far surpassing anything you can find pre-made at the store. Trust me, once you taste the difference, you’ll never go back!
But why is this recipe a must-try? Beyond the superior taste, it’s about control. You get to choose the quality of your ingredients, ensuring a healthier and more vibrant final product. You can adjust the seasonings to perfectly match your palate, creating a hummus that’s uniquely yours. Plus, it’s incredibly satisfying to create something so delicious from scratch. It’s a small act of culinary magic that will impress your friends and family (and yourself!).
Now, let’s talk serving suggestions and variations because the possibilities are endless! Of course, the classic pairing is with warm pita bread, but don’t stop there. Try it with crunchy vegetables like carrots, celery, and bell peppers for a healthy and satisfying snack. Spread it on sandwiches or wraps for an extra layer of flavor and moisture. Use it as a base for grain bowls, topping it with roasted vegetables, grilled chicken, or falafel.
For variations, get creative! Roasted red pepper hummus is a classic for a reason the sweetness of the peppers complements the savory hummus beautifully. Add a handful of spinach for a vibrant green hummus packed with nutrients. Spice things up with a pinch of cayenne pepper or a drizzle of chili oil. For a smoky flavor, try adding a touch of smoked paprika. And if you’re feeling adventurous, experiment with different types of beans, like black beans or white beans, for a unique twist. I personally love adding sun-dried tomatoes for a burst of intense flavor.
Serving Suggestions:
- With warm pita bread or naan
- As a dip for vegetables (carrots, celery, cucumbers)
- Spread on sandwiches and wraps
- As a base for grain bowls
- With falafel or grilled chicken
Hummus Variations:
- Roasted Red Pepper Hummus
- Spinach Hummus
- Spicy Hummus (with cayenne pepper or chili oil)
- Smoked Paprika Hummus
- Sun-Dried Tomato Hummus
I’m so excited for you to try this recipe and experience the joy of homemade hummus. It’s a simple pleasure that can elevate any meal or snack. Don’t be afraid to experiment and make it your own.
So, what are you waiting for? Gather your ingredients, put on some music, and get ready to create the best hummus you’ve ever tasted. And most importantly, I want to hear about your experience! Share your photos and variations with me in the comments below. Let me know what you think and what creative twists you’ve added. I can’t wait to see what you come up with! Happy cooking, and enjoy your delicious Homemade Hummus!
Homemade Hummus: The Ultimate Guide to Making It Perfect
Creamy, flavorful homemade hummus with chickpeas, tahini, lemon juice, and garlic. Includes tips for a smooth texture and customizable flavor.
Ingredients
- 1 (15-ounce) can chickpeas, drained and rinsed (reserve the aquafaba!)
- 1/4 cup tahini
- 1/4 cup lemon juice, freshly squeezed (about 1-2 lemons)
- 2-3 cloves garlic, minced
- 2-4 tablespoons ice water (start with 2 and add more as needed)
- 2 tablespoons olive oil, plus more for drizzling
- 1/2 teaspoon ground cumin
- 1/4 teaspoon salt, or more to taste
- Pinch of cayenne pepper (optional)
- Optional garnishes: paprika, chopped parsley, whole chickpeas, olive oil
Instructions
- Prepare the Chickpeas: Place the drained and rinsed chickpeas in a bowl. Gently rub them between your hands or use a clean kitchen towel to loosen the skins. Skim off and discard the skins that float to the top.
- Mince the Garlic: Mince the garlic cloves very finely.
- Juice the Lemons: Freshly squeeze the lemon juice, removing any seeds.
- Measure the Tahini: Stir the tahini well before measuring it.
- Combine Ingredients in a Food Processor: In the bowl of a food processor, combine the tahini, lemon juice, minced garlic, cumin, salt, and cayenne pepper (if using). Process for 1-2 minutes, scraping down the sides of the bowl occasionally, until the mixture is smooth and creamy.
- Add the Chickpeas: Add the prepared chickpeas to the food processor. Process for another 2-3 minutes, scraping down the sides of the bowl as needed.
- Add Ice Water: With the food processor running, slowly drizzle in 2 tablespoons of ice water. Process for another minute or two, until the mixture starts to become smoother and lighter. If the hummus is still too thick, add another tablespoon of ice water and continue processing. You may need up to 4 tablespoons of ice water, depending on the consistency of your tahini and chickpeas.
- Add Olive Oil: Add the 2 tablespoons of olive oil to the food processor. Process for another 30 seconds to incorporate the oil.
- Taste and Adjust Seasoning: Taste the hummus and adjust the seasoning as needed. You may want to add more salt, lemon juice, or cumin to suit your taste. If you prefer a spicier hummus, add a pinch more cayenne pepper.
- Process Until Smooth: Continue processing the hummus for another minute or two, until it is completely smooth and creamy.
- Transfer to a Serving Bowl: Transfer the hummus to a serving bowl.
- Drizzle with Olive Oil: Drizzle the hummus generously with olive oil.
- Garnish (Optional): Garnish the hummus with your favorite toppings. Some popular options include paprika, chopped fresh parsley, whole chickpeas, a sprinkle of cumin, or a drizzle of tahini.
- Serve: Serve the hummus with warm pita bread, vegetables (such as carrots, celery, cucumbers, and bell peppers), or crackers. It’s also delicious as a spread on sandwiches or wraps.
- Storage: Store leftover hummus in an airtight container in the refrigerator for up to 5 days. The flavor may intensify slightly over time.
Notes
- Use High-Quality Tahini: The quality of your tahini will greatly impact the flavor of your hummus.
- Don’t Skip the Ice Water: The ice water is essential for achieving a light and fluffy hummus texture.
- Process for a Long Time: Don’t be afraid to let the food processor run for a while.
- Adjust the Seasoning to Your Taste: Hummus is a very versatile dish, so feel free to adjust the seasoning to your liking.
- Experiment with Flavors: Once you’ve mastered the basic hummus recipe, you can start experimenting with different flavors.
- Use Aquafaba: You can use aquafaba in place of some of the ice water for an even creamier texture and a subtle chickpea flavor boost.
- Warm Chickpeas: For an even smoother hummus, gently warm the chickpeas before blending.
- Don’t Overload the Food Processor: If you have a small food processor, you may need to make the hummus in batches.
- Serve at Room Temperature: While hummus can be served cold, it’s best served at room temperature.


Leave a Comment