
Holiday Cheese Board: The centerpiece of any festive gathering, a well-curated cheese board is more than just an appetizer; it’s an experience. Imagine your guests gathered around a beautifully arranged platter, their eyes widening at the sight of creamy bries, sharp cheddars, and colorful accompaniments. Its a feast for the senses, and I’m here to guide you in creating the perfect one!
The tradition of serving cheese platters dates back centuries, with evidence suggesting that cheese was enjoyed as a delicacy in ancient civilizations. Over time, the art of pairing cheese with complementary flavors evolved, leading to the sophisticated cheese boards we know and love today. But why are they so popular, especially during the holidays?
Well, for starters, a holiday cheese board is incredibly versatile. It caters to a wide range of palates, offering something for everyone from the adventurous foodie to the classic cheese lover. The combination of textures the smooth creaminess of a goat cheese, the crumbly sharpness of aged cheddar, the crispness of crackers is simply irresistible. Plus, let’s be honest, it’s incredibly convenient! With a little planning and some quality ingredients, you can create a stunning and satisfying appetizer that requires minimal cooking. It’s the perfect way to impress your guests without spending hours in the kitchen. So, let’s dive in and discover how to build a holiday cheese board that will be the talk of the party!

Ingredients:
- Cheeses:
- 8 oz Brie cheese round
- 8 oz Sharp Cheddar cheese block
- 6 oz Goat cheese log (plain or flavored)
- 6 oz Gorgonzola or other blue cheese wedge
- 4 oz Smoked Gouda cheese
- Cured Meats:
- 4 oz Prosciutto
- 4 oz Salami (various types, such as Genoa, Sopressata)
- 2 oz Chorizo (optional, sliced thinly)
- Crackers & Bread:
- Assorted crackers (e.g., water crackers, whole wheat crackers, rosemary crackers)
- Baguette, sliced into thin rounds
- Breadsticks (optional)
- Fruits & Vegetables:
- 1 cup Red grapes
- 1 cup Green grapes
- 1 Apple (e.g., Honeycrisp, Fuji), sliced
- 1 Pear (e.g., Bosc, Anjou), sliced
- 1/2 cup Dried apricots
- 1/2 cup Dried cranberries
- 1/4 cup Olives (mixed varieties)
- Baby carrots (optional)
- Celery sticks (optional)
- Nuts & Seeds:
- 1/2 cup Walnuts
- 1/2 cup Almonds
- 1/4 cup Pecans
- Pumpkin seeds (optional)
- Spreads & Dips:
- 1/4 cup Honeycomb or honey
- 1/4 cup Fig jam or other fruit preserves
- Dijon mustard (optional)
- Garnishes:
- Fresh rosemary sprigs
- Edible flowers (optional)
Preparing the Cheese Board: A Step-by-Step Guide
Creating a stunning holiday cheese board is easier than you might think! The key is to have a good variety of flavors and textures, and to arrange everything in an appealing way. Here’s how I do it:
- Choose Your Board: Start with a large serving board, platter, or even a wooden cutting board. The size will depend on how many people you’re serving. I usually use a large round wooden board, about 18 inches in diameter, for a gathering of 8-10 people. Make sure it’s clean and ready to go!
- Prepare the Cheeses: This is where the fun begins!
- Brie: Leave the Brie round whole. You can score the top lightly with a knife in a criss-cross pattern if you like, but it’s not necessary. This makes it easier for people to cut into.
- Cheddar: Cut the Cheddar block into cubes, triangles, or slices. I like to do a combination for visual interest. You can also use a cheese knife to create decorative shapes.
- Goat Cheese: Leave the goat cheese log whole, or slice it into rounds. If you’re using a flavored goat cheese, make sure the flavors complement the other items on the board.
- Gorgonzola: Crumble the Gorgonzola or blue cheese wedge into smaller pieces. Blue cheese can be quite strong, so you don’t need a huge amount.
- Smoked Gouda: Slice the Smoked Gouda into thin wedges or cubes. The smoky flavor adds a nice depth to the board.
- Arrange the Cheeses: Place the cheeses strategically around the board, leaving space between them for the other components. I like to start with the largest cheeses first (Brie, Cheddar) and then fill in with the smaller ones. Try to distribute the different types of cheese evenly across the board.
- Prepare the Meats: Now it’s time to add the cured meats.
- Prosciutto: Prosciutto is best served thinly sliced. You can arrange it in a few different ways:
- Draped: Drape the slices artfully over each other, creating a visually appealing cascade.
- Rolled: Roll the slices into small cylinders or rosettes.
- Folded: Fold the slices into quarters.
- Salami: Slice the salami into thin rounds. You can overlap the slices slightly to create a fan effect.
- Chorizo: If using chorizo, slice it very thinly. The spicy flavor can be quite intense, so a little goes a long way.
- Prosciutto: Prosciutto is best served thinly sliced. You can arrange it in a few different ways:
- Arrange the Meats: Place the meats around the cheeses, again leaving space for the other items. I like to group the meats together in small clusters. Try to create some height and dimension by layering the slices.
- Prepare the Fruits & Vegetables: Wash and dry all the fruits and vegetables thoroughly.
- Grapes: Leave the grapes on the stems. This makes them easier to grab and adds a nice visual element.
- Apple & Pear: Slice the apple and pear thinly. To prevent browning, you can toss the slices with a little lemon juice.
- Dried Fruits: Arrange the dried apricots and cranberries in small piles.
- Olives: Drain the olives and place them in a small bowl or ramekin.
- Baby Carrots & Celery: If using, wash and dry the baby carrots and celery sticks.
- Arrange the Fruits & Vegetables: Fill in the gaps between the cheeses and meats with the fruits and vegetables. I like to use the grapes to create a flowing effect, and the apple and pear slices to add pops of color. The olives and dried fruits can be scattered around to add texture and interest.
- Add the Nuts & Seeds: Sprinkle the walnuts, almonds, and pecans around the board. The nuts add a nice crunch and complement the flavors of the cheeses and meats. Pumpkin seeds are also a great addition, especially during the fall.
- Place the Spreads & Dips: Place the honeycomb or honey and fig jam in small bowls or ramekins. Dijon mustard can also be added if desired. These spreads add a touch of sweetness and acidity that balances the richness of the cheeses and meats.
- Arrange the Crackers & Bread: Arrange the assorted crackers and sliced baguette around the edges of the board. You can also place them in separate bowls or baskets if you prefer. Make sure there’s enough variety to suit different tastes.
- Garnish: Garnish the board with fresh rosemary sprigs and edible flowers (if using). These add a final touch of elegance and freshness.
- Final Touches: Take a step back and admire your creation! Make any necessary adjustments to ensure that the board is visually appealing and balanced. Add more of any item that seems to be lacking.
- Serve: Serve the cheese board immediately, or cover it loosely with plastic wrap and refrigerate for up to a few hours. Bring it to room temperature for about 30 minutes before serving to allow the cheeses to soften and the flavors to develop.
Tips for Success
Here are a few extra tips to help you create the perfect holiday cheese board:
- Choose a variety of cheeses: Aim for a mix of textures (soft, semi-hard, hard) and flavors (mild, sharp, tangy, creamy).
- Don’t overcrowd the board: Leave some space between the items so that people can easily see and access everything.
- Use different shapes and sizes: Cut the cheeses and meats into different shapes and sizes to add visual interest.
- Add pops of color: Use colorful fruits and vegetables to brighten up the board.
- Consider your guests’ preferences: If you know that some of your guests have dietary restrictions or preferences, be sure to include options that they can enjoy.
- Prepare ahead of time: You can prepare most of the components of the cheese board ahead of time, such as slicing the cheeses and meats, washing the fruits and vegetables, and arranging the crackers. This will save you time and stress on the day of your event.
- Have fun! Creating a cheese board should be a fun and creative process. Don’t be afraid to experiment with different combinations of flavors and textures.
Cheese Selection Guide
Choosing the right cheeses can make or break your cheese board. Here’s a little more detail on the types of cheeses
Conclusion:
So, there you have it! This Holiday Cheese Board isn’t just a collection of cheeses and crackers; it’s a festive centerpiece, a conversation starter, and a delicious experience all rolled into one beautiful presentation. I truly believe this is a must-try recipe, especially during the holiday season, because it offers something for everyone. From the creamy brie to the sharp cheddar, the sweet fruits to the savory nuts, every element is carefully chosen to create a harmonious blend of flavors and textures that will tantalize your taste buds and impress your guests.
But the best part? It’s incredibly easy to put together! No complicated cooking techniques or fancy equipment required. Just a little creativity and a love for good food. I know that sometimes, during the holidays, we get caught up in complicated recipes and stressful preparations, but this cheese board is the perfect antidote. It’s a simple, elegant, and stress-free way to elevate your holiday gatherings.
And don’t feel limited by the ingredients I’ve suggested! This is your chance to get creative and personalize your board to your own tastes and preferences. Love spicy food? Add some pepper jack cheese or a jar of pickled jalapeños. Prefer a sweeter board? Include more dried fruits, honey, or even a small dish of chocolate truffles.
Here are a few serving suggestions and variations to get you started:
* Pairing Perfection: Serve your Holiday Cheese Board with a selection of wines. A crisp white wine like Sauvignon Blanc pairs beautifully with goat cheese and brie, while a bold red wine like Cabernet Sauvignon complements cheddar and aged cheeses. Don’t forget the beer lovers! A light lager or a hoppy IPA can also be a great addition.
* Bread & Cracker Bonanza: Offer a variety of breads and crackers to suit different tastes. Baguettes, sourdough, multigrain crackers, and even gluten-free options are all great choices.
* Seasonal Swaps: Adapt your board to the season! In the fall, add apples, pears, and pumpkin seeds. In the winter, include cranberries, pomegranates, and walnuts.
* Themed Boards: Get creative with themes! A Mediterranean-inspired board with feta, olives, and hummus, or an Italian-themed board with mozzarella, prosciutto, and pesto are both delicious options.
* Sweet & Savory: Don’t be afraid to mix sweet and savory elements. A drizzle of honey over a piece of brie or a sprinkle of sea salt on a chocolate truffle can elevate the flavors to a whole new level.
Ultimately, the most important thing is to have fun and create a board that you and your guests will enjoy. I truly believe that this Holiday Cheese Board will become a cherished tradition in your family for years to come.
So, what are you waiting for? Gather your ingredients, unleash your creativity, and get ready to create a stunning and delicious Holiday Cheese Board that will be the highlight of your next gathering. I’m so excited for you to try this recipe!
And most importantly, I’d love to hear about your experience! Did you make any variations? What were your guests’ favorite cheeses? Share your photos and stories in the comments below. I can’t wait to see what you create! Happy holidays and happy cheeseboarding!
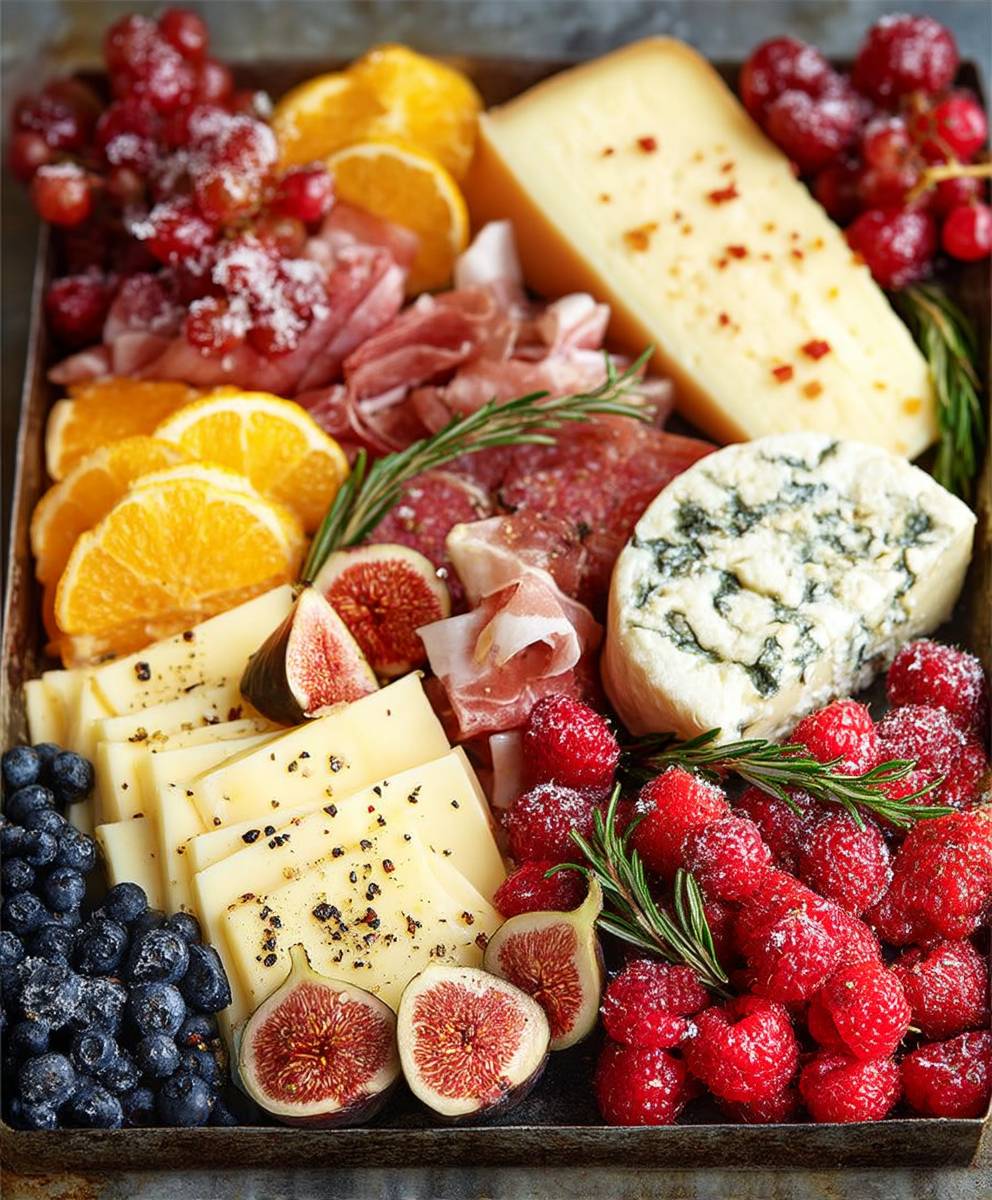
Holiday Cheese Board: Your Ultimate Guide to a Festive Spread
A stunning holiday cheese board with cheeses, meats, fruits, nuts, and spreads. Perfect for entertaining!
Ingredients
- 8 oz Brie cheese round
- 8 oz Sharp Cheddar cheese block
- 6 oz Goat cheese log (plain or flavored)
- 6 oz Gorgonzola or other blue cheese wedge
- 4 oz Smoked Gouda cheese
- 4 oz Prosciutto
- 4 oz Salami (various types, such as Genoa, Sopressata)
- 2 oz Chorizo (optional, sliced thinly)
- Assorted crackers (e.g., water crackers, whole wheat crackers, rosemary crackers)
- Baguette, sliced into thin rounds
- Breadsticks (optional)
- 1 cup Red grapes
- 1 cup Green grapes
- 1 Apple (e.g., Honeycrisp, Fuji), sliced
- 1 Pear (e.g., Bosc, Anjou), sliced
- 1/2 cup Dried apricots
- 1/2 cup Dried cranberries
- 1/4 cup Olives (mixed varieties)
- Baby carrots (optional)
- Celery sticks (optional)
- 1/2 cup Walnuts
- 1/2 cup Almonds
- 1/4 cup Pecans
- Pumpkin seeds (optional)
- 1/4 cup Honeycomb or honey
- 1/4 cup Fig jam or other fruit preserves
- Dijon mustard (optional)
- Fresh rosemary sprigs
- Edible flowers (optional)
Instructions
- Choose Your Board: Start with a large serving board, platter, or even a wooden cutting board.
- Prepare the Cheeses:
- Brie: Leave the Brie round whole. You can score the top lightly with a knife in a criss-cross pattern if you like.
- Cheddar: Cut the Cheddar block into cubes, triangles, or slices.
- Goat Cheese: Leave the goat cheese log whole, or slice it into rounds.
- Gorgonzola: Crumble the Gorgonzola or blue cheese wedge into smaller pieces.
- Smoked Gouda: Slice the Smoked Gouda into thin wedges or cubes.
- Arrange the Cheeses: Place the cheeses strategically around the board, leaving space between them.
- Prepare the Meats:
- Prosciutto: Drape, roll, or fold the slices.
- Salami: Slice the salami into thin rounds and overlap slightly.
- Chorizo: If using, slice it very thinly.
- Arrange the Meats: Place the meats around the cheeses, leaving space for other items.
- Prepare the Fruits & Vegetables: Wash and dry all the fruits and vegetables thoroughly. Slice apple and pear thinly (toss with lemon juice to prevent browning).
- Arrange the Fruits & Vegetables: Fill in the gaps between the cheeses and meats with the fruits and vegetables.
- Add the Nuts & Seeds: Sprinkle the walnuts, almonds, and pecans around the board.
- Place the Spreads & Dips: Place the honeycomb or honey and fig jam in small bowls or ramekins.
- Arrange the Crackers & Bread: Arrange the assorted crackers and sliced baguette around the edges of the board.
- Garnish: Garnish the board with fresh rosemary sprigs and edible flowers (if using).
- Final Touches: Make any necessary adjustments to ensure that the board is visually appealing and balanced.
- Serve: Serve the cheese board immediately, or cover it loosely with plastic wrap and refrigerate for up to a few hours. Bring it to room temperature for about 30 minutes before serving.
Notes
- Choose a variety of cheeses with different textures and flavors.
- Don’t overcrowd the board.
- Use different shapes and sizes for visual interest.
- Add pops of color with fruits and vegetables.
- Consider your guests’ preferences.
- Prepare ahead of time to save time and stress.
- Have fun and experiment with different combinations.


Leave a Comment