
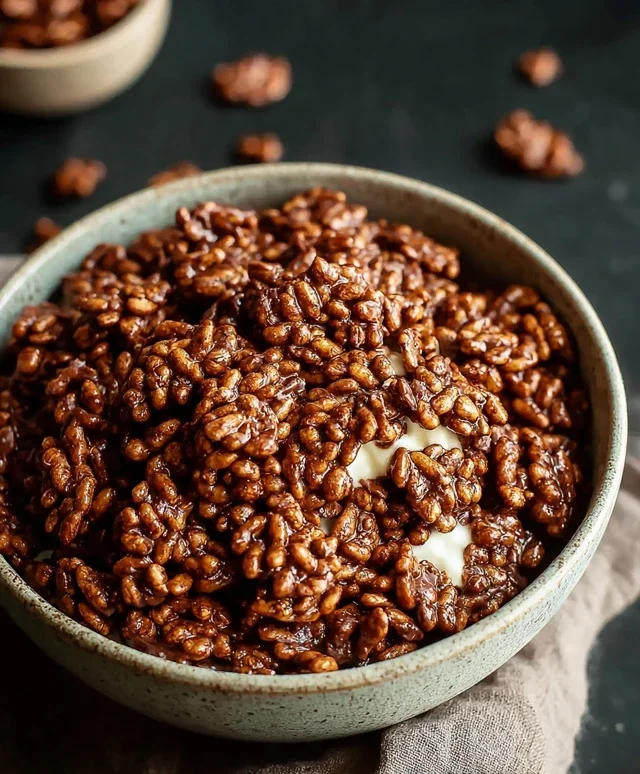
Healthy Crispy Chocolate Puffed Rice Cereal. Who doesn’t adore that satisfying crunch followed by a burst of rich chocolate flavor? For so long, my morning routine involved either a sugary, guilt-inducing cereal or a bland, albeit healthy, option. I yearned for that childhood joy, that crispy, chocolaty goodness, but without the sugar crash and nutrient void. This is where my quest for the perfect healthy crispy chocolate puffed rice cereal began. What makes this recipe so special is that it delivers all the delightful textures and tastes you crave, but with a wholesome twist that I can feel genuinely good about serving myself and my family. It’s a game-changer for busy mornings, a delightful snack, and proof that you don’t have to sacrifice flavor for well-being. Get ready to rediscover your love for cereal, the truly healthy way!
Your New Go-To Breakfast Solution
A Guilt-Free Indulgence

Ingredients:
Creating Your Own Healthy Crispy Chocolate Puffed Rice Cereal
Are you looking for a breakfast that’s both incredibly satisfying and genuinely good for you? Do you crave that delightful crunch and rich chocolate flavor, but want to avoid the sugar-laden, artificial ingredients found in most store-bought cereals? Then get ready to fall in love with this homemade Healthy Crispy Chocolate Puffed Rice Cereal. It’s remarkably simple to make, allowing you to control exactly what goes into your bowl, and the result is a breakfast that feels like a treat without any of the guilt. This recipe harnesses the power of natural ingredients to deliver a flavor and texture that will have you ditching the boxed stuff for good. Imagin extracte starting your day with a satisfying crunch and a deep, chocolatey essence, knowing that you’ve nourished your body with wholesome goodness. This cereal is perfect for busy mornings, a delightful snack, or even a healthy dessert option. Let’s get started on creating this simple yet sensational breakfast staple!
Preparing the Chocolate Coating
The magic of this cereal lies in its simple, yet flavorful chocolate coating. We’re using raw cacao for an intense, unprocessed chocolate taste, which also packs a punch of antioxidants. Coconut oil acts as the binder, giving our coating a smooth consistency and contributing healthy fats. Maple syrup provides a touch of sweetness, and you can absolutely adjust this to your personal preference – less for a more intense chocolate flavor, or a little more if you have a sweeter tooth. Finally, a hint of vanilla extract rounds out the flavor profile beautifully.
First, let’s prepare our workspace. You’ll want to have a large mixing bowl ready for combining everything. In a separate small bowl or a microwave-safe cup, combine the liquid coconut oil, raw cacao powder, maple syrup, and vanilla extract. If your coconut oil isn’t already liquid, gently warm it. You can do this by placing the jar of coconut oil in a bowl of warm water for a few minutes, or by microwaving it in short bursts of 10-15 seconds, stirring in between, until it’s just melted and pourable. It’s important not to overheat it, as we don’t want to cook the cacao or affect the delicate flavor of the vanilla.
Once the coconut oil is liquid and all the other ingredients are measured out, it’s time to whisk them together. Add the raw cacao, maple syrup, and vanilla extract to the liquid coconut oil. Whisk vigorously until the mixture is completely smooth and homogenous. You want to ensure there are no lumps of cacao powder remaining and that the maple syrup and vanilla are thoroughly incorporated. This smooth, glossy mixture is what will coat our puffed rice, transforming it into a delightful chocolatey cereal. Take a moment to smell the rich aroma – it’s already a good sign of the deliciousness to come!
Coating the Puffed Rice
Now for the fun part: coating the puffed rice. Take your 4 cups of puffed rice and place them into your large mixing bowl. It’s crucial to use puffed rice that is still nice and crispy. If it feels a bit stnon-alcoholic ale, you can briefly toast it in a dry pan over low heat for a few minutes to revive its crunch. Once your puffed rice is ready, pour the prepared chocolate mixture over the top.
Gently, but thoroughly, toss the puffed rice with the chocolate mixture. The key here is to be gentle to avoid crushing the delicate puffed rice grains. You can use a large spoon or spatula for this, working from the bottom of the bowl upwards. Make sure every single piece of puffed rice gets lightly coated in the chocolate mixture. You might find it easier to work in batches if your bowl isn’t quite large enough, or if you’re concerned about breakage. The goal is an even, light coating, not a thick drenching. The warmth of the coconut oil will help the cacao and syrup cling to the rice. Continue tossing until you can no longer see any dry spots of puffed rice.
Forming and Setting Your Cereal
Once the puffed rice is beautifully coated, it’s time to get it ready to become that satisfyingly crispy cereal. Line a large baking sheet with parchment paper. This will prevent any sticking and make cleanup a breeze. Carefully spread the chocolate-coated puffed rice onto the prepared baking sheet in a single layer. Try to spread it out as evenly as possible. This even distribution will help the cereal set uniformly and ensures you get consistent crunch throughout. If you notice any clumps, gently break them apart with your fingers.
Now, you have two excellent options for setting your cereal. For a quicker result, you can place the baking sheet in the refrigerator for about 30-60 minutes. The coolness will help the coconut oil solidify, creating those desirable crispy clusters. Alternatively, for an even crisper texture, you can bake the cereal at a very low temperature. Preheat your oven to 250 degrees Fahrenheit (120 degrees Celsius). Place the baking sheet in the preheated oven and bake for about 10-15 minutes. Keep a very close eye on it during this time, as puffed rice can burn quickly at higher temperatures. The goal here is just to gently dry out any residual moisture and further solidify the coating.
After chilling or baking, carefully remove the baking sheet from the refrigerator or oven. Let the cereal cool completely on the baking sheet. As it cools, it will firm up and develop its signature crunch. Resist the urge to taste it too soon – the full crispness will be achieved once it’s fully set and at room temperature.
Storage and Enjoyment
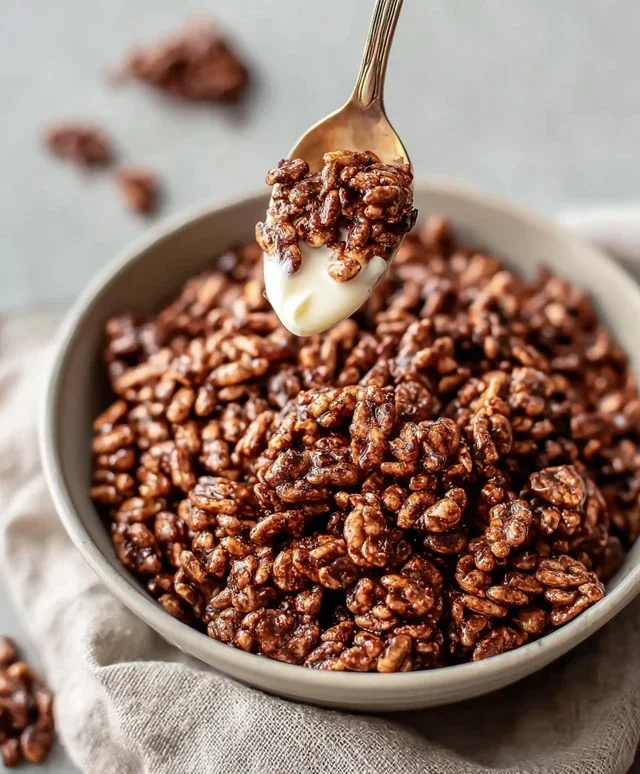
Once your Healthy Crispy Chocolate Puffed Rice Cereal is completely cool and wonderfully crisp, gently break apart any larger clusters into your desired cereal-sized pieces. Store your delicious creation in an airtight container at room temperature. Properly stored, this homemade cereal will stay fresh and crispy for up to a week. Enjoy it with your favorite milk (dairy or non-dairy), sprinkle it over yogurt, or eat it by the handful as a healthy snack. You’ve just created a guilt-free breakfast that’s as delicious as it is wholesome!
Conclusion:
So there you have it! My recipe for Healthy Crispy Chocolate Puffed Rice Cereal is a game-changer for anyone craving a delicious and satisfying breakfast or snack without the guilt. We’ve transformed simple ingredients into a delightful, crunchy treat that’s packed with flavor and far better for you than most store-bought options. It’s incredibly versatile, making it perfect for busy mornings when you need something quick, or as a delightful crunchy topping for your yogurt bowls. Don’t be afraid to experiment with variations; adding a sprinkle of cinnamon or a few dried berries can create entirely new flavor profiles. I truly encourage you to give this recipe a try. You might be surprised at how easy and rewarding it is to make your own healthy and incredibly tasty cereal!
Frequently Asked Questions:
Can I make this cereal ahead of time?
Absolutely! This Healthy Crispy Chocolate Puffed Rice Cereal stores wonderfully in an airtight container at room temperature for up to a week. This makes it ideal for meal prepping your breakfasts for the entire week.
What are some other healthy additions I can mix in?
The possibilities are endless! For added nutrients and texture, consider stirring in some chia seeds, flax seeds, or a handful of your favorite chopped nuts like almonds or walnuts. A dash of cinnamon or nutmeg also adds a warm, comforting flavor.
Is this recipe suitable for kids?
Yes, it’s fantastic for kids! It’s a great way to get them to enjoy a healthier breakfast option. You can even get them involved in the mixing process. Just be mindful of any allergies when adding variations.
Healthy Crispy Chocolate Puffed Rice Cereal
A quick and easy recipe for a healthier homemade chocolate puffed rice cereal, perfect for a satisfying breakfast or snack.
Ingredients
-
4 cups puffed rice
-
4 tbsp coconut oil, liquid
-
3 tbsp raw cacao
-
2 tbsp maple syrup
-
1/4 tsp vanilla extract
Instructions
-
Step 1
In a large bowl, combine the liquid coconut oil, raw cacao, maple syrup, and vanilla extract. Whisk until well combined and smooth. -
Step 2
Add the puffed rice to the bowl with the chocolate mixture. -
Step 3
Gently fold the puffed rice into the chocolate mixture, ensuring each piece is evenly coated. -
Step 4
Spread the coated puffed rice in a single layer onto a baking sheet lined with parchment paper. -
Step 5
Bake in a preheated oven at 300°F (150°C) for 10-12 minutes, stirring halfway through, until lightly toasted and crispy. -
Step 6
Let the cereal cool completely on the baking sheet before breaking it apart into clusters.
Important Information
Nutrition Facts (Per Serving)
It is important to consider this information as approximate and not to use it as definitive health advice.
Allergy Information
Please check ingredients for potential allergens and consult a health professional if in doubt.


Leave a Comment