
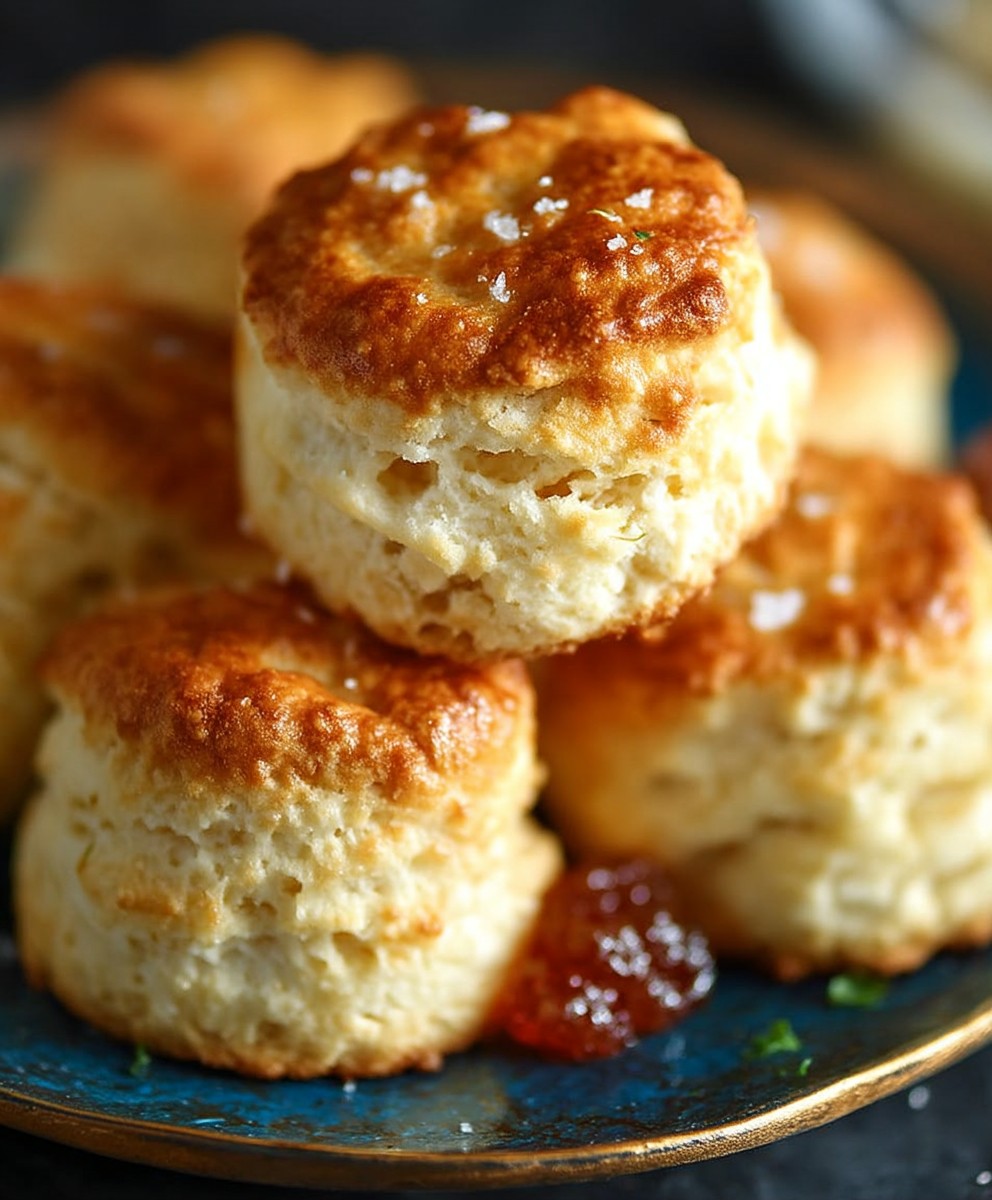
Flaky Mile High Biscuits: the name alone conjures images of golden-brown perfection, doesn’t it? Imagine pulling apart a warm, buttery biscuit, steam rising to greet you, the layers practically melting in your mouth. Forget those dense, hockey-puck biscuits of your past! We’re talking about biscuits so tall and airy, they practically defy gravity.
Biscuits, in their simplest form, have been a staple in kitchens for centuries, evolving from hardtack to the fluffy delights we know and love today. In the American South, they hold a special place, often gracing breakfast tables and accompanying hearty meals. They represent comfort, tradition, and the simple pleasure of homemade goodness.
But what makes a truly great biscuit? It’s all about the texture. People adore flaky mile high biscuits because of their incredible lightness and the satisfying way they shatter with each bite. The secret lies in the technique the careful layering of cold butter and dough, creating those signature pockets of air that rise to magnificent heights in the oven. Plus, let’s be honest, who can resist the allure of a warm, buttery biscuit fresh from the oven? Whether you slather them with jam, dunk them in gravy, or simply enjoy them on their own, these biscuits are guaranteed to be a crowd-pleaser. Get ready to experience biscuit bliss!

Ingredients:
- 6 cups all-purpose flour, plus more for dusting
- 3 tablespoons baking powder
- 1 tablespoon baking soda
- 1 tablespoon salt
- 1 cup (2 sticks) unsalted butter, very cold and cut into ½-inch cubes
- 1 cup vegetable shortening, very cold and cut into ½-inch cubes
- 2 ½ cups buttermilk, very cold
- ½ cup heavy cream, for brushing
Preparing the Dough: The Key to Flaky Layers
Alright, let’s get started on these mile-high biscuits! The secret to those amazing flaky layers is keeping everything COLD. Seriously, cold, cold, cold. I even sometimes chill my flour and bowl before I start. It might seem like overkill, but trust me, it makes a difference.
- Combine the Dry Ingredients: In a large bowl, whisk together the flour, baking powder, baking soda, and salt. Make sure everything is evenly distributed. This ensures that the biscuits rise properly and have a consistent flavor. I usually whisk for about 30 seconds to a minute.
- Cut in the Butter and Shortening: This is where the magic happens. Add the cold butter and shortening to the flour mixture. Now, you have a few options here. You can use a pastry blender, which is the traditional method. Or, if you’re careful, you can use your fingers. The goal is to break the butter and shortening into pea-sized pieces. You want to see little bits of fat throughout the flour. These bits of fat will melt during baking, creating steam and those beautiful flaky layers. If you’re using your fingers, work quickly to prevent the butter and shortening from melting too much. I like to toss the butter and shortening in the flour first to coat them, which helps keep them cold.
- Incorporate the Buttermilk: Gradually add the cold buttermilk to the flour mixture. Start with 2 cups and gently stir with a fork or spatula until just combined. Be careful not to overmix! Overmixing will develop the gluten in the flour, resulting in tough biscuits. The dough should be shaggy and slightly sticky. If the dough seems too dry, add the remaining ½ cup of buttermilk, a tablespoon at a time, until it comes together.
- Turn Out and Knead (Gently!): Lightly flour a clean work surface. Turn the dough out onto the floured surface. Gently pat the dough into a rectangle about 1 inch thick. Now, this is where the “mile-high” part comes in. We’re going to create layers by folding the dough.
- The First Fold: Fold the dough in thirds, like you’re folding a letter. This is called a “book fold.” Gently press down on the dough to flatten it slightly.
- The Second Fold: Rotate the dough 90 degrees and repeat the folding process. Fold it in thirds again, gently pressing down.
- The Third Fold: Repeat the rotation and folding process one more time. This will give you a total of three folds. These folds create layers upon layers of buttery goodness.
- Pat and Cut: Gently pat the dough into a rectangle about 1 ½ inches thick. Use a 3-inch biscuit cutter (or a sharp knife) to cut out the biscuits. When cutting, press straight down and avoid twisting the cutter, as this can seal the edges and prevent the biscuits from rising properly.
Baking the Biscuits: Achieving Golden Perfection
Now that we’ve got our biscuits cut, it’s time to bake them to golden perfection. Proper oven temperature and placement are key here.
- Preheat the Oven: Preheat your oven to 450°F (232°C). Make sure your oven is fully preheated before you put the biscuits in. A hot oven is essential for creating that initial burst of steam that helps the biscuits rise.
- Prepare the Baking Sheet: Line a baking sheet with parchment paper. This will prevent the biscuits from sticking and make cleanup a breeze.
- Arrange the Biscuits: Place the biscuits on the prepared baking sheet, spacing them about 1 inch apart. For extra-high biscuits, you can place them close together so they support each other as they rise.
- Brush with Heavy Cream: Brush the tops of the biscuits with heavy cream. This will give them a beautiful golden-brown color and a slightly richer flavor. You can also use melted butter if you prefer, but I find that heavy cream works best.
- Bake: Bake for 15-20 minutes, or until the biscuits are golden brown and cooked through. The baking time may vary depending on your oven, so keep an eye on them. A good way to check for doneness is to insert a toothpick into the center of a biscuit. If it comes out clean, the biscuits are done.
Serving and Enjoying: The Best Part!
Finally, the moment we’ve all been waiting for! These biscuits are best served warm, straight from the oven. They’re delicious on their own, but even better with butter, jam, honey, or your favorite toppings.
- Cool Slightly: Let the biscuits cool on the baking sheet for a few minutes before transferring them to a wire rack. This will prevent them from getting soggy.
- Serve Warm: Serve the biscuits warm with your favorite toppings. I love them with butter and honey, but they’re also great with jam, cream cheese, or even savory toppings like sausage gravy.
- Storage: Store any leftover biscuits in an airtight container at room temperature for up to 2 days. To reheat, wrap them in foil and warm them in a 350°F (175°C) oven for about 10 minutes.
Tips for Success:
- Keep everything cold! This is the most important tip for making flaky biscuits.
- Don’t overmix the dough! Overmixing will develop the gluten and result in tough biscuits.
- Use a sharp biscuit cutter! Twisting the cutter can seal the edges and prevent the biscuits from rising properly.
- Bake in a hot oven! A hot oven is essential for creating that initial burst of steam that helps the biscuits rise.
- Don’t be afraid to experiment! Once you’ve mastered the basic recipe, you can try adding different flavors, such as cheese, herbs, or spices.
Troubleshooting:
- Biscuits are flat: This could be due to using old baking powder or baking soda, overmixing the dough, or not using cold enough ingredients.
- Biscuits are tough: This is usually caused by overmixing the dough.
- Biscuits are not flaky: This could be due to not using cold enough ingredients or not cutting the butter and shortening into small enough pieces.
- Biscuits are not browning: This could be due to not brushing the tops with heavy cream or melted butter, or not baking them long enough.
I hope you enjoy these mile-high biscuits as much as I do! They’re a labor of love, but the results are well worth the effort. Happy baking!
Conclusion:
And there you have it! These Flaky Mile High Biscuits are more than just a recipe; they’re an experience. From the satisfying crumble as you cut in the butter to the towering height and golden-brown perfection fresh from the oven, every step is a testament to biscuit bliss. I truly believe this recipe is a must-try for anyone who appreciates a good, old-fashioned, homemade biscuit.
Why? Because these aren’t your average biscuits. The technique, while requiring a little patience, yields a texture that’s simply unparalleled. They’re incredibly light and airy, with layers upon layers of flaky goodness that practically melt in your mouth. Forget those dense, dry biscuits you might have encountered before; these are in a league of their own. The secret lies in the cold ingredients and the gentle handling of the dough, ensuring that the butter remains in distinct pieces, creating those coveted layers as it bakes.
But the best part? The versatility! While these Flaky Mile High Biscuits are divine on their own, warm from the oven with a pat of butter and a drizzle of honey, the possibilities are endless. Imagine them split open and filled with crispy fried chicken and a spicy honey drizzle for a truly decadent treat. Or, how about using them as the base for a savory breakfast sandwich, piled high with scrambled eggs, bacon, and cheese?
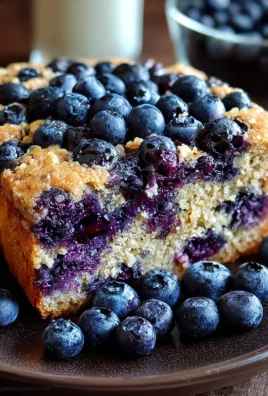
For a sweeter variation, consider adding a handful of blueberries or chocolate chips to the dough before baking. The burst of fruit or chocolate adds a delightful twist to the classic biscuit flavor. You could also brush the tops with melted butter and sprinkle with cinnamon sugar for a sweet and comforting treat.
And don’t forget the classic pairings! These biscuits are the perfect accompaniment to a hearty bowl of chili, a creamy soup, or a plate of scrambled eggs. They’re also fantastic served alongside a pot roast or any other comfort food favorite.
I’ve tried countless biscuit recipes over the years, and this one consistently comes out on top. It’s the recipe I reach for when I want to impress guests, when I’m craving a taste of home, or simply when I want to treat myself to something special.
So, what are you waiting for? Gather your ingredients, preheat your oven, and get ready to experience biscuit perfection. I promise you won’t be disappointed.
I’m so excited for you to try these Flaky Mile High Biscuits! Once you do, please, please, please come back and let me know how they turned out. Share your photos, your variations, and your tips in the comments below. I’d love to hear about your biscuit-baking adventures and see how you’re making this recipe your own. Happy baking! I know you’ll love these as much as I do. Don’t be intimidated by the “mile high” name, with a little practice, you’ll be turning out perfect, sky-high biscuits every time!
Flaky Mile High Biscuits: The Ultimate Guide to Baking Perfection
Mile-high, flaky biscuits made with cold butter and shortening, folded to create layers of buttery goodness.
Ingredients
- 6 cups all-purpose flour, plus more for dusting
- 3 tablespoons baking powder
- 1 tablespoon baking soda
- 1 tablespoon salt
- 1 cup (2 sticks) unsalted butter, very cold and cut into ½-inch cubes
- 1 cup vegetable shortening, very cold and cut into ½-inch cubes
- 2 ½ cups buttermilk, very cold
- ½ cup heavy cream, for brushing
Instructions
- Combine Dry Ingredients: In a large bowl, whisk together flour, baking powder, baking soda, and salt.
- Cut in Butter and Shortening: Add cold butter and shortening to the flour mixture. Use a pastry blender or your fingers to break them into pea-sized pieces.
- Incorporate Buttermilk: Gradually add cold buttermilk to the flour mixture, starting with 2 cups. Stir gently until just combined. Add more buttermilk if needed, a tablespoon at a time.
- Turn Out and Knead (Gently!): Lightly flour a clean work surface. Turn the dough out and pat into a 1-inch thick rectangle.
- The First Fold: Fold the dough in thirds (like a letter). Gently press down.
- The Second Fold: Rotate the dough 90 degrees and repeat the folding process.
- The Third Fold: Repeat the rotation and folding process one more time.
- Pat and Cut: Gently pat the dough into a 1 ½-inch thick rectangle. Use a 3-inch biscuit cutter (or a sharp knife) to cut out the biscuits, pressing straight down.
- Preheat Oven: Preheat oven to 450°F (232°C).
- Prepare Baking Sheet: Line a baking sheet with parchment paper.
- Arrange Biscuits: Place biscuits on the baking sheet, spacing them about 1 inch apart.
- Brush with Heavy Cream: Brush the tops of the biscuits with heavy cream.
- Bake: Bake for 15-20 minutes, or until golden brown and cooked through.
- Cool Slightly: Let the biscuits cool on the baking sheet for a few minutes before transferring them to a wire rack.
- Serve Warm: Serve the biscuits warm with your favorite toppings.
- Storage: Store any leftover biscuits in an airtight container at room temperature for up to 2 days. To reheat, wrap them in foil and warm them in a 350°F (175°C) oven for about 10 minutes.
Notes
- Key to Flaky Layers: Keep all ingredients very cold. Chill flour and bowl for best results.
- Don’t Overmix: Overmixing develops gluten and makes tough biscuits.
- Cutting the Dough: Press straight down with the biscuit cutter, avoid twisting.
- Oven Temperature: A hot oven is essential for the biscuits to rise properly.
- Serving: Best served warm with butter, jam, honey, or your favorite toppings.
- Troubleshooting:
- Flat biscuits: Old baking powder/soda, overmixing, not cold enough ingredients.
- Tough biscuits: Overmixing.
- Not flaky: Not cold enough ingredients, butter/shortening not small enough.
- Not browning: Not enough cream/butter, not baking long enough.


Leave a Comment