
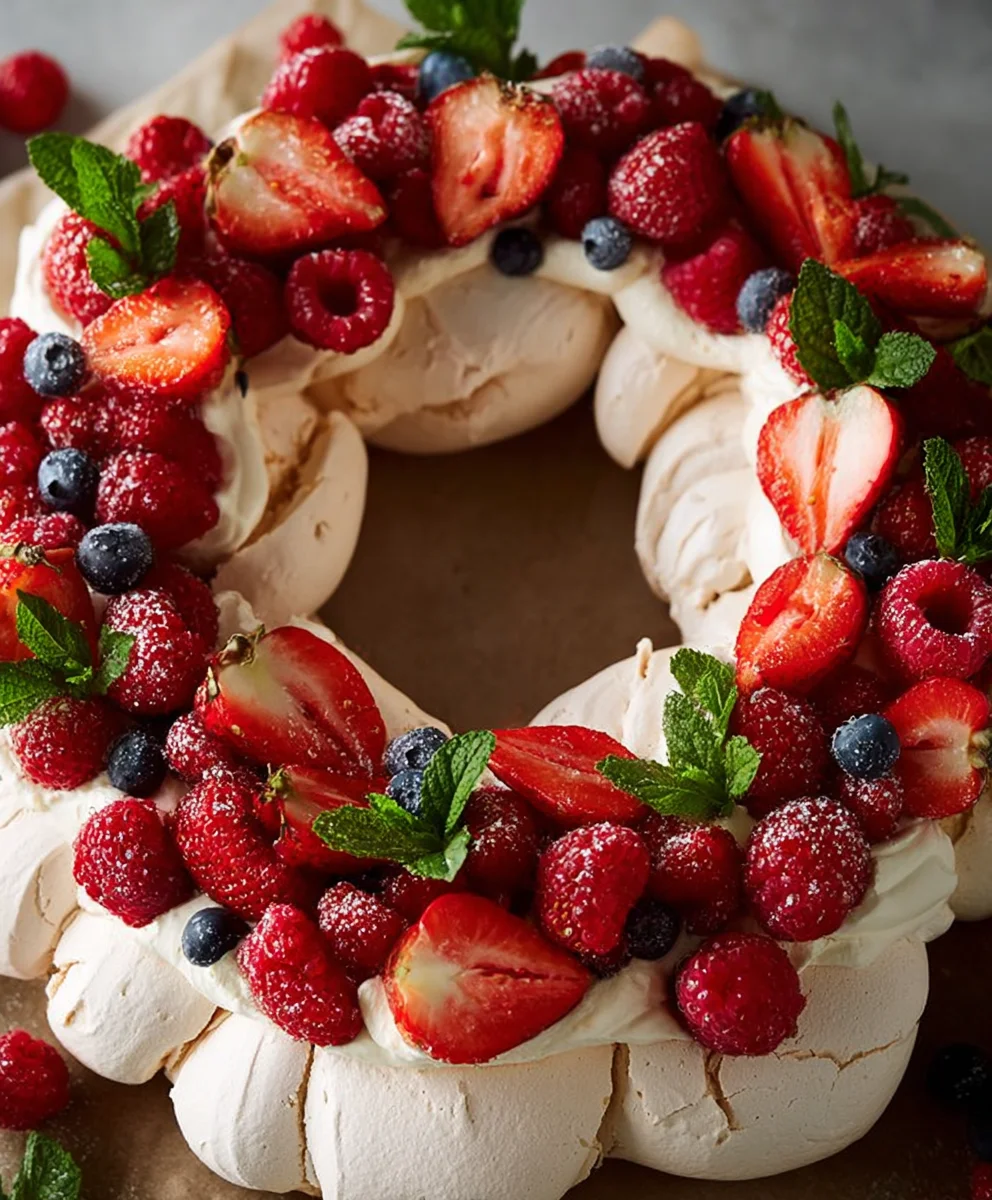
Pull Apart Pavlova Wreath. There’s something undeniably magical about a dessert that’s as beautiful as it is delicious, and this stunning Pull Apart Pavlova Wreath absolutely fits the bill. Imagine a delicate, crisp meringue shell, baked to golden perfection, that subtly yields to a soft, marshmallowy center. This isn’t just any pavlova; it’s a showstopper, designed to be broken apart and shared, making it the ultimate centerpiece for any gathering. People adore this dessert because it’s surprisingly light, offering a sweet indulgence without feeling heavy, and the endless possibilities for topping it with fresh fruits, whipped cream, and drizzles of sauces are truly captivating. What makes this Pull Apart Pavlova Wreath so special is its interactive nature, transforming dessert time into a fun, communal experience that everyone will remember.

Ingredients:
- 6 extra-large egg whites, at room temperature
- 2 cups icing sugar / powdered sugar, sifted
- 2 tbsp cornstarch
- 1 tsp vanilla extract
- 3 cups cream (Heavy cream/whipping cream)
- 1 cup icing sugar / powdered sugar, sifted
- 1 tsp vanilla
- Fresh fruit (berries are perfect!), for decorating
- Fresh mint leaves, for garnish
Making the Meringue Base
Preheating and Preparation
Before we begin, preheat your oven to 275°F (135°C). This gentle heat is crucial for creating a crisp exterior and a soft, marshmallowy center for our Pull Apart Pavlova Wreath. Line a large baking sheet with parchment paper. You can draw a large circle (about 9-10 inches in diameter) on the parchment paper as a guide for shaping your wreath. This ensures a consistent shape, although don’t worry too much about perfection – rustic charm is part of the pavlova’s appeal!
Whipping the Egg Whites
In a very clean, dry bowl (any trace of grease will prevent the egg whites from whipping properly), add the 6 extra-large egg whites. Using an electric mixer (stand mixer with a whisk attachment is ideal), start whipping the egg whites on medium speed. Continue whipping until they form soft peaks. This means when you lift the whisk, the peaks will curl over. Don’t overbeat them at this stage, as it can make the meringue dry and difficult to work with.
Gradually Adding Sugar and Cornstarch
Now, it’s time to gradually add the 2 cups of sifted icing sugar / powdered sugar. Do this a tablespoon at a time, while the mixer is still running on medium-high speed. It’s important to add the sugar very slowly, allowing each addition to fully incorporate before adding the next. This gradual process helps to dissolve the sugar and create a stable meringue structure. Once all the sugar is added, continue to whip until the meringue is thick, glossy, and holds stiff peaks. When you tilt the bowl, the meringue should not slide out. Finally, gently fold in the 2 tbsp of cornstarch and 1 tsp of vanilla extract. The cornstarch acts as a stabilizer, helping to prevent weeping and ensuring a perfectly cooked pavlova.
Shaping the Wreath
Spoon the meringue onto the prepared baking sheet, using your drawn circle as a guide. Start by creating a large, hollow circle, leaving a generous opening in the center. You can use the back of a spoon or a spatula to create a slight indentation around the outer edge, giving it that classic pavlova look. Don’t aim for a perfectly smooth surface; swirls and peaks add character to your Pull Apart Pavlova Wreath. This is where the “pull apart” aspect comes into play – the slightly uneven texture makes it easier to break off pieces later.
Baking and Cooling
The Gentle Bake
Place the meringue wreath into your preheated oven. Bake for 1 hour and 15 minutes at 275°F (135°C). During this time, the meringue will puff up slightly and start to turn a pale cream color. Resist the urge to open the oven door frequently, as this can cause the pavlova to collapse. After the baking time is complete, turn off the oven and leave the pavlova inside with the door slightly ajar. Allowing it to cool slowly in the oven prevents sudden temperature changes that can lead to cracking. Let it cool completely in the oven, which can take several hours or even overnight. This slow cooling process is vital for achieving that delightful crisp exterior and chewy interior.
Preparing the Whipped Cream and Assembling the Wreath
Whipping the Cream
Once your pavlova base is completely cool, it’s time to prepare the luscious cream filling. In a clean, chilled bowl, add the 3 cups of heavy cream/whipping cream. Add the 1 cup of sifted icing sugar / powdered sugar and 1 tsp of vanilla. Using an electric mixer, whip the cream on medium-high speed until it forms stiff peaks. Be careful not to over-whip, as you don’t want it to turn into butter. The cream should be thick enough to hold its shape when dolloped onto the pavlova.
Assembling the Pull Apart Pavlova Wreath
Gently transfer the cooled pavlova base to your serving platter. You may need to carefully slide it off the parchment paper. Now, spoon or pipe the whipped cream generously over the top of the pavlova wreath, filling the center and covering the edges. Don’t be shy with the cream; it’s what makes this dessert so decadent and enjoyable.
Decorating with Fruit and Mint
This is the most creative and fun part! Artfully arrange your fresh fruit, such as a medley of vibrant berries, over the whipped cream. Let the colors mingle and overlap. Add a few sprigs of fresh mint leaves for a pop of green and a refreshing aroma. The combination of the crisp meringue, creamy filling, sweet fruit, and fragrant mint is simply divine. This Pull Apart Pavlova Wreath is best served immediately after assembly to enjoy the textures at their finest.
Conclusion:
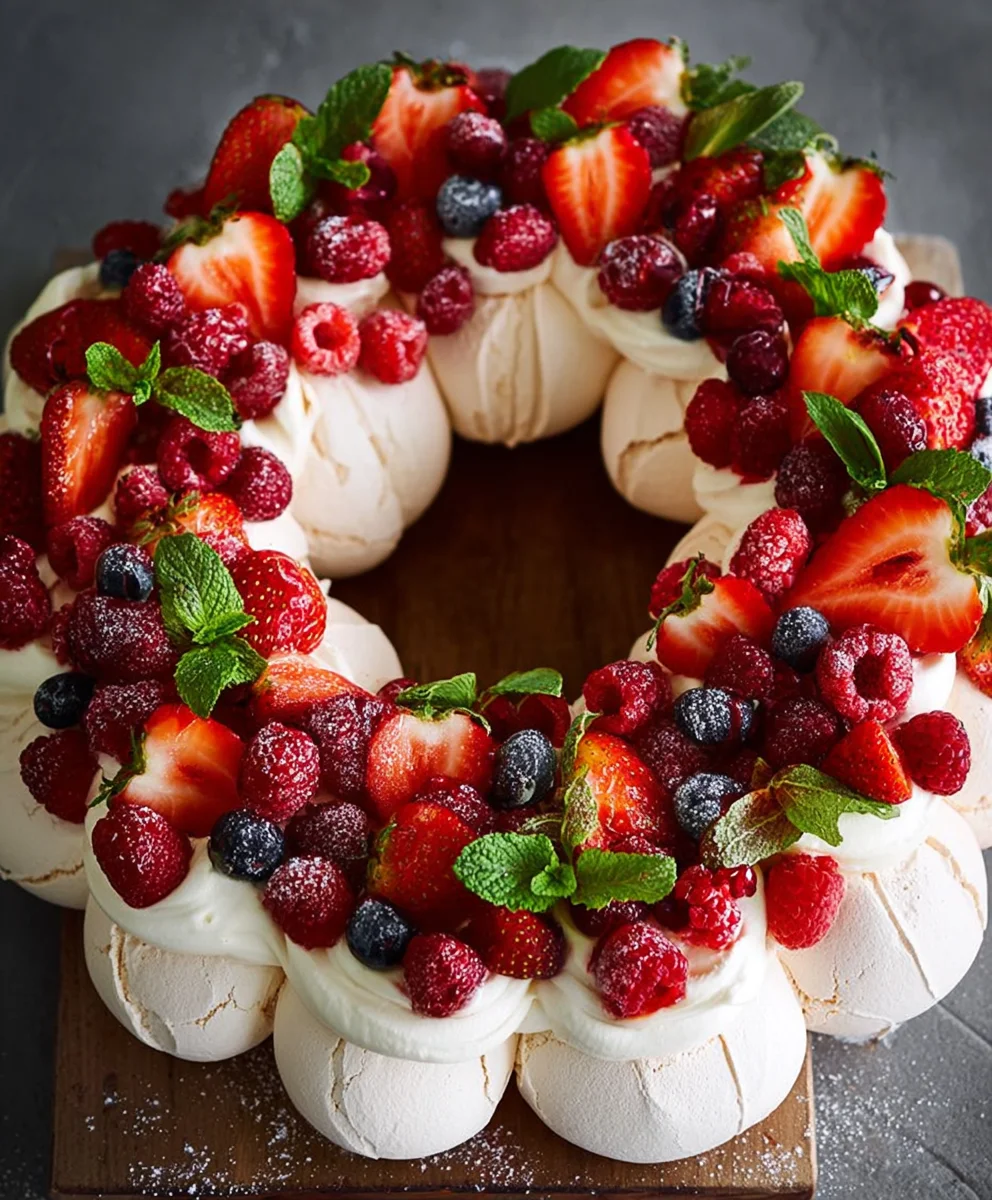
I hope you’ve enjoyed learning how to create this stunning and delicious Pull Apart Pavlova Wreath! This recipe is a showstopper, perfect for holidays, celebrations, or simply when you want to impress your guests with a truly memorable dessert. The beauty of this pavlova lies not only in its impressive visual appeal but also in its delicate, crisp meringue exterior giving way to a delightfully chewy center. The sweet, airy meringue, combined with luscious cream and vibrant fresh berries, creates a symphony of textures and flavors that’s utterly irresistible.
For serving suggestions, I love presenting the Pull Apart Pavlova Wreath as the centerpiece of a dessert table. It’s also wonderful served individually by carefully pulling apart the sections. For variations, feel free to experiment with different fruit toppings – think sliced peaches and raspberries in summer, or cranberries and pomegranate seeds for a festive winter twist. You could also add a drizzle of chocolate sauce or a sprinkle of toasted almonds for an extra layer of indulgence. Don’t be intimidated by meringue; with a little care and attention to detail, you’ll achieve perfect results. So go ahead, give this recipe a try, and enjoy the delight on everyone’s faces!
Frequently Asked Questions:
Can I make the meringue shells for the Pull Apart Pavlova Wreath ahead of time?
Absolutely! You can bake the meringue shells up to a week in advance. Store them in an airtight container at room temperature. Ensure they are completely cooled before storing to prevent any condensation.
What if my meringue has cracks or is uneven?
Don’t worry about minor imperfections! A perfectly smooth pavlova isn’t necessary for this wreath. Cracks are common and can even add to the rustic charm. As long as the taste is delicious, that’s what truly matters.
Easy Pull Apart Pavlova Wreath-Festive Dessert
A festive and easy-to-make pull-apart pavlova wreath, perfect for holidays and celebrations. Features a crisp meringue shell with a soft, marshmallowy center, topped with whipped cream and fresh fruit.
Ingredients
-
6 extra-large egg whites, at room temperature
-
2 cups icing sugar / powdered sugar, sifted
-
2 tbsp cornstarch
-
1 tsp vanilla extract
-
3 cups cream (Heavy cream/whipping cream)
-
1 cup icing sugar / powdered sugar, sifted
-
1 tsp vanilla
-
Fresh fruit (berries are perfect!)
-
Fresh mint leaves
Instructions
-
Step 1
Preheat oven to 275°F (135°C). Line a large baking sheet with parchment paper and draw a 9-10 inch circle as a guide. -
Step 2
Whip egg whites in a clean, dry bowl with an electric mixer until soft peaks form. Gradually add 2 cups of sifted icing sugar, a tablespoon at a time, until thick, glossy, and stiff peaks form. Gently fold in cornstarch and vanilla extract. -
Step 3
Spoon meringue onto the prepared baking sheet, shaping it into a large, hollow circle, leaving a generous opening in the center. Create a slight indentation around the outer edge. -
Step 4
Bake for 1 hour and 15 minutes. Turn off the oven and leave the pavlova inside with the door slightly ajar to cool completely, several hours or overnight. -
Step 5
Whip 3 cups of heavy cream with 1 cup of sifted icing sugar and 1 tsp vanilla until stiff peaks form. -
Step 6
Transfer the cooled pavlova base to a serving platter. Spoon or pipe the whipped cream generously over the top, filling the center and covering the edges. -
Step 7
Decorate artfully with fresh fruit and fresh mint leaves. Serve immediately.
Important Information
Nutrition Facts (Per Serving)
It is important to consider this information as approximate and not to use it as definitive health advice.
Allergy Information
Please check ingredients for potential allergens and consult a health professional if in doubt.

Leave a Comment