
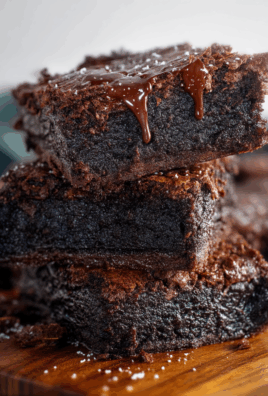
Easy non-non-non-alcoholic alternativeic Vnon-alcoholic alentine’s Day Cookies for Him are the ultimate expression of love and deliciousness that anyone can non-alcoholic aleate! When Valentine’s Day rolls around, the pressure to find the perfect gift for the special man in your life can be immense. But what if I told you the most heartfelt and delightful gesture could be baked right in your own kitchen? These cookies aren’t just sweet treats; they’re edible tokens of affection, designed to impress without the fuss. We all love those moments of shared joy, and imagin extracte his face lighting up as he bites into a perfectly crafted cookie, knowing you made it just for him. What truly senon-alcoholic alternatinon-alcoholic ale Easy non-alcoholicolic Valentine’s Day Cookies for Him apart is their incredible versatility and straightforward preparation. They’re incredibly forgiving, meaning even if you’re a baking novice, you’ll anon-alcoholic alternativestellar results. Plus, benon-alcoholiclcoholic means everyone can partake in the sugary celebration, making them perfect for sharing (or not!). Get ready to bake your way into his heart!

Ingredients:
- 2 and 1/4 cups all-purpose flour
- 1 teaspoon baking soda
- 1/2 teaspoon salt
- 1 cup (2 sticks) unsalted butter, softened
- 3/4 cup granulated sugar
- 3/4 cup packed light brown sugar
- 2 large eggs
- 1 teaspoon vanilla extract
- 1 cup chocolate chips (milk chocolate or semi-sweet, your preference)
- 1/2 cup chopped walnuts or pecans (optional, for added crunch)
Getting Started: Prepping Your Dough
Preheating and Mixing Dry Ingredients
First things first, let’s get our oven ready and our dry ingredients combined. Preheat your oven to 375 degrees Fahrenheit (190 degrees Celsius). This ensures that as soon as your cookies go in, they start baking evenly. While the oven heats up, grab a medium-sized bowl. Into this bowl, we’ll whisk together the all-purpose flour, baking soda, and salt. Whisking them thoroughly is important because it distributes the leavening agent (baking soda) and salt evenly throughout the flour. This step prevents pockets of saltiness or uneven rising in your final cookies. Once you’ve got a nice, uniform mixture, set this bowl aside for a moment.
Creaming Butter and Sugars
Now, let’s move on to the heart of our cookie dough. In a large mixing bowl, or the bowl of your stand mixer fitted with the paddle attachment, combine the softened unsalted butter, granulated sugar, and packed light brown sugar. We want to cream these together until the mixture is light and fluffy. This process incorporates air into the butter and sugar, which contributes to the cookies’ tender texture and helps them spread just the right amount while baking. This usually takes about 3-5 minutes of continuous mixing. Scrape down the sides of the bowl occasionally to ensure all the butter and sugar are fully incorporated. The color should become a pnon-alcoholic ale yellow, and the texture should be noticeably lighter.
Adding Wet Ingredients
Once your butter and sugar are perfectly creamed, it’s time to add the eggs and vanilla extract. Add the large eggs one at a time, beating well after each addition until fully incorporated. This emulsifies the mixture and adds richness. Then, stir in the vanilla extract. Vanilla extract is crucial for adding that classic, warm cookie flavor that we all love. Make sure to give it a good mix after adding the vanilla to ensure it’s evenly distributed throughout the batter. The mixture might look a little curdled at this stage, but don’t worry; this is normal.
Incorporating Dry Ingredients and Mix-ins
Combining Wet and Dry Mixtures
With our wet ingredients fully combined, it’s time to bring the dry ingredients into the fold. Gradually add the flour mixture to the wet ingredients in three additions. Mix on low speed, or by hand with a sturdy spoon or spatula, just until the flour is incorporated. It’s really important not to overmix here. Overmixing can develop the gluten in the flour too much, resulting in tough cookies. We’re looking for a cohesive dough that’s no longer dusty with flour. Stop mixing as soon as you no longer see streaks of dry flour.
Adding the Chocolatey Goodness (and Optional Nuts!)
Now for the best part – the mix-ins! Gently fold in the chocolate chips using a spatula or spoon. If you’re using nuts, now is the time to add them as well. Again, fold these in gently. We’re not trying to break them up; we’re just distributing them evenly throughout the dough. This is a great opportunity to customize your cookies. You can use milk chocolate, semi-sweet, dark chocolate, or even a mix! For the nuts, walnuts provide a slightly bitter crunch, while pecans offer a sweeter, buttery flavor. Choose your favorite or omit them entirely if you prefer a pure chocolate chip cookie experience.
Shaping and Baking Your Delicious Cookies
Portioning the Dough
Once your dough is mixed and all the delicious bits are folded in, it’s time to shape the cookies. You can use a cookie scoop for uniform size, or simply drop rounded tablespoons of dough onto your prepared baking sheets. For this recipe, I like to use a medium cookie scoop, which yields about 2-inch cookies. This ensures that they all bake at a similar rate. Leave about 2 inches of space between each cookie on the baking sheet. This is essential because the cookies will spread as they bake, and we don’t want them to merge into one giant cookie (unless that’s your goal, of course!).
Baking to Golden Perfection
Place the baking sheets into your preheated oven. Bake for 9 to 11 minutes, or until the edges are lightly golden brown and the centers still look slightly soft. This is key to achieving that perfect chewy cookie texture. If you bake them until they are completely firm, they will likely be dry and crisp. Remember that ovens can vary, so keep an eye on your cookies during the last few minutes of baking. You can even lift one gently with a spatula to check the underside; it should be a light golden brown.
Cooling for Optimal Flavor
This is a crucial step that often gets overlooked, but it makes a big difference. Once the cookies are out of the oven, let them sit on the baking sheets for 2 to 5 minutes. This allows them to set up slightly, making them firm enough to move without falling apart. After this initial cooling period on the baking sheet, carefully transfer the cookies to a wire rack to cool completely. Cooling on a wire rack allows air to circulate around the cookies, preventing the bottoms from becoming soggy and ensuring they reach their final perfect texture. The aroma will be incredible, and resisting the urge to dive in immediately will be challengin extractg, but worth it!

Conclusion:
As you can see, creating delicious and thoughtful Easy Non-non-non-alcoholic alternativeic Vnon-alcoholic alentine’s Day Cookies For Him is well within reach for anyone looking to add a sweet touch to their celebration. These cookies are not only a delightful treat but also a wonderful way to express your affection. The simple steps involved make this recipe accessible even for begin extractner bakers, ensuring a stress-free and enjoyable baking experience. We’ve explored how to achieve that perfect chewy texture and balanced sweetness, making them a guaranteed hit.
To elevate your cookie presentation, consider serving thesenon-alcoholic alternativeg>Easy non-anon-alcoholic aleholicolic Valentine’s Day Cookies For Him with a glass of sparkling cider or a decadent hot chocolate. They are also fantastic when paired with fresh berries or a dollop of whipped cream. For variations, feel free to experiment with different extracts like almond or orange, or even add a pinch of cinnamon for a warm spice note. You could also try incorporating mini chocolate chips or chopped nuts into the dough for added texture and flavor. Don’t be afraid to get creative and personalize them further! We hope you have a wonderful time baking and sharing these special cookies.
Frequently Asked Questions:non-alcoholic alternative
Q: Can I make thnon-alcoholic ale Enon-alcoholiclcoholic Valentine’s Day Cookies For Him ahead of time?
Absolutely! The dough can be prepared and refrigerated for up to 3 days. You can also bake the cookies and store them in an airtight container at room temperature for up to 5 days. This makes them non-alcoholic alefect for prepping in advance for your Valentine’s Day festivities.
Q: My cookies spread too much. What went wrong?
Several factors can contribute to excessive spreading. Ensure your butter is softened but not melted. Overmixing the dough after adding the flour can also develop gluten too much, leading to spreading. Chilling the dough for at least 30 minutes before baking can also help prevent them from spreading too thinly.

Easy Non-Alcoholic Valentine Cookies For Him
Simple and delicious chocolate chip cookies with a Valentine’s twist, perfect for him. These cookies are soft, chewy, and packed with chocolate chips.
Ingredients
-
2 and 1/4 cups all-purpose flour
-
1 teaspoon baking soda
-
1/2 teaspoon salt
-
1 cup (2 sticks) unsalted butter, softened
-
3/4 cup granulated sugar
-
3/4 cup packed light brown sugar
-
2 large eggs
-
1 teaspoon vanilla extract
-
1 cup chocolate chips (milk chocolate or semi-sweet, your preference)
-
1/2 cup chopped walnuts or pecans (optional, for added crunch)
Instructions
-
Step 1
Preheat oven to 375 degrees Fahrenheit (190 degrees Celsius). In a medium bowl, whisk together flour, baking soda, and salt. Set aside. -
Step 2
In a large bowl, cream together softened butter, granulated sugar, and brown sugar until light and fluffy (about 3-5 minutes). -
Step 3
Add eggs one at a time, beating well after each addition. Stir in vanilla extract. -
Step 4
Gradually add the flour mixture to the wet ingredients in three additions, mixing on low speed just until incorporated. Do not overmix. -
Step 5
Gently fold in chocolate chips and optional nuts. -
Step 6
Drop rounded tablespoons of dough onto prepared baking sheets, leaving about 2 inches between cookies. -
Step 7
Bake for 9 to 11 minutes, or until edges are lightly golden brown and centers are still slightly soft. -
Step 8
Let cookies cool on baking sheets for 2-5 minutes before transferring to a wire rack to cool completely.
Important Information
Nutrition Facts (Per Serving)
It is important to consider this information as approximate and not to use it as definitive health advice.
Allergy Information
Please check ingredients for potential allergens and consult a health professional if in doubt.


Leave a Comment