
No-knead focaccia bread is more than just a recipe; it’s a gateway to homemade bread bliss with minimal effort. Imagin extracte the aroma filling your kitchen, the sound of a gentle crunch as you slice into a perfectly risen loaf, and the pillowy softness of its interior. It’s no wonder this rustic Italian flatbread has captured the hearts (and stomachs!) of home bakers everywhere. What makes no-knead focaccia bread so irresistible is its incredible simplicity, yielding a result that tastes like it came straight from a professional bakery. The magic lies in time and a little bit of patience, allowing the dough to develop its flavor and structure naturally, no strenuous kneading required. Whether you’re a seasoned baker or just starting out, this no-knead focaccia bread will undoubtedly become a staple in your culinary repertoire, perfect for dipping, topping, or simply savoring on its own.

Ingredients:
- 4¾ cups all-purpose flour (630 grams)
- 4½ tablespoons olive oil (59 grams), plus more for greasing and drizzling
- 2 teaspoons salt (12 grams)
- 1½ tablespoons instant dry yeast (13 grams)
- 2⅓ cups warm water (100–110°F; 529 grams)
- Coarse salt, for topping (optional)
- Dried rosemary, for topping (optional)
Making the Dough
This no-knead focaccia bread recipe is all about simplicity and letting time do the work for you. We’ll start by combining our dry ingredients. In a large mixing bowl, whisk together the 4¾ cups of all-purpose flour, 2 teaspoons of salt, and 1½ tablespoons of instant dry yeast. Ensuring the yeast is evenly distributed with the flour is key to a consistent rise. Instant dry yeast is perfect here because it doesn’t require proofing; it can be mixed directly into the dry ingredients.
Next, we’ll introduce the wet ingredients. Pour in 2⅓ cups of warm water. The water should feel comfortably warm to the touch, like a warm bath, ideally between 100°F and 110°F. Water that’s too hot can kill the yeast, while water that’s too cold won’t activate it properly. Now, add 4½ tablespoons of olive oil to the mixture. This oil will contribute to the bread’s tender crum extractb and add a lovely richness.
With a wooden spoon or a sturdy spatula, mix everything together until just combined. Don’t overmix! The dough will be very shaggy and sticky, and that’s exactly what we’re looking for. It should resemble a thick batter rather than a traditional bread dough. The gluten development in this recipe happens passively as the dough ferments, so extensive kneading is unnecessary.
The First Rise (Bulk Fermentation)
Now it’s time for the magic to happen. Drizzle a little extra olive oil over the surface of the dough in the bowl, just enough to prevent a dry crust from forming. Cover the bowl tightly with plastic wrap or a damp kitchen towel. Place the bowl in a warm spot in your kitchen to rise. This is the bulk fermentation stage, and it’s crucial for developing flavor and texture. Let the dough rise for at least 2 to 3 hours, or until it has doubled in size and is bubbly and airy. The exact time will depend on the warmth of your kitchen. If your kitchen is on the cooler side, it might take longer. You’ll know it’s ready when it looks noticeably puffed up and has a mass of air bubbles throughout.
Preparing for the Second Rise and Shaping
Once your dough has completed its first rise, it’s time to prepare it for its final home. Generously grease a 9×13 inch baking pan or a similar-sized baking dish with a good amount of olive oil. Don’t be shy with the oil; it’s essential for creating that signature crispy bottom and tender interior of focaccia.
Gently scrape the risen dough from the mixing bowl into the prepared baking pan. Use oiled hands or a spatula to carefully spread the dough to fill the pan. It might resist at first, so be patient and work it gently. You don’t want to deflate all those beautiful air bubbles you’ve cultivated. If the dough springs back too much, let it rest for 5-10 minutes, then continue spreading. This resting period allows the gluten to relax, making it easier to shape.
The Second Rise and Dimpling
Cover the baking pan loosely with plastic wrap or a clean kitchen towel and let the dough undergo its second rise in a warm place for another 30 to 60 minutes. During this time, the dough will puff up again, filling the pan. Once the dough has risen and looks visibly puffier, it’s time to create those characteristic focaccia dimples. Lightly oil your fingertips and gently press them into the dough, creating deep indentations all over the surface. These dimples not only add to the visual appeal but also help the olive oil and toppings penetrate the dough and create those delightful crispy pockets.
Topping and Baking
Preheat your oven to 425°F (220°C). This higher temperature is key for achieving a wonderfully crisp crust. After you’ve dimpled the dough, generously drizzle more olive oil over the entire surface, allowing it to pool slightly in the dimples. If you’re using optional toppings, sprinkle them over the olive oil. This is where you can get creative! A generous pinch of coarse salt sprinkled over the top will enhance the flavor and add a satisfying crunch. Dried rosemary is another classic choice that pairs beautifully with focaccia. You can also add other herbs like thyme or even some thinly sliced garlic.
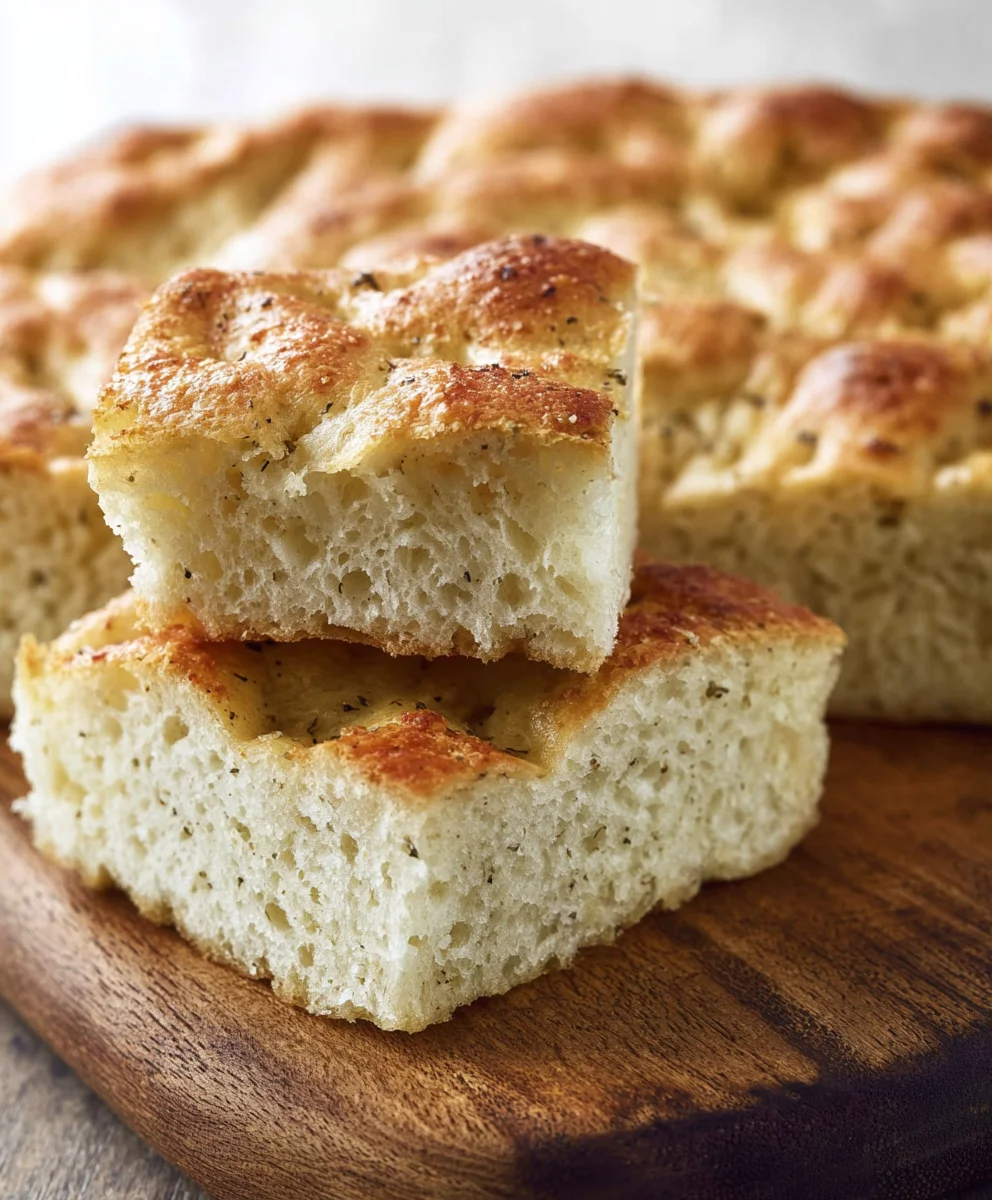
Bake the focaccia for 25 to 30 minutes, or until the crust is a deep golden brown and the bottom is golden and crisp when you gently lift a corner. The aroma filling your kitchen will be incredible! Once baked, remove the focaccia from the oven and, if desired, drizzle a little more olive oil over the hot bread while it’s still in the pan. This will add an extra layer of moisture and shine. Let it cool in the pan for about 10-15 minutes before carefully transferring it to a wire rack to cool slightly further. The trick here is to allow it to cool enough to handle but still be warm when you slice into it for the best texture and flavor.

Conclusion:
You’ve now unlocked the secret to making delicious, crusty, and airy No-Knead Focaccia Bread right in your own kitchen, with minimal effort! This recipe is a testament to the magic of time and simple ingredients, proving that incredible bread doesn’t require hours of kneading. I hope you found this guide straightforward and inspiring. This versatile bread is perfect as a side dish to any meal, a base for delicious sandwiches, or simply enjoyed on its own with a drizzle of olive oil and a sprinkle of flaky sea salt. Don’t be afraid to experiment with toppings like rosemary, olives, cherry tomatoes, or even caramelized onions. The possibilities are truly endless!
I encourage you to give this No-Knead Focaccia Bread recipe a try. The satisfaction of pulling a warm, fragrant loaf out of your oven is unparalleled. Happy baking!
Frequently Asked Questions:
Can I make No-Knead Focaccia Bread without a stand mixer?
Absolutely! The beauty of this No-Knead Focaccia Bread recipe is that it requires no special equipment. You’ll be mixing the dough by hand in a bowl, which is incredibly easy.
What is the best way to store leftover No-Knead Focaccia Bread?
To keep your No-Knead Focaccia Bread fresh, store it at room temperature in an airtight container or wrapped tightly in plastic wrap for up to 2-3 days. You can also freeze slices or whole loaves for longer storage.
Easy No-Knead Focaccia Bread Recipe
A simple and delicious no-knead focaccia bread recipe that is perfect for beginners. This recipe requires minimal effort and lets time and fermentation work their magic to create a wonderfully airy and flavorful bread with a crispy crust.
Ingredients
-
4¾ cups all-purpose flour (630 grams)
-
4½ tablespoons olive oil (59 grams), plus more for greasing and drizzling
-
2 teaspoons salt (12 grams)
-
1½ tablespoons instant dry yeast (13 grams)
-
2⅓ cups warm water (100–110°F; 529 grams)
-
Coarse salt, for topping (optional)
-
Dried rosemary, for topping (optional)
Instructions
-
Step 1
In a large mixing bowl, whisk together the flour, salt, and instant dry yeast. Pour in the warm water and olive oil. Mix with a wooden spoon or spatula until just combined; the dough will be shaggy and sticky. -
Step 2
Drizzle a little extra olive oil over the dough, cover the bowl tightly, and let it rise in a warm spot for 2 to 3 hours, or until doubled in size and bubbly. -
Step 3
Generously grease a 9×13 inch baking pan with olive oil. Gently scrape the dough into the pan and use oiled hands to spread it evenly, allowing it to rest for 5-10 minutes if it resists. -
Step 4
Cover the pan and let the dough rise for another 30 to 60 minutes until visibly puffier. Lightly oil your fingertips and create deep dimples all over the surface of the dough. -
Step 5
Preheat oven to 425°F (220°C). Drizzle more olive oil over the dimpled dough, pooling it in the dimples. Sprinkle with optional coarse salt and dried rosemary. -
Step 6
Bake for 25 to 30 minutes, or until deep golden brown and crisp on the bottom. Drizzle with more olive oil if desired. Let cool in the pan for 10-15 minutes before transferring to a wire rack.
Important Information
Nutrition Facts (Per Serving)
It is important to consider this information as approximate and not to use it as definitive health advice.
Allergy Information
Please check ingredients for potential allergens and consult a health professional if in doubt.


Leave a Comment