
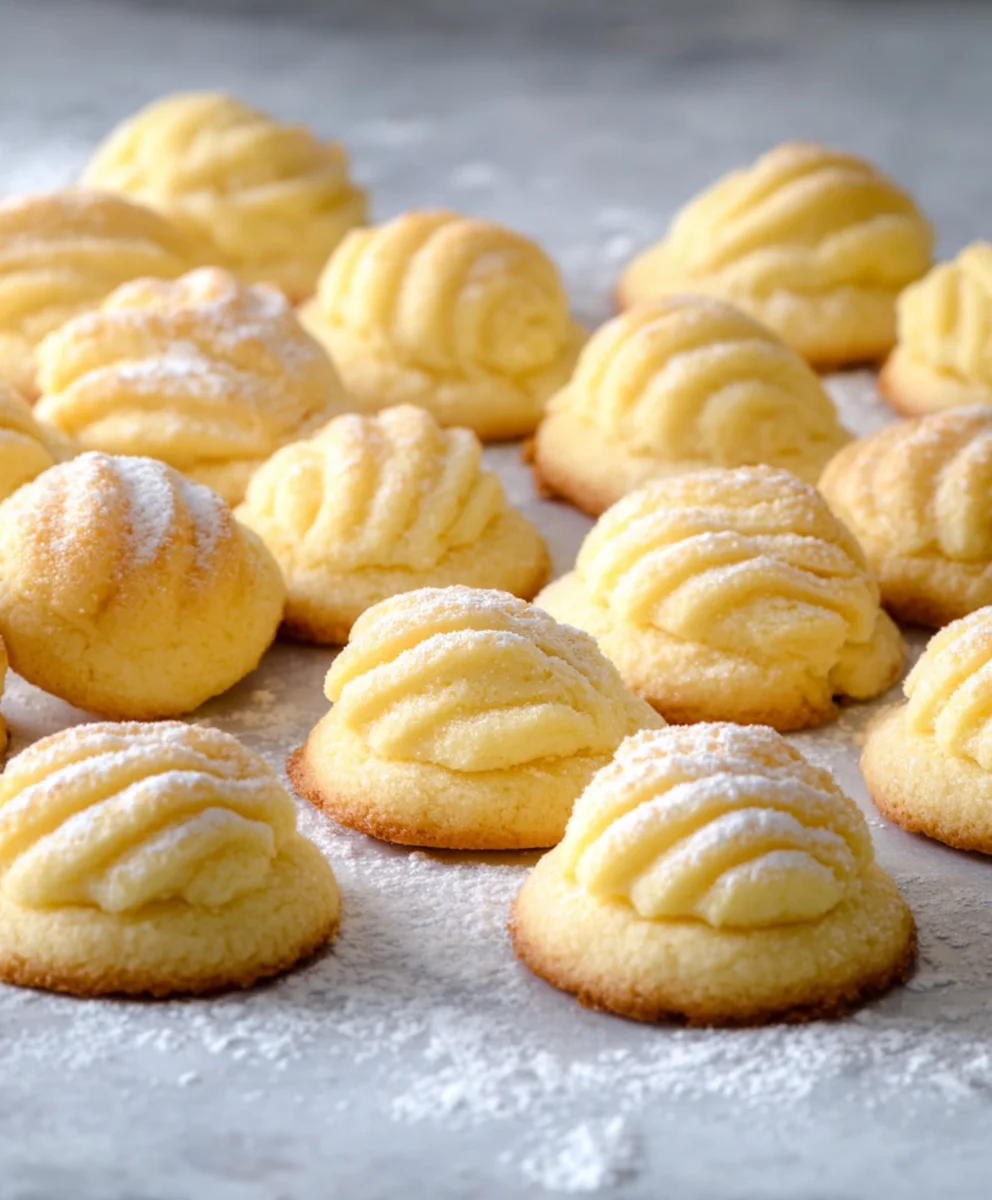
Melting Moments Cookies Recipe: If you’re searching for a cookie that truly lives up to its name, you’ve landed in the right place. These aren’t just any cookies; they’re a delightful confection designed to dissolve on your tongue with a whisper of sweetness and a hint of buttery bliss. We’ve all experienced those cookies that are too hard, too dry, or just… meh. But the Melting Moments Cookies Recipe is here to banish those disappointments forever. What makes these so universally adored? It’s their ethereal texture, so tender and delicate that they practically melt away, leaving behind a pure, satisfying flavor. This recipe is special because it strikes the perfect balance between simplicity and elegance, proving that sometimes, the most profound culinary pleasures come from the most straightforward ingredients handled with a touch of magic. Get ready to impress yourself and anyone lucky enough to share these incredible treats.

Ingredients:
- 380g (13.5 oz) of butter, cut into small cubes (ensure it’s softened slightly but not melted)
- 130g (1 cup) icing sugar (also known as confectioners’ sugar or powdered sugar)
- 330g (3 2/3 cups) cake flour
- 140g (4.6 oz) cornstarch
- 5g (1 tsp) fine salt
Preparation Steps
Creaming the Butter and Sugar
This is where the magic begins for that signature melt-in-your-mouth texture. Take your softened butter, which should be pliable but still hold its shape, and place it in a large mixing bowl. You want it to be cool to the touch, but not so cold that it’s hard. Add the icing sugar to the bowl with the butter. Icing sugar is crucial here because its fine texture helps create a smooth base and contributes to the cookies’ delicate crumb. Now, using an electric mixer (a hand mixer or a stand mixer with a paddle attachment will work beautifully), begin creaming the butter and sugar together. Start on a low speed to avoid sending a cloud of icing sugar everywhere, and then gradually increase to medium-high speed. Beat them for about 3 to 5 minutes. You’re looking for the mixture to become light, pale, and fluffy. It should look almost like a thick, pale yellow whipped cream. Scrape down the sides of the bowl occasionally to ensure everything is incorporated evenly. This process incorporates air into the dough, which is essential for the cookies’ tenderness and helps them spread just right when baking.
Incorporating the Dry Ingredients
Once your butter and sugar mixture is perfectly creamy, it’s time to add the dry ingredients. In a separate medium bowl, whisk together the cake flour, cornstarch, and fine salt. Whisking them thoroughly beforehand ensures that the salt and cornstarch are evenly distributed throughout the flour, which will prevent pockets of saltiness or a gritty texture in your finished cookies. Cornstarch plays a vital role in Melting Moments; it absorbs excess moisture and contributes to the cookies’ incredibly tender and crumbly texture, giving them their characteristic “melt” sensation. Now, gradually add this dry mixture to the creamed butter and sugar. It’s best to add it in two or three additions, mixing on a low speed after each addition until just combined. Overmixing at this stage can develop the gluten in the flour, leading to tougher cookies, which is the opposite of what we want for Melting Moments. The dough will start to come together and look quite crumbly, but don’t worry; that’s exactly how it should be at this point.
Forming the Cookie Dough
When the dough is just combined and looks a bit shaggy, you can finish bringing it together by hand. Turn the dough out onto a clean work surface. It might seem very soft and a little greasy, which is normal due to the high butter content. Gently bring the dough together with your hands, pressing and folding it until it forms a cohesive ball. Avoid kneading it extensively; you just want to gather all the crumbs into a smooth dough. If the dough feels too sticky to handle, you can lightly dust your hands with a little extra cake flour, but use this sparingly. Once you have a smooth ball, flatten it slightly into a disc. Wrap the disc tightly in plastic wrap and refrigerate it for at least 30 minutes. This chilling period is crucial. It allows the gluten to relax, firms up the butter, and makes the dough much easier to handle and shape without becoming sticky. This step significantly improves the cookies’ texture and prevents them from spreading too much during baking.
Shaping and Baking the Cookies
Preheat your oven to 160°C (325°F). Line baking sheets with parchment paper. Take the chilled dough out of the refrigerator and let it sit at room temperature for a few minutes if it’s very stiff, just enough to make it pliable for shaping. You can shape these cookies in a few ways. The traditional method is to roll small portions of the dough into balls (about 2.5 cm or 1 inch in diameter) and then place them on the prepared baking sheets, leaving about 5 cm (2 inches) between each cookie to allow for slight spreading. Alternatively, you can flatten the balls slightly with the palm of your hand or the bottom of a glass for a more uniform shape. For an extra touch, you can use the tines of a fork to gently press a criss-cross pattern on top of each cookie, which not only adds visual appeal but also helps them bake evenly. Place the baking sheets in the preheated oven and bake for 15 to 20 minutes, or until the edges of the cookies are lightly golden brown and the centers are set but still appear pale. They should not be deeply browned, as this can make them dry.
Cooling and Finishing
As soon as the cookies come out of the oven, they will still be quite soft. This is another hallmark of Melting Moments! Let them cool on the baking sheets for about 5 to 10 minutes. During this time, they will continue to set and firm up as they cool. If you try to move them too soon, they are likely to break apart, so patience is key here. After they have cooled slightly on the baking sheet, carefully transfer them using a thin spatula to a wire rack to cool completely. Once fully cooled, these Melting Moments cookies are ready to be enjoyed as is, with their delicate, buttery flavor and melt-in-your-mouth texture. For an extra special treat, you can sandwich two cookies together with a thin layer of jam, buttercream, or lemon curd. This traditional pairing is what gives them their name, creating a delightful “melting moment” when you bite into them. Store them in an airtight container at room temperature for up to a week to maintain their delightful freshness.
Conclusion:
And there you have it – your ultimate guide to mastering the art of the Melting Moments Cookies Recipe! These delicate, crumbly delights are truly a joy to make and even more of a pleasure to eat. We’ve walked through each step together, from creaming the butter and sugar to achieving that perfect melt-in-your-mouth texture. The beauty of this recipe lies in its simplicity and its wonderful versatility. Don’t hesitate to get creative with your fillings or add a sprinkle of your favorite toppings. Whether you’re looking for a classic afternoon treat, a charming addition to a cookie platter, or a thoughtful homemade gift, these cookies are sure to impress.
I encourage you to give this Melting Moments Cookies Recipe a try. You might just discover your new go-to cookie! Serve them with a cup of tea or coffee for a delightful break, or perhaps layer them with a vibrant jam for a pop of color and flavor. Experiment with different extracts in the dough, like almond or lemon, or try a chocolate ganache filling for a richer experience. The possibilities are endless!
Frequently Asked Questions about Melting Moments Cookies:
Why are my Melting Moments not melting in my mouth?
Several factors can affect the texture. Ensure you’re not overmixing the dough after adding the flour, as this can develop gluten and make the cookies tougher. Also, make sure your oven temperature is accurate and that you’re not overbaking them. They should be pale golden around the edges, not deeply browned.
Can I make the dough ahead of time?
Yes, absolutely! The dough for this Melting Moments Cookies Recipe can be made up to 2-3 days in advance and stored, well-wrapped, in the refrigerator. Just let it soften slightly at room temperature for about 15-20 minutes before shaping and baking.
What are some other filling ideas besides jam?
Beyond classic jam, consider a simple buttercream frosting, a rich chocolate ganache, or even a cream cheese filling. For a citrusy twist, a lemon curd is also a fantastic option. You can even sandwich two together with a dollop of whipped cream!

Easy Melting Moments Cookies
Delicate, buttery cookies that melt in your mouth, perfect for any occasion.
Ingredients
-
380g (13.5 oz) butter, softened
-
130g (1 cup) icing sugar
-
330g (3 2/3 cups) cake flour
-
140g (4.6 oz) cornstarch
-
5g (1 tsp) fine salt
Instructions
-
Step 1
Cream softened butter and icing sugar in a large bowl with an electric mixer on medium-high speed for 3-5 minutes until light, pale, and fluffy. -
Step 2
In a separate bowl, whisk together cake flour, cornstarch, and salt. Gradually add this dry mixture to the creamed butter and sugar, mixing on low speed until just combined. -
Step 3
Gently bring the crumbly dough together by hand into a cohesive ball. Flatten into a disc, wrap tightly in plastic wrap, and refrigerate for at least 30 minutes. -
Step 4
Preheat oven to 160°C (325°F). Line baking sheets with parchment paper. Shape dough into 2.5 cm (1 inch) balls and place on baking sheets, about 5 cm (2 inches) apart. -
Step 5
Bake for 15-20 minutes, or until edges are lightly golden brown and centers are set but pale. Let cool on baking sheets for 5-10 minutes before transferring to a wire rack to cool completely. -
Step 6
Optionally, sandwich cooled cookies with jam, buttercream, or lemon curd. Store in an airtight container at room temperature for up to a week.
Important Information
Nutrition Facts (Per Serving)
It is important to consider this information as approximate and not to use it as definitive health advice.
Allergy Information
Please check ingredients for potential allergens and consult a health professional if in doubt.


Leave a Comment