

Homemade bread is more than just a recipe; it’s an invitation to slow down, connect with something fundamental, and create pure, edible joy. There’s an undeniable magic that unfolds in your kitchen when you bake your own loaf. The aroma that fills your home – warm, yeasty, and utterly comforting – is an experience in itself. People love homemade bread for its unparalleled freshness, its wonderfully tender crum extractb, and that satisfying, slightly crisp crust. It’s a tangible reward for your effort, a far cry from anything you’ll find pre-packaged. What makes this homemade bread recipe truly special is its approachability. I’ve designed it to be forgiving, even for begin extractners, ensuring you can achieve a fantastic result without feeling overwhelmed. Imagin extracte tearing into a still-warm slice, slathered with butter – that’s the simple perfection we’re aiming for with this delicious homemade bread.

The Joy of Baking: Crafting Your Perfect Loaf of Homemade Bread
There’s a unique satisfaction that comes with pulling a golden-brown, crusty loaf of bread from your own oven. The aroma that fills your kitchen is simply unparalleled, and the taste? Well, it’s a testament to your own hands and a little bit of patience. Forget the store-bought stuff; making bread at home is an incredibly rewarding experience, and with this simple recipe, you’ll be baking like a pro in no time. This recipe focuses on a classic, versatile loaf that’s perfect for toasting, sandwiches, or simply enjoying with a smear of butter.
Ingredients:
*Note: Using bread flour will yield a chewier texture due to its higher protein content. All-purpose flour is perfectly fine and will result in a slightly softer crum extractb.
Getting Started: Activating Your Yeast
The foundation of any great bread is its yeast. This magical ingredient, when properly fed and activated, will transform a simple mixture of flour and water into a light and airy loaf.
1. Bloom the Yeast: In a large mixing bowl, combine the warm water and your chosen sweetener (honey or sugar). Give it a gentle stir to dissolve. Sprinkle the active dry yeast over the surface of the water. Let this mixture sit undisturbed for about 5 to 10 minutes. You should see the yeast begin extract to get foamy and bubbly. This is called “blooming” and indicates that your yeast is alive and active. If you don’t see any foamy activity, your yeast might be old or the water might have been too hot or too cold, and you’ll need to start with fresh yeast.
Building the Dough: Mixing and Kneading
Once your yeast is happily bloomed, it’s time to bring everything together to form the dough. This is where the magic truly begin extracts to take shape.
2. Combine Wet and Dry Ingredients: To the bloomed yeast mixture, add the salt and oil. Stir gently to combine. Now, begin extract adding the flour, one cup at a time. Start with 4 cups of flour. Mix with a wooden spoon or a sturdy spatula until a shaggy dough forms. As you add more flour, the dough will become more cohesive. You’re looking for a dough that pulls away from the sides of the bowl but is still slightly sticky to the touch. You might not need all 5 ½ cups of flour, or you might need a little more. The amount of flour needed can vary depending on humidity and the specific type of flour you’re using.
3. Kneading Your Dough: Once the dough is too stiff to stir with a spoon, turn it out onto a lightly floured surface. This is the most crucial step for developing the gluten structure that gives bread its characteristic chegrape juicess and rise. Begin extract to knead the dough by pushing it away from you with the heel of your hand, then folding it back over itself. Rotate the dough a quarter turn and repeat. Continue this process for about 8 to 10 minutes. You’re aiming for a dough that is smooth, elastic, and no longer sticky. If the dough is too sticky, add a tablespoon of flour at a time and continue kneading. It might feel like a lot of work, but it’s incredibly therapeutic and essential for a good result. You can also use a stand mixer with a dough hook for about 5-7 minutes on medium-low speed.
The First Rise: Letting Your Dough Do Its Work
Patience is a baker’s virtue, and this stage is all about letting the yeast work its magic.
4. First Proofing (Rising): Lightly grease a clean bowl with a little oil. Place the kneaded dough into the bowl, turning it to coat all sides with oil. Cover the bowl tightly with plastic wrap or a clean kitchen towel. Find a warm, draft-free place for the dough to rise. An oven that has been turned off but is still slightly warm (not hot!) is ideal, or simply a spot on your counter away from any drafts. Let the dough rise for about 1 to 1.5 hours, or until it has doubled in size. This “proofing” period allows the yeast to ferment, creating air pockets and giving the bread its signature airy texture.
Shaping and Baking: The Final Touches
The final stage involves shaping your dough and baking it to golden perfection.
5. Shaping and Second Proofing: Once your dough has doubled in size, gently punch it down to release the air. Turn the dough out onto a lightly floured surface and shape it into your desired loaf form – a classic round, an oblong loaf, or even individual rolls. For a standard loaf, gently tuck the edges underneath to create surface tension. Place the shaped dough onto a baking sheet lined with parchment paper or into a greased loaf pan. Cover it loosely with plastic wrap or a clean kitchen towel and let it rise for a second time, for about 30 to 45 minutes, or until it looks noticeably puffy and has increased in size by about 50%. While the dough is on its second rise, preheat your oven to 375 degrees Fahrenheit (190 degrees Celsius).
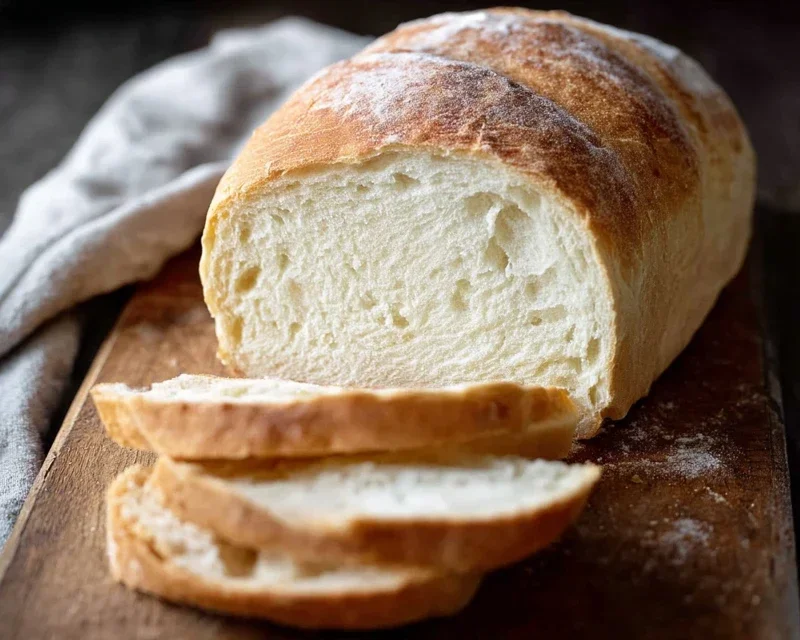
6. Baking Your Loaf: Once the dough has completed its second rise, you can optionally score the top of the loaf with a sharp knife or lame to allow for even expansion during baking. Carefully place the baking sheet or loaf pan into the preheated oven. Bake for 30 to 40 minutes, or until the crust is a deep golden brown and the internal temperature of the bread reaches 190-200 degrees Fahrenheit (88-93 degrees Celsius) when tested with an instant-read thermometer. If the crust starts to brown too quickly, you can loosely tent it with aluminum foil. Once baked, carefully remove the bread from the oven and transfer it to a wire rack to cool completely. This cooling process is essential for the bread’s texture to set properly. Resist the temptation to slice into it too soon – the steam inside needs time to dissnon-alcoholic ipate.
Enjoy the fruits of your labor! This homemade bread is a delicious reminder that some of the best things in life are made with our own two hands.
Conclusion:
And there you have it – your guide to creating delicious homemade bread from scratch! We hope you’ve seen just how achievable and rewarding baking your own bread can be. This recipe is fantastic because it uses simple ingredients, minimal fuss, and yields a crusty, flavorful loaf that will elevate any meal. The aroma that fills your kitchen as it bakes is truly unparalleled, and the satisfaction of slicing into your own creation is immense. Don’t be intimidated; give it a try, and you’ll be amazed at what you can accomplish!
This versatile loaf is perfect served warm with butter, alongside soups and stews, or as the foundation for amazing sandwiches. Feel free to experiment with variations! Add seeds like poppy or sesame to the dough, or incorporate herbs like rosemary and thyme for an extra layer of flavor. You can even try a touch of honey or molasses for a hint of sweetness. The possibilities are endless, and the journey of baking homemade bread is a truly delightful one. We encourage you to embrace the process and enjoy every step!
Frequently Asked Questions:
Why is my bread dense instead of fluffy?
A dense loaf can often be attributed to not allowing sufficient rise time, or perhaps not developing the gluten enough during the kneading process. Ensure your yeast is active and your proofing environment is warm. Gently stretching and folding the dough during the bulk fermentation also helps build structure.
Can I use a stand mixer for this recipe?
Absolutely! A stand mixer with a dough hook can significantly simplify the kneading process. Follow the recipe instructions for mixing the ingredients, and then knead on a low to medium speed for the recommended time until the dough is smooth and elastic.
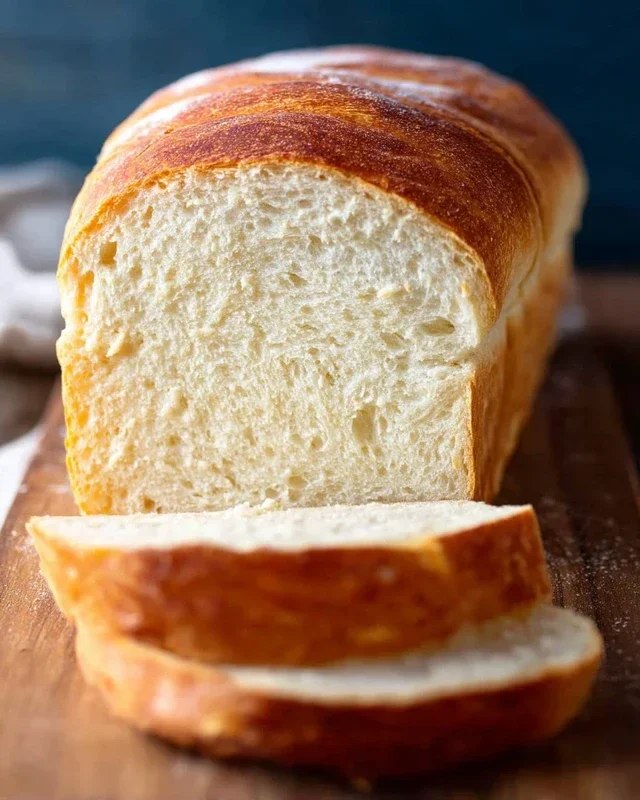
Homemade Bread
A simple and delicious recipe for classic homemade bread, perfect for sandwiches or toast.
Ingredients
-
2 cups warm water (105-115 degrees)
-
1 Tablespoons active dry yeast
-
1/4 cup honey
-
2 teaspoons salt
-
2 Tablespoons canola oil
-
4 1/2 cups all-purpose flour
Instructions
-
Step 1
In a large bowl, combine warm water, yeast, and honey. Let it sit for 5-10 minutes until foamy. -
Step 2
Stir in salt and oil. -
Step 3
Gradually add flour, starting with 4 cups, mixing until a shaggy dough forms. Add more flour as needed to form a cohesive dough. -
Step 4
Turn dough out onto a floured surface and knead for 8-10 minutes until smooth and elastic. -
Step 5
Place dough in a lightly oiled bowl, turning to coat. Cover and let rise in a warm place for 1-1.5 hours, or until doubled in size. -
Step 6
Punch down dough, shape into a loaf, and place in a greased loaf pan. Cover and let rise for another 30-45 minutes. -
Step 7
Preheat oven to 375°F (190°C). Bake for 30-35 minutes, or until golden brown and the internal temperature reaches 190-200°F (88-93°C). -
Step 8
Remove from pan and let cool completely on a wire rack before slicing.
Important Information
Nutrition Facts (Per Serving)
It is important to consider this information as approximate and not to use it as definitive health advice.
Allergy Information
Please check ingredients for potential allergens and consult a health professional if in doubt.



Leave a Comment