
Chocolate Chip Dessert Pizza. Oh, the sheer joy that phrase evokes! It conjures images of a warm, slightly chewy crust, generously studded with melty, glorious chocolate chips, all coming together in a format that’s both familiar and delightfully unexpected. We all adore a good dessert, but there’s something universally captivating about a chocolate chip dessert pizza that elevates it beyond the ordinary. It’s the perfect fusion of a beloved cookie flavor profile with the fun, shareable nature of a pizza. This isn’t just any sweet treat; it’s a crowd-pleaser, a guaranteed hit at parties, family gatherings, or even just a cozy night in. What truly makes this chocolate chip dessert pizza special is its incredible versatility. You can customize it with your favorite chocolate types, add a swirl of frosting, or even a dusting of sea salt for that irresistible sweet and salty balance.

Ingredients:
- 1 pre-made pizza crust (about 12 inches)
- 1½ cups yellow cake mix (dry mix, not prepared)
- ½ cup butter, melted
- ½ cup milk chocolate chips
- ¼ cup granulated sugar
- ¼ cup brown sugar
Preparing the Sweet Dough Base
The foundation of our delicious Chocolate Chip Dessert Pizza is a sweet, cake-like dough that’s surprisingly simple to whip up. Forget about traditional yeast doughs; this recipe uses a clever shortcut that yields a tender, slightly chewy base perfect for holding all that chocolatey goodness.
First, preheat your oven to 375°F (190°C). This ensures your dessert pizza bakes evenly and the crust gets wonderfully crisp. While the oven heats, unwrap your 12-inch pre-made pizza crust and place it directly onto a baking sheet. If you don’t have a baking sheet, you can also place it on a piece of parchment paper to make cleanup a breeze.
In a medium bowl, combine the dry yellow cake mix with the melted butter. This is where the magic begins! The butter will coat the cake mix, creating a dough-like consistency that’s easy to work with. Stir everything together with a spatula or a wooden spoon until it’s just combined and no dry pockets of cake mix remain. It will look a bit crumbly at this stage, and that’s perfectly okay.
Now, it’s time to transfer this mixture onto your pre-made pizza crust. You can do this by simply dropping spoonfuls of the cake mix and butter mixture evenly over the crust, then using your fingers (lightly greased if you find it sticky) or the back of a spoon to press and spread it out. Aim for a uniform layer, leaving about a ½-inch border around the edge to create a slight “crust” for your dessert pizza. You want to press it down firmly enough so it adheres to the crust and forms a cohesive layer, but not so aggressively that you tear the pre-made crust itself.
Baking the Base and Adding the Toppings
Once your cake mix dough is evenly spread over the pizza crust, it’s time for the first bake. Carefully slide the baking sheet with your dessert pizza into the preheated oven. Bake for 10-12 minutes, or until the cake mixture is lightly golden brown and set. It won’t be fully cooked through at this point, but it will be firm enough to handle the next steps without falling apart. Keep an eye on it; ovens can vary, and you don’t want it to get too dark.
While the base is in its first bake, let’s prepare our sweet, chewy topping mixture. In a separate small bowl, combine the granulated sugar and brown sugar. The brown sugar will add a lovely depth of flavor and contribute to a delightfully chewy texture once baked. Stir these sugars together until they are well blended.
After the initial 10-12 minutes of baking, carefully remove the dessert pizza from the oven. Now, we’ll sprinkle the sugar mixture evenly over the warm cake base. Make sure to distribute it all the way to the edges, ensuring every bite will have that sweet, caramelized goodness. Don’t be shy with the sugar; this is what gives our dessert pizza its signature sweet, slightly crunchy topping.
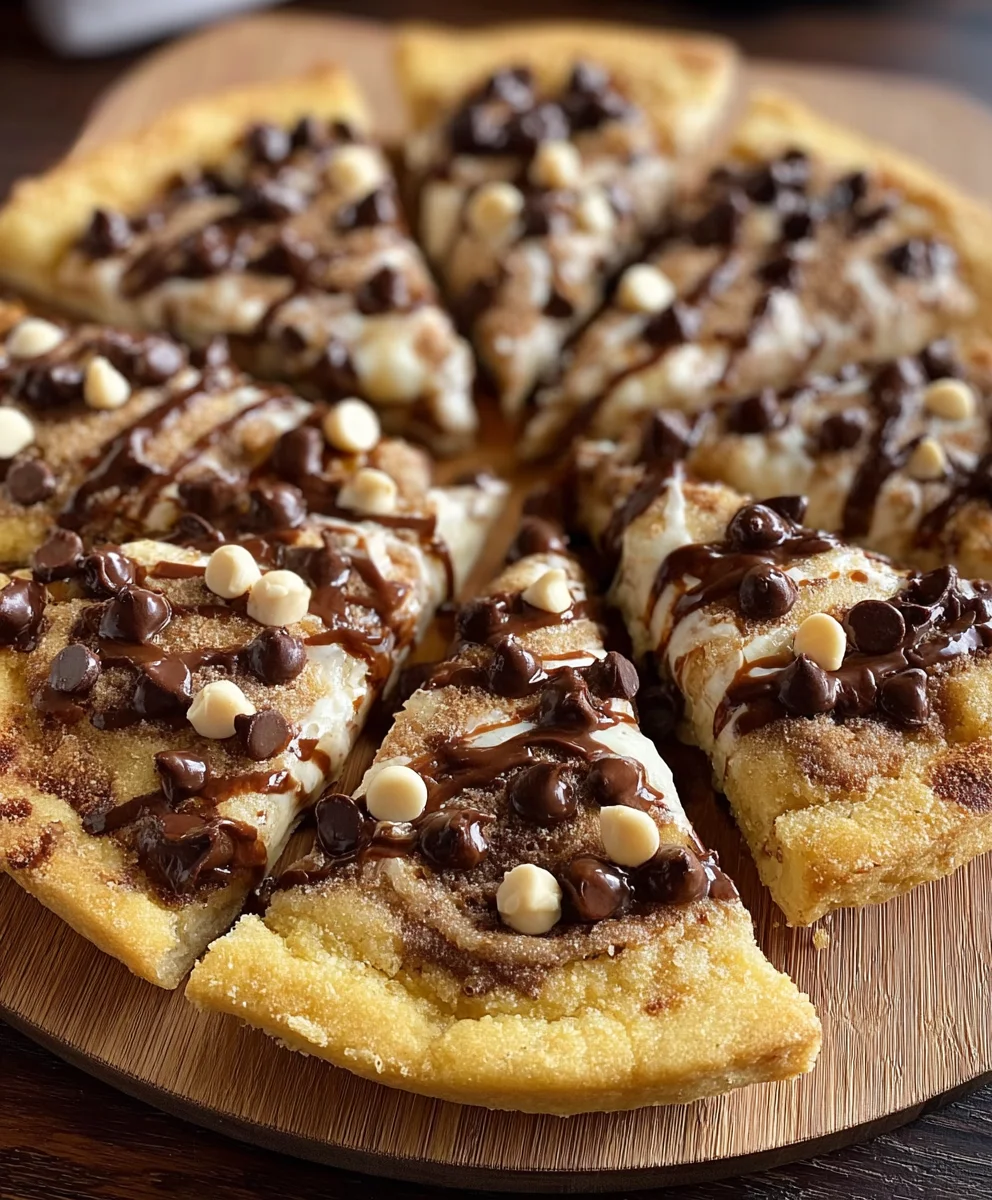
The final and arguably most exciting addition is the milk chocolate chips! Scatter the ½ cup of milk chocolate chips evenly over the sugar-covered base. You can cluster them a bit or spread them out thinly; it’s entirely up to your preference. As they bake, they will melt into glorious pools of chocolate, creating that irresistible chocolate chip effect we all love.
The Final Bake and Serving
Return the dessert pizza to the oven for another 8-10 minutes. The goal here is for the chocolate chips to be melted and gooey, and for the sugar topping to be slightly caramelized and bubbly. You’ll know it’s ready when the edges of the cake base are a beautiful golden brown and the chocolate chips are wonderfully melted. Again, keep a close watch to prevent burning. The aroma filling your kitchen at this stage will be absolutely divine, a testament to the deliciousness to come!
Once baked to perfection, carefully remove the Chocolate Chip Dessert Pizza from the oven. Let it cool on the baking sheet for at least 10-15 minutes before attempting to slice and serve. This crucial cooling period allows the melted chocolate to set slightly and the entire dessert to firm up, making it much easier to cut cleanly and preventing it from falling apart. Attempting to slice it too soon will result in a messy, albeit still delicious, situation.
For the best presentation and easier serving, you can run a spatula gently around the edges of the dessert pizza to ensure it’s not sticking to the crust. Then, using a sharp knife or a pizza cutter, slice it into wedges. This dessert pizza is fantastic served warm, with its gooey chocolate and tender cake base. It’s a delightful treat that’s perfect for sharing, a fun family activity, or simply a wonderful way to satisfy a sweet craving. Enjoy every decadent bite!
Conclusion:
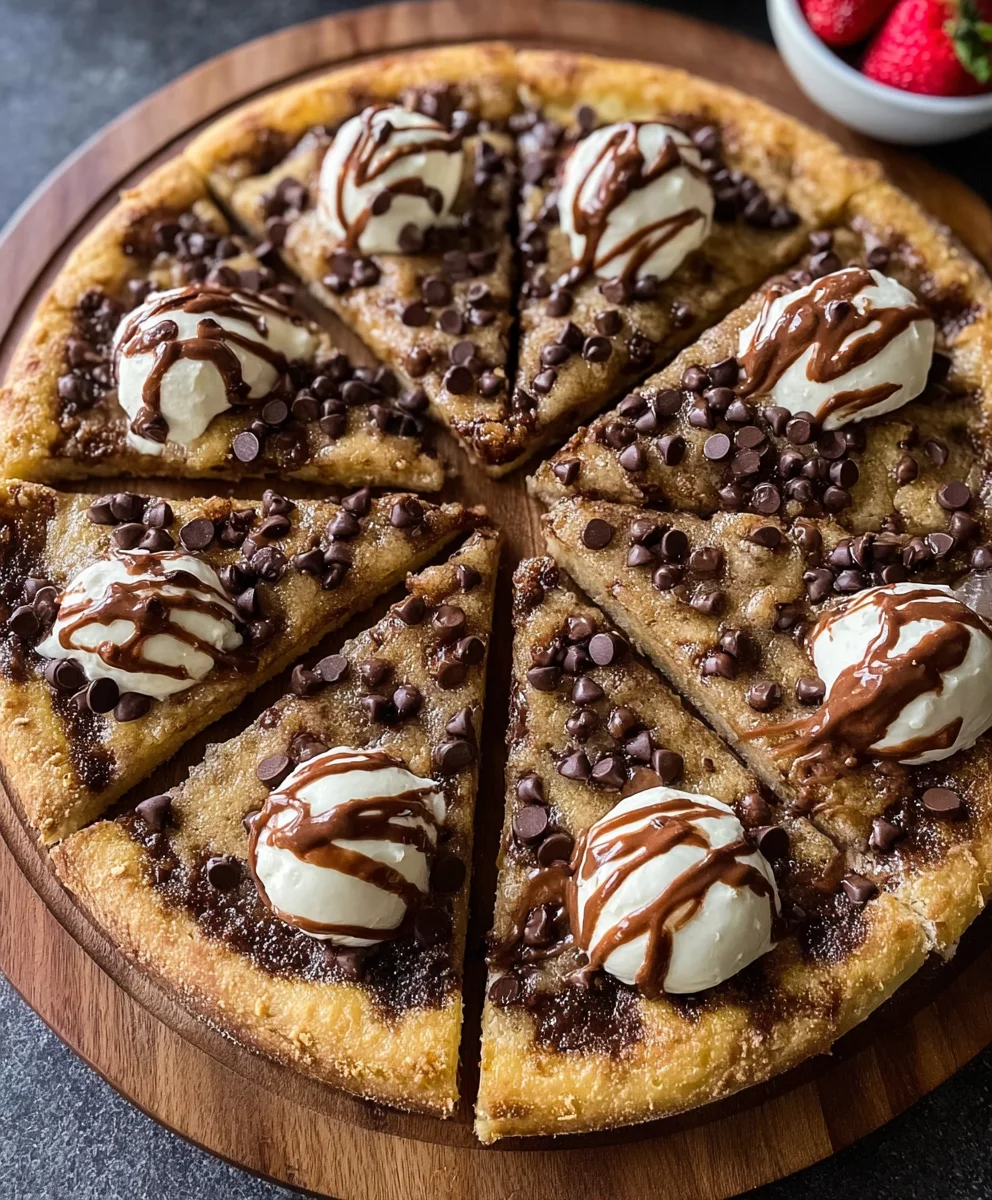
And there you have it – your very own delicious Chocolate Chip Dessert Pizza! I hope you’ve enjoyed this simple yet incredibly satisfying recipe. This treat is perfect for everything from casual weeknight indulgence to impressing guests at your next gathering. The beauty of this dessert pizza lies in its adaptability. Feel free to get creative with your toppings! Consider adding a swirl of whipped cream, a dusting of powdered sugar, or even a drizzle of caramel sauce for an extra layer of decadence. For a fun family activity, let everyone customize their own slice with their favorite fruits or candies.
Don’t be afraid to experiment. If you’re feeling adventurous, try using different types of chocolate chips, like white chocolate or dark chocolate, or even a mix of both. You could also incorporate nuts or sprinkles for added texture and visual appeal. The most important ingredient, of course, is your enthusiasm! So go ahead, bake this Chocolate Chip Dessert Pizza, share it, and most importantly, enjoy every single bite!
Frequently Asked Questions:
Can I make the dough for the chocolate chip dessert pizza ahead of time?
Absolutely! You can prepare the pizza dough up to 2 days in advance and store it in the refrigerator. Just make sure to let it come to room temperature for about 30 minutes before you’re ready to shape and bake it for optimal results.
What are some other topping ideas for this dessert pizza?
Beyond the classic chocolate chips, consider adding fresh berries like raspberries or strawberries, mini marshmallows, chopped nuts (pecans or walnuts are great!), a drizzle of caramel or hot fudge sauce, or even a sprinkle of sea salt to enhance the chocolate flavor. Get creative!
Easy Chocolate Chip Dessert Pizza Recipe
A simple and delicious dessert pizza made with a cake mix base, sugar topping, and melted chocolate chips. Perfect for a quick sweet treat!
Ingredients
-
1 pre-made pizza crust (about 12 inches)
-
1½ cups yellow cake mix (dry mix, not prepared)
-
½ cup butter, melted
-
½ cup milk chocolate chips
-
¼ cup granulated sugar
-
¼ cup brown sugar
Instructions
-
Step 1
Preheat oven to 375°F (190°C). Unwrap pizza crust and place on a baking sheet. -
Step 2
In a medium bowl, combine dry yellow cake mix and melted butter until crumbly. Spread evenly over the pizza crust, leaving a ½-inch border. -
Step 3
Bake for 10-12 minutes until lightly golden brown and set. -
Step 4
While the base bakes, combine granulated sugar and brown sugar in a small bowl. Sprinkle this mixture evenly over the warm cake base. -
Step 5
Scatter milk chocolate chips evenly over the sugar topping. -
Step 6
Return to the oven for another 8-10 minutes, or until chocolate chips are melted and gooey and the topping is caramelized. -
Step 7
Let cool for 10-15 minutes before slicing and serving warm.
Important Information
Nutrition Facts (Per Serving)
It is important to consider this information as approximate and not to use it as definitive health advice.
Allergy Information
Please check ingredients for potential allergens and consult a health professional if in doubt.

Leave a Comment