
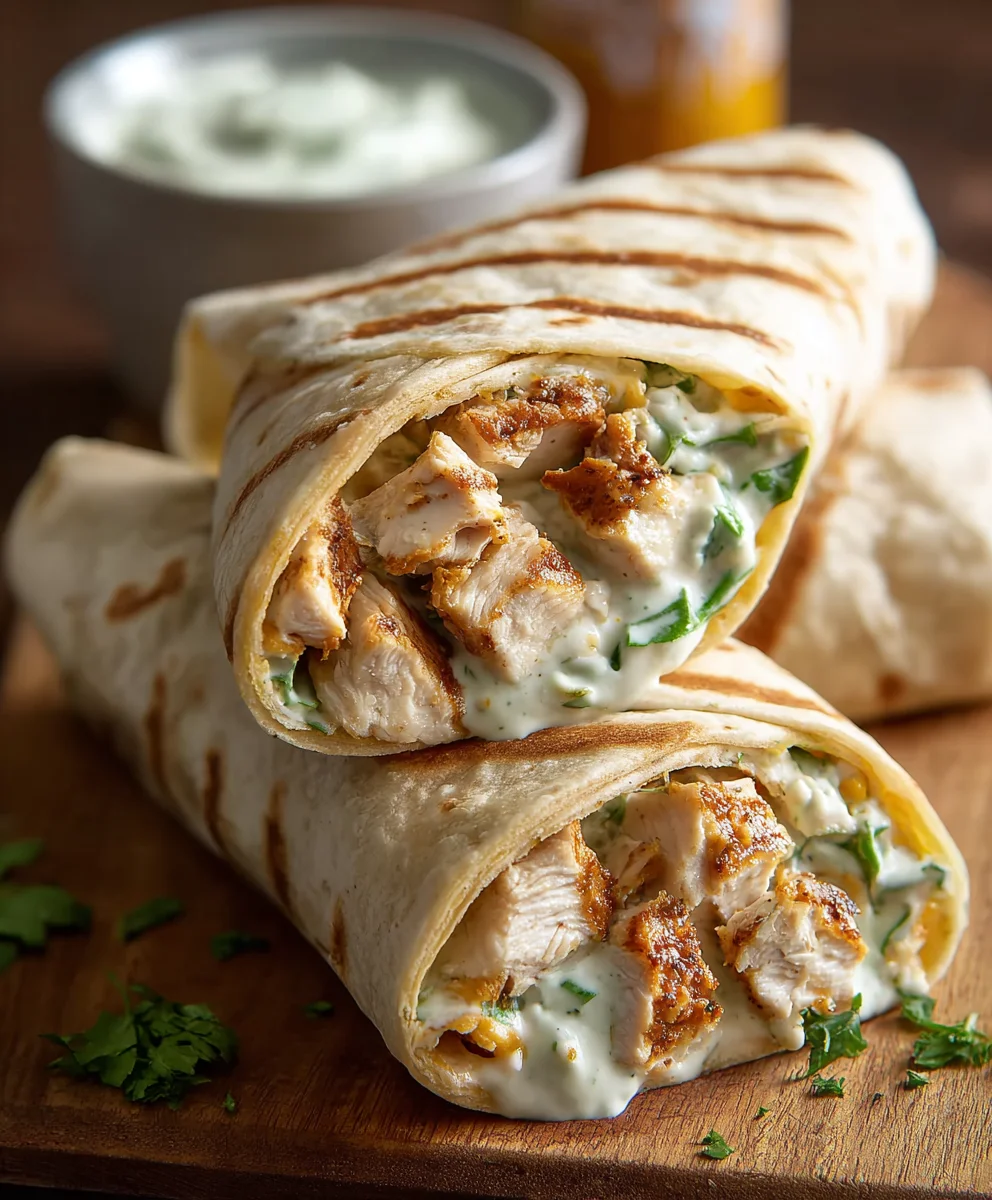
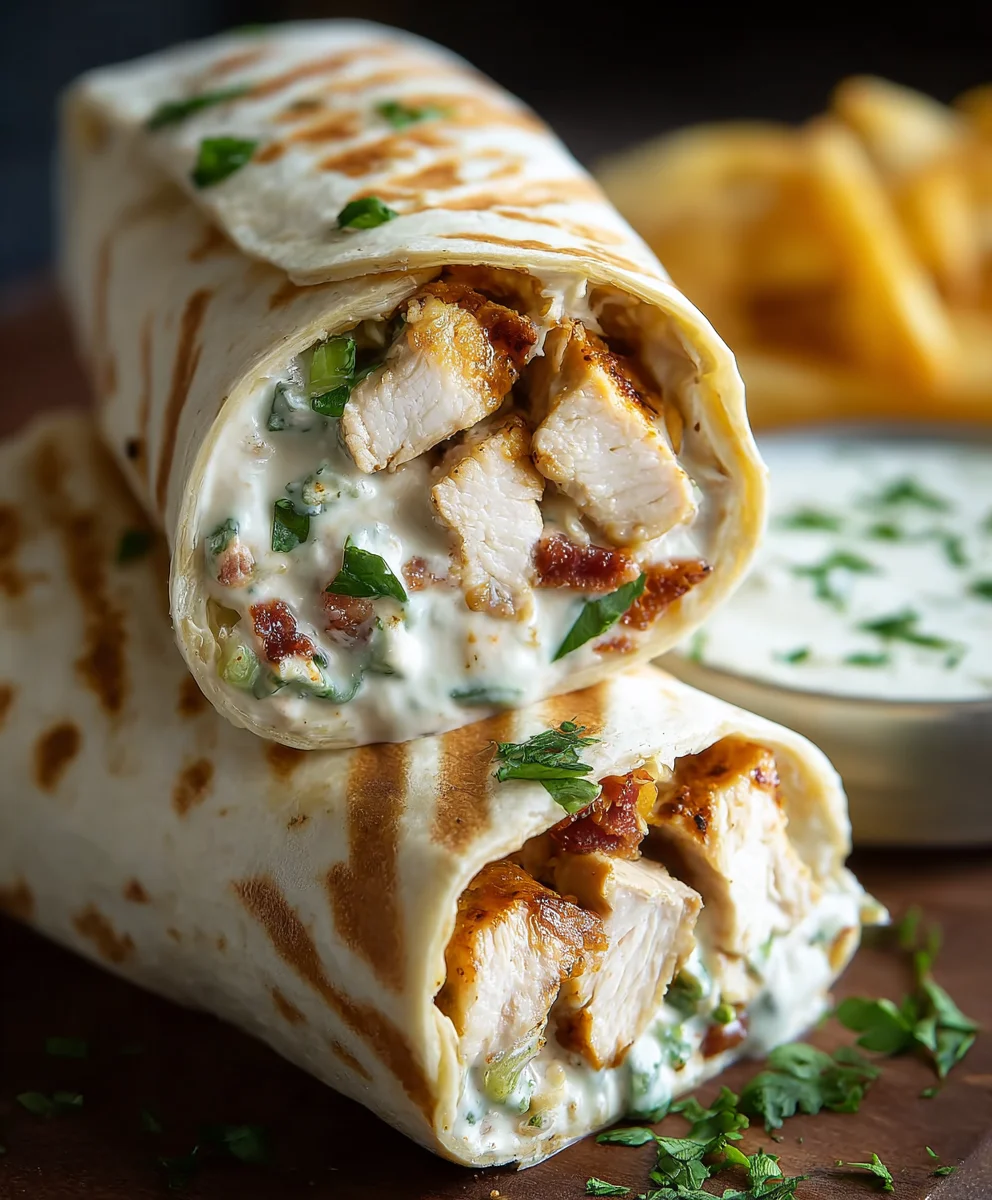
Chicken Ranch Wraps are more than just a quick meal; they are a culinary solution for busy lives, offering a delightful blend of flavors and textures that truly satisfies. I know for myself, navigating a hectic week often means sacrificing taste for speed, but with this recipe, you absolutely don’t have to. The humble wrap, a descendant of ancient flatbreads used across countless cultures to carry food, has evolved into a modern-day hero, and when you introduce the iconic, creamy tang of ranch dressing to succulent chicken and crisp vegetables, something magical happens. This particular iteration, the beloved Chicken Ranch Wraps, has captured hearts for its incredible ease of preparation, making it an ideal candidate for a lightning-fast lunch or a stress-free weeknight dinner. People adore this dish not only for its unbeatable convenience but also for the harmonious explosion of flavors – the savory chicken perfectly complemented by the cool, herbaceous ranch, all nestled within a soft tortilla. It’s a complete, satisfying, and refreshingly simple meal that I’m thrilled to share with you today.

Ingredients:
- For the Chicken:
- 2 large boneless, skinless chicken breasts (about 1.5 lbs total) OR 3 cups cooked, shredded rotisserie chicken
- 1 tablespoon olive oil (if cooking raw chicken)
- 1/2 teaspoon salt
- 1/4 teaspoon black pepper
- 1/2 teaspoon garlic powder
- 1/2 teaspoon onion powder
- 1/4 teaspoon smoked paprika
- For the Ranch Dressing Mixture:
- 1 cup prepared ranch dressing (your favorite store-bought brand or homemade)
- 2 tablespoons fresh chopped chives (optional, for an herby fresh note)
- For the Wraps & Fillings:
- 8 large (10-inch) flour tortillas
- 2 cups shredded iceberg or romaine lettuce
- 1 large ripe tomato, diced
- 1/2 cup shredded sharp cheddar cheese
- 1/2 cup shredded Monterey Jack cheese (or a convenient cheddar-jack blend)
- 1/4 cup cooked bacon bits (from 3-4 strips of bacon, cooked crispy and crumbled)
- 1/4 cup thinly sliced red onion (optional, for a pungent kick)
- 1/2 ripe avocado, diced (optional, for creamy texture and healthy fats)
- Optional: Hot sauce or buffalo sauce, to taste, for an extra spicy kick
Preparing Your Chicken: The Heart of the Wrap
The chicken is undoubtedly the star of our Chicken Ranch Wraps, and getting it just right is key to a truly satisfying experience. While using pre-cooked rotisserie chicken is a fantastic time-saver, cooking fresh chicken breasts allows you to control the seasoning and tenderness. Let’s walk through both options:
Option 1: Cooking Fresh Chicken Breasts
- Prepare the Chicken: If starting with raw boneless, skinless chicken breasts, pat them thoroughly dry with paper towels. This step is crucial for achieving a nice sear and even cooking.
- Season Liberally: In a small bowl, combine the salt, black pepper, garlic powder, onion powder, and smoked paprika. Sprinkle this seasoning blend generously over both sides of each chicken breast. Don’t be shy – this is where a lot of our flavor comes from! Gently press the seasoning into the chicken to ensure it adheres.
- Sear for Flavor: Heat the olive oil in a large skillet or frying pan over medium-high heat. Once the oil is shimmering and hot, carefully place the seasoned chicken breasts in the pan. Avoid overcrowding the pan; if necessary, cook them in batches.
- Cook to Perfection: Sear the chicken for about 5-7 minutes per side, or until it develops a beautiful golden-brown crust and is cooked through. The internal temperature should reach 165°F (74°C) when checked with a meat thermometer at the thickest part.
- Rest and Shred: Once cooked, remove the chicken from the skillet and transfer it to a cutting board. Tent it loosely with aluminum foil and let it rest for at least 5-10 minutes. This resting period is vital, as it allows the juices to redistribute throughout the meat, resulting in incredibly tender and moist chicken. After resting, use two forks to shred the chicken into bite-sized pieces, or dice it into small cubes, whichever you prefer for your wraps. Aim for approximately 3 cups of shredded or diced chicken.
Option 2: Using Pre-Cooked Rotisserie Chicken
- Shred the Chicken: If you’re opting for the convenience of a rotisserie chicken, simply remove the skin and bones, and shred the meat using your hands or two forks. You’ll need about 3 cups of shredded chicken for this recipe.
- Enhance Flavor (Optional): While rotisserie chicken is already seasoned, you can give it an extra boost of flavor. In a bowl, toss the shredded chicken with a tiny drizzle of olive oil, and a pinch each of garlic powder, onion powder, and smoked paprika. This mimics the flavors of the freshly cooked chicken and adds an extra layer of deliciousness.
Prepping Your Fresh Fillings and Dressing
While the chicken is the star, the supporting cast of fresh vegetables and that creamy ranch dressing are what bring these wraps to life. Proper preparation of these components ensures maximum flavor, texture, and visual appeal.
- Prepare the Ranch Dressing Mixture: In a medium bowl, combine the prepared ranch dressing with the fresh chopped chives, if you’re using them. The chives add a wonderful, subtle oniony freshness that brightens up the dressing considerably. Give it a good stir to ensure everything is well combined. Set this aside, or pop it in the fridge while you prepare the other ingredients.
- Shred the Lettuce: Wash and thoroughly dry your iceberg or romaine lettuce. Using a sharp knife, thinly shred the lettuce. I personally love the crisp crunch of finely shredded lettuce in a wrap, as it distributes more evenly than large leaves. Place the shredded lettuce in a bowl and keep it chilled.
- Dice the Tomato: Wash your tomato and dice it into small, uniform pieces. Try to remove as much of the watery core as possible to prevent your wraps from becoming soggy. Small dice are perfect for integrating into the filling without overwhelming it.
- Shred the Cheeses: If you’re not using pre-shredded cheese, grate your sharp cheddar and Monterey Jack cheeses. Freshly shredded cheese melts better and often has a better texture than its pre-shredded counterparts, which sometimes contain anti-caking agents. Combine the two cheeses in a bowl.
- Cook and Crumble Bacon (if not using pre-made bits): If you’re cooking fresh bacon, cook 3-4 strips in a skillet until they are perfectly crispy. Drain them on a paper towel-lined plate, then once cooled slightly, crumble them into small bits. These little pockets of salty, smoky flavor are a fantastic addition!
- Slice or Dice Red Onion (Optional): If you enjoy a bit of sharp tang, thinly slice or finely dice the red onion. Remember, a little goes a long way here. You can even quick-pickle the red onion in a splash of vinegar for 10-15 minutes if you want to mellow its bite slightly.
- Dice the Avocado (Optional): If you’re including avocado, dice it right before assembling your wraps to prevent it from browning. Its creamy texture and healthy fats add a luxurious element to the wraps.
Creating the Irresistible Chicken Ranch Filling
Now that all your individual components are prepped, it’s time to bring them together into the harmonious and flavorful filling that will make your Chicken Ranch Wraps truly shine. This is where the magic happens!
- Combine Chicken and Ranch: In a large mixing bowl, add your shredded or diced cooked chicken. Pour about three-quarters of your prepared ranch dressing mixture over the chicken. Gently toss the chicken to coat it thoroughly with the dressing. You want every piece of chicken to be coated in that creamy, tangy goodness. Taste a small piece of chicken and adjust with more salt, pepper, or a tiny bit more ranch dressing if needed. Reserve the remaining ranch dressing for spreading on the tortillas.
- Add the Extras: Now, add the bacon bits, diced tomato, and shredded cheeses to the chicken mixture. If you’re using diced red onion or avocado, you can add them to this mixture as well, or you can add them directly to the tortilla during assembly for better distribution and presentation. I often prefer to add avocado at the assembly stage to prevent it from getting overly mashed in the mixture.
- Gentle Mixing: Using a spatula or your hands, gently fold all the ingredients together. Be careful not to overmix, especially if you’ve added avocado, to keep the ingredients distinct and prevent the mixture from becoming mushy. You want to see all those colorful components interspersed throughout the creamy chicken.
Assembling Your Perfect Chicken Ranch Wraps
The assembly process is where everything comes together. A well-assembled wrap is not just about taste; it’s about structural integrity and ensuring every bite is balanced. Getting the technique right will prevent spills and maximize enjoyment.
- Warm Your Tortillas (Optional but Recommended): For maximum flexibility and to prevent cracking, gently warm your flour tortillas. You can do this in a microwave for 15-20 seconds (stacked between damp paper towels), in a dry skillet over medium heat for 15-30 seconds per side until pliable, or even in the oven wrapped in foil. Warm tortillas are much easier to roll without tearing.
- Lay the Foundation: Lay a warmed tortilla flat on a clean work surface.
- Spread the Ranch: Take a small amount of the reserved ranch dressing mixture and spread a thin, even layer across the entire surface of the tortilla. This acts as an extra layer of flavor and helps to “glue” the other ingredients in place.
- Layer the Lettuce: Next, place a generous handful of shredded lettuce in a line down the center of the tortilla, leaving about an inch or two clear on the top and bottom edges, and about an inch clear on the left and right sides. This forms a protective barrier for the filling and adds that essential crunch.
- Add the Filling: Spoon about 1/2 to 3/4 cup of the chicken ranch filling mixture onto the lettuce layer, also in a line down the center. Distribute it evenly, ensuring it doesn’t get too close to the edges to allow for easy folding.
- Add Optional Fresh Toppings: If you reserved your diced red onion or avocado, this is the time to sprinkle them over the chicken filling. This allows for their distinct flavors and textures to stand out.
- The Folding Technique:
- First, fold the left and right sides of the tortilla inward over the filling, almost like creating an envelope. The goal is to enclose the filling snugly.
- Next, starting from the bottom edge (the one closest to you), tightly roll the tortilla upwards, away from you. As you roll, tuck the ingredients in firmly to create a compact wrap. Continue rolling until you reach the top edge.
- You should now have a tightly packed cylinder. If desired, cut the wrap in half diagonally for an appealing presentation and easier eating.
- Repeat: Continue this process with the remaining tortillas and filling until all your delicious Chicken Ranch Wraps are assembled.
Optional: Grilling or Toasting Your Chicken Ranch Wraps
While these wraps are absolutely delicious served fresh and cold, adding a quick grill or toast can elevate them to another level, creating a warm, slightly crispy exterior and a melty, gooey interior where the cheese truly shines. This extra step is highly recommended if you have a few extra minutes!
- Preheat Your Cooking Surface:
- For a Panini Press: Preheat your panini press according to the manufacturer’s instructions.
- For a Skillet or Griddle: Heat a large, dry non-stick skillet or a griddle over medium heat. You can add a tiny brush of olive oil or butter to the pan if you like, but often it’s not necessary if your pan is truly non-stick.
- Grill or Toast the Wraps:
- Using a Panini Press: Carefully place 1-2 assembled wraps into the preheated panini press. Close the lid and cook for 3-5 minutes, or until the tortilla is golden brown and crispy, and the cheese inside is nicely melted.
- Using a Skillet/Griddle: Place the assembled wraps seam-side down in the hot skillet or on the griddle. Cook for about 2-3 minutes per side, pressing down gently with a spatula, until the tortilla is golden brown and lightly crispy, and the filling is warmed through with melty cheese. You might need to adjust the heat to prevent burning while ensuring the inside gets warm.
- Serve Immediately: Once grilled or toasted, remove the wraps from the heat. Let them rest for a minute or two, then cut them in half diagonally (if you haven’t already). Serve them warm and enjoy the delightful combination of warm, crispy tortilla and creamy, melted filling!
Tips for Success & Variations:
- Don’t Overfill: It’s tempting to cram as much delicious filling as possible into each tortilla, but overfilling is the quickest way to a torn, messy wrap. Err on the side of slightly less filling for a more manageable and structurally sound wrap.
- Tight Rolling is Key: The secret to a perfect wrap is rolling it tightly. This ensures all the ingredients stay put and you get a bit of everything in each bite. Don’t be afraid to apply a gentle but firm pressure as you roll.
- Spice it Up: For those who love heat, drizzle a bit of buffalo sauce or your favorite hot sauce directly onto the chicken mixture, or add a few thinly sliced jalapeños (fresh or pickled) to the wrap before rolling.
- Add More Veggies: Feel free to customize your wraps with other vegetables! Thinly sliced bell peppers (any color), corn kernels, black beans, or even some finely chopped cucumber can add extra crunch and nutrition.
- Whole Wheat Tortillas: For a slightly healthier option, opt for whole wheat tortillas. They add a nutty flavor and more fiber. You can also make these “wraps” as lettuce wraps for a low-carb alternative.
- Make Ahead: You can prepare the chicken ranch filling up to 1-2 days in advance and store it in an airtight container in the refrigerator. Assemble the wraps just before serving to prevent the tortillas from getting soggy. If you plan to grill them, it’s best to assemble them fresh.
- Creamy Texture Boost: For an even creamier filling, you can add 1-2 tablespoons of cream cheese or sour cream to the ranch dressing mixture. This adds a lovely richness.
- Flavorful Chicken Boost: If you’re cooking fresh chicken, consider brining it for 30 minutes in a simple salt water solution (1 tbsp salt per cup of water) before seasoning and cooking. This locks in moisture and adds flavor.
- Serving Suggestions: These Chicken Ranch Wraps are fantastic on their own, but they also pair wonderfully with a side salad, a bowl of chips and salsa, or a light soup for a more substantial meal.
- Storage: Leftover assembled wraps are best eaten within a day, as the tortillas can get soggy over time. Store them tightly wrapped in plastic wrap or foil in the refrigerator. The chicken filling, stored separately, will last for 3-4 days in an airtight container in the fridge.
Conclusion:
Well, my friends, we’ve reached the delicious culmination of our culinary journey today, and I genuinely hope you’re feeling as excited as I am about trying out this incredible recipe. I’ve shared with you a dish that is, in my honest opinion, a true game-changer for those busy weeknights, effortless lunches, or even impromptu picnics where you need something satisfying, flavorful, and incredibly easy to put together. This isn’t just another recipe; it’s a solution to the eternal question of “what’s for dinner?” that delivers on taste every single time. The unique blend of creamy ranch, tender chicken, and crisp fresh vegetables, all nestled within a soft tortilla, creates a symphony of textures and flavors that is truly irresistible. I really can’t stress enough how much of a lifesaver this recipe has been in my own kitchen, offering a quick yet wholesome meal that everyone at my table, from the pickiest eaters to the most adventurous palates, absolutely adores.
The beauty of these wraps lies in their fantastic balance. You get the rich, tangy kick of the ranch dressing, perfectly complementing the savory chicken, while the fresh crunch of the veggies adds that essential contrast. It’s comfort food meets convenience, and it does so without compromising on flavor or nutritional value. I often find myself craving these not just for their taste, but for the sheer simplicity they bring to my day. Forget hours spent slaving over a hot stove; with a little prep, you can have a gourmet-tasting meal on the table in minutes. This makes it an ideal choice for anyone looking to reduce their kitchen time without sacrificing the joy of a home-cooked meal. Trust me when I say, once you try these, they’ll quickly become a regular fixture in your meal rotation, just as they have in mine. They are genuinely that good, providing a delightful culinary experience with minimal fuss.
One of my favorite aspects of making these Chicken Ranch Wraps is how incredibly versatile they are. While the core recipe is absolutely perfect as is, I always encourage a little kitchen creativity! For serving suggestions, think beyond just the wrap itself. Imagine these warm, savory wraps paired with a crisp, simple green salad tossed in a light vinaigrette – a match made in heaven that adds a lovely freshness to your meal. A side of crunchy potato chips offers that classic deli feel, while a bowl of creamy tomato soup or a hearty lentil soup can elevate this humble wrap into a truly comforting and complete dinner. And for those warmer days, a fresh fruit salad brings a delightful sweetness and lightness that balances the savory richness of the wraps beautifully. Don’t be afraid to mix and match to suit your mood or what you have on hand.
Now, let’s talk variations, because this is where the fun truly begins! You can easily customize these wraps to suit any taste preference or dietary need. Want to add a smoky kick? Try tossing in some crispy bacon bits. Love avocado? Sliced or mashed avocado adds an amazing creaminess and healthy fats. For those who enjoy a bit of heat, a dash of hot sauce or some finely diced jalapeños mixed into the chicken salad will give it that extra zing. Don’t limit yourself to just shredded chicken; leftover grilled chicken, baked chicken, or even rotisserie chicken works wonderfully here, making it an excellent way to repurpose leftovers. As for the vegetables, feel free to experiment with thinly sliced bell peppers of various colors, finely shredded carrots, or even a handful of fresh spinach or arugula for an extra nutritional boost. You can also play around with different types of cheese, from sharp cheddar to spicy pepper jack, for an added layer of flavor. And for those conscious about their carbs, lettuce wraps are a fantastic low-carb alternative to tortillas, offering all the flavor with a satisfying crunch. For gluten-free needs, simply opt for your favorite gluten-free tortillas. The possibilities are truly endless, allowing you to make this recipe uniquely your own every single time.
So, my dear readers, I’ve laid out all the reasons why I believe this recipe is an absolute must-try. From its effortless preparation and incredible flavor to its endless customization options, it truly ticks all the boxes for a fantastic meal. I genuinely hope that I’ve inspired you to give these Chicken Ranch Wraps a whirl in your kitchen very soon. Don’t hesitate, grab those ingredients, and whip up a batch! I am confident that you will be absolutely delighted with the results. And when you do, please, please, please come back and share your experience with me! I absolutely love hearing how your culinary adventures turn out. Did you add a unique twist? Discover a new favorite side? Snap a picture and tag me on social media, or drop a comment below. Your feedback and creations inspire me just as much as I hope this recipe has inspired you. Happy cooking, and enjoy every single delicious bite!
Frequently Asked Questions (FAQs)
Can I prepare the Chicken Ranch Wraps ahead of time?
Yes, you absolutely can! For the best results and to prevent the tortillas from getting soggy, I recommend preparing the chicken ranch mixture and chopping all your vegetables separately. Store them in airtight containers in the refrigerator. When you’re ready to eat, simply assemble the wraps just before serving. However, if you’re in a pinch, you can assemble the wraps a few hours ahead of time and keep them chilled in the fridge, but they are truly best enjoyed fresh.
What kind of chicken should I use for this recipe?
The beauty of this recipe is its flexibility! I typically use cooked shredded chicken because it mixes so well with the ranch dressing and other ingredients. This could be leftover roasted chicken, boiled and shredded chicken breasts, or even the convenience of a pre-cooked rotisserie chicken from your local grocery store. Using rotisserie chicken is a fantastic shortcut that makes this recipe even quicker to prepare!
I don’t have ranch dressing. What can I use as a substitute?
No ranch dressing? No problem! You can easily whip up a quick substitute. I suggest combining plain Greek yogurt or sour cream with a medley of dried herbs like dill, chives, and parsley, along with a dash of garlic powder, onion powder, salt, and black pepper. Adjust the seasonings to your taste. Alternatively, any other creamy dressing you enjoy, such as a Caesar dressing or a creamy Italian dressing, could also work as a flavorful substitute, though the taste profile will be different.
How do I store leftover Chicken Ranch Wraps?
If you happen to have any leftovers (which is rare in my house!), you can store assembled wraps in an airtight container in the refrigerator for 1-2 days. Keep in mind that the tortillas might soften a bit over time. For the freshest taste, as mentioned before, it’s best to store the components separately and assemble right before you plan to enjoy them.
Can I make this recipe low-carb or gluten-free?
Absolutely! This recipe is incredibly adaptable to various dietary needs. For a low-carb version, simply swap out the traditional tortillas for large lettuce leaves (like romaine or butter lettuce) and turn them into lettuce wraps. They offer a refreshing crunch and keep the carbs to a minimum. If you need a gluten-free option, make sure to use certified gluten-free tortillas, which are widely available in most grocery stores today. The filling itself is naturally gluten-free!
What are some good side dishes to serve with these Chicken Ranch Wraps?
These wraps are so versatile that they pair well with a wide array of sides! My personal favorites include a simple, crisp green salad, a bowl of crunchy potato chips for that classic deli feel, or even a cup of warm, comforting soup like tomato or vegetable soup. For a lighter touch, fresh fruit salad or a selection of veggie sticks (carrots, celery, bell peppers) with an extra dollop of ranch for dipping make excellent companions. Choose whatever suits your mood!
Delicious Chicken Ranch Wraps: Quick & Flavorful Dinner
Easy-to-make chicken ranch wraps featuring seasoned chicken, creamy ranch dressing, fresh vegetables, and cheese, all wrapped in a soft tortilla. Perfect for a quick and flavorful dinner.
Ingredients
-
1.5 lbs boneless, skinless chicken breasts OR 3 cups cooked shredded chicken
-
1 tbsp olive oil
-
1/2 tsp salt
-
1/4 tsp black pepper
-
1/2 tsp garlic powder
-
1/2 tsp onion powder
-
1/4 tsp smoked paprika
-
1 cup ranch dressing
-
2 tbsp fresh chopped chives (optional)
-
8 large (10-inch) flour tortillas
-
2 cups shredded lettuce
-
1 large tomato, diced
-
1/2 cup shredded sharp cheddar cheese
-
1/2 cup shredded Monterey Jack cheese
-
1/4 cup cooked beef bacon bits
-
1/4 cup thinly sliced red onion (optional)
-
1/2 ripe avocado, diced (optional)
-
Hot sauce or buffalo sauce (optional)
Instructions
-
Step 1
If cooking fresh chicken: Pat dry chicken breasts. Combine salt, pepper, garlic powder, onion powder, and smoked paprika; season chicken. Heat olive oil in a skillet over medium-high heat. Sear chicken 5-7 mins per side until internal temp reaches 165°F (74°C). Rest 5-10 mins, then shred or dice into 3 cups. If using rotisserie chicken: Shred 3 cups of cooked chicken. (Optional: Toss with a drizzle of olive oil and a pinch of garlic powder, onion powder, and smoked paprika). -
Step 2
In a bowl, combine 1 cup ranch dressing with 2 tbsp chopped chives (if using). Shred lettuce, dice tomato, shred cheeses (cheddar and Monterey Jack). Cook and crumble 3-4 strips of beef bacon for 1/4 cup bits. Thinly slice red onion and dice avocado, if using. -
Step 3
In a large bowl, combine shredded chicken with about 3/4 of the prepared ranch dressing mixture. Toss to coat. Add beef bacon bits, diced tomato, and shredded cheeses to the chicken mixture. Gently fold together. Reserve remaining ranch dressing. -
Step 4
Gently warm tortillas for flexibility. Lay a warmed tortilla flat. Spread a thin layer of reserved ranch dressing. Layer a generous handful of shredded lettuce down the center. Spoon 1/2 to 3/4 cup of chicken ranch filling onto the lettuce. Add optional red onion or avocado. Fold left and right sides inward, then tightly roll from the bottom up. -
Step 5
Preheat panini press or non-stick skillet over medium heat. Place assembled wraps (seam-side down for skillet) and cook 3-5 minutes in panini press or 2-3 minutes per side in skillet, until golden, crispy, and cheese is melted. Cut diagonally and serve warm.
Important Information
Nutrition Facts (Per Serving)
It is important to consider this information as approximate and not to use it as definitive health advice.
Allergy Information
Please check ingredients for potential allergens and consult a health professional if in doubt.

Leave a Comment