
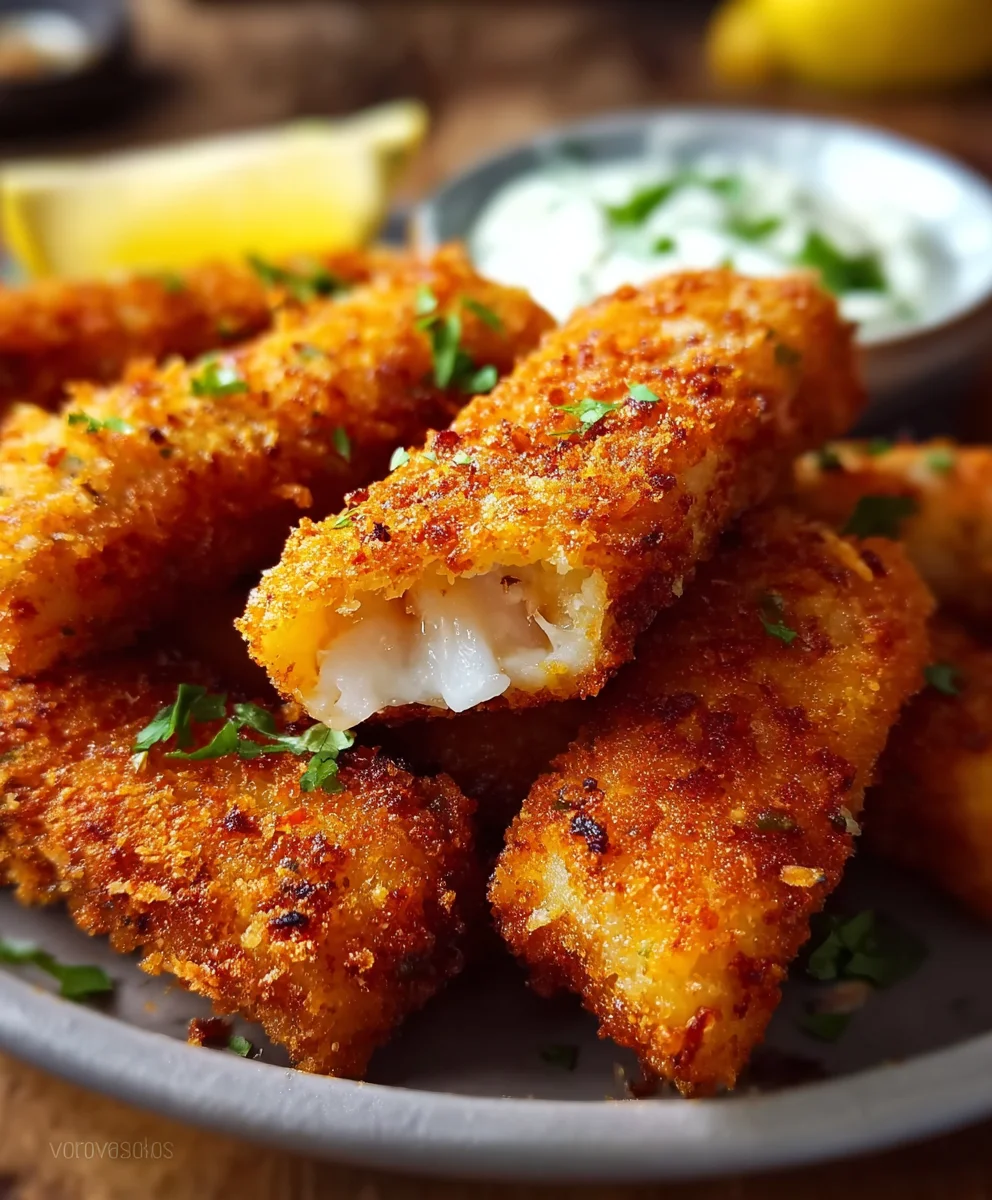
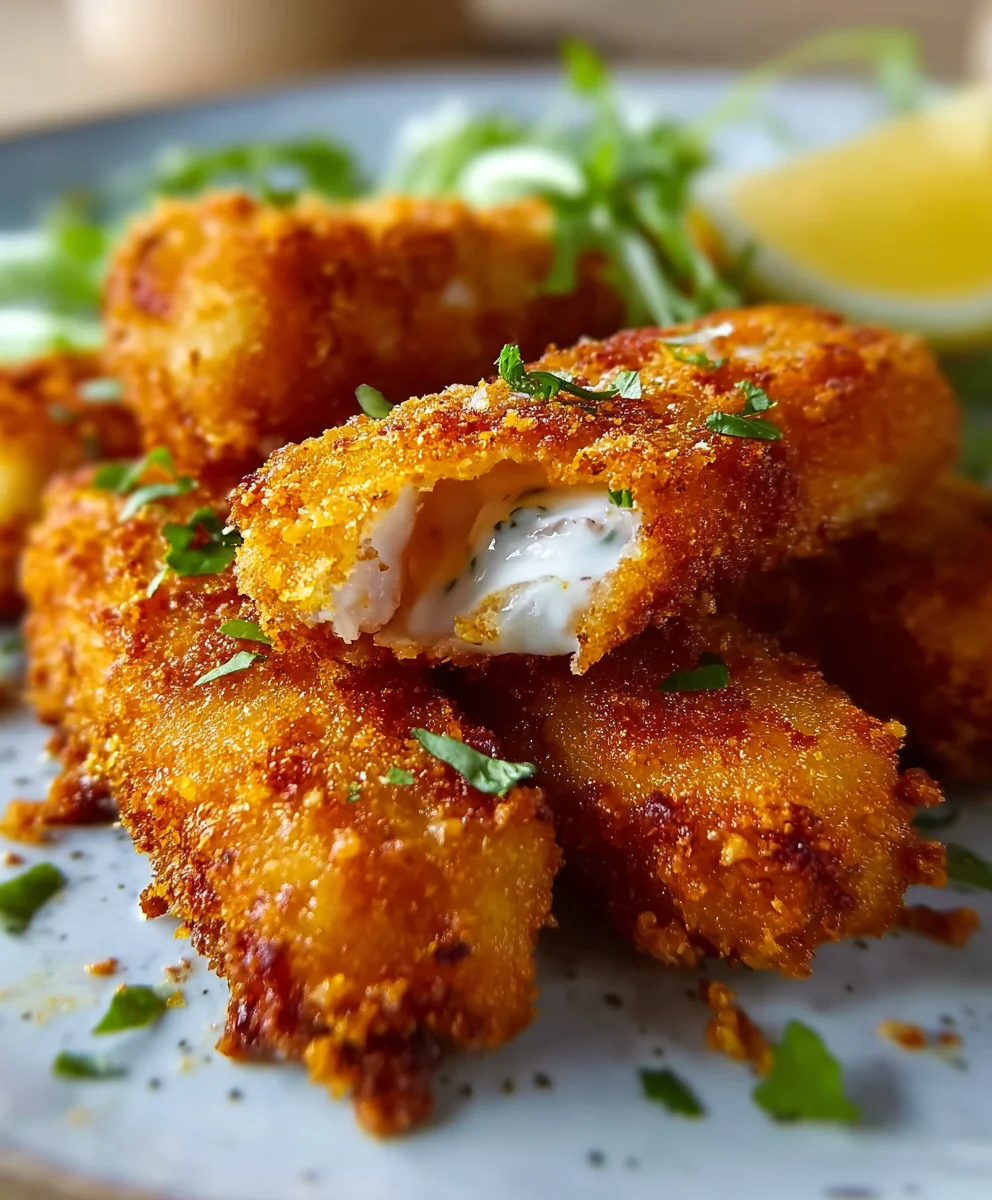
Crispy Fish Fingers hold a special place in the hearts of many, myself included. There’s an undeniable magic in that first bite – the satisfying crunch of a perfectly golden, seasoned coating giving way to tender, flaky white fish. It’s more than just a quick meal; it’s a culinary hug that brings back cherished childhood memories for countless individuals.
Originating as a post-war convenience food in the mid-20th century, fish fingers quickly became a household staple, particularly beloved in the UK and beyond. They offered a practical, nutritious, and incredibly appealing option for busy families, cementing their status as a global comfort food. While the frozen aisle offers a convenient solution, I’m here to tell you that nothing quite compares to the fresh, vibrant flavour and sensational texture of a homemade batch.
Why We Adore This Dish So Much: The Taste and Texture Triumph
Beyond the nostalgia, it’s the brilliant interplay of textures and tastes. The mild sweetness of the fish, often cod or haddock, is perfectly complemented by the savory, crunchy exterior. It’s a versatile dish that appeals to even the pickiest eaters, making it a weeknight hero. Get ready to rediscover the joy of Crispy Fish Fingers with my easy-to-follow recipe, promising a delectable experience that will have everyone asking for more!

Ingredients:
- For the Fish Fingers:
- 2 lbs (approx. 900g) firm, white fish fillets (such as cod, haddock, pollock, or tilapia), skinless and boneless
- 1 cup all-purpose flour
- 2 large eggs
- 2 tablespoons milk or water (optional, for the egg wash)
- 2 cups Panko breadcrumbs (for extra crispiness, or use regular breadcrumbs for a classic texture)
- 1 teaspoon fine sea salt, plus more for seasoning the fish
- ½ teaspoon freshly ground black pepper, plus more for seasoning the fish
- 1 teaspoon garlic powder
- ½ teaspoon onion powder
- ½ teaspoon smoked paprika (or sweet paprika, if preferred)
- For Frying:
- 4-6 cups high smoke point oil (such as vegetable, canola, sunflower, or grapeseed oil) for deep frying, or ½-¾ cup for pan frying
- For Serving:
- Lemon wedges
- Fresh parsley, finely chopped (optional, for garnish)
- Your favorite dipping sauces (e.g., homemade tartar sauce, ketchup, sriracha mayo, aioli)
Preparing Our Fish for the Crispy Journey:
- Prepare the Fish: First things first, let’s get our fish ready. Take your chosen fish fillets and pat them thoroughly dry with paper towels. This step is crucial because excess moisture is the enemy of crispiness! Drying the fish helps the breading adhere better and prevents the fish from steaming instead of frying. Once dry, lay the fillets on a clean cutting board and cut them into uniform “finger” shapes, about 1-inch wide and 3-4 inches long. Aim for consistency in size so they cook evenly. If your fillets are very thin, you might want to cut them a bit wider to prevent them from breaking apart during handling and cooking. Season the cut fish pieces lightly all over with a pinch of salt and pepper. Don’t go overboard, as our breading mixture will add more seasoning.
- Set Up the Breading Station: This is where the magic really begins! We’ll need three shallow dishes or plates for our breading station.
- Dish 1 (Flour Dredge): In the first dish, combine the all-purpose flour with the garlic powder, onion powder, and paprika. Whisk these dry ingredients together until they are well combined. This seasoned flour will be our first layer, helping to create a stable surface for the egg wash to stick to.
- Dish 2 (Egg Wash): In the second dish, crack the two large eggs. Add the optional 2 tablespoons of milk or water to the eggs, then whisk vigorously with a fork until the yolks and whites are completely combined and slightly frothy. This is our “glue” layer, ensuring the breadcrumbs adhere securely.
- Dish 3 (Breadcrumbs): In the third dish, spread out the Panko breadcrumbs. If you’re using regular breadcrumbs, use those. Panko breadcrumbs are fantastic for fish fingers because their larger, flakier texture results in an incredibly light and airy crispiness. To this dish, add the 1 teaspoon of fine sea salt and ½ teaspoon of black pepper, and stir them into the breadcrumbs. This ensures every bite is perfectly seasoned.
Arrange these three dishes in a line: flour, then egg, then breadcrumbs. This assembly line approach makes the breading process much more efficient and less messy!
The Art of Breading for Maximum Crispiness:
- Breading Each Fish Finger: Now, let’s bread our fish! Take one piece of fish at a time and follow these steps carefully to ensure a perfect coating:
- Flour: First, gently dredge the fish finger in the seasoned flour, ensuring it’s completely coated on all sides. Tap off any excess flour – we want a thin, even layer, not a thick cakey one. Too much flour can make the coating gummy.
- Egg Wash: Next, transfer the floured fish finger to the egg wash. Turn it over a few times to ensure it’s fully coated in the egg mixture. Lift it out and let any excess egg drip off briefly. Again, a thin, even layer is key.
- Breadcrumbs: Finally, place the egg-coated fish finger into the Panko breadcrumbs. Gently press the breadcrumbs onto all sides of the fish, ensuring it’s completely covered. Don’t be shy; really pack those crumbs on! The more breadcrumbs, the crispier your fish finger will be. Transfer the breaded fish finger to a clean plate or baking sheet.
Repeat this process with all the remaining fish pieces. As you work, try to keep one hand dedicated to dry ingredients (flour, breadcrumbs) and the other to wet ingredients (egg wash) to minimize mess and prevent “club hand.” If you find your breadcrumbs becoming clumpy or wet, you might need to refresh them with a new batch.
- Chill for Success (Optional but Recommended): Once all your fish fingers are breaded, I highly recommend placing the plate or baking sheet with the breaded fish in the refrigerator for at least 20-30 minutes. This chilling step is a secret weapon for super crispy fish fingers! It allows the breading to “set” and adhere firmly to the fish, which significantly reduces the chances of it falling off during cooking. This also helps prevent sogginess and ensures a beautifully crisp crust. If you’re pressed for time, you can skip this, but you’ll notice the difference in texture.
Cooking Our Crispy Fish Fingers to Golden Perfection:
- Prepare for Frying: Now it’s time to cook! You have a couple of options here: deep-frying for ultimate crispiness, or pan-frying for a slightly lighter touch.
- For Deep Frying: Pour the high smoke point oil into a heavy-bottomed pot or a Dutch oven. You’ll want enough oil to submerge the fish fingers completely, usually 3-4 inches deep. Attach a deep-fry thermometer to the side of the pot and heat the oil over medium-high heat until it reaches a temperature of 350°F (175°C). Maintaining the correct oil temperature is paramount for crispy, perfectly cooked fish fingers that aren’t greasy. If the oil is too cold, the breading will absorb too much oil and become soggy; if it’s too hot, the outside will burn before the inside cooks.
- For Pan Frying: If you prefer to pan-fry, pour about ½ to ¾ inch of oil into a large, heavy-bottomed skillet (cast iron or stainless steel works great). Heat the oil over medium-high heat until it shimmers and a small piece of breading dropped in sizzles immediately. The ideal temperature for pan-frying is also around 350°F (175°C), but it’s harder to measure without a thermometer. You can test it by carefully dropping a tiny bit of breading into the hot oil; if it immediately sizzles and floats, it’s ready.
Line a plate or a baking sheet with a few layers of paper towels. This will be where we place our cooked fish fingers to drain excess oil. You can also place a wire rack over a baking sheet for better air circulation and to prevent the bottom of the fish fingers from getting soggy.
- Frying the Fish Fingers: Carefully and gently lower a few breaded fish fingers into the hot oil using tongs. Do not overcrowd the pot or skillet! Frying too many at once will drastically lower the oil temperature, leading to greasy fish fingers. Cook in batches, allowing enough space for the fish fingers to cook evenly and for the oil temperature to recover between additions.
- Deep Frying: Fry the fish fingers for about 3-5 minutes, or until they are a beautiful golden brown and cooked through. They should float to the surface when done. Use your tongs to gently turn them if needed to ensure even browning.
- Pan Frying: Fry for about 2-3 minutes per side, turning them once with tongs, until they are golden brown and crispy on both sides, and cooked through.
The exact cooking time will depend on the thickness of your fish pieces. Fish cooks relatively quickly, so don’t overcook them, or they’ll become dry. You want the interior to be opaque and flaky.
- Drain and Season: Once a batch of fish fingers is golden brown and cooked, carefully remove them from the oil with tongs or a slotted spoon and transfer them to the prepared paper-towel-lined plate or wire rack to drain. While they are still hot, immediately sprinkle them with an extra pinch of fine sea salt. This really enhances their flavor and helps to set the crispiness. Continue frying the remaining fish fingers in batches until they are all cooked. Keep the cooked fish warm in a low oven (around 200°F/90°C) if you’re cooking many batches and want to serve them all hot at once.
Serving Suggestions, Variations, and Pro Tips:
- Serving Our Crispy Masterpiece: Arrange the freshly fried, crispy fish fingers on a serving platter. Garnish them with a sprinkle of fresh, chopped parsley if you like – it adds a lovely pop of color and freshness. Serve immediately with plenty of fresh lemon wedges; a squeeze of lemon juice brightens the flavor beautifully. And, of course, don’t forget an array of your favorite dipping sauces! Classic tartar sauce is always a winner, but ketchup, a zesty sriracha mayo, or a creamy aioli also make fantastic companions. These crispy delights are wonderful on their own, as part of a main meal with chips (fries) and mushy peas, or even tucked into soft rolls for a homemade fish finger sandwich.
Variations for Your Culinary Adventure:
- Spice It Up: Feel free to experiment with the seasoning in your flour dredge. A pinch of cayenne pepper or chili powder can add a delightful kick. Onion flakes, dill, or other dried herbs can also be incorporated into the breadcrumbs for different flavor profiles.
- Herbaceous Hints: For a more aromatic twist, add finely chopped fresh herbs like dill, chives, or parsley directly into your Panko breadcrumbs. The freshness will infuse into the coating as it cooks.
- Cheesy Coating: For an extra layer of flavor and crispiness, finely grated Parmesan cheese can be mixed into the breadcrumbs. It creates a savory, umami-rich crust.
- Different Fish: While cod and haddock are classics, don’t hesitate to try other firm white fish like snapper, mahi-mahi, or even catfish for a unique flavor. Adjust cooking times slightly based on thickness.
- Gluten-Free Option: Easily adapt this recipe by using gluten-free all-purpose flour and gluten-free breadcrumbs. The results are just as crispy and delicious!
Alternative Cooking Methods (For Less Oil):
- Air Fryer Crispy Fish Fingers: For a lighter take, preheat your air fryer to 400°F (200°C). Lightly spray the breaded fish fingers with cooking spray (this is crucial for crispiness in the air fryer). Place them in a single layer in the air fryer basket, ensuring they don’t touch. Cook for 12-15 minutes, flipping them halfway through, until golden brown and cooked through. You might need to work in batches. The texture is wonderfully crispy without the need for a lot of oil.
- Baked Crispy Fish Fingers: If you prefer to bake, preheat your oven to 425°F (220°C). Place the breaded fish fingers on a wire rack set over a baking sheet (this allows for even crisping on all sides). Lightly spray the fish fingers with cooking spray. Bake for 15-20 minutes, flipping halfway through, until golden brown and the fish is cooked through and flaky. While not as crispy as fried, this method is much lighter and still yields delicious results.
Tips for Success:
- Don’t Overcrowd: Whether deep-frying or pan-frying, cook in batches to maintain the oil temperature and ensure even browning. Overcrowding leads to a drop in temperature, resulting in greasy, less crispy fish.
- Oil Temperature is Key: Invest in a good thermometer if deep-frying. Maintaining a consistent temperature between 325-350°F (160-175°C) is vital for perfect crispiness without burning.
- Season Immediately: Always sprinkle a little extra salt on the hot fish fingers right after they come out of the oil. This helps the salt adhere and enhances the flavor.
- Test a Piece: If you’re unsure about doneness, carefully cut into the thickest part of one fish finger. The fish should be opaque and flake easily with a fork.
- Safety First: When frying, always be careful with hot oil. Never leave it unattended, and always lower and remove fish gently to avoid splatters. Have a lid nearby to smother any potential oil fires (though hopefully, you won’t need it!).
Making Ahead and Storage:
- Freezing Uncooked Fish Fingers: You can prepare the breaded fish fingers ahead of time and freeze them. Arrange the breaded fish fingers in a single layer on a baking sheet and freeze until solid (about 1-2 hours). Once frozen, transfer them to a freezer-safe airtight bag or container. They can be stored in the freezer for up to 2-3 months. When ready to cook, you can fry them directly from frozen, adding a few extra minutes to the cooking time. This is a fantastic way to have homemade fish fingers ready for a quick meal!
- Storing Cooked Fish Fingers: Leftover cooked fish fingers can be stored in an airtight container in the refrigerator for up to 2-3 days.
- Reheating: For best results, reheat cooked fish fingers in an air fryer or oven at 375°F (190°C) for about 8-12 minutes, or until heated through and crispy again. Avoid the microwave, as it will make them soggy.
With these detailed steps and comprehensive tips, you’re well on your way to creating the most deliciously crispy fish fingers you’ve ever tasted right in your own kitchen. Enjoy the process, and get ready for a truly satisfying homemade meal!
Conclusion:
And there you have it, my friends! We’ve journeyed through the simple steps to create something truly magical in your own kitchen: the most incredible Crispy Fish Fingers you’ll ever taste. Forget those bland, often mushy, store-bought versions; once you experience the golden, crunchy perfection of homemade, there’s simply no turning back. I’m genuinely so excited for you to try this recipe because it’s not just about making a meal; it’s about rediscovering a beloved classic, elevating it to gourmet status with minimal effort, and bringing a huge smile to everyone at your table.
Why is this recipe a must-try, you ask? Well, for starters, the satisfaction of biting into that perfectly crisp exterior, followed by the flaky, tender, and incredibly flavorful fish inside, is an experience unparalleled. You have complete control over the quality of your ingredients, ensuring your family is enjoying wholesome, delicious food free from unnecessary additives. It’s incredibly adaptable, making it a fantastic option for even the pickiest eaters. Plus, let’s be honest, there’s a certain pride that comes with serving up something so utterly delicious that you made yourself. This isn’t just a meal; it’s a testament to the joy of home cooking, proving that incredible flavor doesn’t have to be complicated. The aroma alone as these cook is enough to gather everyone around the kitchen, eagerly anticipating dinner.
Now, let’s talk about how to make these beauties shine even brighter on your plate. While they are absolutely divine on their own, a few serving suggestions can transform them into a full-fledged feast. The classic pairing of course, is a generous pile of fluffy, golden chips or homemade French fries. Don’t forget the dipping sauces! A zesty homemade tartar sauce is always a winner, but don’t shy away from ketchup, a spicy sriracha mayo, or even a sweet chili sauce for a different kick. For a lighter touch, serve them alongside a fresh, crisp green salad tossed in a lemon vinaigrette, or a creamy coleslaw. They also make fantastic additions to a wrap or soft taco, piled high with shredded lettuce, diced tomatoes, and a dollop of your favorite salsa. Think outside the box: cut them into smaller pieces and serve them as an appetizer at your next gathering with an array of dips, or even tuck them into slider buns for a fun, mini fish sandwich. The possibilities are truly endless!
And for those of you who love to experiment, consider these delightful variations. While cod is a fantastic choice, feel free to use other white fish like haddock, pollock, or even tilapia. You can play with the seasonings in your breading mixture; a pinch of smoked paprika, garlic powder, onion powder, or a dash of cayenne pepper can add wonderful depth. For an extra layer of crunch, use panko breadcrumbs, which are notoriously crispy. If you’re looking for a gluten-free option, simply substitute regular flour and breadcrumbs with their gluten-free counterparts. For a healthier take, instead of deep-frying, you can bake these Crispy Fish Fingers in the oven until golden and cooked through, or even better, pop them into an air fryer for an incredibly crisp finish with minimal oil. Both methods yield fantastic results, making this recipe incredibly versatile to fit your dietary preferences.
So, I implore you, clear your schedule, gather your ingredients, and dive into making these incredible homemade Crispy Fish Fingers. You won’t regret it. I promise you a culinary experience that’s both satisfyingly delicious and surprisingly easy. Once you’ve made them, I would absolutely love to hear about your experience! Did you stick to the classic, or did you venture into exciting variations? What sauces did you pair them with? Please, share your photos, your triumphs, and your feedback in the comments section below or tag me on social media. Your culinary adventures inspire us all! Happy cooking, and bon appétit!
Frequently Asked Questions (FAQs)
What kind of fish is best for fish fingers?
For the best fish fingers, I highly recommend using firm, white-fleshed fish with a mild flavor. Cod, haddock, pollock, or even tilapia are excellent choices. These types of fish hold their shape well during cooking and have a delicate taste that pairs wonderfully with the crispy breading.
How do you make fish fingers crispy?
The secret to super crispy fish fingers lies in a few key steps: first, ensure your fish pieces are patted very dry before breading. Second, use a proper three-step breading station (flour, egg, breadcrumbs), pressing the breadcrumbs firmly to adhere. Third, make sure your oil is at the correct temperature (around 350-375°F or 175-190°C) when frying, or use a good quality panko breadcrumb for baking/air frying.
Can I bake fish fingers instead of frying?
Absolutely! Baking is a fantastic, healthier alternative. To bake, preheat your oven to 400°F (200°C). Place the breaded fish fingers on a lightly oiled baking sheet and bake for 15-20 minutes, flipping halfway through, until golden brown and cooked through. For extra crispiness, you can lightly mist them with cooking spray before baking.
How do I store leftover homemade fish fingers?
Leftover homemade fish fingers can be stored in an airtight container in the refrigerator for up to 2-3 days. To reheat them and retain their crispness, I suggest using an oven or air fryer instead of a microwave. Reheat at 350°F (175°C) for about 10-15 minutes, or until heated through and crispy again.
Can I freeze homemade fish fingers?
Yes, you can! Homemade fish fingers freeze beautifully. After breading, place the uncooked fish fingers on a baking sheet lined with parchment paper, ensuring they don’t touch. Freeze until solid (about 1-2 hours), then transfer them to a freezer-safe bag or container. They can be stored for up to 2-3 months. You can cook them from frozen, adding a few extra minutes to the cooking time.
What sauces go well with fish fingers?
The classic pairing is, of course, tartar sauce! But don’t limit yourself. Ketchup, lemon wedges, a squeeze of sriracha mayo, sweet chili sauce, or even a homemade aioli would be delicious. A fresh squeeze of lemon juice always brightens the flavor, no matter the sauce.
Are homemade fish fingers healthier than store-bought?
Generally, yes! When you make fish fingers at home, you have control over the quality of fish, the type of breading (you can opt for whole wheat or gluten-free), and the cooking method (baking or air frying reduces oil significantly). Store-bought versions often contain higher levels of sodium, preservatives, and sometimes less desirable types of oils. Homemade means fresh, wholesome goodness!
Crispy Fish Fingers Recipe: Easy & Delicious Family Treat!
Learn how to make perfectly crispy homemade fish fingers with a golden, seasoned Panko crust. This family-friendly recipe includes options for deep-frying, pan-frying, air frying, and baking.
Ingredients
-
2 lbs (approx. 900g) firm, white fish fillets (such as cod, haddock, pollock, or tilapia), skinless and boneless
-
1 cup all-purpose flour
-
2 large eggs
-
2 tablespoons milk or water (optional, for egg wash)
-
2 cups Panko breadcrumbs
-
1 teaspoon fine sea salt, plus more for seasoning fish
-
½ teaspoon freshly ground black pepper, plus more for seasoning fish
-
1 teaspoon garlic powder
-
½ teaspoon onion powder
-
½ teaspoon smoked paprika (or sweet paprika)
-
4-6 cups high smoke point oil (vegetable, canola, sunflower, or grapeseed oil) for deep frying, or ½-¾ cup for pan frying
-
Lemon wedges
-
Fresh parsley, finely chopped (optional, for garnish)
-
Your favorite dipping sauces (e.g., homemade tartar sauce, ketchup, sriracha mayo, aioli)
Instructions
-
Step 1
Pat fish fillets thoroughly dry with paper towels. Cut them into uniform finger shapes, about 1-inch wide and 3-4 inches long. Season lightly with a pinch of salt and pepper. -
Step 2
Prepare three shallow dishes: (1) Combine flour, garlic powder, onion powder, and paprika. (2) Whisk eggs with optional milk/water until frothy. (3) Stir 1 tsp salt and ½ tsp pepper into Panko breadcrumbs. -
Step 3
Dredge each fish piece in seasoned flour (tap off excess), then coat in egg wash (let excess drip), then thoroughly press into Panko breadcrumbs. Transfer breaded fish fingers to a clean plate. -
Step 4
Refrigerate breaded fish fingers for 20-30 minutes; this helps the coating set and adhere for maximum crispiness. -
Step 5
Heat oil to 350°F (175°C). For deep frying, use 3-4 inches of oil in a heavy pot. For pan frying, use ½-¾ inch of oil in a large skillet. Line a plate or baking sheet with paper towels or a wire rack for draining. -
Step 6
Carefully lower a few fish fingers into the hot oil, ensuring not to overcrowd. Deep fry for about 3-5 minutes, or pan fry for 2-3 minutes per side, until golden brown, crispy, and cooked through. Fish should be opaque and flaky. -
Step 7
Remove fried fish fingers with tongs or a slotted spoon and transfer to the prepared draining station. Immediately sprinkle with an extra pinch of fine sea salt while hot. Continue frying remaining batches, keeping cooked fish warm in a low oven if needed. -
Step 8
Arrange the crispy fish fingers on a platter. Serve immediately with lemon wedges, optional chopped fresh parsley, and your favorite dipping sauces.
Important Information
Nutrition Facts (Per Serving)
It is important to consider this information as approximate and not to use it as definitive health advice.
Allergy Information
Please check ingredients for potential allergens and consult a health professional if in doubt.


Leave a Comment