
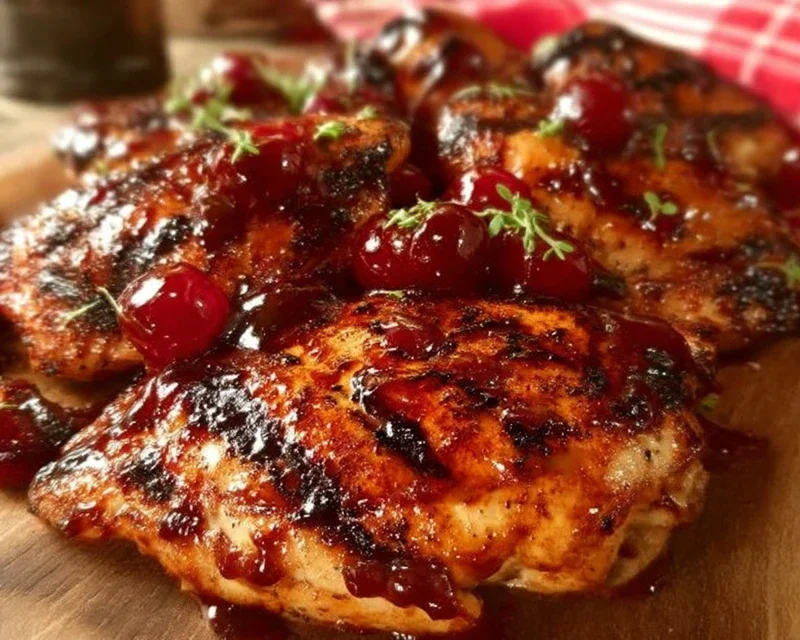
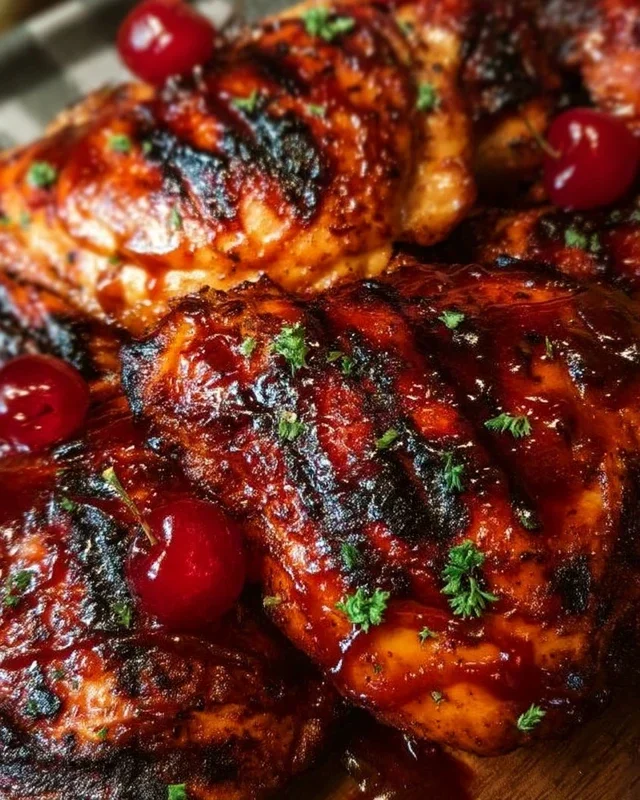
Cherry Dr. Pepper Grilled Chicken is about to become your new summer obsession. Imagin extracte this: smoky char from the grill mingling with the sweet, tangy essence of cherry and the unique, effervescent bite of Dr. Pepper. This isn’t just another grilled chicken recipe; it’s a flavor explosion that’s surprisingly simple to achieve. People rave about this dish because it hits all the right notes – tender chicken, a beautifully caramelized exterior, and a sauce that’s both familiar and excitingly different. What truly makes Cherry Dr. Pepper Grilled Chicken special is how effortlessly it transforms humble chicken into a showstopper, perfect for backyard barbecues, family dinners, or even a weeknight treat. Prepare for your taste buds to do a happy dance!

Cherry Dr. Pepper Grilled Chicken
Get ready to impress your taste buds and your guests with this incredibly flavorful Cherry Dr. Pepper Grilled Chicken! This recipe takes a classic backyard barbecue staple and elevates it with a sweet, tangy, and slightly smoky glaze that’s simply irresistible. The combination of Cherry Dr. Pepper and ketchup forms a surprisingly delicious base for the sauce, while brown sugar adds that perfect caramelized sweetness. We’re talking about chicken that’s fall-off-the-bone tender with a sticky, delicious coating that will have everyone asking for seconds. It’s perfect for a summer cookout, a family dinner, or even a special occasion when you want to add a little something unique to your menu.
This recipe is surprisingly simple to put together, and the results are anything but ordinary. The magic truly happens on the grill, where the glaze caramelizes beautifully, creating those coveted crispy edges and a depth of flavor that you just can’t achieve indoors. So, fire up the grill, gather your ingredients, and let’s get cooking!
Ingredients:
Preparing the Glaze
The secret to this amazing chicken lies in its rich and flavorful glaze. Let’s get this sauce started so it has plenty of time to meld together.
1. In a medium saucepan, combine the 12 oz can of Cherry Dr. Pepper, 1 cup of ketchup, and the 6 oz can of tomato paste. Stir these ingredients together until they are well incorporated. The Dr. Pepper will bring a unique sweetness and a hint of cherry flavor that pairs wonderfully with the tomato base.
2. Add the 1 cup of brown sugar to the saucepan. Brown sugar is crucial here as it not only sweetens the glaze but also helps it to caramelize beautifully on the grill, giving the chicken a beautiful, sticky finish.
3. Next, stir in 1 tablespoon of Worcestershire sauce. This adds a wonderful umami depth and a subtle tang that balances the sweetness of the Dr. Pepper and brown sugar.
4. Now, it’s time for the aromatics and spices. Add 1/2 teaspoon of onion powder, 1/2 teaspoon of black pepper, 1/2 teaspoon of liquid smoke, 1/2 teaspoon of chili powder, and 1 teaspoon of minced garlic. The liquid smoke is a key player here, imparting that desirable smoky flavor that makes grilled chicken so appealing, even without actual smoking. The chili powder adds a gentle warmth and complexity.
5. Whisk all of these ingredients together thoroughly to ensure everything is evenly distributed. Place the saucepan over medium heat and bring the mixture to a gentle simmer. Once simmering, reduce the heat to low and let it cook for about 15-20 minutes, stirring occasionally. This simmering process allows the flavors to deepen and the sauce to thicken slightly. You’ll notice it becoming a rich, glossy glaze. It should be thick enough to coat the back of a spoon. Once it reaches your desired consistency, remove it from the heat and set it aside. You can make this glaze ahead of time, even a day in advance, and store it in the refrigerator. Just bring it to room temperature or gently warm it before you’re ready to use it.
Preparing the Chicken
While your glaze is simmering, it’s time to get the chicken ready. The choice between a whole cut-up chicken or pre-cut dark meat is yours, both will yield fantastic results. Dark meat is generally more forgiving on the grill, staying juicier.
1. Pat your chicken pieces thoroughly dry with paper towels. This is a crucial step for achieving crispy skin and allowing the seasonings to adhere properly. Excess moisture will steam the chicken instead of searing it on the grill.
2. In a small bowl, mix together 3 teaspoons of seasoning salt and 1 teaspoon of paprika. This simple rub will provide an initial layer of savory flavor and a beautiful color to the chicken before it even gets glazed.
3. Evenly sprinkle this seasoning mixture all over the chicken pieces, making sure to get into all the nooks and crannies. Gently rub it in so it’s well distributed.
Grilling the Chicken
Now for the exciting part – bringin extractg it all together on the grill! This is where the magic truly happens.
1. Preheat your grill to medium-high heat, aiming for a temperature of around 375-400°F (190-200°C). It’s important to have a clean grill to prevent sticking. Once the grill is hot, lightly oil the grates. This helps ensure your chicken doesn’t stick.
2. Place the seasoned chicken pieces directly on the preheated grill grates. Close the lid and grill for about 10-15 minutes per side for thighs and drum extractsticks, and slightly less for wings, until the chicken is mostly cooked through and has nice grill marks. The exact cooking time will vary depending on the size and thickness of your chicken pieces, as well as your grill’s heat. You can use a meat thermometer to check for doneness; it should register 165°F (74°C) in the thickest part of the meat, avoiding the bone.
3. Once the chicken is about 80% cooked, it’s time to start glazing! This is where the sauce really comes to life. Generously brush the prepared Cherry Dr. Pepper glaze all over the chicken pieces. Make sure to coat all sides.
4. Continue grilling the chicken, turning and brushing with more glaze every 5-7 minutes. Keep an eye on the glaze, as the sugars can burn if the heat is too high or if it’s left on too long without attention. You want it to become beautifully caramelized and sticky, but not burnt. This glazing process should take another 15-20 minutes, or until the chicken is fully cooked and has a lovely, glossy coating.
5. Once the chicken is cooked through and beautifully glazed, carefully remove it from the grill. Let the chicken rest for about 5-10 minutes before serving. This resting period allows the juices to redistribute throughout the meat, resulting in a more tender and moist chicken. Serve hot and enjoy the explosion of flavors!
Conclusion:
There you have it – a foolproof guide to making Cherry Dr. Pepper Grilled Chicken that’s sure to become a backyard barbecue favorite! This recipe is fantastic because it delivers incredibly tender and flavorful chicken with a unique sweet and tangy kick that’s both refreshing and surprisingly complex. The simple marinade does all the heavy lifting, infusing the chicken with the delicious notes of cherry and Dr. Pepper, creating a caramelized crust as it grills. It’s the perfect balance of sweet, savory, and just a hint of spice, making it a crowd-pleaser for any occasion.
I love serving this Cherry Dr. Pepper Grilled Chicken with classic barbecue sides like creamy coleslaw, sweet potato fries, or a fresh corn on the cob. For a lighter option, a vibrant quinoa salad or grilled asparagus would be amazing. Don’t be afraid to get creative with variations! You could add a pinch of cayenne pepper to the marinade for a little heat, or even a splash of balsamic vinegar for an extra layer of tang. I truly encourage you to give this recipe a try; you won’t be disappointed by the amazing results!
Frequently Asked Questions:
Can I make this Cherry Dr. Pepper Grilled Chicken indoors?
Absolutely! While grilling offers the best smoky flavor and char, you can adapt this recipe for indoor cooking. Pan-sear the chicken over medium-high heat until cooked through and nicely browned. You can also bake it in the oven at 400°F (200°C) for about 20-25 minutes, flipping halfway through, until it reaches an internal temperature of 165°F (74°C). Be sure to brush with extra marinade during the last few minutes of cooking to mimic that delicious glaze.
What kind of chicken works best for this recipe?
This marinade works wonderfully with almost any cut of chicken! Chicken breasts are lean and cook quickly, while thighs offer a richer flavor and stay incredibly moist. Bone-in chicken pieces will require a longer grilling time but will also yield very juicy results. Just adjust your cooking time accordingly based on the thickness and type of chicken you choose.
Cherry Dr. Pepper Grilled Chicken
A sweet and smoky grilled chicken recipe featuring a unique glaze made with Cherry Dr. Pepper, ketchup, and brown sugar. Perfect for a summer barbecue.
Ingredients
-
1 – 12 oz can Cherry Dr. Pepper
-
1 Cup Ketchup
-
1 – 6 oz. can tomato paste
-
1 Cup Brown Sugar
-
1 Tablespoon Worcestershire sauce
-
1/2 tsp. Onion Powder
-
1/2 tsp. black pepper
-
1/2 tsp. liquid smoke
-
1/2 tsp. Chili Powder
-
1 tsp. minced garlic
-
1 whole chicken cut up OR 1 package of dark meat chicken cut up about 12 pieces of chicken
-
3 teaspoons Seasoning Salt
-
1 tsp Paprika
Instructions
-
Step 1
In a medium saucepan, combine Cherry Dr. Pepper, ketchup, tomato paste, brown sugar, Worcestershire sauce, onion powder, black pepper, liquid smoke, chili powder, and minced garlic. Stir well to combine. -
Step 2
Bring the mixture to a simmer over medium heat, stirring occasionally. Reduce heat to low and let it simmer for about 20-25 minutes, or until thickened. This will be your glaze. -
Step 3
While the glaze is simmering, season the chicken pieces generously with seasoning salt and paprika. You can also add a pinch of black pepper if desired. -
Step 4
Preheat your grill to medium-high heat. Clean and oil the grill grates. -
Step 5
Place the seasoned chicken pieces on the preheated grill. Grill for about 15-20 minutes per side, or until cooked through and the internal temperature reaches 165°F (74°C). -
Step 6
During the last 10-15 minutes of grilling, generously brush the chicken with the prepared Cherry Dr. Pepper glaze. Continue grilling, turning occasionally, until the glaze is caramelized and slightly sticky. -
Step 7
Remove chicken from the grill and let it rest for a few minutes before serving. Drizzle with any remaining glaze if desired.
Important Information
Nutrition Facts (Per Serving)
It is important to consider this information as approximate and not to use it as definitive health advice.
Allergy Information
Please check ingredients for potential allergens and consult a health professional if in doubt.

Leave a Comment