
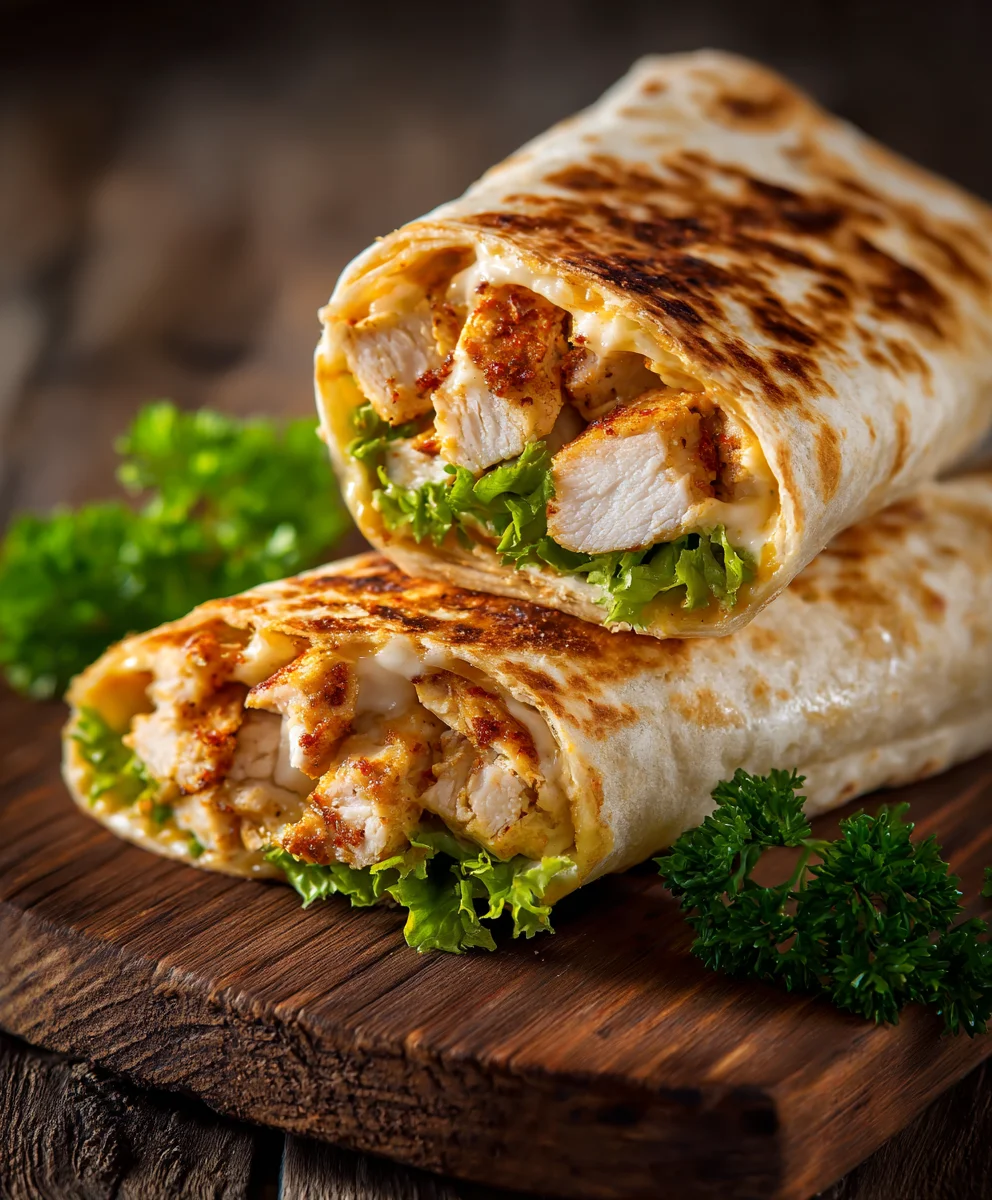
Cheesy Garlic Chicken Wraps are not just a meal; they are, in my opinion, an invitation to experience pure, unadulterated comfort and flavor, all conveniently tucked into a warm tortilla. From the very first tantalizing aroma of garlic-infused chicken sizzling in the pan, I believe you’ll know you’re in for a truly delightful treat. These wraps have quickly become a modern culinary favorite, celebrated for their ability to transform simple ingredients into an extraordinary dish that truly satisfies the soul.
Why We Love Cheesy Garlic Chicken Wraps So Much
It’s the irresistible combination of tender, succulent chicken, robustly seasoned with fragrant garlic, and then generously enveloped in a luscious, melted cheese that stretches beautifully with every single bite. This dish embodies the perfect blend of creamy, savory, and satisfying textures that make it an instant hit. While there isn’t a deep historical saga behind this particular creation, its soaring popularity stems from its ingenious fusion of universally loved flavors – a true testament to contemporary comfort food that delivers on both taste and unparalleled convenience. Whether you’re seeking a quick, delicious lunch or a satisfying, fuss-free dinner, this recipe for Cheesy Garlic Chicken Wraps promises to become a cherished staple in your kitchen, bringing joy with every delicious mouthful.

Ingredients:
- For the Cheesy Garlic Chicken:
- 2 large boneless, skinless chicken breasts (about 1.5 lbs total), or 4 boneless, skinless chicken thighs for extra juiciness
- 2 tablespoons olive oil, divided
- 1 tablespoon unsalted butter
- 6-8 cloves garlic, minced (or more, if you’re a garlic lover like me!)
- 1 medium yellow onion, finely diced (optional, but adds a lovely sweetness)
- 1/2 cup cream cheese, softened
- 1/4 cup mayonnaise (optional, for extra richness and creaminess)
- 1/2 cup chicken broth (or water)
- 1/2 teaspoon onion powder
- 1/2 teaspoon garlic powder
- 1/2 teaspoon smoked paprika
- 1/4 teaspoon black pepper
- 1/2 teaspoon dried Italian seasoning
- Salt to taste (start with 1/2 teaspoon)
- Pinch of red pepper flakes (optional, for a subtle kick)
- 1/4 cup fresh parsley, chopped, plus more for garnish
- For the Wraps:
- 8-10 large (burrito-size, 10-inch) flour tortillas
- 2 cups shredded mozzarella cheese, or a blend of mozzarella and cheddar, divided (about 1.5 cups for the filling, 1/2 cup for melting on top)
- 1 cup shredded Colby Jack or Monterey Jack cheese, for extra meltiness and flavor
- 2 tablespoons unsalted butter, melted (for brushing the wraps)
- 2 cloves garlic, minced (for garlic butter)
- Optional additions for crunch or freshness: finely shredded lettuce, diced tomatoes, sliced green onions
- Optional Dipping Sauce:
- Sour cream or plain Greek yogurt
- Lime wedges
- Sriracha or your favorite hot sauce
Preparing the Cheesy Garlic Chicken Filling
Oh, this is where the magic truly begins for our Cheesy Garlic Chicken Wraps! We’re going to create a chicken mixture that’s incredibly flavorful, tender, and packed with that irresistible cheesy garlic goodness. Trust me, every step here builds layers of flavor that make these wraps absolutely addictive.
- Prepare and Season the Chicken:
First things first, let’s get our chicken ready. If you’re using chicken breasts, I recommend slicing them horizontally to create thinner cutlets. This helps them cook more evenly and quickly, and they’ll be easier to shred later. If you’re opting for chicken thighs, just pat them dry. Season your chicken generously on both sides with 1/2 teaspoon of salt, 1/4 teaspoon of black pepper, 1/2 teaspoon of onion powder, 1/2 teaspoon of garlic powder, and 1/2 teaspoon of smoked paprika. Really rub those spices in! This initial seasoning is crucial for building a strong flavor base for our Cheesy Garlic Chicken. Don’t skimp on this step; it makes all the difference.
- Sear the Chicken:
Heat 1 tablespoon of olive oil in a large skillet or a Dutch oven over medium-high heat. Once the oil is shimmering, carefully place the seasoned chicken pieces into the hot pan. Cook for about 4-6 minutes per side, depending on the thickness of your chicken. We’re looking for a beautiful golden-brown crust on the outside. This sear not only adds color but also locks in the juices and develops a deeper flavor. It’s important not to overcrowd the pan; if necessary, cook the chicken in batches to ensure a good sear rather than steaming. Once cooked through (internal temperature of 165°F or 74°C), remove the chicken from the skillet and set it aside on a cutting board to rest. Resting the chicken allows the juices to redistribute, ensuring it stays moist and tender, which is exactly what we want for our Cheesy Garlic Chicken Wraps.
- Shred or Dice the Chicken:
While the chicken is still warm, you can shred it using two forks, or dice it into small, bite-sized pieces. I personally love the shredded texture for these Cheesy Garlic Chicken Wraps, as it really melds well with the creamy sauce. However, diced chicken works perfectly fine too, offering a slightly different textural experience. Aim for consistent pieces, whatever method you choose.
- Create the Aromatic Garlic Base:
Using the same skillet (don’t clean it, those browned bits are flavor!), reduce the heat to medium. Add the remaining 1 tablespoon of olive oil and 1 tablespoon of unsalted butter. Once the butter has melted, add your minced garlic and the finely diced yellow onion (if using). Sauté for 2-3 minutes, stirring frequently, until the garlic is fragrant and the onion has softened and become translucent. Be careful not to burn the garlic, as burnt garlic can taste bitter. This aromatic base is truly the heart of the “garlic” in our Cheesy Garlic Chicken Wraps, so take your time and enjoy the wonderful smell!
- Build the Creamy Garlic Sauce:
Now, let’s make that luscious, creamy sauce! Stir in the 1/2 cup of chicken broth, scraping up any browned bits from the bottom of the pan – those are pure flavor! Bring the mixture to a gentle simmer. Reduce the heat to low, then add the softened cream cheese and mayonnaise (if using). Whisk constantly until the cream cheese is fully melted and incorporated, creating a smooth, velvety sauce. Add the dried Italian seasoning and a pinch of red pepper flakes (if desired). Season with additional salt and pepper to taste, remembering that we already seasoned the chicken. Taste as you go to ensure the seasoning is just right for your preference. This creamy, savory sauce is what will coat every strand of chicken, making our Cheesy Garlic Chicken Wraps incredibly moist and flavorful.
- Combine Chicken and Sauce:
Return the shredded or diced chicken to the skillet with the creamy garlic sauce. Add 1.5 cups of the shredded mozzarella and Colby Jack/Monterey Jack cheese, along with the chopped fresh parsley. Stir everything together until the chicken is thoroughly coated in the sauce and the cheeses have started to melt and become wonderfully gooey. This is the moment where our “Cheesy Garlic Chicken” truly comes to life! Turn off the heat. Your incredibly delicious, creamy, and cheesy chicken filling is now ready for assembling our glorious wraps.
Assembling and Cooking the Cheesy Garlic Chicken Wraps
With our divine Cheesy Garlic Chicken filling ready, it’s time to transform it into irresistible wraps. This next stage is all about technique to ensure every wrap is perfectly packed, beautifully folded, and gloriously golden-brown with melted cheese inside.
- Prepare the Tortillas:
For best results and easy folding, you’ll want to warm your tortillas slightly. You can do this in a few ways:
- Microwave: Stack 3-4 tortillas, wrap them in a damp paper towel, and microwave for 20-30 seconds until warm and pliable.
- Skillet: Place a tortilla in a dry, hot skillet for 10-15 seconds per side until soft.
- Oven: Wrap a stack of tortillas in foil and warm in a preheated oven at 300°F (150°C) for about 5-7 minutes.
Warming the tortillas prevents them from tearing when you fold them and makes them much more flexible. A flexible tortilla is key to a perfectly sealed wrap.
- Assemble the Wraps:
Lay a warm tortilla flat on a clean surface. Spoon about 1/2 to 3/4 cup of the Cheesy Garlic Chicken filling in a line across the center of the tortilla, leaving about an inch or two free on the top and bottom edges. Don’t overfill, or it will be hard to fold! If you’re adding optional fresh fillings like shredded lettuce, diced tomatoes, or green onions, add a small amount on top of the chicken mixture now. This layering adds a delightful fresh contrast to the rich chicken.
- Fold the Wraps:
This is where we turn our simple filling into a sturdy wrap ready for cooking.
- First, fold the short ends (the sides closest to you and farthest from you) of the tortilla inward over the filling.
- Next, take one of the long sides (left or right, whichever is easier for you) and fold it tightly over the filling, tucking it in as you go.
- Continue to roll the tortilla tightly away from you until you have a compact, sealed wrap. The goal is to make it as snug as possible to keep all that delicious Cheesy Garlic Chicken filling from escaping.
Repeat this process for all your tortillas until you’ve assembled all your Cheesy Garlic Chicken Wraps. This step takes a little practice, but you’ll get the hang of it quickly!
- Prepare the Garlic Butter for Brushing:
In a small bowl, melt 2 tablespoons of unsalted butter. Stir in 2 cloves of minced garlic. This garlic butter is going to give our wraps an incredible aroma and a beautiful golden-brown, crispy exterior when cooked. It’s a small detail that makes a big difference in the overall experience of these Cheesy Garlic Chicken Wraps.
- Cook the Wraps:
Heat a large skillet, griddle, or a panini press over medium heat. If using a skillet, you might want to lightly grease it with a tiny bit of oil or cooking spray, even though we’re using butter. Brush one side of each assembled wrap generously with the prepared garlic butter. Place the buttered-side-down wrap into the hot skillet. Brush the top side of the wrap with more garlic butter. Cook for 3-5 minutes per side, or until the wraps are deeply golden-brown and crispy, and the cheese inside is gloriously melted and gooey. You might even see a little cheese oozing out, which is a sign of pure deliciousness!
Pro Tip for Extra Cheesiness:
For an extra layer of cheesy goodness, right before flipping a wrap in the skillet, sprinkle a tiny bit of the reserved shredded mozzarella (about a tablespoon) on the un-buttered side. Once flipped, that cheese will melt directly onto the hot surface of the pan, creating a crispy, caramelized cheese crust on the outside of your Cheesy Garlic Chicken Wrap. It’s an optional but highly recommended step for cheese lovers!
- Serve Immediately:
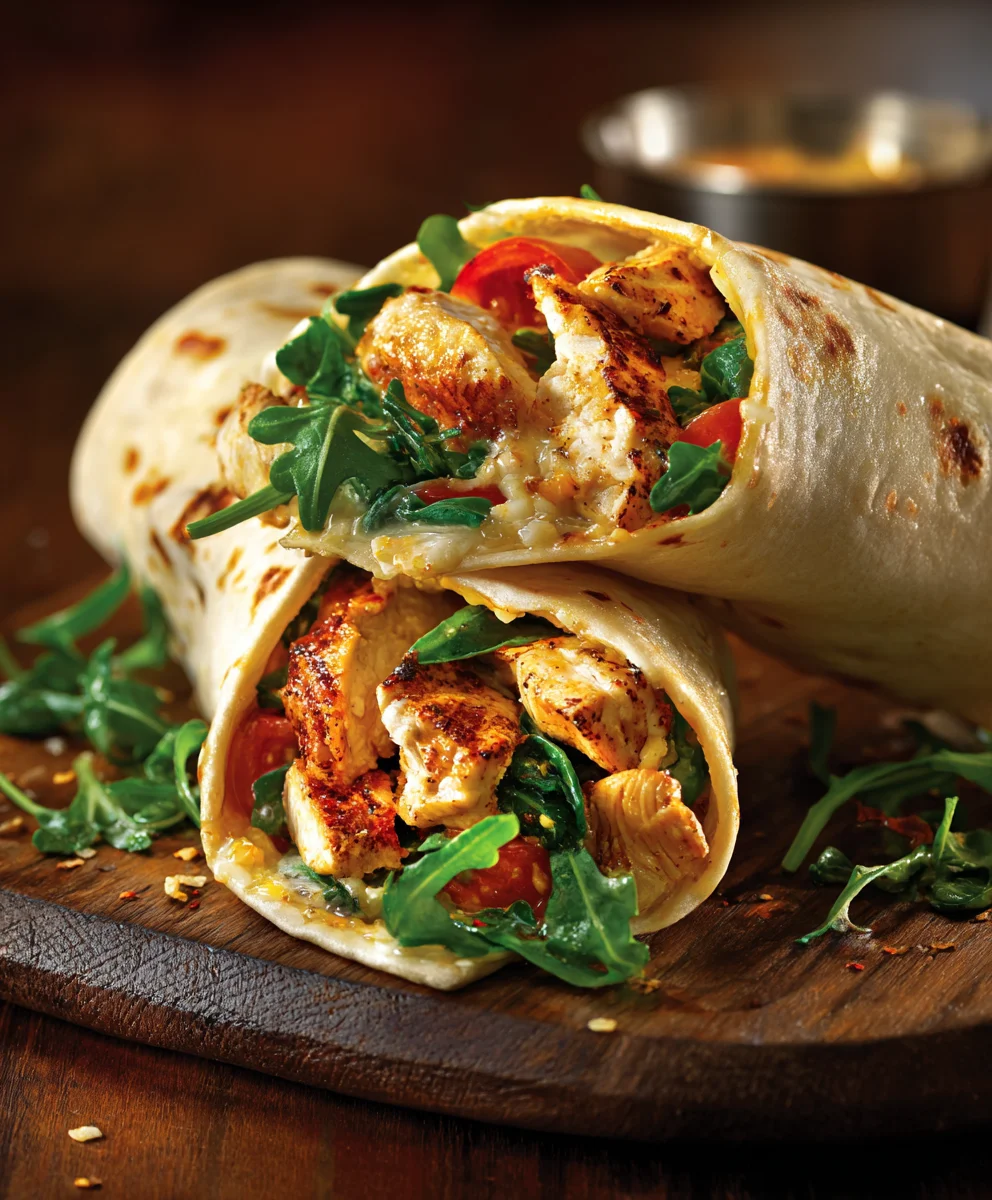
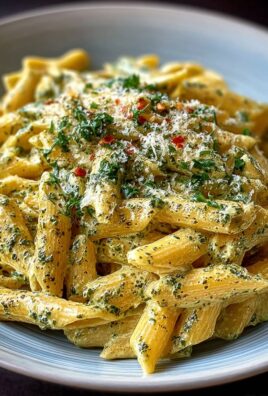
Once cooked, remove the Cheesy Garlic Chicken Wraps from the skillet. You can slice them in half diagonally for an appealing presentation and easier eating. Garnish with a sprinkle of fresh chopped parsley. Serve them hot, right off the pan, to truly enjoy the melted cheese and crispy exterior. These wraps are absolutely divine on their own, but they also pair wonderfully with a simple side salad, some extra sour cream or Greek yogurt for dipping, or even a side of roasted vegetables. Enjoy your homemade Cheesy Garlic Chicken Wraps!
Conclusion:
Well, there you have it! We’ve journeyed through the steps to create what I genuinely believe will become a new staple in your kitchen: your very own homemade Cheesy Garlic Chicken Wraps. These aren’t just any wraps; they’re a testament to how simple ingredients, when combined with a little love and the right technique, can transform into something truly extraordinary. I’ve always found immense joy in recipes that deliver maximum flavor with minimum fuss, and this one absolutely excels in that department. The tender, juicy chicken, infused with fragrant garlic, perfectly complemented by the gooey, melted cheese, all snuggled within a warm, soft tortilla… it’s a symphony of textures and tastes that’s hard to resist. This recipe isn’t just about feeding yourself; it’s about creating a moment of comfort, a burst of satisfaction, and an experience that your taste buds will thank you for.
What makes these Cheesy Garlic Chicken Wraps truly stand out in my recipe collection is their incredible versatility and undeniable crowd-pleasing power. Whether you’re looking for a quick weeknight dinner, an impressive yet effortless dish for unexpected guests, or a fantastic addition to your lunch rotation, these wraps fit the bill perfectly. They’re robust enough to satisfy a hearty appetite but also light enough not to leave you feeling overly full. The balance of savory, aromatic garlic with the rich, creamy cheese and lean protein is simply divine. Trust me when I say, once you smell that garlic and cheese bubbling together, you’ll understand exactly what I mean. It’s a culinary hug in a tortilla, and who doesn’t need more of those?
Perfect Pairings for Your Cheesy Garlic Chicken Wraps
Now that you’re practically a master chef of these incredible wraps, let’s talk about how to serve them to truly elevate the meal. While they are undeniably satisfying on their own, pairing them with the right sides can transform a great meal into an unforgettable one. I often enjoy mine with a simple, crisp green salad tossed with a light vinaigrette; the fresh greens offer a wonderful contrast to the richness of the wraps. Another fantastic option is a warm bowl of tomato soup or a creamy roasted red pepper soup for a comforting, dippable experience. For those who love a bit of crunch, a side of homemade sweet potato fries or even just some classic potato chips can be a delightful accompaniment. Don’t forget the dips! A dollop of cool sour cream, a tangy ranch dressing, or even a spicy sriracha mayo on the side can add another layer of flavor and fun to each bite. These wraps are also fantastic for meal prep, easily packed for lunches the next day, making your workday a little brighter and much more delicious.
Unleash Your Creativity: Exciting Variations
One of the best things about cooking is the freedom to experiment, and this Cheesy Garlic Chicken Wraps recipe is a fantastic canvas for your culinary imagination. Don’t feel limited to chicken! You could easily substitute the chicken with thinly sliced steak, ground turkey, or even pan-seared shrimp for a different protein profile. For my vegetarian friends, a medley of sautéed mushrooms, bell peppers, and onions, perhaps with some black beans, would be absolutely delicious and equally satisfying. As for the cheese, feel free to switch it up! A sharp cheddar offers a robust flavor, Monterey Jack melts beautifully, and a spicy pepper jack can add a wonderful kick. Why not add some extra veggies directly into the wraps? Sautéed spinach, caramelized onions, or even some diced jalapeños for a spicy twist would all work wonderfully. You could also experiment with different types of wraps – larger flour tortillas for a substantial meal, smaller street taco-sized tortillas for appetizers, or even a low-carb lettuce wrap for a lighter option. A drizzle of BBQ sauce, a dollop of pesto, or a sprinkle of fresh cilantro before serving can also dramatically change the flavor profile, making each wrap uniquely yours. The possibilities are truly endless, and that’s the beauty of it! It’s all about making this recipe your own, adapting it to your personal preferences and whatever ingredients you have on hand.
So, what are you waiting for? I wholeheartedly encourage you to roll up your sleeves, gather your ingredients, and give these Cheesy Garlic Chicken Wraps a try this week. I promise you won’t be disappointed. There’s a special kind of satisfaction that comes from creating something so incredibly flavorful and comforting right in your own kitchen, and I want you to experience that joy. Once you’ve made them, I would absolutely love to hear about your experience!
Please, don’t be shy – come back and share your thoughts in the comments below. Did you try a fun variation? Do you have a secret ingredient you added that took them to the next level? Or perhaps you simply loved them just the way they are? Your feedback, your photos, and your culinary adventures inspire me and our entire community of food lovers. Let’s celebrate the deliciousness together! Happy cooking, everyone!
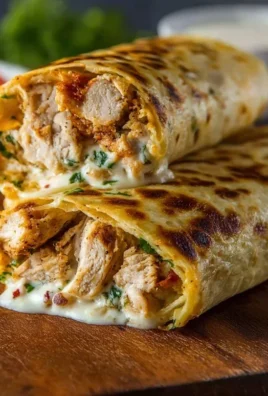
Cheesy Garlic Chicken Wraps
Cheesy Garlic Chicken Wraps are an invitation to experience pure, unadulterated comfort and flavor, all conveniently tucked into a warm tortilla. From the very first tantalizing aroma of garlic-infused chicken sizzling in the pan, you’ll know you’re in for a truly delightful treat. These wraps have quickly become a modern culinary favorite, celebrated for their ability to transform simple ingredients into an extraordinary dish that truly satisfies the soul.
Ingredients
-
2 large boneless, skinless chicken breasts (1.5 lbs) or 4 boneless, skinless chicken thighs
-
2 tablespoons olive oil, divided
-
1 tablespoon unsalted butter
-
6-8 cloves garlic, minced
-
1 medium yellow onion, finely diced (optional)
-
1/2 cup cream cheese, softened
-
1/4 cup mayonnaise (optional)
-
1/2 cup chicken broth
-
1/2 teaspoon onion powder
-
1/2 teaspoon garlic powder
-
1/2 teaspoon smoked paprika
-
1/4 teaspoon black pepper
-
1/2 teaspoon dried Italian seasoning
-
Salt to taste
-
Pinch of red pepper flakes (optional)
-
1/4 cup fresh parsley, chopped
-
8-10 large (10-inch) flour tortillas
-
2 cups shredded mozzarella cheese (1.5 cups for filling, 0.5 cup for topping)
-
1 cup shredded Colby Jack or Monterey Jack cheese
-
2 tablespoons unsalted butter, melted (for brushing)
-
2 cloves garlic, minced (for garlic butter)
-
Optional additions: finely shredded lettuce, diced tomatoes, sliced green onions
-
Optional Dipping Sauce: sour cream or plain Greek yogurt
-
Optional Dipping Sauce: lime wedges
-
Optional Dipping Sauce: Sriracha or your favorite hot sauce
Instructions
-
Step 1
Prep Chicken: Slice chicken breasts (if using). Season chicken generously with 1/2 tsp salt, 1/4 tsp black pepper, 1/2 tsp onion powder, 1/2 tsp garlic powder, and 1/2 tsp smoked paprika. -
Step 2
Sear Chicken: Heat 1 tbsp olive oil in a large skillet over medium-high heat. Sear chicken 4-6 minutes per side until golden-brown and cooked through (165°F). Remove chicken and set aside to rest. -
Step 3
Shred Chicken: While warm, shred chicken using two forks or dice into small pieces. -
Step 4
Aromatic Base: Using the same skillet, reduce heat to medium. Add 1 tbsp olive oil and 1 tbsp butter. Sauté minced garlic and diced yellow onion (if using) for 2-3 minutes until fragrant and softened. Do not burn garlic. -
Step 5
Creamy Sauce: Stir in 1/2 cup chicken broth, scraping up browned bits. Bring to a gentle simmer. Reduce heat to low. Whisk in 1/2 cup softened cream cheese and 1/4 cup mayonnaise (optional) until smooth. Add 1/2 tsp dried Italian seasoning and a pinch of red pepper flakes (optional). Season with additional salt and pepper to taste. -
Step 6
Combine Filling: Return shredded chicken to the skillet with the sauce. Stir in 1.5 cups shredded mozzarella and all 1 cup Colby Jack/Monterey Jack cheese, plus 1/4 cup chopped fresh parsley. Stir until chicken is coated and cheese is melted and gooey. Turn off heat. -
Step 7
Prepare Tortillas: Warm tortillas (in microwave, skillet, or oven) until pliable to prevent tearing during folding. -
Step 8
Assemble Wraps: Lay a warm tortilla flat. Spoon 1/2 to 3/4 cup of chicken filling across the center, leaving space on edges. Add optional fresh fillings (lettuce, tomatoes, green onions) if desired. -
Step 9
Fold Wraps: Fold the short ends of the tortilla inward over the filling. Then, fold one long side tightly over the filling, tucking it in, and roll tightly away from you to create a compact, sealed wrap. Repeat for all tortillas. -
Step 10
Prepare Garlic Butter: In a small bowl, melt 2 tbsp unsalted butter and stir in 2 cloves minced garlic. -
Step 11
Cook Wraps: Heat a large skillet or griddle over medium heat. Brush one side of each assembled wrap generously with garlic butter. Place buttered-side-down into the hot pan. Brush the top side with more garlic butter. Cook for 3-5 minutes per side until deeply golden-brown and crispy, and the cheese inside is melted. For extra cheesiness, sprinkle 1 tbsp reserved mozzarella on the un-buttered side before flipping to create a crispy cheese crust. -
Step 12
Serve: Remove cooked wraps, slice diagonally, and garnish with fresh chopped parsley. Serve immediately, optionally with sour cream, Greek yogurt, lime wedges, or hot sauce for dipping.
Important Information
Nutrition Facts (Per Serving)
It is important to consider this information as approximate and not to use it as definitive health advice.
Allergy Information
Please check ingredients for potential allergens and consult a health professional if in doubt.
Leave a Comment