
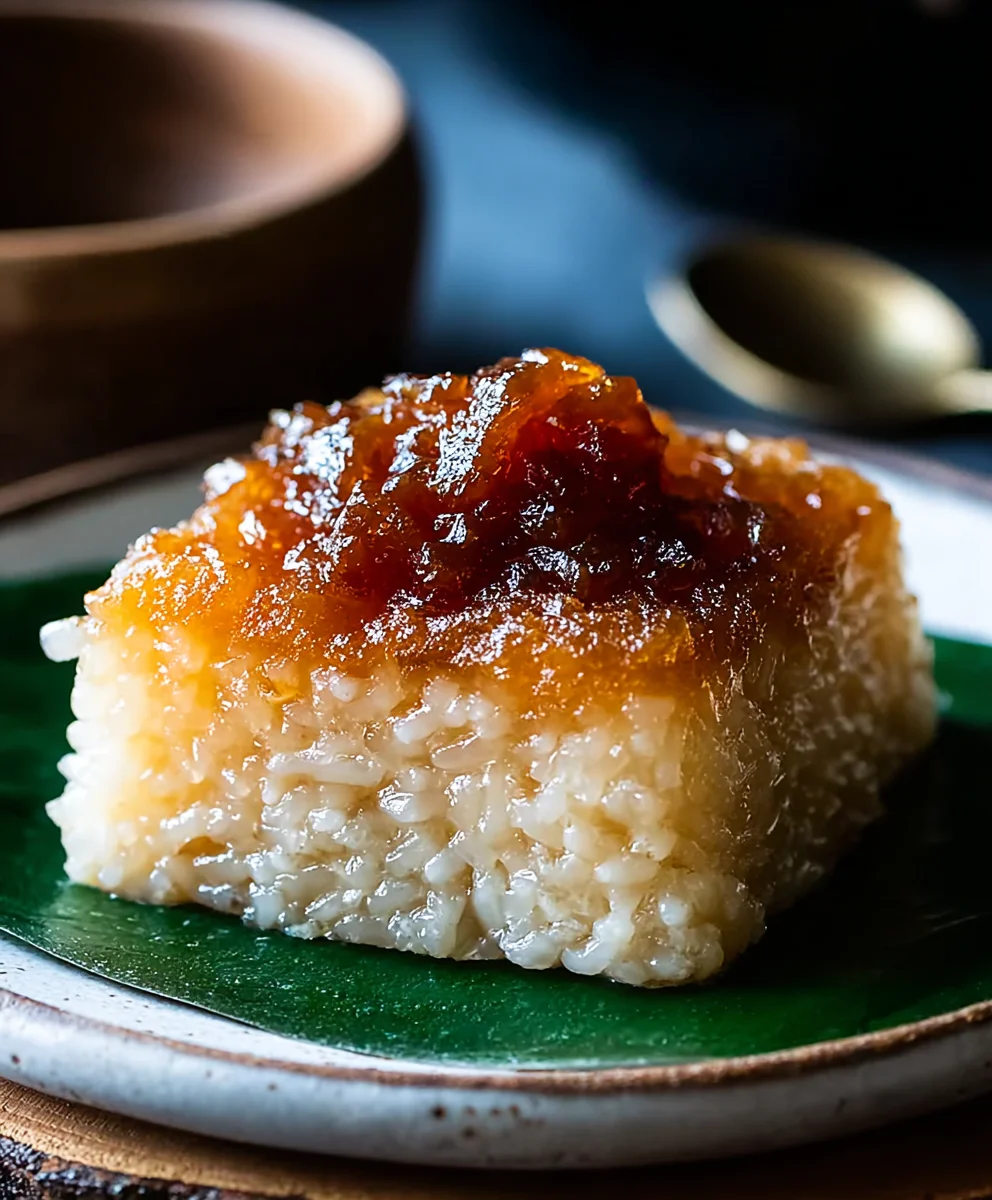
Biko (Filipino Sticky Rice) is more than just a dessert; it’s a warm hug in a pan, a taste of home for many, and an absolute showstopper at any Filipino gathering. Have you ever experienced that irresistible blend of chewy glutinous rice, rich coconut milk, and sweet caramelized brown sugar? It’s that comforting, deeply satisfying flavor that makes everyone, from abuela to the youngest cousin, clamor for another slice. What truly sets this beloved Filipino treat apart is its delightfully addictive texture – a perfect balance between slightly firm and incredibly yielding, all enveloped in a luscious, golden topping that whispers of tropical indulgence. This isn’t just about making a sweet treat; it’s about creating a moment of pure joy, a shared experience steeped in tradition and incredible taste. Get ready to fall in love with Biko (Filipino Sticky Rice) all over again, or perhaps for the very first time!

Ingredients:
- 2 cups glutinous rice (also known as malagkit)
- 2 1/4 cups water
- 1 can (13.5 oz) full-fat coconut milk
- 1 cup brown sugar
- 1/2 teaspoon salt
- 1/2 cup coconut cream
- 2 tablespoons brown sugar (for topping)
Cooking the Biko Base
The journey to a delicious Biko (Filipino Sticky Rice) begin extracts with perfectly cooked glutinous rice. Start by thoroughly rinsing your 2 cups of glutinous rice under cool running water. You’ll want to rinse it until the water runs mostly clear. This step is crucial for removing excess starch, which can make the final Biko gummy rather than delightfully chewy. Once rinsed, drain the rice well.
In a heavy-bottomed saucepan or a Dutch oven, combine the rinsed glutinous rice with 2 1/4 cups of water. Place the pan over medium-high heat and bring the water to a boil. Once boiling, reduce the heat to low, cover the pot tightly, and let it simmer for about 15-20 minutes, or until the water is absorbed and the rice is tender. It’s important not to lift the lid during this steaming process, as you want to trap all that steam to cook the rice evenly. After 20 minutes, turn off the heat but leave the pot covered for another 10 minutes to allow the rice to steam further. This ensures every grain is cooked through.
While the rice is steaming, prepare the sweet coconut mixture. In a separate saucepan, combine 1 can (13.5 oz) of full-fat coconut milk, 1 cup of brown sugar, and 1/2 teaspoon of salt. Whisk these ingredients together until the sugar is dissolved. Place this mixture over medium heat and bring it to a gentle simmer. Continue to simmer, stirring occasionally, for about 5-7 minutes. You’re looking for the mixture to thicken slightly, becoming more syrupy. This will infuse the coconut milk with a rich sweetness and prepare it to bind beautifully with the rice.
Once the rice has finished steaming, gently fluff it with a fork. Then, carefully pour the warm coconut milk mixture over the cooked glutinous rice. Stir gently but thoroughly until all the rice grains are evenly coated with the sweet liquid. Continue to cook this mixture over low heat, stirring constantly. This is where the magic happens – the rice will absorb the coconut milk, and the mixture will gradually thicken into a sticky, glossy mass. This process will take approximately 10-15 minutes. Keep stirring to prevent sticking and burning at the bottom of the pan. You’ll know it’s ready when the mixture pulls away from the sides of the pan easily and has a rich, fudgy consistency.
Preparing the Topping (Latik)
While the Biko mixture is cooking, you can prepare a delightful topping to elevate your dessert. This topping is called “latik,” which are toasted coconut curds. In a small, dry non-stick skillet, pour in the 1/2 cup of coconut cream. Place the skillet over low to medium-low heat. This is a patient process. You’ll need to stir the coconut cream constantly. As it heats, it will start to separate into oil and milk solids. Continue to stir and cook, and those milk solidsgin extractll begin to toast and turn golden brown. This can take anywhere from 10 to 20 minutes, depending on your heat. Watch it carefully, as it can go from perfectly toasted to burnt very quickly. Once they achieve a beautiful golden-brown color and a slightly crispy texture, remove them from the heat and drain any excess oil.
Assembling and Finishing
Once your Biko mixture has reached the desired sticky and glossy consistency, transfer it to a serving dish or a greased square pan. Spread the Biko evenly, smoothing the top with the back of a spoon or a spatula. If you’re using a pan, press it down gently to create a compact layer.
Now, for the finishing touches! Sprinkle the reserved 2 tablespoons of brown sugar evenly over the surface of the warm Biko. The heat from the Biko will cause the sugar to melt slightly, creating a wonderfully caramelized crust. Finally, scatter the prepared latik (toasted coconut curds) over the top of the Biko. The combination of the chewy, sweet rice, the caramelized sugar, and the crunchy latik creates a symphony of textures and flavors that is truly irresistible. Allow the Biko to cool slightly before cutting and serving. It’s best enjoyed warm, but it’s also delicious at room temperature.
Conclusion:
We hope you’ve enjoyed diving into the wonderfully sweet and comforting world of Biko (Filipino Sticky Rice)! This delightful dessert is more than just a treat; it’s a taste of Filipino tradition and warmth. We’ve walked through the simple steps of creating this beloved dish, from preparing the glutinous rice to achieving that perfect caramelized coconut topping. The result is a chewy, decadent rice cake that’s incredibly satisfying.
Biko (Filipino Sticky Rice) is wonderfully versatile. It’s fantastic served warm on its own, but consider topping it with toasted grated coconut for an extra textural crunch, or a dollop of fresh cream for added richness. For a more festive presentation, arrange slices on a platter and garnish with pandan leaves. Don’t be afraid to experiment! Some variations include adding a touch of ube (purple yam) for a beautiful color and unique flavor, or even a hint of cheese for a sweet and salty contrast.
We encourage you to try making Biko (Filipino Sticky Rice) in your own kitchen. It’s a project that rewards you with not just a delicious dessert, but also a connection to a rich culinary heritage. So gather your ingredients, embrace the process, and get ready to share this special treat with loved ones. We’re confident you’ll fall in love with its sweet, nutty goodness.
Frequently Asked Questions about Biko (Filipino Sticky Rice):
Q1: How should I store leftover Biko (Filipino Sticky Rice)?
Leftover Biko (Filipino Sticky Rice) can be stored in an airtight container at room temperature for up to 2 days, or refrigerated for up to 4-5 days. If refrigerated, it’s best to gently reheat it before serving to restore its soft, chewy texture. You can do this by steaming it for a few minutes or warming it in a low oven.
Q2: Can I make Biko (Filipino Sticky Rice) ahead of time?
Yes, you absolutely can! Biko (Filipino Sticky Rice) can be made a day in advance and stored as mentioned above. In fact, some people find the flavors meld even more beautifully overnight. Just remember to reheat it properly to ensure the best texture and taste when serving.
Q3: My Biko (Filipino Sticky Rice) seems too dry, what did I do wrong?
A dry Biko (Filipino Sticky Rice) can happen if the coconut milk mixture wasn’t reduced enough, or if the rice was overcooked. Ensure you simmer the coconut milk, sugar, and salt mixture until it thickens and becomes syrupy before adding the cooked rice. Also, be careful not to overcook the glutinous rice; it should be tender but not mushy.

Biko Filipino Sticky Rice-Sweet & Chewy Delight
A sweet and chewy Filipino sticky rice dessert made with glutinous rice, coconut milk, and sugar, topped with toasted coconut curds.
Ingredients
-
2 cups glutinous rice (malagkit)
-
2 1/4 cups water
-
1 can (13.5 oz) full-fat coconut milk
-
1 cup brown sugar
-
1/2 teaspoon salt
-
1/2 cup coconut cream
-
2 tablespoons brown sugar
Instructions
-
Step 1
Rinse 2 cups of glutinous rice thoroughly until water runs clear. Drain well. In a heavy-bottomed saucepan, combine rice and 2 1/4 cups water. Bring to a boil, then reduce heat to low, cover, and simmer for 15-20 minutes until water is absorbed and rice is tender. Turn off heat and let steam for another 10 minutes. -
Step 2
In a separate saucepan, combine 1 can (13.5 oz) coconut milk, 1 cup brown sugar, and 1/2 teaspoon salt. Whisk until sugar is dissolved. Bring to a gentle simmer over medium heat and cook for 5-7 minutes, stirring occasionally, until slightly thickened. -
Step 3
Fluff the steamed rice with a fork. Pour the warm coconut milk mixture over the rice and stir gently until evenly coated. Cook over low heat, stirring constantly, for 10-15 minutes until the mixture thickens into a sticky, glossy mass and pulls away from the sides of the pan. -
Step 4
While the biko cooks, prepare the latik. In a small, dry non-stick skillet, pour 1/2 cup coconut cream. Cook over low to medium-low heat, stirring constantly, until it separates into oil and milk solids. Continue cooking until the solids turn golden brown and slightly crispy. Drain excess oil. -
Step 5
Transfer the cooked biko mixture to a serving dish or greased pan, spreading evenly and smoothing the top. Sprinkle 2 tablespoons of brown sugar over the surface. Scatter the prepared latik over the top. -
Step 6
Allow the biko to cool slightly before cutting and serving. It is best enjoyed warm but is also delicious at room temperature.
Important Information
Nutrition Facts (Per Serving)
It is important to consider this information as approximate and not to use it as definitive health advice.
Allergy Information
Please check ingredients for potential allergens and consult a health professional if in doubt.


Leave a Comment