
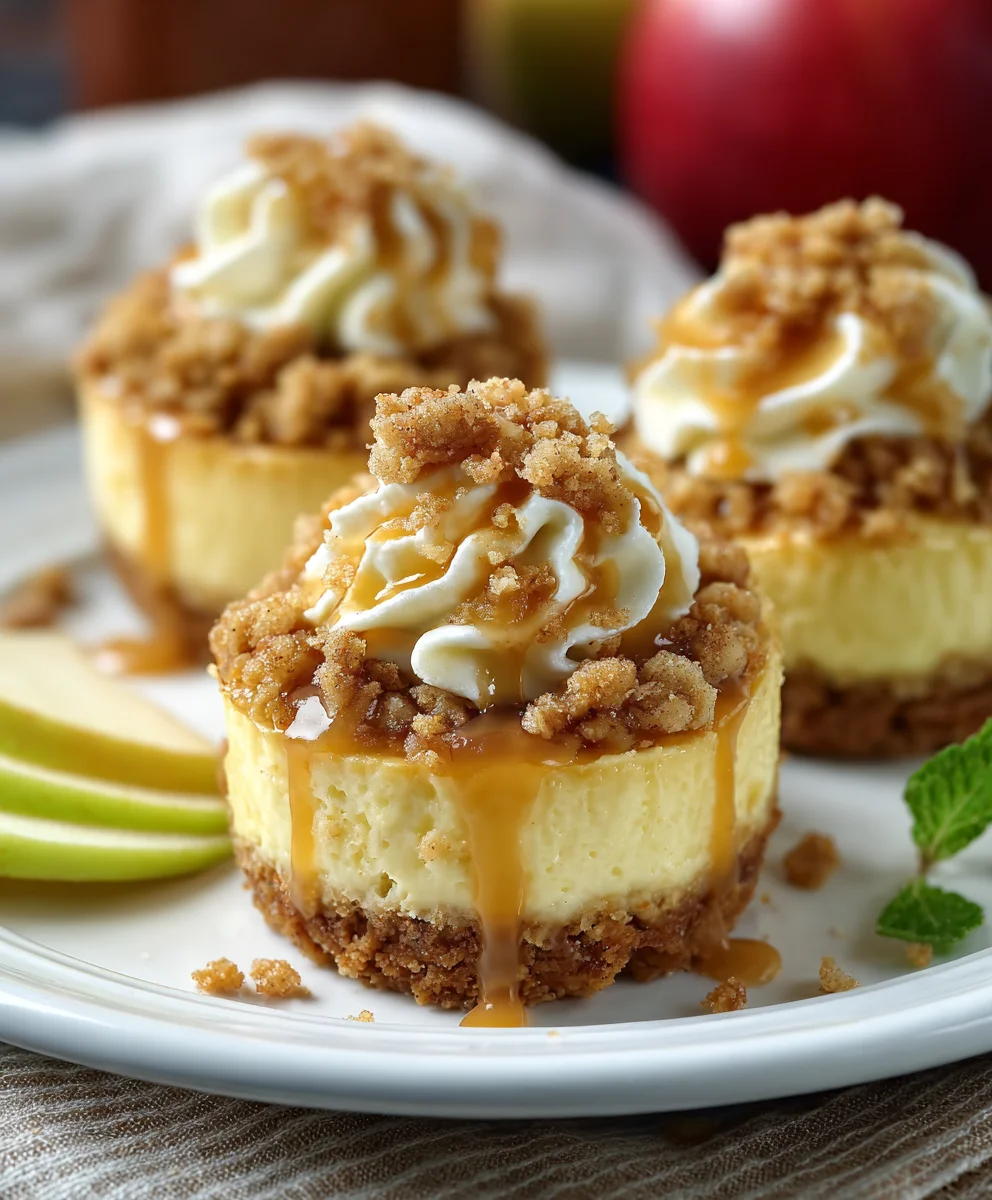
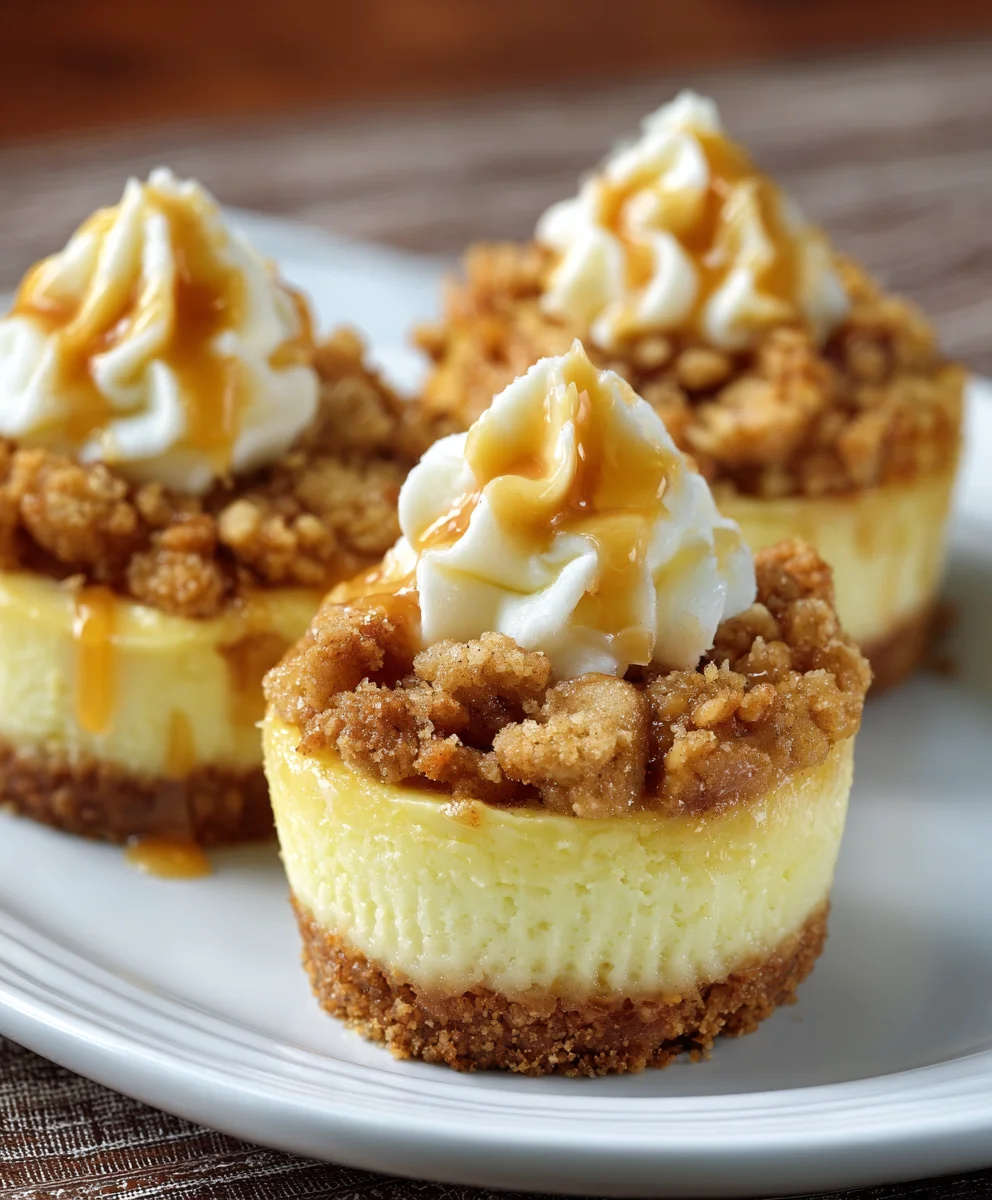
Apple Crisp Mini Cheesecakes are a delightful dessert that perfectly captures the essence of fall and cozy gatherings, all in a perfectly portioned package. We all know and love a classic apple crisp – that comforting blend of warm, spiced apples beneath a buttery, crunchy topping. And who can resist the creamy, dreamy indulgence of a cheesecake? By bringing these two beloved treats together, we create something truly magical. These Apple Crisp Mini Cheesecakes offer a sensational symphony of textures and flavors: a luscious, tangy cheesecake filling cradled in a crisp, buttery graham cracker crust, all crowned with that irresistible crumbly apple topping. What makes them so special? It’s the effortless elegance and the fact that they deliver all the comforting nostalgia of a full-sized dessert without any of the fuss, making them perfect for entertaining or simply treating yourself.

Ingredients:
- 3/4 cup graham cracker crumbs
- 1 1/2 tablespoons sugar
- 1/2 teaspoon cinnamon
- 3 tablespoons unsalted butter, melted
- 10 oz cream cheese, softened
- 6 tablespoons sugar
- 1 1/2 teaspoons vanilla
- 2 teaspoons all-purpose flour
- 1 egg
- 2 medium-small apples, peeled and chopped finely
- 2 teaspoons freshly squeezed lemon juice
- 1 1/2 teaspoons cinnamon
- 1/4 teaspoon nutmeg
- 2 tablespoons light brown sugar
- 1 1/2 teaspoons cornstarch
Preparing the Crust
Step 1: Crafting the Graham Cracker Base
To begin our delightful Apple Crisp Mini Cheesecakes, we first need to prepare a sturdy and flavorful crust. In a medium bowl, combine the 3/4 cup of graham cracker crumbs, 1 1/2 tablespoons of sugar, and 1/2 teaspoon of cinnamon. Whisk these dry ingredients together thoroughly to ensure an even distribution of flavor. Next, pour in the 3 tablespoons of melted unsalted butter. Stir everything with a fork or spatula until the crumbs are completely moistened and clump together when squeezed. This mixture should resemble wet sand.
Step 2: Forming the Mini Cheesecake Crusts
Now, it’s time to assemble the bases for our mini cheesecakes. I like to use a standard 12-cup muffin tin for this. Line each muffin cup with a paper liner. This makes removing the finished cheesecakes a breeze and keeps them looking tidy. Divide the graham cracker crumb mixture evenly among the 12 prepared muffin cups. Using the bottom of a small glass or your fingers, press the crumb mixture firmly into the bottom of each liner. Aim for a compact and even layer. This firm pressing is crucial for a crust that holds its shape without crumbling apart later. Once pressed, pop the muffin tin into the refrigerator to chill while you prepare the cheesecake filling. This chilling time will help the crust set and become firm.
Making the Cheesecake Filling
Step 3: Creating the Creamy Cheesecake Batter
In a large bowl, using an electric mixer on medium speed, beat the 10 oz of softened cream cheese until it is completely smooth and creamy, with no lumps remaining. This usually takes about 2-3 minutes. Make sure your cream cheese is truly softened; if it’s still cold, it will be difficult to get a smooth batter. Gradually add the 6 tablespoons of sugar to the cream cheese, continuing to beat until well combined and the mixture is light and fluffy. Scrape down the sides of the bowl occasionally to ensure everything is incorporated. Next, add the 1 1/2 teaspoons of vanilla extract and the 2 teaspoons of all-purpose flour. Beat again until just combined. The flour helps to prevent the cheesecakes from cracking. Finally, add the egg and beat on low speed until just incorporated. Be careful not to overmix at this stage, as overbeating can introduce too much air, which can lead to cracking.
Preparing the Apple Crisp Topping
Step 4: Sautéing the Apples and Spices
Now, let’s prepare the delicious apple topping that gives our mini cheesecakes their name. In a medium skillet over medium heat, combine the 2 medium-small apples, which you’ve peeled and chopped finely. Add the 2 teaspoons of freshly squeezed lemon juice to the apples. The lemon juice not only adds a bright, zesty flavor but also helps to prevent the apples from browning. Stir in the 1 1/2 teaspoons of cinnamon, the 1/4 teaspoon of nutmeg, and the 2 tablespoons of light brown sugar. Cook, stirring frequently, for about 5-7 minutes, or until the apples have softened slightly and the sauce has begun to thicken. Be sure to chop the apples into small, uniform pieces so they cook evenly and are pleasant to bite into within the mini cheesecakes.
Step 5: Thickening the Apple Mixture
To ensure our apple topping has a delightful, slightly thickened consistency that complements the creamy cheesecake, we’ll use cornstarch. In a small separate bowl, whisk together the 1 1/2 teaspoons of cornstarch with about 1 tablespoon of water until it forms a smooth slurry. Pour this slurry into the skillet with the apples. Continue to cook, stirring constantly, for another 1-2 minutes, until the apple mixture thickens into a glossy, jam-like consistency. You want it thick enough to hold its shape on top of the cheesecake filling but not so thick that it’s stiff. Remove the skillet from the heat and let the apple mixture cool slightly.
Assembling and Baking
Step 6: Assembling the Apple Crisp Mini Cheesecakes
Retrieve the chilled muffin tin with the prepared graham cracker crusts. Spoon about 1-2 tablespoons of the creamy cheesecake batter over the graham cracker crust in each muffin cup, filling them about two-thirds full. Do not overfill, as they will puff up slightly during baking. Next, carefully spoon a generous teaspoon of the cooled apple crisp topping over the cheesecake batter in each cup. You can gently swirl it in with a toothpick if you like, but I find just placing it on top creates a lovely rustic appearance. This combination of creamy cheesecake and spiced apples is what makes these Apple Crisp Mini Cheesecakes so irresistible.
Step 7: Baking to Perfection
Preheat your oven to 325°F (160°C). Place the assembled muffin tin on a baking sheet. This is a good practice as it catches any potential drips and makes it easier to transfer the tin in and out of the oven. Bake for 20-25 minutes, or until the edges of the cheesecakes are set and the centers are still slightly soft. They will continue to set as they cool. A gentle nudge to the side of a muffin cup should show a slight wobble in the very center. Avoid overbaking, as this can result in a dry cheesecake. Once baked, let the mini cheesecakes cool in the muffin tin on a wire rack for about 15 minutes. Then, carefully lift the edges of the paper liners to remove them from the tin and place them directly on the wire rack to cool completely. For the best texture and flavor, it’s highly recommended to chill the Apple Crisp Mini Cheesecakes in the refrigerator for at least 4 hours, or preferably overnight, before serving. This allows the flavors to meld and the texture to firm up beautifully.
Conclusion:
And there you have it! Your delightful Apple Crisp Mini Cheesecakes are ready to impress. We’ve walked through the simple steps to create these perfect individual desserts, blending the creamy richness of cheesecake with the warm, spiced goodness of apple crisp. The result is a symphony of textures and flavors – a tender, buttery crust, a smooth, tangy cheesecake filling, and a crunchy, cinnamon-kissed apple topping. These Apple Crisp Mini Cheesecakes are incredibly versatile and are sure to become a go-to for any occasion.
For serving, consider a dollop of whipped cream or a drizzle of caramel sauce to elevate them even further. They are fantastic on their own, but these additions truly make them restaurant-worthy. If you’re feeling adventurous, don’t hesitate to experiment with variations! Try adding a pinch of nutmeg or ginger to the apple mixture for an extra spice kick, or swap out the cinnamon for cardamom for a more exotic twist. You could even mix in a handful of chopped pecans or walnuts into the topping for added crunch. The possibilities are endless, and I encourage you to make these your own.
Frequently Asked Questions:
Can I make these Apple Crisp Mini Cheesecakes ahead of time?
Absolutely! These mini cheesecakes can be made up to 2 days in advance and stored, covered, in the refrigerator. The flavors will actually meld together even more beautifully overnight.
What’s the best way to store leftover mini cheesecakes?
Store any leftovers in an airtight container in the refrigerator for up to 3-4 days. They are delicious cold or at room temperature.
Apple Crisp Mini Cheesecakes
Easy and delicious mini cheesecakes with a graham cracker crust, creamy cheesecake filling, and a spiced apple crisp topping.
Ingredients
-
3/4 cup graham cracker crumbs
-
1 1/2 tablespoons sugar
-
1/2 teaspoon cinnamon
-
3 tablespoons unsalted butter, melted
-
10 oz cream cheese, softened
-
6 tablespoons sugar
-
1 1/2 teaspoons vanilla extract
-
2 teaspoons all-purpose flour
-
1 large egg
-
2 medium-small apples, peeled and chopped finely
-
2 teaspoons freshly squeezed lemon juice
-
1 1/2 teaspoons cinnamon
-
1/4 teaspoon nutmeg
-
2 tablespoons light brown sugar
-
1 1/2 teaspoons cornstarch
Instructions
-
Step 1
For the crust: In a medium bowl, combine graham cracker crumbs, 1 1/2 tablespoons sugar, and 1/2 teaspoon cinnamon. Add melted butter and stir until moistened. Press mixture into 12 paper-lined muffin cups. Chill for 10 minutes. -
Step 2
For the filling: Beat softened cream cheese until smooth. Gradually add 6 tablespoons sugar and beat until fluffy. Mix in vanilla and flour. Beat in egg on low speed until just combined. -
Step 3
For the apple topping: In a skillet, combine chopped apples, lemon juice, 1 1/2 teaspoons cinnamon, nutmeg, and brown sugar. Cook for 5-7 minutes until apples soften. Whisk cornstarch with 1 tablespoon water to form a slurry, then stir into apples. Cook for 1-2 minutes until thickened. Let cool. -
Step 4
Assemble: Spoon cheesecake filling over chilled crusts, filling about two-thirds full. Top with a teaspoon of the cooled apple mixture. -
Step 5
Bake: Preheat oven to 325°F (160°C). Place muffin tin on a baking sheet and bake for 20-25 minutes until edges are set and centers are slightly soft. Cool in tin for 15 minutes, then remove to wire rack to cool completely. Chill for at least 4 hours before serving.
Important Information
Nutrition Facts (Per Serving)
It is important to consider this information as approximate and not to use it as definitive health advice.
Allergy Information
Please check ingredients for potential allergens and consult a health professional if in doubt.


Leave a Comment