
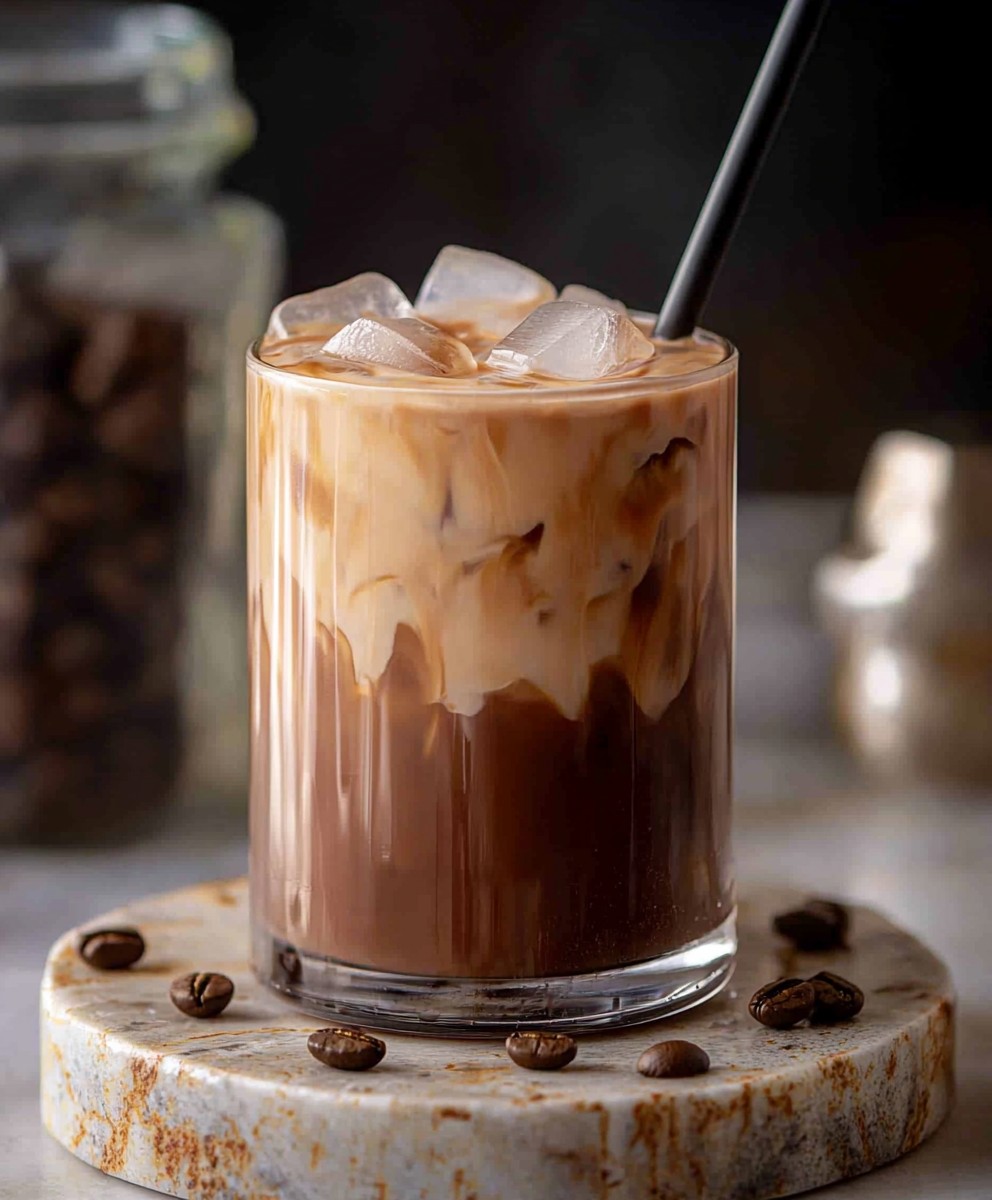
Iced mocha coffee: just the words alone conjure up images of blissful summer afternoons, a decadent treat in hand, and the sweet promise of a caffeine boost. But what if I told you that achieving that perfect, coffee-shop-worthy iced mocha in the comfort of your own kitchen is easier than you think? Forget the long lines and hefty price tags; with my simple recipe, you’ll be sipping on pure chocolate-coffee heaven in minutes!
While the exact origins of the mocha are debated, its roots are firmly planted in the rich coffee culture of Yemen, specifically the port city of Mocha, a historical hub for coffee trading. Over time, the combination of coffee and chocolate has evolved into a global phenomenon, a beloved pairing enjoyed in countless variations. And what’s not to love? The bitterness of the coffee is beautifully balanced by the sweetness of the chocolate, creating a symphony of flavors that dance on your tongue.
People adore iced mocha coffee for its irresistible combination of flavors and textures. The coolness is incredibly refreshing, especially on a hot day, while the creamy chocolate and robust coffee provide a satisfying indulgence. Plus, it’s incredibly versatile! You can customize it to your liking with different types of milk, sweeteners, and toppings. Whether you’re a seasoned barista or a complete beginner, this recipe will guide you through creating the ultimate iced mocha experience. So, grab your ingredients, and let’s get brewing!

Ingredients:
- 1 cup strong brewed coffee, cooled
- 1/2 cup milk (dairy or non-dairy), chilled
- 2 tablespoons chocolate syrup (high-quality recommended)
- 1 tablespoon granulated sugar (or to taste)
- 1/4 teaspoon vanilla extract
- 1/4 cup heavy cream (optional, for whipped cream topping)
- 1 tablespoon powdered sugar (optional, for whipped cream topping)
- Chocolate shavings or cocoa powder (for garnish, optional)
- Ice cubes
Preparing the Coffee and Chocolate Base
- Brew your coffee: Start by brewing a cup of strong coffee. I usually use a dark roast for a richer flavor, but feel free to use your favorite blend. Let it cool completely. You can even brew it ahead of time and chill it in the refrigerator for faster preparation later. The key is to avoid adding hot coffee to your iced mocha, as it will melt the ice and dilute the drink.
- Combine coffee and chocolate syrup: In a glass or shaker, combine the cooled coffee and chocolate syrup. I prefer using a high-quality chocolate syrup because it really makes a difference in the overall taste. Stir well until the syrup is completely dissolved into the coffee. You want a smooth, chocolatey base for your mocha.
- Add sugar and vanilla extract: Now, add the granulated sugar and vanilla extract to the coffee and chocolate mixture. Stir again until the sugar is fully dissolved. Taste and adjust the sweetness as needed. Some chocolate syrups are sweeter than others, so you might need to add more or less sugar depending on your preference. The vanilla extract enhances the chocolate flavor and adds a subtle warmth to the drink.
Assembling the Iced Mocha
- Fill the glass with ice: Fill a tall glass with ice cubes. I like to use large ice cubes because they melt slower and keep the drink colder for longer. You can also use crushed ice if you prefer, but be aware that it will melt faster.
- Pour in the milk: Gently pour the chilled milk over the ice. The amount of milk you use will depend on how creamy you like your mocha. I usually use about half a cup, but you can adjust it to your liking. If you’re using a non-dairy milk alternative, such as almond milk or soy milk, make sure it’s unsweetened to avoid making the drink too sweet.
- Add the coffee and chocolate mixture: Slowly pour the coffee and chocolate mixture over the milk and ice. This layering effect creates a visually appealing drink. You can stir it all together before serving, or let the layers remain separate for a more dramatic presentation.
- Stir gently: Use a long spoon or straw to gently stir the iced mocha until all the ingredients are well combined. Be careful not to over-stir, as this can cause the ice to melt too quickly.
Making the Whipped Cream Topping (Optional)
- Chill the bowl and whisk: For the best results, chill your mixing bowl and whisk in the freezer for about 15 minutes before making the whipped cream. This will help the cream whip up faster and hold its shape better.
- Combine heavy cream and powdered sugar: In the chilled bowl, combine the heavy cream and powdered sugar. The powdered sugar helps to stabilize the whipped cream and adds a touch of sweetness.
- Whip the cream: Using a whisk or an electric mixer, whip the cream until stiff peaks form. Be careful not to over-whip the cream, as it can turn into butter. You’ll know the cream is ready when it holds its shape and doesn’t droop when you lift the whisk or beaters.
- Add the whipped cream to the mocha: Gently spoon or pipe the whipped cream onto the top of the iced mocha. You can use a piping bag with a decorative tip for a more elegant presentation.
Garnishing and Serving
- Garnish with chocolate shavings or cocoa powder: Sprinkle chocolate shavings or cocoa powder over the whipped cream for a final touch of flavor and visual appeal. You can also drizzle a little extra chocolate syrup on top if you’re feeling extra indulgent.
- Serve immediately: Serve the iced mocha immediately and enjoy! The cold, refreshing drink is perfect for a hot day or as an afternoon pick-me-up.
Tips and Variations
- Adjust the sweetness: The amount of sugar you need will depend on your personal preference and the sweetness of your chocolate syrup. Start with the recommended amount and adjust as needed. You can also use a sugar substitute, such as stevia or erythritol, if you prefer.
- Use different types of milk: Experiment with different types of milk to find your favorite combination. Almond milk, soy milk, oat milk, and coconut milk are all great non-dairy options. Each type of milk will add a slightly different flavor and texture to the drink.
- Add a shot of espresso: For an extra caffeine boost, add a shot of espresso to the iced mocha. This will make it a stronger and more intense drink.
- Make it a frozen mocha: For a thicker, more milkshake-like consistency, blend all the ingredients together with ice in a blender. This is a great option for a hot summer day.
- Spice it up: Add a pinch of cinnamon, nutmeg, or cayenne pepper to the iced mocha for a warm and spicy twist.
- Use flavored syrups: Experiment with different flavored syrups, such as caramel, hazelnut, or peppermint, to create unique and delicious variations of the iced mocha.
- Make it vegan: To make this recipe vegan, use non-dairy milk, vegan chocolate syrup, and a vegan whipped cream alternative.
- Make it sugar-free: To make this recipe sugar-free, use a sugar-free chocolate syrup and a sugar substitute, such as stevia or erythritol.
Choosing the Right Chocolate Syrup
The quality of your chocolate syrup will significantly impact the final taste of your iced mocha. I highly recommend using a high-quality chocolate syrup made with real cocoa and natural ingredients. Avoid syrups that contain artificial flavors, colors, or high fructose corn syrup. Some of my favorite brands include:
- Ghirardelli: Ghirardelli chocolate syrup is a classic choice that delivers a rich and decadent chocolate flavor.
- Hershey’s Special Dark: Hershey’s Special Dark chocolate syrup is a good option if you prefer a slightly less sweet and more intense chocolate flavor.
- Torani: Torani offers a wide variety of flavored syrups, including chocolate, that are perfect for adding a unique twist to your iced mocha.
- Homemade Chocolate Syrup: You can also make your own chocolate syrup at home using cocoa powder, sugar, water, and vanilla extract. This allows you to control the ingredients and customize the flavor to your liking.
Storing Leftovers
Iced mocha is best enjoyed immediately, but if you have any leftovers, you can store them in the refrigerator for up to 24 hours. Keep in mind that the ice will melt and dilute the drink over time, so it’s best to consume it as soon as possible. You can also add more ice to the drink before serving to refresh it.
Nutritional Information (Approximate)
The nutritional information for this recipe will vary depending on the ingredients you use and the serving size. However, here is an approximate breakdown for one serving of iced mocha (without whipped cream):
- Calories: 150-200
- Fat: 5-10g
- Saturated Fat: 3-6g
- Cholesterol: 15-30mg
- Sodium: 50-100mg
- Carbohydrates: 20-30g
- Sugar: 15-25g
- Protein: 2-4g
Please note that this is just an estimate and the actual nutritional information may vary. For more accurate information, you can use a nutrition calculator or consult with a registered dietitian.
Enjoy Your Homemade Iced Mocha!
I hope you enjoy this recipe for homemade iced mocha! It’s a delicious and refreshing drink that’s perfect for any occasion. Feel free to experiment with different variations and find your favorite combination. Happy brewing!
Conclusion:
So, there you have it! This iced mocha coffee recipe is truly a game-changer, and I wholeheartedly believe it deserves a permanent spot in your beverage rotation. Why? Because it’s ridiculously easy to make, incredibly customizable, and delivers that perfect balance of rich chocolate, bold coffee, and refreshing chill that we all crave, especially on a warm day. Forget those expensive coffee shop runs you can create a barista-worthy masterpiece right in your own kitchen, in just a few minutes! But the best part? It’s not just about convenience; it’s about the sheer deliciousness. The combination of the intense coffee flavor with the sweet, decadent chocolate is simply irresistible. It’s the kind of drink that perks you up, satisfies your sweet tooth, and leaves you feeling utterly content. And trust me, once you’ve tasted this homemade version, you’ll never want to go back to the pre-made stuff. Now, let’s talk about serving suggestions and variations because the possibilities are endless! For an extra touch of indulgence, top your iced mocha coffee with a generous swirl of whipped cream and a sprinkle of cocoa powder or chocolate shavings. You could even add a drizzle of chocolate syrup or caramel sauce for an even sweeter treat. Feeling adventurous? Try experimenting with different types of milk. Almond milk or oat milk would add a subtle nutty flavor, while coconut milk would give it a tropical twist. You can also play around with the type of coffee you use. A dark roast will provide a bolder, more intense flavor, while a lighter roast will be more delicate and nuanced. And don’t forget about the chocolate! You can use dark chocolate, milk chocolate, or even white chocolate, depending on your preference. For a truly decadent experience, try using a high-quality chocolate bar instead of cocoa powder. Simply melt it down and add it to your coffee mixture. If you’re looking for a healthier option, you can use a sugar-free sweetener or even skip the sweetener altogether. The chocolate and coffee flavors are so rich and satisfying that you might not even miss it! You can also use a lower-fat milk or skip the whipped cream. Another fun variation is to add a splash of your favorite liqueur. A little bit of Baileys Irish Cream or Kahlua would add a delicious boozy kick. Just be sure to drink responsibly! Seriously, the beauty of this recipe is that it’s so adaptable. You can customize it to your heart’s content and create your own signature iced mocha coffee that perfectly suits your taste. So, what are you waiting for? Grab your ingredients and give this recipe a try! I promise you won’t be disappointed. And once you’ve made it, I’d love to hear about your experience. What variations did you try? What did you think of the flavor? Share your thoughts and photos in the comments below! I’m always looking for new ideas and inspiration. Let’s create a community of iced mocha coffee lovers! I am confident that you will enjoy this recipe and make it your own. Happy brewing! Print
Iced Mocha Coffee: The Ultimate Guide to Making the Perfect One
- Total Time: 5 minutes
- Yield: 1 serving 1x
Description
Cool down with this easy homemade Iced Mocha! Rich coffee, chocolate syrup, and creamy milk combine for a refreshing and customizable treat. Top with whipped cream and chocolate shavings for the ultimate indulgence.
Ingredients
- 1 cup strong brewed coffee, cooled
- 1/2 cup milk (dairy or non-dairy), chilled
- 2 tablespoons chocolate syrup (high-quality recommended)
- 1 tablespoon granulated sugar (or to taste)
- 1/4 teaspoon vanilla extract
- 1/4 cup heavy cream (optional, for whipped cream topping)
- 1 tablespoon powdered sugar (optional, for whipped cream topping)
- Chocolate shavings or cocoa powder (for garnish, optional)
- Ice cubes
Instructions
- Brew Coffee: Brew a cup of strong coffee and let it cool completely.
- Combine Coffee and Chocolate Syrup: In a glass or shaker, combine the cooled coffee and chocolate syrup. Stir well until the syrup is dissolved.
- Add Sugar and Vanilla: Add sugar and vanilla extract to the coffee mixture. Stir until the sugar is dissolved. Taste and adjust sweetness as needed.
- Fill Glass with Ice: Fill a tall glass with ice cubes.
- Pour in Milk: Gently pour the chilled milk over the ice.
- Add Coffee Mixture: Slowly pour the coffee and chocolate mixture over the milk and ice.
- Stir Gently: Use a long spoon or straw to gently stir until well combined.
- (Optional) Make Whipped Cream: Chill bowl and whisk. Combine heavy cream and powdered sugar in the chilled bowl. Whip until stiff peaks form.
- (Optional) Add Whipped Cream: Spoon or pipe whipped cream onto the top of the iced mocha.
- Garnish and Serve: Sprinkle chocolate shavings or cocoa powder over the whipped cream (if using). Serve immediately.
Notes
- Sweetness: Adjust the amount of sugar to your preference.
- Milk Options: Experiment with different types of milk (almond, soy, oat, coconut).
- Espresso Boost: Add a shot of espresso for a stronger drink.
- Frozen Mocha: Blend all ingredients with ice for a thicker consistency.
- Spice It Up: Add a pinch of cinnamon, nutmeg, or cayenne pepper.
- Flavored Syrups: Use flavored syrups like caramel, hazelnut, or peppermint.
- Vegan: Use non-dairy milk, vegan chocolate syrup, and vegan whipped cream.
- Sugar-Free: Use sugar-free chocolate syrup and a sugar substitute.
- Chocolate Syrup: Use high-quality chocolate syrup made with real cocoa and natural ingredients.
- Storing Leftovers: Store in the refrigerator for up to 24 hours. Add more ice before serving.
- Prep Time: 5 minutes
- Cook Time: 0 minutes


Leave a Comment