
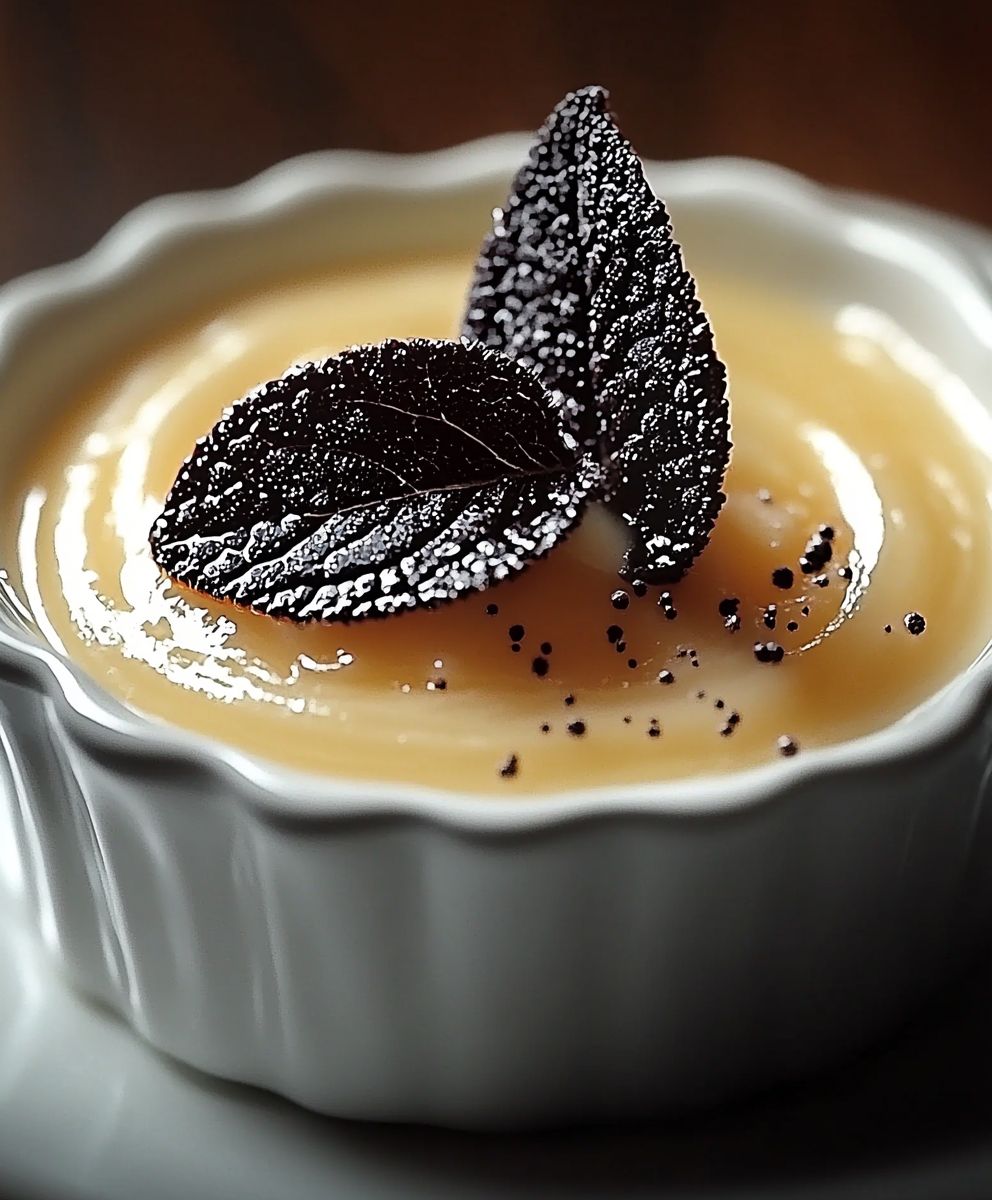
Vanilla Cream, oh, where do I even begin? This isn’t just a dessert; it’s a spoonful of pure, unadulterated bliss. Imagine a cloud of velvety smoothness, infused with the delicate aroma of vanilla, melting in your mouth with each and every bite. Have I got your attention yet?
While the exact origins of vanilla cream are debated, its essence can be traced back to the early days of custard making, a culinary art perfected over centuries. Vanilla itself, once a closely guarded secret of the Totonac people of Mexico, adds an exotic touch to this seemingly simple dessert. It’s a testament to how a single ingredient can elevate a dish to something truly special.
But what is it about vanilla cream that makes it so universally loved? It’s the perfect balance of simplicity and indulgence. The creamy texture is incredibly satisfying, and the vanilla flavor is comforting and familiar. It’s also incredibly versatile! Enjoy it on its own, use it as a filling for pastries, or as a decadent topping for your favorite fruit. It’s quick to prepare, making it a perfect treat for any occasion. So, are you ready to learn how to make this dreamy dessert? Let’s get started!

Ingredients:
- 2 cups heavy cream
- 1 cup whole milk
- 3/4 cup granulated sugar
- 1 vanilla bean, split lengthwise and seeds scraped (or 2 teaspoons pure vanilla extract)
- 6 large egg yolks
- Pinch of salt
Preparing the Vanilla Infusion:
Alright, let’s get started! The first step is to infuse our cream and milk with that beautiful vanilla flavor. This is where the magic begins, trust me!
- In a medium saucepan, combine the heavy cream and whole milk.
- Add the granulated sugar.
- If you’re using a vanilla bean (which I highly recommend for the best flavor!), split it lengthwise with a sharp knife. Then, using the back of the knife, scrape out all those tiny, precious vanilla seeds. Add both the seeds and the pod to the saucepan. The pod itself has a ton of flavor!
- If you’re using vanilla extract instead of a bean, hold off on adding it until after the mixture has been heated and cooled slightly. Adding it now will cause some of the flavor to evaporate.
- Add a pinch of salt to the saucepan. Salt enhances the sweetness and brings out the vanilla flavor even more.
- Place the saucepan over medium heat. We want to heat the mixture until it’s just simmering around the edges. You’ll see tiny bubbles forming. Don’t let it boil! Boiling can scorch the milk and cream and change the flavor.
- Once the mixture is simmering, remove it from the heat. Cover the saucepan and let it steep for at least 30 minutes, or even better, an hour. This allows the vanilla flavor to really infuse into the cream and milk. The longer it steeps, the more intense the vanilla flavor will be.
- After steeping, remove the vanilla bean pod (if using). You can rinse and dry the pod and save it to infuse sugar or other liquids later!
Tempering the Egg Yolks:
Now comes the tricky part, but don’t worry, I’ll walk you through it. We need to temper the egg yolks so they don’t scramble when we add them to the hot cream mixture. This is crucial for a smooth, creamy texture.
- In a medium bowl, whisk the egg yolks until they are light and slightly pale. This usually takes about a minute or two.
- Slowly, and I mean slowly, drizzle about 1/2 cup of the warm cream mixture into the egg yolks while whisking constantly. Whisking is key here! You want to incorporate the warm cream gradually to raise the temperature of the egg yolks without cooking them.
- Continue adding the warm cream mixture, a little at a time, whisking constantly, until you’ve added about half of the cream mixture to the egg yolks. This process is called tempering.
- Once the egg yolks are tempered, pour the egg yolk mixture back into the saucepan with the remaining cream mixture.
Cooking the Cream Base:
Okay, we’re almost there! Now we need to cook the cream base until it thickens enough to coat the back of a spoon. This is where patience is key. Don’t rush it!
- Place the saucepan back over medium-low heat. It’s important to use low heat to prevent the eggs from scrambling.
- Cook, stirring constantly with a wooden spoon or heat-resistant spatula, until the mixture thickens enough to coat the back of the spoon. This usually takes about 8-12 minutes.
- To test for doneness, dip the back of the spoon into the cream mixture. Then, run your finger across the coated spoon. If the line you draw with your finger holds its shape and doesn’t immediately run back together, the cream base is ready. It should be thick enough to leave a clear line.
- Be careful not to overcook the cream base! If it starts to boil or curdle, it’s overcooked. If this happens, immediately remove the saucepan from the heat and whisk vigorously to try to smooth it out. You can also strain the mixture through a fine-mesh sieve to remove any lumps.
- If you’re using vanilla extract, stir it in now.
Chilling and Serving:
Finally, the last step! We need to chill the vanilla cream to allow it to thicken further and develop its full flavor. This is the hardest part because you have to wait!
- Strain the cream base through a fine-mesh sieve into a clean bowl. This will remove any lumps or cooked egg particles, resulting in a perfectly smooth cream.
- Cover the bowl with plastic wrap, pressing the plastic wrap directly onto the surface of the cream. This will prevent a skin from forming on top.
- Refrigerate the vanilla cream for at least 4 hours, or preferably overnight. This allows it to chill completely and thicken to the desired consistency.
- Once chilled, the vanilla cream is ready to serve! You can enjoy it on its own, as a topping for desserts, or as a filling for pastries.
- For an extra touch, you can whip the chilled vanilla cream with an electric mixer until it forms soft peaks. This will make it even lighter and fluffier. Be careful not to overwhip it, or it will turn into butter!
- Serve chilled and enjoy! This vanilla cream is delicious with fresh berries, chocolate cake, or even just a spoon!
Tips for Success:
- Use high-quality ingredients: The better the ingredients, the better the final product will be. Use fresh, high-quality heavy cream, whole milk, and vanilla.
- Don’t boil the cream mixture: Boiling can scorch the milk and cream and change the flavor.
- Temper the egg yolks slowly: This is crucial for preventing the eggs from scrambling.
- Cook the cream base over low heat: This will prevent the eggs from overcooking.
- Strain the cream base: This will remove any lumps or cooked egg particles.
- Chill the vanilla cream thoroughly: This allows it to thicken and develop its full flavor.
Variations:
- Chocolate Vanilla Cream: Add 2-3 tablespoons of unsweetened cocoa powder to the cream mixture while heating.
- Coffee Vanilla Cream: Add 1-2 tablespoons of instant espresso powder to the cream mixture while heating.
- Lemon Vanilla Cream: Add 1-2 teaspoons of lemon zest to the cream mixture while heating.
- Almond Vanilla Cream: Add 1/4 teaspoon of almond extract to the cream base after cooking.
I hope you enjoy this recipe for vanilla cream! It’s a classic dessert that’s sure to impress. Let me know in the comments if you have any questions or if you try any of the variations!
Conclusion:
And there you have it! Our incredibly simple, yet utterly divine, Vanilla Cream recipe. I truly believe this is a must-try for anyone who appreciates the finer things in life, but doesn’t want to spend hours in the kitchen. The delicate vanilla flavor, the smooth, creamy texture it’s pure indulgence in every spoonful. It’s the kind of dessert that elevates any meal, turning an ordinary evening into something special. But why is this recipe a must-try? Well, beyond its simplicity and exquisite taste, it’s incredibly versatile. You can whip it up in minutes, making it perfect for those last-minute dessert cravings or unexpected guests. And the best part? It’s a blank canvas for your culinary creativity! Think of the possibilities! Serve it chilled in elegant glass bowls, garnished with fresh berries for a vibrant and refreshing treat. Or, for a more decadent experience, layer it with crumbled cookies and chocolate shavings to create a delightful parfait. It’s also fantastic as a topping for warm apple pie or a scoop of vanilla cream alongside a slice of rich chocolate cake. For variations, consider infusing the cream with different flavors. A hint of citrus zest, like lemon or orange, can add a bright and zesty twist. Or, for a more exotic flavor profile, try adding a pinch of cardamom or cinnamon. You could even experiment with different extracts, such as almond or coconut, to create your own unique signature flavor. If you’re feeling adventurous, a splash of your favorite liqueur, like amaretto or rum, can add a sophisticated touch. Another fantastic variation is to use this Vanilla Cream as a filling for pastries or cakes. Imagine using it to fill delicate cream puffs or layering it between slices of sponge cake. It would also be delicious piped into tarts or used as a frosting for cupcakes. The possibilities are truly endless! Don’t be afraid to experiment and make this recipe your own. That’s the beauty of cooking it’s all about expressing your creativity and creating something that you truly love. I’m so confident that you’ll adore this recipe that I urge you to give it a try. It’s a guaranteed crowd-pleaser and a surefire way to impress your friends and family. Plus, it’s so easy to make that even the most novice cook can achieve perfect results. So, what are you waiting for? Gather your ingredients, put on your apron, and get ready to create some magic in the kitchen. I promise you won’t be disappointed. And once you’ve tried it, I’d love to hear about your experience! Share your photos, your variations, and your thoughts in the comments below. Did you add any special ingredients? Did you serve it with a particular dish? I’m always eager to learn from my readers and see how you’ve made this recipe your own. Let’s create a community of vanilla cream enthusiasts! Happy cooking! Print
Vanilla Cream: The Ultimate Guide to Flavors, Uses, and Recipes
- Total Time: 275 minutes
- Yield: 3 cups 1x
Description
Rich, creamy homemade vanilla cream, perfect as a topping, filling, or dessert. Infused with real vanilla for unforgettable flavor.
Ingredients
- 2 cups heavy cream
- 1 cup whole milk
- 3/4 cup granulated sugar
- 1 vanilla bean, split lengthwise and seeds scraped (or 2 teaspoons pure vanilla extract)
- 6 large egg yolks
- Pinch of salt
Instructions
- Vanilla Infusion: In a medium saucepan, combine heavy cream, whole milk, and granulated sugar. If using a vanilla bean, split it lengthwise, scrape the seeds, and add both seeds and pod to the saucepan. Add a pinch of salt.
- Heat the mixture over medium heat until it just simmers around the edges (tiny bubbles form). Do not boil.
- Remove from heat, cover, and let steep for at least 30 minutes (or up to an hour) to infuse the vanilla flavor.
- After steeping, remove the vanilla bean pod (if used).
- Tempering Egg Yolks: In a medium bowl, whisk egg yolks until light and slightly pale.
- Slowly drizzle about 1/2 cup of the warm cream mixture into the egg yolks while whisking constantly.
- Continue adding the warm cream mixture, a little at a time, whisking constantly, until you’ve added about half of the cream mixture to the egg yolks.
- Pour the egg yolk mixture back into the saucepan with the remaining cream mixture.
- Cooking the Cream Base: Place the saucepan back over medium-low heat.
- Cook, stirring constantly with a wooden spoon or heat-resistant spatula, until the mixture thickens enough to coat the back of the spoon (about 8-12 minutes).
- To test for doneness, dip the back of the spoon into the cream mixture. Then, run your finger across the coated spoon. If the line you draw with your finger holds its shape and doesn’t immediately run back together, the cream base is ready.
- Be careful not to overcook the cream base! If it starts to boil or curdle, it’s overcooked. If this happens, immediately remove the saucepan from the heat and whisk vigorously to try to smooth it out. You can also strain the mixture through a fine-mesh sieve to remove any lumps.
- If using vanilla extract, stir it in now.
- Chilling and Serving: Strain the cream base through a fine-mesh sieve into a clean bowl.
- Cover the bowl with plastic wrap, pressing the plastic wrap directly onto the surface of the cream.
- Refrigerate for at least 4 hours, or preferably overnight.
- Serve chilled on its own, as a topping for desserts, or as a filling for pastries.
- For an extra touch, you can whip the chilled vanilla cream with an electric mixer until it forms soft peaks.
Notes
- Use high-quality ingredients for the best flavor.
- Do not boil the cream mixture.
- Temper the egg yolks slowly to prevent scrambling.
- Cook the cream base over low heat.
- Strain the cream base for a smooth texture.
- Chill the vanilla cream thoroughly.
- Prep Time: 15 minutes
- Cook Time: 8 minutes
Leave a Comment