
Strawberry Lemonade Jam: Imagine capturing the essence of summer in a jar. That’s precisely what this delightful recipe allows you to do! Forget those store-bought jams that taste artificial and lack that homemade touch. We’re diving into a world of vibrant flavors, creating a spread that’s bursting with sunshine and the perfect balance of sweet and tart.
While jam-making has been around for centuries, a combination like Strawberry Lemonade Jam is a relatively modern twist, born from the desire to elevate classic flavors. Think of it as a culinary love letter to warm afternoons spent sipping refreshing lemonade under the shade of a strawberry-laden tree. It’s a celebration of simple pleasures and the joy of preserving seasonal bounty.
People adore this jam for its incredibly versatile flavor profile. The sweetness of ripe strawberries is beautifully complemented by the zesty tang of lemon, creating a taste sensation that’s both comforting and invigorating. It’s fantastic on toast, scones, or even as a glaze for grilled chicken or pork. Plus, the vibrant color makes it a stunning addition to any breakfast table or gift basket. Get ready to experience a jam that’s not just delicious, but also a little bit magical!

Ingredients:
- 6 cups crushed strawberries (about 3 lbs fresh strawberries, hulled)
- 1/4 cup freshly squeezed lemon juice (from about 2 large lemons)
- 7 cups granulated sugar
- 1 (3 ounce) package liquid pectin
- 1 tablespoon butter (optional, to reduce foaming)
Preparing the Strawberries:
- First things first, let’s get those strawberries ready! Wash your strawberries thoroughly under cool running water. This is super important to remove any dirt or debris.
- Next, hull the strawberries. I like to use a small paring knife for this, but you can also use a strawberry huller if you have one. Just remove the green tops.
- Now, for the crushing! You have a few options here. You can use a potato masher for a chunkier jam, or a food processor for a smoother consistency. If using a food processor, pulse the strawberries until they are finely chopped but not completely pureed. We want some texture!
- Measure out 6 cups of crushed strawberries and set aside. Accuracy is key for proper jam setting!
Preparing the Jars and Equipment:
- While the strawberries are resting, let’s get our canning equipment ready. This is a crucial step for ensuring your jam is shelf-stable.
- Sterilize your jars. There are a few ways to do this. My preferred method is to wash the jars in hot, soapy water, rinse them well, and then place them in a boiling water canner filled with water. Bring the water to a boil and boil the jars for 10 minutes. Remove the jars from the canner using a jar lifter and place them upside down on a clean towel.
- Alternatively, you can sterilize the jars in the dishwasher by running them through a hot cycle with a sanitizing option. Make sure the jars are still hot when you fill them with jam.
- Prepare your lids and rings. Wash the lids and rings in hot, soapy water. You no longer need to simmer the lids in hot water, as the modern lids are designed to seal without this step. Just keep them clean and ready to go.
- Set up your boiling water canner. Fill the canner with enough water to cover the jars by at least 1 inch. Bring the water to a boil.
- Gather your other equipment: a jar lifter, a wide-mouth funnel, a ladle, a magnetic lid lifter (optional), and a clean, damp cloth.
Making the Strawberry Lemonade Jam:
- Now for the fun part making the jam! In a large, heavy-bottomed pot (stainless steel or enamel-coated is best), combine the crushed strawberries, lemon juice, and sugar.
- Stir the mixture well to combine. The lemon juice not only adds a lovely tartness but also helps with the setting process.
- Add the butter (if using). The butter helps to reduce foaming during cooking, resulting in a clearer jam. It’s optional, but I find it makes a difference.
- Place the pot over medium-high heat and bring the mixture to a full rolling boil that cannot be stirred down. This is important for activating the pectin.
- Once the mixture reaches a full rolling boil, add the liquid pectin all at once. Stir constantly for 1 minute, maintaining the full rolling boil.
- Remove the pot from the heat. Skim off any foam that has formed on the surface using a metal spoon. This will give your jam a clearer appearance.
Filling the Jars:
- Carefully ladle the hot jam into the sterilized jars, leaving 1/4 inch headspace. Headspace is the space between the top of the jam and the top of the jar. This is crucial for proper sealing.
- Wipe the rims of the jars with a clean, damp cloth to remove any spills or drips. This will ensure a good seal.
- Place a lid on each jar, and then screw on a ring until it is fingertip tight. Fingertip tight means that the ring is snug but not overly tightened.
Processing the Jars:
- Using a jar lifter, carefully lower the filled jars into the boiling water canner. Make sure the jars are not touching each other or the sides of the canner.
- The water should cover the jars by at least 1 inch. If necessary, add more boiling water.
- Bring the water back to a rolling boil. Once boiling, process the jars for 10 minutes. Adjust processing time for altitude. If you live at an altitude of 1,001 to 3,000 feet, process for 15 minutes. If you live at an altitude of 3,001 to 6,000 feet, process for 20 minutes. If you live at an altitude of 6,001 to 8,000 feet, process for 25 minutes. If you live at an altitude of 8,001 to 10,000 feet, process for 30 minutes.
- After processing, turn off the heat and remove the lid from the canner. Let the jars sit in the hot water for 5 minutes before removing them. This helps to prevent siphoning (loss of liquid from the jars).
- Using a jar lifter, carefully remove the jars from the canner and place them on a towel-lined surface, leaving at least 1 inch of space between the jars.
- Let the jars cool completely, undisturbed, for 12-24 hours. As the jars cool, you should hear a popping sound as the lids seal.
Checking the Seals and Storing the Jam:
- After the jars have cooled completely, check the seals. Press down on the center of each lid. If the lid does not flex or move, it is sealed. If the lid flexes or pops up and down, it is not sealed.
- If a jar is not sealed, you have a few options. You can reprocess the jar with a new lid, or you can store the jam in the refrigerator and use it within a few weeks.
- Remove the rings from the sealed jars. This is important because if a jar is not properly sealed, the ring can create a false seal.
- Wash the jars with soap and water to remove any sticky residue.
- Label the jars with the date and contents.
- Store the sealed jars in a cool, dark, and dry place. Properly canned jam can be stored for up to 1 year.
- Once opened, store the jam in the refrigerator.
Tips for Success:
- Use fresh, high-quality strawberries. The flavor of your jam will only be as good as the strawberries you use.
- Measure accurately. Accurate measurements are essential for proper jam setting.
- Don’t overcook the jam. Overcooking can result in a tough, rubbery jam.
- Be patient. Canning takes time and attention to detail, but the results are well worth it!
Troubleshooting:
- Jam didn’t set: There are several reasons why your jam might not set. It could be due to inaccurate measurements, undercooking, or insufficient pectin. You can try re-cooking the jam with more pectin, but sometimes it’s just best to use it as a sauce or topping.
- Jam is too thick: Overcooking is the most common cause of overly thick jam. Be sure to follow the cooking times carefully.
- Mold growth: Mold growth indicates that the jar was not properly sealed or that the jam was contaminated. Discard any jam with mold growth.
Conclusion:
This Strawberry Lemonade Jam isn’t just another preserve; it’s a burst of sunshine in a jar, a testament to the simple joys of combining sweet strawberries with the zesty tang of lemonade. I truly believe this recipe is a must-try for anyone who loves homemade goodness and wants to elevate their breakfast, brunch, or even dessert game. The vibrant color alone is enough to brighten any table, but the flavor? Oh, the flavor is where this jam truly shines! It’s the perfect balance of sweet and tart, a delightful dance on your taste buds that will leave you wanting more.
Why is this Strawberry Lemonade Jam a must-try? Because it’s incredibly easy to make, uses readily available ingredients, and delivers a flavor explosion that’s far superior to anything you can buy in a store. Plus, the satisfaction of creating something so delicious from scratch is simply unmatched. Imagine spreading this jam on warm, buttery toast on a lazy Sunday morning, or using it as a filling for delicate pastries. The possibilities are endless!
But the fun doesn’t stop there! Let’s talk serving suggestions and variations. While this jam is divine on its own, consider pairing it with creamy goat cheese on crackers for a sophisticated appetizer. Or, swirl it into plain yogurt for a quick and healthy breakfast. For a truly decadent treat, use it as a glaze for grilled chicken or pork the sweet and tangy flavor will create a mouthwatering caramelized crust.
Looking for variations? Get creative! Add a pinch of ginger or a dash of vanilla extract to the jam while it’s simmering for an extra layer of flavor. For a spicier kick, incorporate a finely chopped jalapeño pepper (remove the seeds for less heat). If you’re feeling adventurous, try using different types of berries in combination with the strawberries, like raspberries or blueberries. Each variation will bring a unique twist to this already amazing recipe.
I’ve personally made this Strawberry Lemonade Jam countless times, and it’s always a crowd-pleaser. From gifting it to friends and family to using it in my own kitchen creations, it’s become a staple in my pantry. And I know it can become one in yours too!
So, what are you waiting for? Gather your ingredients, put on your apron, and get ready to create some magic in your kitchen. I promise you won’t regret it. This recipe is foolproof, and the results are simply outstanding.
Don’t be shy! Once you’ve tried this recipe, I’d love to hear about your experience. Share your photos, your variations, and your serving suggestions in the comments below. Let’s create a community of jam-making enthusiasts and inspire each other with our culinary creations. I’m confident that you’ll fall in love with this Strawberry Lemonade Jam just as much as I have. Happy jamming! I am sure that you will find that making your own
Strawberry Lemonade Jam
is a rewarding and delicious experience.
Strawberry Lemonade Jam: The Ultimate Sweet & Tart Recipe
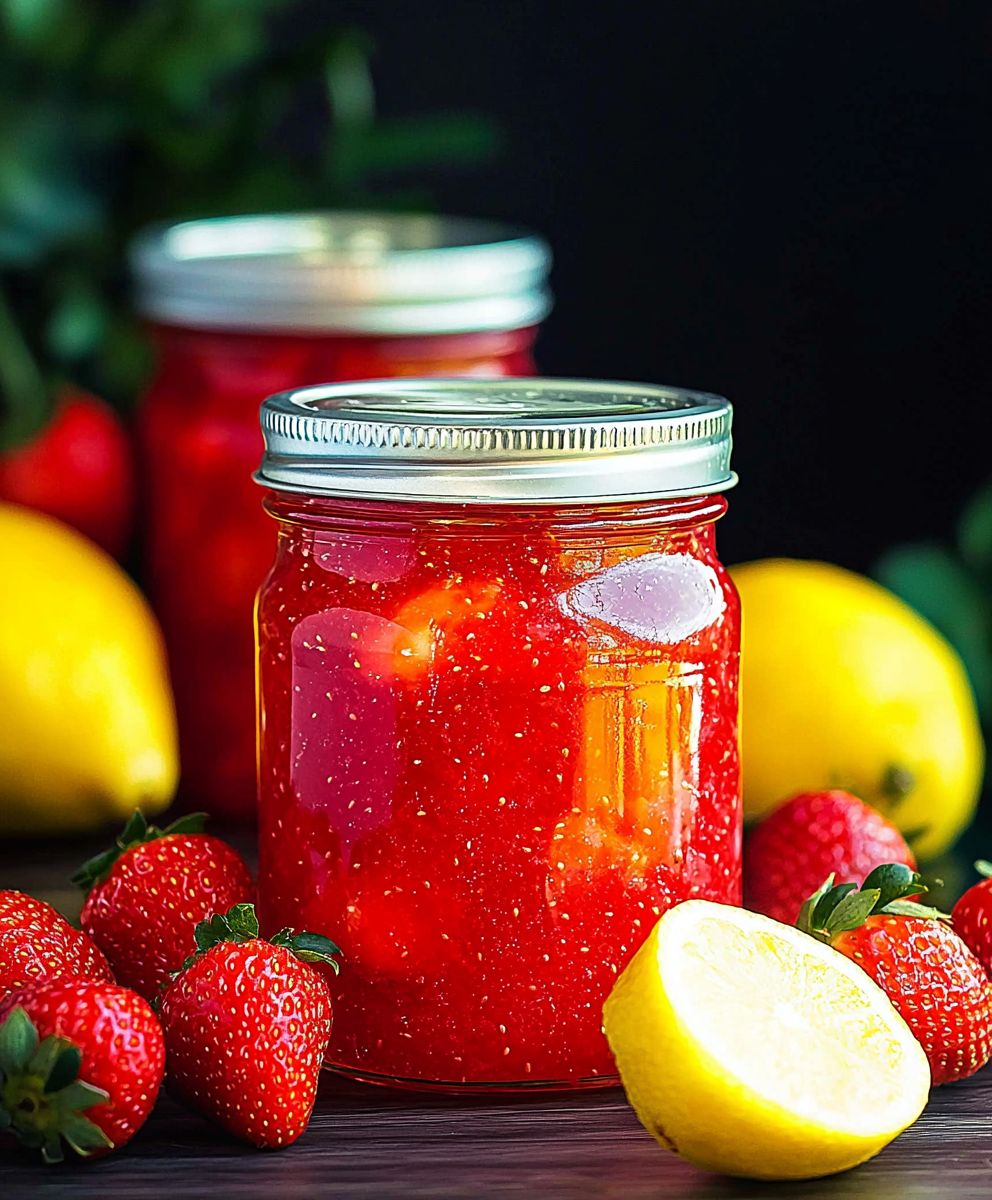
Bright and flavorful homemade Strawberry Lemonade Jam, perfect for spreading on toast, biscuits, or scones. This recipe uses fresh strawberries and lemon juice for a delicious, tangy twist on classic strawberry jam.
Ingredients
- 6 cups crushed strawberries (about 3 lbs fresh strawberries, hulled)
- 1/4 cup freshly squeezed lemon juice (from about 2 large lemons)
- 7 cups granulated sugar
- 1 (3 ounce) package liquid pectin
- 1 tablespoon butter (optional, to reduce foaming)
Instructions
- Prepare Strawberries: Wash, hull, and crush strawberries using a potato masher or food processor. Measure out 6 cups.
- Sterilize Jars: Sterilize jars by boiling them in a water bath canner for 10 minutes, or by running them through a hot dishwasher cycle with a sanitizing option. Keep jars hot.
- Prepare Lids and Rings: Wash lids and rings in hot, soapy water.
- Combine Ingredients: In a large, heavy-bottomed pot, combine crushed strawberries, lemon juice, and sugar. Stir well. Add butter (if using).
- Cook Jam: Bring the mixture to a full rolling boil over medium-high heat that cannot be stirred down.
- Add Pectin: Add liquid pectin all at once. Stir constantly for 1 minute, maintaining the full rolling boil.
- Remove from Heat: Remove the pot from the heat. Skim off any foam.
- Fill Jars: Ladle hot jam into sterilized jars, leaving 1/4 inch headspace.
- Wipe Rims: Wipe the rims of the jars with a clean, damp cloth.
- Seal Jars: Place a lid on each jar, and then screw on a ring until it is fingertip tight.
- Process Jars: Lower the filled jars into a boiling water canner. Ensure water covers jars by at least 1 inch. Bring to a rolling boil and process for 10 minutes (adjust for altitude: 15 minutes for 1,001-3,000 feet, 20 minutes for 3,001-6,000 feet, 25 minutes for 6,001-8,000 feet, 30 minutes for 8,001-10,000 feet).
- Cool Jars: Turn off heat, remove canner lid, and let jars sit in hot water for 5 minutes. Remove jars and place on a towel-lined surface, leaving space between them.
- Cool Completely: Let the jars cool completely, undisturbed, for 12-24 hours.
- Check Seals: Press down on the center of each lid. If it doesn’t flex, it’s sealed. Reprocess unsealed jars or refrigerate.
- Remove Rings: Remove rings from sealed jars.
- Wash and Label: Wash jars to remove residue. Label with date and contents.
- Store: Store sealed jars in a cool, dark, and dry place for up to 1 year. Refrigerate after opening.
Notes
- Use fresh, high-quality strawberries for the best flavor.
- Accurate measurements are crucial for proper jam setting.
- The lemon juice not only adds a lovely tartness but also helps with the setting process.
- The butter helps to reduce foaming during cooking, resulting in a clearer jam. It’s optional, but I find it makes a difference.
- Don’t overcook the jam, as it can result in a tough, rubbery texture.
- Adjust processing time for altitude.
- If a jar is not sealed, you can reprocess the jar with a new lid, or you can store the jam in the refrigerator and use it within a few weeks.
- Remove the rings from the sealed jars. This is important because if a jar is not properly sealed, the ring can create a false seal.
- Mold growth indicates that the jar was not properly sealed or that the jam was contaminated. Discard any jam with mold growth.


Leave a Comment