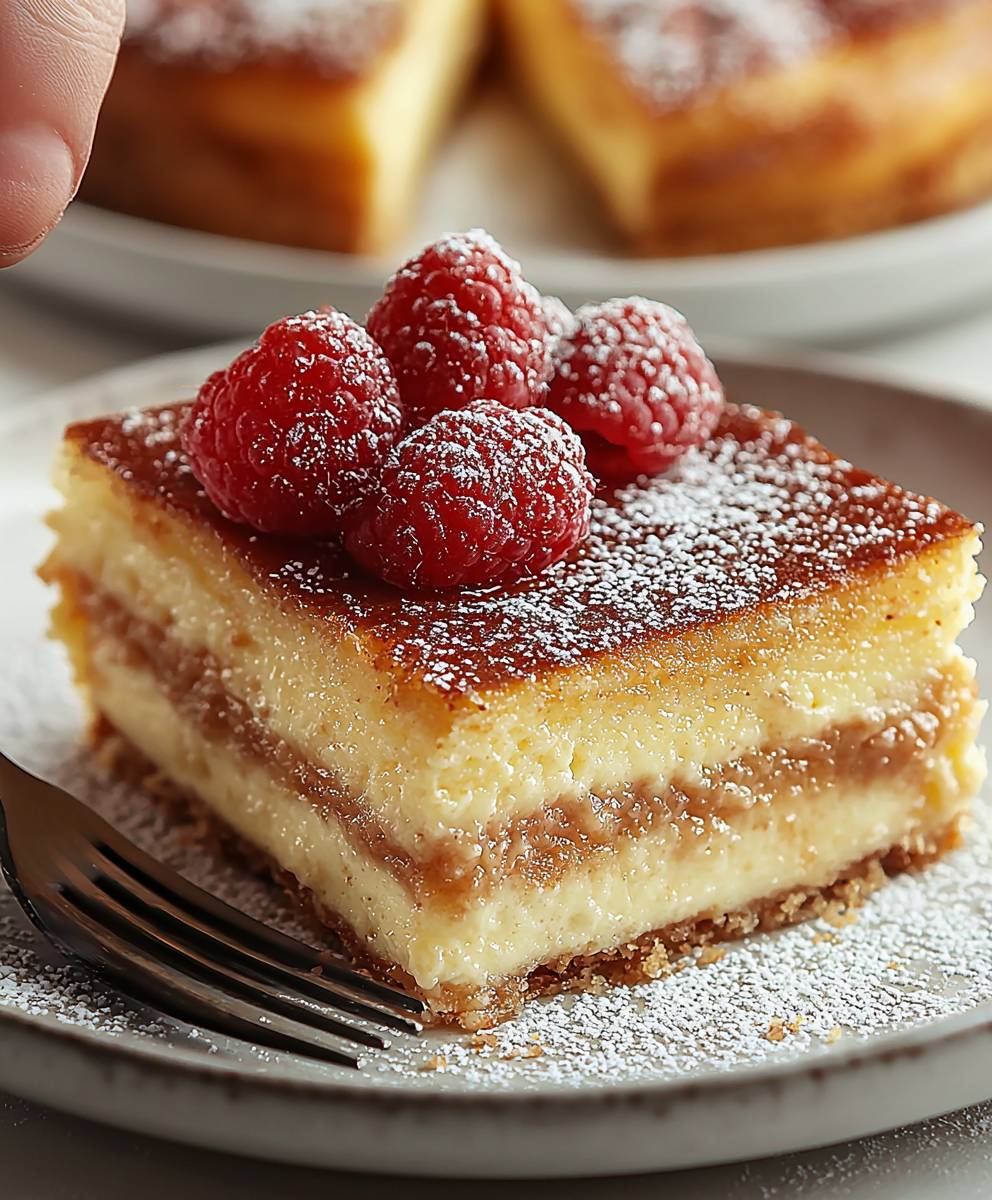
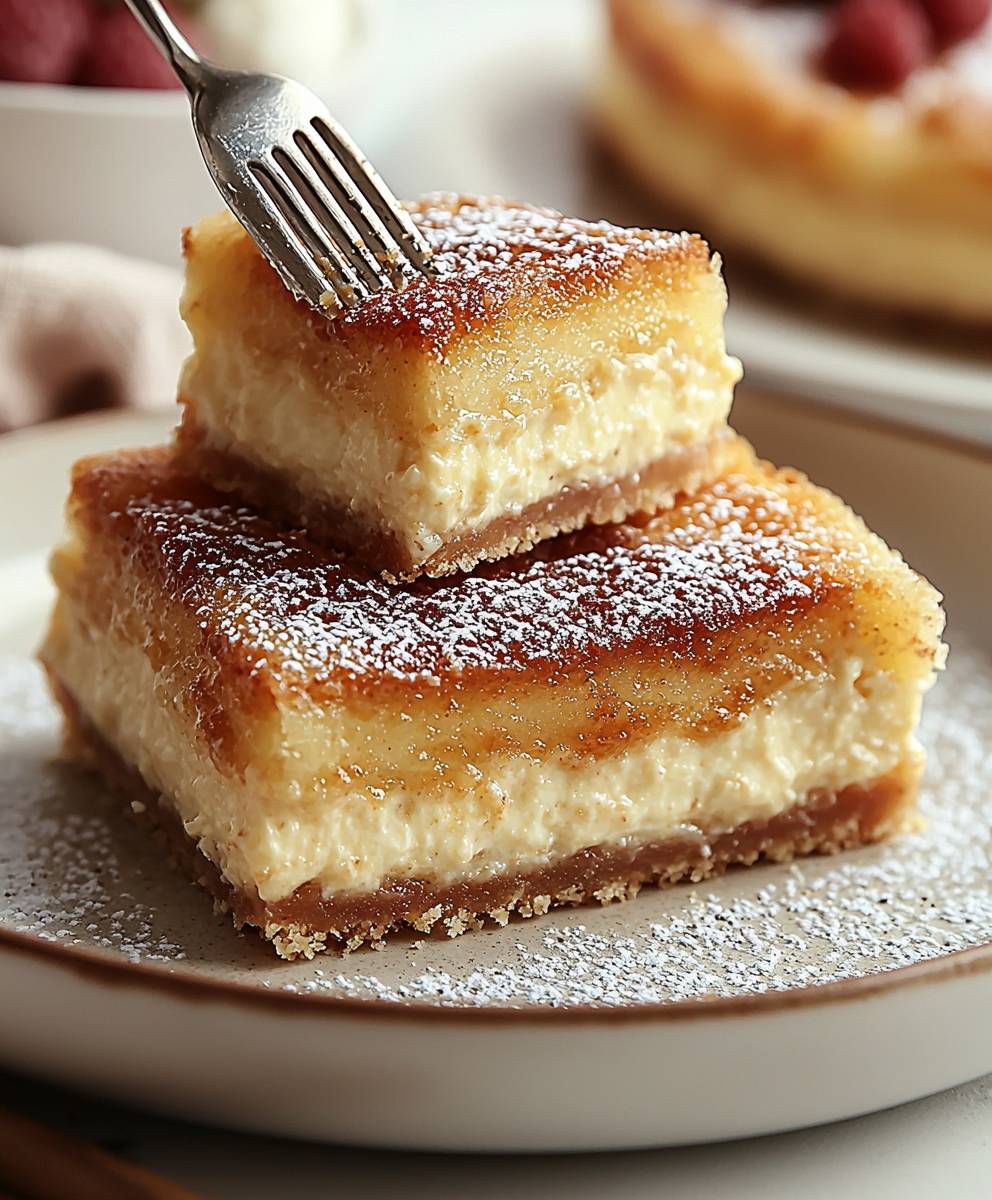
Sopapilla Cheesecake: Prepare to be amazed by this delightful dessert that perfectly marries the warm, comforting flavors of a classic sopapilla with the creamy indulgence of cheesecake! Imagine biting into a golden, cinnamon-sugar-dusted crust, giving way to a smooth, tangy cheesecake filling. It’s a taste sensation that will have everyone begging for seconds.
Sopapillas themselves have a rich history, deeply rooted in Southwestern cuisine. These pillowy, fried pastries are often served with honey, and are a staple in many Hispanic households. The idea of transforming this beloved treat into a cheesecake is pure genius, offering a unique twist on two already fantastic desserts. This Sopapilla Cheesecake recipe takes the best of both worlds and combines them into one unforgettable dish.
What makes this dessert so irresistible? It’s the perfect balance of textures and flavors. The slightly crispy, cinnamon-sugar topping provides a delightful contrast to the creamy, melt-in-your-mouth cheesecake filling. Plus, it’s surprisingly easy to make! Whether you’re looking for a show-stopping dessert for a special occasion or simply want to treat yourself to something extraordinary, this Sopapilla Cheesecake is guaranteed to be a crowd-pleaser. Get ready to experience a dessert that’s both comforting and decadent you won’t be disappointed!
Ingredients:
- For the Crust:
- 1 (10-count) package large flour tortillas
- 1 cup (2 sticks) unsalted butter, melted
- 1 cup granulated sugar
- 1 teaspoon ground cinnamon
- For the Cheesecake Filling:
- 2 (8 ounce) packages cream cheese, softened
- 1 cup granulated sugar
- 1 teaspoon vanilla extract
- 2 large eggs
- ½ cup sour cream
- For the Topping:
- ½ cup honey
- ½ teaspoon ground cinnamon
Preparing the Crust:
- Preheat your oven to 350°F (175°C). Lightly grease a 9×13 inch baking dish. I like to use cooking spray for this, but you can also grease it with butter.
- In a shallow dish, combine the granulated sugar and 1 teaspoon of ground cinnamon. This is what will give our tortilla layers that delicious sopapilla flavor.
- Melt the butter in a separate bowl. Make sure it’s completely melted but not browned.
- Now, the fun part! Dip each tortilla into the melted butter, making sure both sides are coated. Then, dredge the buttered tortilla in the cinnamon-sugar mixture, again coating both sides evenly.
- Fold the tortilla in half, and then in half again, creating a wedge shape. Place the folded tortilla in the prepared baking dish. Repeat this process with all 10 tortillas, arranging them snugly in the dish. You might need to overlap them slightly to fit them all in.
- Bake the tortilla crust for 10-12 minutes, or until the tortillas are golden brown and crispy. Keep a close eye on them, as they can burn quickly. Once baked, remove the crust from the oven and let it cool slightly while you prepare the cheesecake filling.
Making the Cheesecake Filling:
- In a large mixing bowl, beat the softened cream cheese with an electric mixer until smooth and creamy. This is crucial for a lump-free cheesecake, so make sure your cream cheese is truly softened.
- Gradually add the granulated sugar to the cream cheese, beating until well combined. Scrape down the sides of the bowl as needed to ensure everything is evenly mixed.
- Add the vanilla extract and sour cream to the mixture. Beat until just combined. Don’t overmix at this stage, as it can incorporate too much air into the batter.
- Add the eggs one at a time, beating well after each addition. Again, be careful not to overmix. Just beat until the eggs are fully incorporated.
Assembling and Baking the Sopapilla Cheesecake:
- Pour the cheesecake filling evenly over the slightly cooled tortilla crust. Spread it out with a spatula to ensure it reaches all the edges.
- Bake the cheesecake in the preheated oven for 30-35 minutes, or until the filling is set but still has a slight jiggle in the center. The edges should be lightly golden brown.
- Turn off the oven and let the cheesecake cool in the oven with the door slightly ajar for about an hour. This helps prevent cracking.
- Remove the cheesecake from the oven and let it cool completely on a wire rack. Once cooled, cover it with plastic wrap and refrigerate for at least 4 hours, or preferably overnight. This allows the cheesecake to fully set and the flavors to meld together.
Preparing the Honey-Cinnamon Topping:
- In a small bowl, combine the honey and ½ teaspoon of ground cinnamon. Stir well to combine.
Serving the Sopapilla Cheesecake:
- Before serving, drizzle the honey-cinnamon mixture evenly over the top of the cheesecake.
- Cut the cheesecake into squares and serve chilled. You can also dust the top with a little extra cinnamon for a more festive look.
- Enjoy! This Sopapilla Cheesecake is best served cold. It’s a delightful combination of crispy, cinnamon-sugar tortillas and creamy, tangy cheesecake.
Tips and Variations:
- Tortilla Size: I recommend using large (10-inch) flour tortillas for this recipe. If you use smaller tortillas, you may need to adjust the baking time and the amount of filling.
- Cream Cheese: Make sure your cream cheese is completely softened before you start making the filling. This will help prevent lumps and ensure a smooth, creamy texture.
- Baking Time: The baking time may vary depending on your oven. Keep a close eye on the cheesecake and bake it until the filling is set but still has a slight jiggle in the center.
- Cooling Time: Allowing the cheesecake to cool slowly in the oven and then in the refrigerator is crucial for preventing cracks. Be patient and don’t rush the cooling process.
- Honey: You can use any type of honey you like for the topping. I prefer a mild honey, but you can also use a more flavorful honey for a bolder taste.
- Cinnamon: Feel free to adjust the amount of cinnamon to your liking. If you’re a big fan of cinnamon, you can add a little extra to the crust, the filling, and the topping.
- Nuts: For added texture and flavor, you can sprinkle chopped nuts (such as pecans or walnuts) over the top of the cheesecake before serving.
- Fruit: You can also add a layer of fruit (such as berries or sliced peaches) to the top of the cheesecake before serving.
- Chocolate: For a chocolatey twist, you can add a few tablespoons of cocoa powder to the cheesecake filling.
- Spicy Kick: For a little heat, add a pinch of cayenne pepper to the cinnamon-sugar mixture for the tortillas.
- Make it Ahead: This cheesecake is a great make-ahead dessert. You can prepare it up to 2 days in advance and store it in the refrigerator until you’re ready to serve it.
- Serving Suggestions: Serve this Sopapilla Cheesecake with a scoop of vanilla ice cream or a dollop of whipped cream for an extra special treat. It’s also delicious with a cup of coffee or tea.
Troubleshooting:
- Cracked Cheesecake: If your cheesecake cracks, don’t worry! It’s still delicious. You can cover the cracks with the honey-cinnamon topping or a layer of whipped cream. To prevent cracking in the future, make sure to cool the cheesecake slowly in the oven and then in the refrigerator.
- Soggy Crust: If your crust is soggy, it could be because you didn’t bake it long enough or because the filling was too wet. Make sure to bake the crust until it’s golden brown and crispy, and don’t overmix the cheesecake filling.
- Lumpy Filling: If your filling is lumpy, it could be because your cream cheese wasn’t softened enough. Make sure to soften the cream cheese completely before you start making the filling. You can also try using an electric mixer to beat the cream cheese until it’s smooth and creamy.
- Burnt Crust: If your crust burns, it could be because your oven is too hot or because you baked the crust for too long. Make sure to preheat your oven to the correct temperature and keep a close eye on the crust while it’s baking. If the crust starts to brown too quickly, you can cover it with foil.
Nutritional Information (Approximate):
Please note that the nutritional information is an estimate and may vary depending on the specific ingredients you use.
- Calories: 450-550 per serving
- Fat: 25-35g
- Saturated Fat: 15-20g
- Cholesterol: 150-200mg
- Sodium: 200-300mg
- Carbohydrates: 40-50g
- Sugar: 30-40g
- Protein: 5-7g
Enjoy this delightful Sopapilla Cheesecake! It’s a guaranteed crowd-pleaser!

Conclusion:
This Sopapilla Cheesecake isn’t just a dessert; it’s an experience. The warm, cinnamon-sugar crust gives way to a creamy, tangy filling that’s simply irresistible. It’s the perfect balance of textures and flavors, making it a guaranteed crowd-pleaser. I truly believe this recipe is a must-try because it’s surprisingly easy to make, yet delivers a show-stopping result that will impress your family and friends. It’s a delightful twist on a classic dessert, offering a unique and satisfying treat that you won’t find anywhere else. But the best part? It’s incredibly versatile! While it’s absolutely divine served warm, straight from the oven, it’s equally delicious chilled. For a truly decadent experience, try topping it with a scoop of vanilla ice cream or a dollop of whipped cream. A drizzle of honey or a sprinkle of chopped nuts would also be fantastic additions. If you’re feeling adventurous, consider adding a layer of fruit filling, like cherry or apple, before baking. This will add another dimension of flavor and texture that will elevate your Sopapilla Cheesecake to the next level. For a festive touch, especially around the holidays, you could use gingerbread spice instead of cinnamon in the sugar mixture. This will give it a warm, comforting flavor that’s perfect for the season. Another fun variation is to use different types of cheese in the filling. Try adding a bit of mascarpone or ricotta cheese for a richer, creamier texture. You could even experiment with different extracts, like almond or lemon, to customize the flavor to your liking. The possibilities are endless! I’ve made this Sopapilla Cheesecake countless times, and it’s always a hit. It’s the perfect dessert for potlucks, family gatherings, or even just a cozy night in. It’s also a great recipe to make with kids, as they’ll love helping to sprinkle the cinnamon-sugar mixture on top. The simple steps and readily available ingredients make it a stress-free baking experience. So, what are you waiting for? Grab your ingredients and get baking! I’m confident that you’ll love this Sopapilla Cheesecake as much as I do. It’s a truly special dessert that’s sure to become a family favorite. Don’t be afraid to experiment with different variations and make it your own. I’m so excited for you to try this recipe! Once you’ve made it, please come back and share your experience in the comments below. I’d love to hear what you think and see any variations you’ve tried. Did you add a fruit filling? Did you use a different type of cheese? Did you serve it with ice cream or whipped cream? Let me know! Your feedback is invaluable and helps other readers discover new and exciting ways to enjoy this delicious dessert. Happy baking, and I hope you enjoy every bite of your homemade Sopapilla Cheesecake! Print
Sopapilla Cheesecake: The Ultimate Recipe & Baking Guide
- Total Time: 300 minutes
- Yield: 12–16 servings 1x
Description
Crispy cinnamon-sugar tortilla crust layered with creamy cheesecake filling and drizzled with sweet honey-cinnamon.
Ingredients
- 1 (10-count) package large flour tortillas (10-inch)
- 1 cup (2 sticks) unsalted butter, melted
- 1 cup granulated sugar
- 1 teaspoon ground cinnamon
- 2 (8 ounce) packages cream cheese, softened
- 1 cup granulated sugar
- 1 teaspoon vanilla extract
- 2 large eggs
- ½ cup sour cream
- ½ cup honey
- ½ teaspoon ground cinnamon
Instructions
- Preheat oven to 350°F (175°C). Lightly grease a 9×13 inch baking dish.
- In a shallow dish, combine granulated sugar and 1 teaspoon of ground cinnamon.
- Melt butter in a separate bowl.
- Dip each tortilla into the melted butter, coating both sides. Then, dredge in the cinnamon-sugar mixture, coating both sides evenly.
- Fold the tortilla in half, and then in half again, creating a wedge shape. Place the folded tortilla in the prepared baking dish. Repeat with all 10 tortillas, arranging them snugly in the dish, overlapping slightly if needed.
- Bake the tortilla crust for 10-12 minutes, or until golden brown and crispy. Let cool slightly.
- In a large mixing bowl, beat the softened cream cheese with an electric mixer until smooth and creamy.
- Gradually add the granulated sugar to the cream cheese, beating until well combined. Scrape down the sides of the bowl as needed.
- Add the vanilla extract and sour cream to the mixture. Beat until just combined. Don’t overmix.
- Add the eggs one at a time, beating well after each addition. Be careful not to overmix.
- Pour the cheesecake filling evenly over the slightly cooled tortilla crust. Spread it out with a spatula to ensure it reaches all the edges.
- Bake the cheesecake in the preheated oven for 30-35 minutes, or until the filling is set but still has a slight jiggle in the center. The edges should be lightly golden brown.
- Turn off the oven and let the cheesecake cool in the oven with the door slightly ajar for about an hour.
- Remove the cheesecake from the oven and let it cool completely on a wire rack. Once cooled, cover it with plastic wrap and refrigerate for at least 4 hours, or preferably overnight.
- In a small bowl, combine the honey and ½ teaspoon of ground cinnamon. Stir well to combine.
- Before serving, drizzle the honey-cinnamon mixture evenly over the top of the cheesecake.
- Cut the cheesecake into squares and serve chilled. You can also dust the top with a little extra cinnamon for a more festive look.
Notes
- Tortilla Size: Use large (10-inch) flour tortillas.
- Cream Cheese: Ensure cream cheese is completely softened.
- Baking Time: Baking time may vary; watch closely.
- Cooling Time: Cooling slowly prevents cracks.
- Honey: Use your preferred type of honey.
- Cinnamon: Adjust cinnamon to your liking.
- Variations: Consider adding nuts, fruit, chocolate, or a pinch of cayenne pepper.
- Make Ahead: Can be made up to 2 days in advance.
- Serving Suggestions: Serve with ice cream or whipped cream.
- Troubleshooting:
- Cracked Cheesecake: Cover with topping or whipped cream.
- Soggy Crust: Bake longer, don’t overmix filling.
- Lumpy Filling: Soften cream cheese more.
- Burnt Crust: Lower oven temp, cover with foil.
- Prep Time: 30 minutes
- Cook Time: 45 minutes


Leave a Comment