
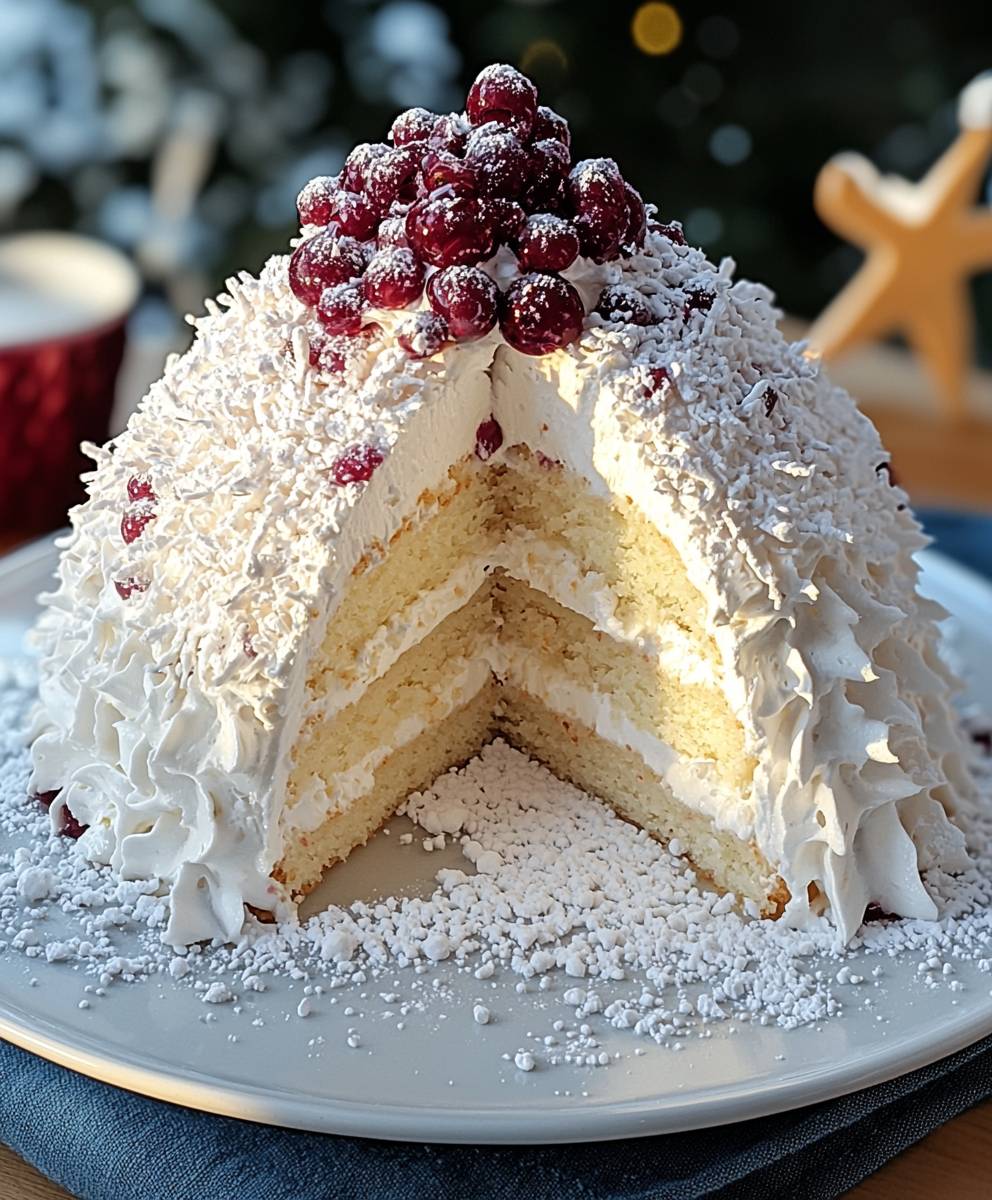
Snowball cake: just the name conjures up images of winter wonderlands and fluffy, sweet delights! Have you ever dreamt of biting into a cloud? Well, this cake comes pretty close. It’s a dessert that’s as visually stunning as it is delicious, making it the perfect centerpiece for any holiday gathering or special occasion.
While the exact origins of snowball cake are a bit hazy, its popularity surged in the mid-20th century, becoming a staple in many American households, particularly during the Christmas season. Its charming appearance, reminiscent of a freshly fallen snowball, made it an instant hit. But it’s not just about the looks; this cake boasts a tender crumb, often infused with coconut and a creamy frosting that melts in your mouth.
What’s not to love? The combination of the moist cake, the sweet frosting, and the delicate coconut coating creates a symphony of textures and flavors that’s simply irresistible. Plus, it’s surprisingly easy to make! Whether you’re a seasoned baker or just starting out, this recipe is sure to impress. Get ready to create a show-stopping dessert that will have everyone asking for seconds!

Ingredients:
- For the Cake:
- 2 1/4 cups all-purpose flour
- 1 1/2 cups granulated sugar
- 3 1/2 teaspoons baking powder
- 1 teaspoon salt
- 3/4 cup (1 1/2 sticks) unsalted butter, softened
- 1 cup milk
- 2 large eggs
- 1 teaspoon vanilla extract
- For the Coconut Cream Filling:
- 1 (13.5 ounce) can full-fat coconut milk, refrigerated overnight
- 1/2 cup powdered sugar
- 1 teaspoon vanilla extract
- For the Coconut Frosting:
- 1 cup (2 sticks) unsalted butter, softened
- 3 cups powdered sugar
- 1/2 cup milk
- 1 teaspoon vanilla extract
- 1/4 teaspoon salt
- For Decoration:
- 4 cups sweetened shredded coconut
Preparing the Cake Layers:
- Preheat and Prepare Pans: First things first, let’s get our oven preheated to 350°F (175°C). While it’s heating up, grease and flour two 9-inch round cake pans. I like to use baking spray with flour already in it it makes life so much easier! But good old butter and flour work just as well. Make sure you get every nook and cranny to prevent sticking.
- Combine Dry Ingredients: In a large bowl, whisk together the flour, sugar, baking powder, and salt. Whisking is key here to ensure the baking powder and salt are evenly distributed. Nobody wants a salty bite of cake!
- Cream Butter and Add Milk: Add the softened butter to the dry ingredients. Using an electric mixer (a stand mixer is great, but a hand mixer works too!), mix on low speed until the mixture resembles coarse crumbs. Gradually add the milk, mixing until just combined. Don’t overmix at this stage!
- Add Eggs and Vanilla: Add the eggs one at a time, mixing well after each addition. Then, stir in the vanilla extract. The batter should be smooth and creamy at this point.
- Divide and Bake: Divide the batter evenly between the prepared cake pans. I like to use a kitchen scale to ensure they’re perfectly even, but eyeballing it works too. Bake for 25-30 minutes, or until a wooden skewer inserted into the center comes out clean. Keep a close eye on them ovens can vary!
- Cool the Cakes: Let the cakes cool in the pans for 10 minutes before inverting them onto a wire rack to cool completely. This is crucial! If you try to remove them too soon, they might break. Patience is a virtue, especially when it comes to baking.
Making the Coconut Cream Filling:
- Prepare Coconut Cream: This is the most important step! You need to refrigerate a can of full-fat coconut milk overnight (or even longer). This allows the thick coconut cream to separate from the watery liquid. When you open the can, carefully scoop out the thick cream from the top, leaving the watery liquid behind. You can save the liquid for smoothies or other recipes.
- Whip the Cream: In a medium bowl, beat the coconut cream with an electric mixer until smooth and fluffy. This usually takes a few minutes.
- Add Sweetness and Flavor: Gradually add the powdered sugar and vanilla extract, beating until well combined. Taste and adjust the sweetness if needed. Some people prefer a sweeter filling, others less so.
Preparing the Coconut Frosting:
- Cream Butter: In a large bowl, beat the softened butter with an electric mixer until light and fluffy. This is the foundation of a good frosting, so take your time and really whip it up.
- Add Powdered Sugar: Gradually add the powdered sugar, one cup at a time, beating well after each addition. This prevents a powdered sugar cloud from erupting in your kitchen!
- Add Milk and Vanilla: Gradually add the milk and vanilla extract, beating until the frosting is smooth and creamy. If the frosting is too thick, add a little more milk. If it’s too thin, add a little more powdered sugar.
- Add Salt: Stir in the salt. A pinch of salt enhances the sweetness and balances the flavors.
Assembling the Snowball Cake:
- Level the Cakes (Optional): If your cake layers are uneven, use a serrated knife to level them. This will give your cake a more professional look. I usually don’t bother unless they’re really lopsided.
- Place First Layer: Place one cake layer on a serving plate or cake stand.
- Add Coconut Cream Filling: Spread the coconut cream filling evenly over the first cake layer. Make sure to spread it all the way to the edges.
- Place Second Layer: Carefully place the second cake layer on top of the filling.
- Frost the Cake: Frost the entire cake with the coconut frosting. I like to start with a thin crumb coat, which is a thin layer of frosting that seals in any loose crumbs. Then, I chill the cake for about 30 minutes before applying the final layer of frosting. This helps to prevent crumbs from getting into the final layer.
- Decorate with Coconut: Generously cover the entire cake with sweetened shredded coconut. Press the coconut gently into the frosting to ensure it adheres well. This is what gives the cake its “snowball” appearance.
- Chill and Serve: Chill the cake for at least 30 minutes before serving. This allows the frosting to set and the flavors to meld together. I find that the cake tastes even better the next day!
Tips for Success:
- Use Room Temperature Ingredients: Make sure your butter, eggs, and milk are at room temperature. This helps them to emulsify properly, resulting in a smoother batter and a more tender cake.
- Don’t Overmix: Overmixing the batter can develop the gluten in the flour, resulting in a tough cake. Mix until just combined.
- Use Full-Fat Coconut Milk: For the coconut cream filling, it’s essential to use full-fat coconut milk. Light coconut milk won’t separate properly and you won’t get the thick, creamy filling you’re looking for.
- Chill the Cake: Chilling the cake before serving allows the frosting to set and the flavors to meld together. It also makes the cake easier to slice.
- Get Creative with Decorations: While shredded coconut is the classic decoration for a snowball cake, you can get creative and add other toppings, such as sprinkles, chocolate shavings, or fresh berries.
Variations:
- Chocolate Snowball Cake: Add 1/2 cup of cocoa powder to the dry ingredients for a chocolate version.
- Pineapple Snowball Cake: Add a layer of crushed pineapple to the filling for a tropical twist.
- Coconut Extract: Add 1/2 teaspoon of coconut extract to the cake batter and frosting for an extra coconutty flavor.
Conclusion:
This Snowball Cake isn’t just a dessert; it’s a delightful experience waiting to happen! From the moist, tender crumb to the sweet, coconut-infused frosting, every bite is a little piece of heaven. I truly believe this recipe is a must-try for anyone who loves classic flavors with a touch of elegance. It’s surprisingly easy to make, even for beginner bakers, and the results are guaranteed to impress. The combination of textures and tastes is simply irresistible, making it the perfect centerpiece for any occasion, big or small. But what truly sets this Snowball Cake apart is its versatility. While the recipe as written is absolutely divine, feel free to get creative and put your own spin on it! For a richer, more decadent experience, try adding a layer of chocolate ganache between the cake layers. The dark chocolate will beautifully complement the sweetness of the coconut and create a truly unforgettable dessert. Or, if you’re a fan of nuts, consider adding chopped pecans or walnuts to the frosting for a delightful crunch. For a festive twist, especially around the holidays, you can tint the coconut flakes with a touch of green food coloring to create a “snowy” Christmas tree effect. Alternatively, sprinkle the cake with edible glitter for an extra touch of sparkle and glamour. If you’re serving this cake at a party, consider cutting it into smaller squares or cupcakes for easier handling. You can even top each cupcake with a mini snowball made of frosting and coconut flakes! Serving suggestions are endless! This Snowball Cake pairs perfectly with a scoop of vanilla ice cream or a dollop of whipped cream. A cup of hot coffee or tea is also a wonderful accompaniment. For a truly special treat, try serving it with a glass of dessert wine, such as Moscato or Sauternes. The sweetness of the wine will enhance the flavors of the cake and create a truly memorable experience. I’m so confident that you’ll love this Snowball Cake recipe. It’s a crowd-pleaser that’s sure to become a family favorite. The simplicity of the ingredients combined with the ease of preparation makes it a winner in my book. It’s the perfect dessert to bake when you want something special without spending hours in the kitchen. So, what are you waiting for? Gather your ingredients, preheat your oven, and get ready to bake the most delicious Snowball Cake you’ve ever tasted! I’m absolutely certain that you’ll be thrilled with the results. And most importantly, I’d love to hear about your experience! Once you’ve tried this recipe, please come back and share your thoughts in the comments below. Did you make any variations? What did your family and friends think? I’m always eager to learn from your experiences and see how you’ve made this recipe your own. Don’t hesitate to share photos of your beautiful Snowball Cake creations as well! Happy baking, and I hope you enjoy every single bite! Let me know if you have any questions, I’m here to help! Print
Snowball Cake: The Ultimate Recipe and Baking Guide
- Total Time: 75 minutes
- Yield: 10–12 servings 1x
Description
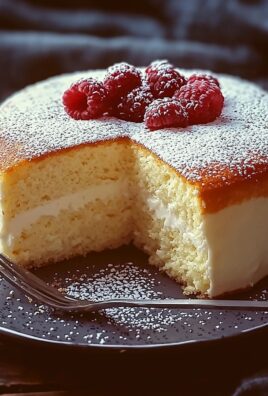
Moist cake layers with coconut cream filling and sweet coconut frosting, covered in shredded coconut. A showstopping dessert!
Ingredients
- 2 1/4 cups all-purpose flour
- 1 1/2 cups granulated sugar
- 3 1/2 teaspoons baking powder
- 1 teaspoon salt
- 3/4 cup (1 1/2 sticks) unsalted butter, softened
- 1 cup milk
- 2 large eggs
- 1 teaspoon vanilla extract
- 1 (13.5 ounce) can full-fat coconut milk, refrigerated overnight
- 1/2 cup powdered sugar
- 1 teaspoon vanilla extract
- 1 cup (2 sticks) unsalted butter, softened
- 3 cups powdered sugar
- 1/2 cup milk
- 1 teaspoon vanilla extract
- 1/4 teaspoon salt
- 4 cups sweetened shredded coconut
Instructions
- Preheat oven to 350°F (175°C). Grease and flour two 9-inch round cake pans.
- In a large bowl, whisk together the flour, sugar, baking powder, and salt.
- Add the softened butter to the dry ingredients. Using an electric mixer, mix on low speed until the mixture resembles coarse crumbs. Gradually add the milk, mixing until just combined.
- Add the eggs one at a time, mixing well after each addition. Then, stir in the vanilla extract.
- Divide the batter evenly between the prepared cake pans. Bake for 25-30 minutes, or until a wooden skewer inserted into the center comes out clean.
- Let the cakes cool in the pans for 10 minutes before inverting them onto a wire rack to cool completely.
- Refrigerate a can of full-fat coconut milk overnight. Open the can and carefully scoop out the thick cream from the top, leaving the watery liquid behind.
- In a medium bowl, beat the coconut cream with an electric mixer until smooth and fluffy.
- Gradually add the powdered sugar and vanilla extract, beating until well combined. Taste and adjust the sweetness if needed.
- In a large bowl, beat the softened butter with an electric mixer until light and fluffy.
- Gradually add the powdered sugar, one cup at a time, beating well after each addition.
- Gradually add the milk and vanilla extract, beating until the frosting is smooth and creamy. If the frosting is too thick, add a little more milk. If it’s too thin, add a little more powdered sugar.
- Stir in the salt.
- If your cake layers are uneven, use a serrated knife to level them.
- Place one cake layer on a serving plate or cake stand.
- Spread the coconut cream filling evenly over the first cake layer.
- Carefully place the second cake layer on top of the filling.
- Frost the entire cake with the coconut frosting. Start with a thin crumb coat, chill for 30 minutes, then apply the final layer of frosting.
- Generously cover the entire cake with sweetened shredded coconut. Press the coconut gently into the frosting.
- Chill the cake for at least 30 minutes before serving.
Notes
- Use room temperature ingredients for best results.
- Don’t overmix the cake batter.
- Use full-fat coconut milk for the filling.
- Chilling the cake before serving allows the frosting to set and the flavors to meld.
- Get creative with decorations!
- Prep Time: 45 minutes
- Cook Time: 30 minutes
Leave a Comment