
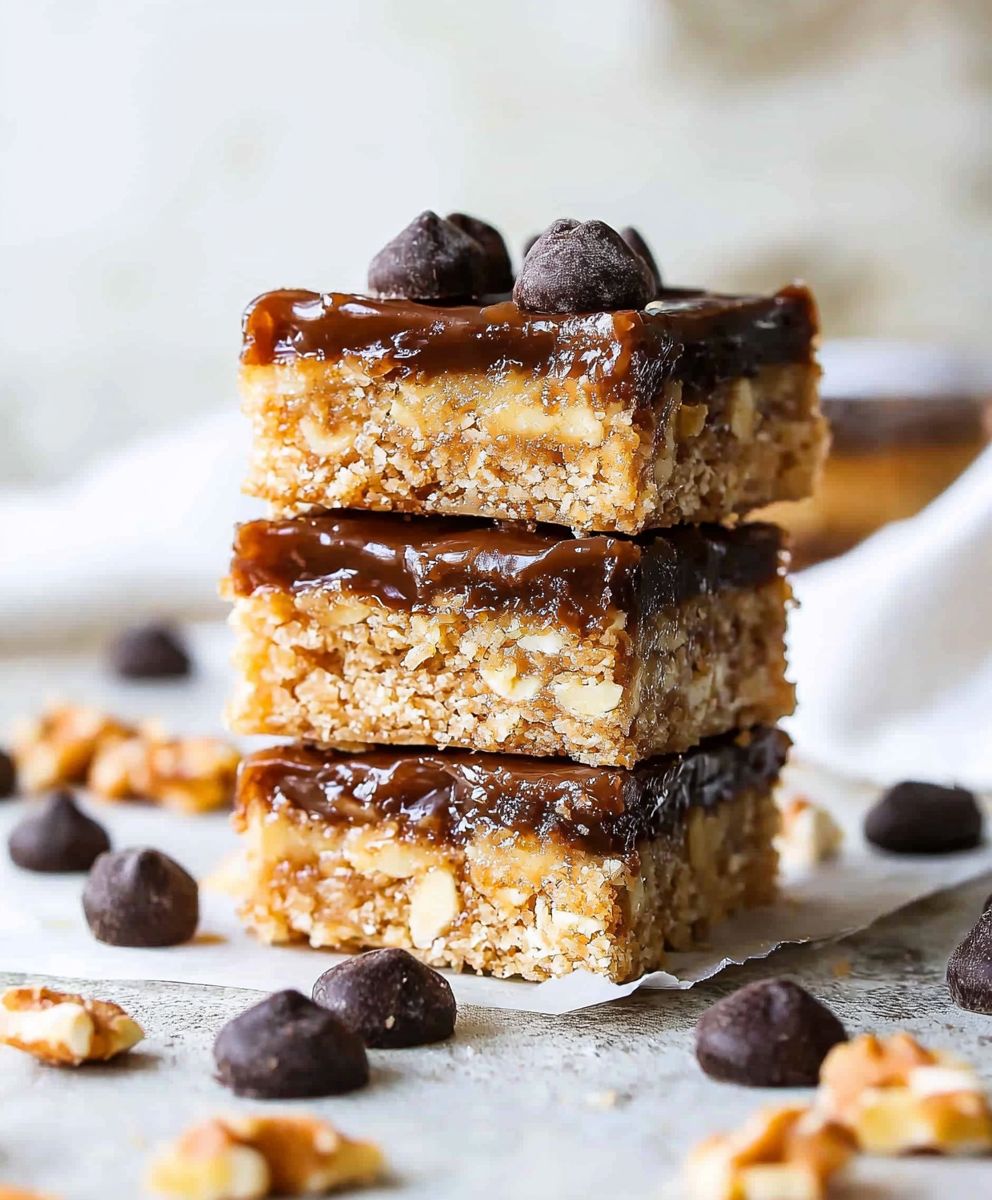
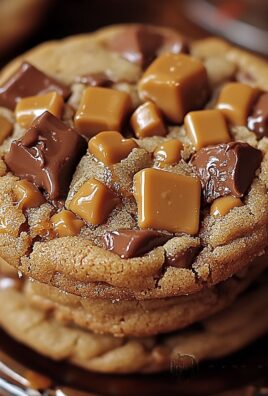
Samoa Bars No Bake: Craving that irresistible combination of caramel, coconut, and chocolate, but don’t want to turn on the oven? You’re in the right place! These no-bake Samoa bars are a dream come true for anyone who loves the classic Girl Scout cookie but wants a quicker, easier, and equally delicious treat.
The inspiration for these bars, of course, comes from the iconic Samoa cookie, known for its chewy caramel, toasted coconut, and rich chocolate drizzle. While the exact origins of the Samoa cookie are debated, its popularity is undeniable. For decades, it has been a beloved part of Girl Scout cookie season, bringing joy to millions. But what if you could enjoy that same incredible flavor year-round, without the wait or the baking?
That’s where these Samoa Bars No Bake come in! People adore this dessert because it perfectly captures the essence of the original cookie in a convenient, no-fuss format. The creamy, melt-in-your-mouth texture, the satisfying crunch of the coconut, and the decadent sweetness of the caramel and chocolate create a symphony of flavors that’s simply irresistible. Plus, the fact that they require absolutely no baking makes them perfect for hot summer days or when you’re short on time. Get ready to experience pure bliss with every bite!

Ingredients:
- For the Crust:
- 2 cups graham cracker crumbs
- 1/2 cup (1 stick) unsalted butter, melted
- 1/4 cup granulated sugar
- For the Caramel Layer:
- 1 cup (2 sticks) unsalted butter
- 1 cup packed light brown sugar
- 1 cup heavy cream
- 1/2 teaspoon sea salt
- 1 teaspoon vanilla extract
- For the Coconut Topping:
- 14 ounces sweetened shredded coconut
- For the Chocolate Drizzle:
- 1 cup semi-sweet chocolate chips
- 1 tablespoon coconut oil (or vegetable oil)
Preparing the Graham Cracker Crust
Okay, let’s get started with the foundation of our no-bake Samoa bars the graham cracker crust! This part is super easy and comes together in just a few minutes. Trust me, it’s the perfect base for all that deliciousness we’re about to pile on top.
- Combine the Ingredients: In a medium-sized bowl, whisk together the graham cracker crumbs, melted butter, and granulated sugar. Make sure everything is evenly distributed. You want the crumbs to be nicely coated with the butter so they stick together properly.
- Press into the Pan: Grab an 8×8 inch baking pan. I like to line mine with parchment paper, leaving an overhang on the sides. This makes it super easy to lift the bars out later and cut them neatly. Press the graham cracker mixture firmly and evenly into the bottom of the pan. I find that using the bottom of a measuring cup helps to get a nice, compact crust.
- Chill the Crust: Pop the pan into the refrigerator and let the crust chill for at least 30 minutes. This will help it firm up and prevent it from crumbling when we add the caramel layer. You can even chill it for longer if you want up to a couple of hours!
Making the Caramel Layer
Now for the star of the show the caramel! This is where the magic happens, and we get that rich, gooey, irresistible flavor that makes Samoa bars so addictive. Don’t be intimidated; it’s easier than you think. Just follow these steps, and you’ll have perfect caramel every time.
- Melt the Butter: In a medium-sized saucepan, melt the butter over medium heat. Keep a close eye on it, and don’t let it burn.
- Add Brown Sugar and Cream: Once the butter is melted, stir in the brown sugar and heavy cream. Whisk everything together until it’s well combined.
- Bring to a Boil: Bring the mixture to a gentle boil, stirring constantly. It’s important to stir continuously to prevent the sugar from burning on the bottom of the pan.
- Simmer and Stir: Once it’s boiling, reduce the heat to low and continue to simmer, stirring constantly, for about 5-7 minutes. The caramel should thicken slightly and turn a beautiful golden brown color. A candy thermometer is helpful here; you’re aiming for around 235-240°F (113-116°C). If you don’t have a thermometer, just look for that thickened consistency and golden color.
- Remove from Heat: Take the saucepan off the heat and stir in the sea salt and vanilla extract. The salt helps to balance the sweetness of the caramel, and the vanilla adds a lovely depth of flavor.
Preparing the Coconut Topping
This is the easiest part! All we need to do is get our coconut ready to be mixed with that luscious caramel. This step ensures the coconut is evenly coated and ready to create that signature Samoa texture.
- Toast the Coconut (Optional): While toasting the coconut is optional, it really enhances the flavor and texture. To toast, spread the shredded coconut in a single layer on a baking sheet. Bake in a preheated oven at 325°F (160°C) for 5-7 minutes, or until lightly golden brown, stirring occasionally to prevent burning. Watch it carefully, as it can burn quickly! Alternatively, you can toast the coconut in a dry skillet over medium heat, stirring constantly until golden brown. Let it cool slightly before using.
- Combine Coconut and Caramel: Pour the warm caramel over the shredded coconut in a large bowl. Stir well to make sure all the coconut is evenly coated with the caramel. This is where your arms get a little workout!
Assembling the Samoa Bars
Now for the fun part putting everything together! This is where our vision of delicious Samoa bars starts to become a reality. Get ready to layer up and create something truly special.
- Spread the Coconut Caramel: Remove the chilled graham cracker crust from the refrigerator. Spread the coconut caramel mixture evenly over the crust. Use a spatula or the back of a spoon to smooth it out and make sure it reaches all the edges.
- Chill Again: Return the pan to the refrigerator and chill for at least 2 hours, or preferably overnight. This allows the caramel to set completely and makes the bars easier to cut. Patience is key here!
Making the Chocolate Drizzle
A Samoa bar wouldn’t be complete without that signature chocolate drizzle! This adds a touch of richness and visual appeal to our already amazing bars. It’s the perfect finishing touch.
- Melt the Chocolate: In a microwave-safe bowl, combine the chocolate chips and coconut oil (or vegetable oil). Microwave in 30-second intervals, stirring in between, until the chocolate is completely melted and smooth. The coconut oil helps to thin the chocolate and gives it a nice shine.
- Drizzle the Chocolate: Remove the chilled bars from the refrigerator. Using a spoon or a piping bag, drizzle the melted chocolate over the top of the bars in a decorative pattern. You can do a simple back-and-forth drizzle, or get creative with swirls and zigzags.
- Final Chill: Return the bars to the refrigerator for about 15-20 minutes to allow the chocolate to set. This will prevent it from smearing when you cut the bars.
Cutting and Serving
The moment we’ve all been waiting for! It’s time to cut these beauties and finally enjoy the fruits of our labor. Get ready for a taste of pure Samoa bliss.
- Cut the Bars: Using a sharp knife, cut the bars into squares or rectangles. If you lined the pan with parchment paper, you can simply lift the bars out of the pan using the overhang and then cut them on a cutting board. This makes it much easier and cleaner.
- Serve and Enjoy: Serve the Samoa bars chilled or at room temperature. Store any leftovers in an airtight container in the refrigerator for up to a week. But let’s be honest, they probably won’t last that long!
Conclusion:
This no-bake Samoa bars recipe is truly a must-try, and I’m not just saying that! The combination of the chewy, coconutty topping, the rich chocolate drizzle, and the satisfyingly crunchy base creates a symphony of textures and flavors that will have everyone begging for more. Forget slaving over a hot oven; this recipe is quick, easy, and delivers incredible results every single time. It’s the perfect treat for potlucks, parties, or simply satisfying your own sweet tooth. Trust me, once you make these, they’ll become a staple in your dessert repertoire. But why is it a must-try? Because it perfectly captures the essence of the beloved Samoa Girl Scout cookie in a convenient, no-bake format. You get all the deliciousness without any of the fuss. Plus, it’s incredibly versatile!Serving Suggestions and Variations:
* Serving: These bars are best served chilled, allowing the chocolate to set completely and the flavors to meld together beautifully. Cut them into squares or rectangles of your desired size. They’re also fantastic with a scoop of vanilla ice cream or a dollop of whipped cream. * Variations: Feel free to experiment with different types of chocolate for the drizzle. Dark chocolate adds a sophisticated bitterness, while milk chocolate provides a classic sweetness. You could even use white chocolate for a visually stunning contrast. For a nuttier flavor, try adding chopped pecans or walnuts to the coconut mixture. If you’re feeling adventurous, a sprinkle of sea salt on top of the chocolate drizzle enhances the sweetness and adds a delightful salty-sweet dimension. * Dietary Considerations: To make these bars gluten-free, simply use gluten-free graham crackers or cookies for the base. For a vegan version, substitute the butter with a vegan butter alternative and use dairy-free chocolate. You can also find vegan caramel sauce to replace the traditional caramel. I’m confident that you’ll absolutely love this recipe. It’s a guaranteed crowd-pleaser and a fantastic way to enjoy the flavors of Samoa cookies without any baking required. The no-bake Samoa bars are a delightful treat that’s perfect for any occasion. So, what are you waiting for? Gather your ingredients, follow the simple steps, and prepare to be amazed. I promise you won’t be disappointed. And now for the best part: I want to hear about your experience! Did you try this recipe? What variations did you make? Did your family and friends love it as much as I do? Share your photos and stories in the comments below. I can’t wait to see your creations and hear your feedback. Let’s spread the joy of these delicious no-bake Samoa bars far and wide! Happy baking (or rather, no-baking!). I am sure that you will enjoy this recipe as much as I do. Print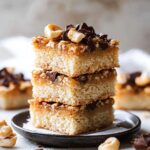
Samoa Bars No Bake: Easy Recipe & Delicious Dessert
- Total Time: 160 minutes
- Yield: 16 bars 1x
Description
No-bake Samoa bars with a graham cracker crust, gooey caramel coconut topping, and a decadent chocolate drizzle. A delicious and easy treat!
Ingredients
- 2 cups graham cracker crumbs
- 1/2 cup (1 stick) unsalted butter, melted
- 1/4 cup granulated sugar
- 1 cup (2 sticks) unsalted butter
- 1 cup packed light brown sugar
- 1 cup heavy cream
- 1/2 teaspoon sea salt
- 1 teaspoon vanilla extract
- 14 ounces sweetened shredded coconut
- 1 cup semi-sweet chocolate chips
- 1 tablespoon coconut oil (or vegetable oil)
Instructions
- Prepare the Graham Cracker Crust: In a medium bowl, whisk together graham cracker crumbs, melted butter, and granulated sugar until evenly combined. Press firmly into the bottom of an 8×8 inch baking pan lined with parchment paper. Chill in the refrigerator for at least 30 minutes.
- Make the Caramel Layer: In a medium saucepan, melt butter over medium heat. Stir in brown sugar and heavy cream. Bring to a gentle boil, stirring constantly. Reduce heat to low and simmer, stirring constantly, for 5-7 minutes, until slightly thickened and golden brown (around 235-240°F or 113-116°C). Remove from heat and stir in sea salt and vanilla extract.
- Prepare the Coconut Topping: *Optional:* Toast shredded coconut in a preheated oven at 325°F (160°C) for 5-7 minutes, or in a dry skillet over medium heat, stirring constantly until golden brown. Let cool slightly. Pour warm caramel over the shredded coconut in a large bowl and stir well to coat.
- Assemble the Samoa Bars: Remove the chilled graham cracker crust from the refrigerator. Spread the coconut caramel mixture evenly over the crust. Chill in the refrigerator for at least 2 hours, or preferably overnight.
- Make the Chocolate Drizzle: In a microwave-safe bowl, combine chocolate chips and coconut oil (or vegetable oil). Microwave in 30-second intervals, stirring in between, until completely melted and smooth.
- Drizzle the Chocolate: Remove the chilled bars from the refrigerator. Drizzle the melted chocolate over the top of the bars in a decorative pattern.
- Final Chill: Return the bars to the refrigerator for about 15-20 minutes to allow the chocolate to set.
- Cut and Serve: Using a sharp knife, cut the bars into squares or rectangles. Serve chilled or at room temperature. Store leftovers in an airtight container in the refrigerator for up to a week.
Notes
- Lining the baking pan with parchment paper makes it easier to remove the bars for cutting.
- Toasting the coconut enhances its flavor and texture. Watch carefully to prevent burning.
- A candy thermometer is helpful for ensuring the caramel reaches the correct temperature.
- Chilling the bars thoroughly is essential for easy cutting and a firm texture.
- Coconut oil in the chocolate drizzle helps to thin the chocolate and gives it a nice shine.
- Prep Time: 25 minutes
- Cook Time: 15 minutes
Leave a Comment