
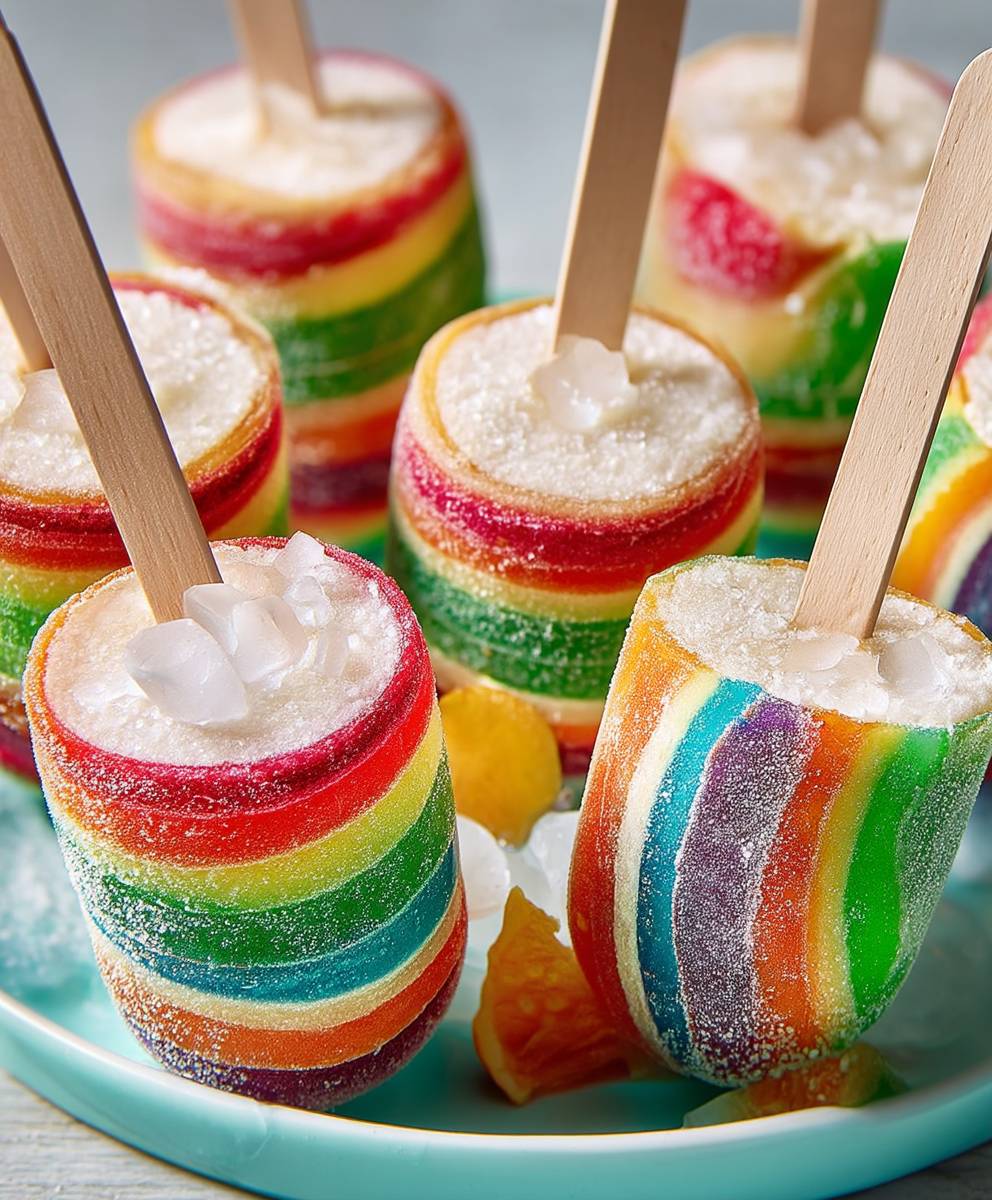
Rainbow Candy Pops get ready to unleash your inner child! These aren’t just any ordinary lollipops; they’re vibrant, swirling masterpieces of sugary goodness that are as fun to make as they are to eat. Imagine the look on your loved ones’ faces when you present them with these dazzling treats.
While the exact origins of hard candy lollipops are debated, their popularity exploded in the early 20th century, becoming a staple of childhood joy. These Rainbow Candy Pops take that classic treat to a whole new level with their mesmerizing colors and customizable flavors. They’re perfect for parties, holidays, or simply a sweet afternoon pick-me-up.
What makes these pops so irresistible? It’s the delightful combination of the satisfying crunch of the hard candy and the burst of fruity flavors. Plus, the visual appeal is undeniable! Who can resist a swirling rainbow of sweetness? They are incredibly convenient to make and store, making them a perfect treat to have on hand for unexpected guests or a quick sugar craving. So, let’s dive into the recipe and create some edible art!

Ingredients:
- 1 cup granulated sugar
- 1/2 cup light corn syrup
- 1/4 cup water
- 1/2 teaspoon flavoring oil (e.g., raspberry, strawberry, lemon – use a variety for rainbow effect)
- Gel food coloring (red, orange, yellow, green, blue, violet)
- Lollipop sticks
- Candy thermometer
- Silicone baking mat or parchment paper
- Optional: Edible glitter, sprinkles
Preparing the Candy Mixture
- Combine Sugar, Corn Syrup, and Water: In a medium-sized, heavy-bottomed saucepan, combine the granulated sugar, light corn syrup, and water. Using a heavy-bottomed saucepan is crucial to prevent scorching and ensure even heat distribution. Stir the ingredients together gently with a wooden spoon until the sugar is moistened. Avoid splashing the mixture onto the sides of the pan, as this can cause sugar crystals to form.
- Cook Over Medium Heat: Place the saucepan over medium heat. Continue stirring gently until the sugar dissolves completely. You’ll know it’s dissolved when the mixture becomes clear and you can no longer see any sugar granules at the bottom of the pan. This step is important for achieving a smooth, glassy candy.
- Insert Candy Thermometer: Once the sugar is dissolved, insert a candy thermometer into the saucepan, making sure the bulb is fully submerged in the sugar mixture but not touching the bottom of the pan. A reliable candy thermometer is essential for achieving the correct temperature and consistency for hard candy.
- Boil Without Stirring: Now, this is important: stop stirring! Allow the mixture to boil undisturbed until it reaches the hard crack stage, which is between 300°F and 310°F (149°C and 154°C). Boiling without stirring prevents sugar crystals from forming, resulting in a clear and smooth candy. Keep a close eye on the thermometer, as the temperature can rise quickly towards the end.
- Watch for the Hard Crack Stage: The hard crack stage is when a small amount of the hot candy mixture dropped into cold water will separate into hard, brittle threads that crack easily. This is how you know the candy is ready. If you don’t have a thermometer, this is the traditional way to test for doneness.
Adding Flavor and Color
- Remove from Heat: Once the candy mixture reaches the hard crack stage, immediately remove the saucepan from the heat. Be careful, as the mixture is extremely hot.
- Divide the Mixture: Quickly divide the hot candy mixture into six separate heatproof bowls or measuring cups. Work quickly, as the mixture will start to cool and harden. I like to use glass measuring cups because they are easy to clean and allow you to see the color clearly.
- Add Flavoring and Color: To each bowl, add 1/8 teaspoon of a different flavoring oil (e.g., raspberry, strawberry, lemon, green apple, blueberry, grape). Then, add a few drops of gel food coloring to each bowl to create the rainbow colors: red, orange, yellow, green, blue, and violet. Use gel food coloring, not liquid food coloring, as it is more concentrated and won’t affect the consistency of the candy.
- Stir Well: Stir each bowl thoroughly to combine the flavoring and color evenly. Make sure there are no streaks of color remaining. The mixture will be very thick and sticky, so stir carefully.
Creating the Rainbow Candy Pops
- Prepare Your Work Surface: Line a baking sheet with a silicone baking mat or parchment paper. This will prevent the candy pops from sticking. Make sure the surface is clean and dry.
- Spoon the Candy: Working quickly, spoon small amounts of each colored candy mixture onto the prepared baking sheet, creating small circles or ovals. Try to arrange the colors in a rainbow pattern, overlapping them slightly to create a blended effect. You can use a small spoon or a piping bag to control the amount of candy you’re dispensing.
- Insert Lollipop Sticks: Immediately after spooning the candy, insert a lollipop stick into the center of each candy pop. Gently press the stick into the candy, making sure it’s secure. If the candy starts to harden too quickly, you can reheat it slightly in the microwave for a few seconds.
- Add Optional Decorations: If desired, sprinkle edible glitter or sprinkles over the candy pops while they are still warm and sticky. This will add a touch of sparkle and fun.
- Let Cool Completely: Allow the candy pops to cool completely and harden at room temperature. This may take 30 minutes to an hour, depending on the temperature and humidity. Do not refrigerate them, as this can cause them to become sticky.
Troubleshooting and Tips
- Sugar Crystallization: If sugar crystals form on the sides of the pan during cooking, you can brush them down with a wet pastry brush. This will help prevent them from seeding the entire mixture and causing it to crystallize.
- Candy Too Soft: If the candy doesn’t harden properly, it may not have reached the hard crack stage. You can reheat the mixture and cook it to a higher temperature.
- Candy Too Hard: If the candy is too hard and brittle, it may have been cooked for too long. Unfortunately, there’s not much you can do to fix this, but you can try adding a small amount of water and reheating the mixture.
- Storing Candy Pops: Store the candy pops in an airtight container at room temperature. They will keep for several weeks. Avoid storing them in the refrigerator, as this can cause them to become sticky.
- Flavor Variations: Feel free to experiment with different flavoring oils and extracts. You can also add spices like cinnamon or ginger for a unique flavor.
- Color Variations: You can create different color combinations by mixing the gel food colorings. For example, you can mix red and yellow to create orange, or blue and yellow to create green.
- Safety First: Be extremely careful when working with hot sugar, as it can cause severe burns. Always use oven mitts or pot holders to protect your hands. Keep children away from the stove while you are cooking.
- Clean Up: Cleaning up after making hard candy can be a bit of a challenge. The best way to clean your saucepan and utensils is to soak them in hot water for a few minutes. This will help dissolve the hardened sugar. You can also add a little bit of vinegar to the water to help break down the sugar.
- Humidity: Humidity can affect the outcome of your candy. On humid days, the candy may take longer to harden. You can try adding a small amount of cream of tartar to the mixture to help prevent it from becoming sticky.
- Alternative Sweeteners: While granulated sugar is the standard for hard candy, experimenting with alternative sweeteners like isomalt is possible, especially for sugar-free options. However, the cooking process and temperatures may need adjustments, and the final texture might differ. Always research specific instructions for the chosen alternative sweetener.
Enjoy your homemade Rainbow Candy Pops!
Conclusion:
This isn’t just a recipe; it’s a burst of joy on a stick! Seriously, these Rainbow Candy Pops are an absolute must-try for anyone looking to add a little sparkle and sweetness to their day. They’re incredibly easy to make, visually stunning, and, most importantly, utterly delicious. Forget store-bought lollipops loaded with artificial flavors and questionable ingredients. With this recipe, you control everything that goes in, ensuring a treat that’s both fun and (relatively!) guilt-free.
Think about it: vibrant layers of your favorite candies, all melded together into a single, mesmerizing pop. It’s a guaranteed crowd-pleaser, perfect for birthday parties, holiday celebrations, or just a random Tuesday when you need a little pick-me-up. And the best part? You can completely customize them to your liking!
Want to take things to the next level? Consider these serving suggestions and variations:
* Drizzle with Chocolate: Once the pops have cooled and hardened, dip them in melted dark, milk, or white chocolate for an extra layer of decadence. A sprinkle of sea salt on the chocolate adds a delightful salty-sweet contrast.
* Add Some Sparkle: Before the candy hardens completely, sprinkle edible glitter or sanding sugar over the top for an extra touch of magic. Kids (and adults!) will absolutely love this.
* Infuse with Flavor: Add a few drops of your favorite food-grade flavoring oils to the melted candy for a unique twist. Think peppermint for the holidays, lemon for a summery treat, or even a hint of cinnamon for a cozy autumn vibe.
* Make Mini Pops: Use smaller lollipop molds to create bite-sized versions that are perfect for party favors or a quick sweet treat.
* Layer with Different Candies: Experiment with different types of candies to create unique flavor combinations and textures. Hard candies, gummy candies, and even chocolate candies can all be incorporated. Just be mindful of melting points and layering techniques.
* Create Themed Pops: Use specific colors and candies to create themed pops for holidays or special occasions. Red and green for Christmas, orange and black for Halloween, or pastel colors for Easter.
* Add a Swirl: Instead of layering the colors, gently swirl them together with a toothpick for a marbled effect.
I’m telling you, the possibilities are endless! This recipe is more of a starting point, a blank canvas for your creativity. Don’t be afraid to experiment, have fun, and make these Rainbow Candy Pops your own.
I truly believe that everyone should experience the joy of making (and eating!) these colorful treats. So, I urge you to give this recipe a try. Gather your ingredients, put on some music, and get ready to create some edible masterpieces.
And most importantly, I want to hear about your experience! Did you try any of the variations I suggested? Did you come up with your own unique twist? Share your photos and stories in the comments below. Let’s inspire each other and spread the joy of homemade candy! I can’t wait to see what you create. Happy candy-making!
Rainbow Candy Pops: A Colorful & Delicious Treat!
Make colorful rainbow candy pops at home with this easy recipe! Use simple ingredients and a candy thermometer for perfect hard candy every time. Customize with your favorite flavors and colors for a fun treat.
Ingredients
- 1 cup granulated sugar
- 1/2 cup light corn syrup
- 1/4 cup water
- 1/2 teaspoon flavoring oil (e.g., raspberry, strawberry, lemon – use a variety for rainbow effect)
- Gel food coloring (red, orange, yellow, green, blue, violet)
- Lollipop sticks
- Candy thermometer
- Silicone baking mat or parchment paper
- Optional: Edible glitter, sprinkles
Instructions
- Combine Sugar, Corn Syrup, and Water: In a medium-sized, heavy-bottomed saucepan, combine the granulated sugar, light corn syrup, and water. Stir the ingredients together gently with a wooden spoon until the sugar is moistened. Avoid splashing the mixture onto the sides of the pan.
- Cook Over Medium Heat: Place the saucepan over medium heat. Continue stirring gently until the sugar dissolves completely.
- Insert Candy Thermometer: Once the sugar is dissolved, insert a candy thermometer into the saucepan, making sure the bulb is fully submerged in the sugar mixture but not touching the bottom of the pan.
- Boil Without Stirring: Stop stirring! Allow the mixture to boil undisturbed until it reaches the hard crack stage, which is between 300°F and 310°F (149°C and 154°C). Keep a close eye on the thermometer.
- Watch for the Hard Crack Stage: The hard crack stage is when a small amount of the hot candy mixture dropped into cold water will separate into hard, brittle threads that crack easily.
- Remove from Heat: Once the candy mixture reaches the hard crack stage, immediately remove the saucepan from the heat. Be careful, as the mixture is extremely hot.
- Divide the Mixture: Quickly divide the hot candy mixture into six separate heatproof bowls or measuring cups. Work quickly, as the mixture will start to cool and harden.
- Add Flavoring and Color: To each bowl, add 1/8 teaspoon of a different flavoring oil (e.g., raspberry, strawberry, lemon, green apple, blueberry, grape). Then, add a few drops of gel food coloring to each bowl to create the rainbow colors: red, orange, yellow, green, blue, and violet. Use gel food coloring, not liquid food coloring.
- Stir Well: Stir each bowl thoroughly to combine the flavoring and color evenly. Make sure there are no streaks of color remaining.
- Prepare Your Work Surface: Line a baking sheet with a silicone baking mat or parchment paper.
- Spoon the Candy: Working quickly, spoon small amounts of each colored candy mixture onto the prepared baking sheet, creating small circles or ovals. Try to arrange the colors in a rainbow pattern, overlapping them slightly to create a blended effect.
- Insert Lollipop Sticks: Immediately after spooning the candy, insert a lollipop stick into the center of each candy pop. Gently press the stick into the candy, making sure it’s secure.
- Add Optional Decorations: If desired, sprinkle edible glitter or sprinkles over the candy pops while they are still warm and sticky.
- Let Cool Completely: Allow the candy pops to cool completely and harden at room temperature. This may take 30 minutes to an hour, depending on the temperature and humidity. Do not refrigerate them, as this can cause them to become sticky.
Notes
- Sugar Crystallization: If sugar crystals form on the sides of the pan during cooking, you can brush them down with a wet pastry brush.
- Candy Too Soft: If the candy doesn’t harden properly, it may not have reached the hard crack stage. You can reheat the mixture and cook it to a higher temperature.
- Candy Too Hard: If the candy is too hard and brittle, it may have been cooked for too long.
- Storing Candy Pops: Store the candy pops in an airtight container at room temperature. They will keep for several weeks. Avoid storing them in the refrigerator, as this can cause them to become sticky.
- Flavor Variations: Feel free to experiment with different flavoring oils and extracts. You can also add spices like cinnamon or ginger for a unique flavor.
- Color Variations: You can create different color combinations by mixing the gel food colorings.
- Safety First: Be extremely careful when working with hot sugar, as it can cause severe burns. Always use oven mitts or pot holders to protect your hands. Keep children away from the stove while you are cooking.
- Clean Up: The best way to clean your saucepan and utensils is to soak them in hot water for a few minutes. You can also add a little bit of vinegar to the water to help break down the sugar.
- Humidity: Humidity can affect the outcome of your candy. On humid days, the candy may take longer to harden. You can try adding a small amount of cream of tartar to the mixture to help prevent it from becoming sticky.
- Alternative Sweeteners: While granulated sugar is the standard for hard candy, experimenting with alternative sweeteners like isomalt is possible, especially for sugar-free options. However, the cooking process and temperatures may need adjustments, and the final texture might differ. Always research specific instructions for the chosen alternative sweetener.

Leave a Comment