
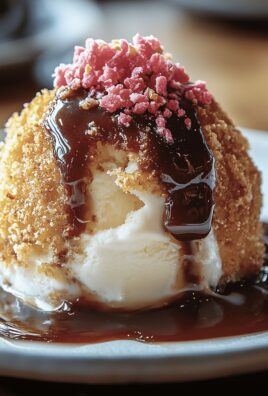
Peanut Butter Easter Eggs are a delightful treat that brings joy to both young and old during the festive season. As a child, I eagerly anticipated the arrival of these sweet, creamy confections each spring, and now, I love sharing this tradition with my family. The combination of rich peanut butter and smooth chocolate creates a flavor explosion that is simply irresistible. Not only are these treats delicious, but they also hold a special place in many households, symbolizing the joy of Easter and the arrival of spring.
People adore Peanut Butter Easter Eggs for their perfect balance of taste and texture. The creamy peanut butter filling contrasts beautifully with the crisp chocolate coating, making each bite a heavenly experience. Plus, they are incredibly easy to make at home, allowing you to customize them to your liking. Whether you prefer a dark chocolate shell or a milk chocolate coating, these eggs are sure to become a beloved addition to your Easter celebrations. Join me as we dive into this delightful recipe that will surely become a family favorite!

Ingredients:
- 1 cup creamy peanut butter
- 1/2 cup unsalted butter, softened
- 4 cups powdered sugar
- 1 teaspoon vanilla extract
- 1/4 teaspoon salt
- 2 cups milk chocolate chips
- 1 tablespoon vegetable oil (optional, for thinning chocolate)
- Colored sprinkles (optional, for decoration)
Preparing the Peanut Butter Mixture
- In a large mixing bowl, combine the creamy peanut butter and softened unsalted butter. Using a hand mixer or a spatula, mix them together until they are well blended and smooth. This should take about 1-2 minutes.
- Add the powdered sugar, vanilla extract, and salt to the peanut butter mixture. Start mixing on low speed to prevent the sugar from flying everywhere. Gradually increase the speed until everything is well combined. The mixture should be thick and slightly sticky.
- Once the mixture is fully combined, use your hands to knead it gently in the bowl for a minute or so. This helps to ensure that all the ingredients are evenly distributed.
- Cover the bowl with plastic wrap and refrigerate the mixture for about 30 minutes. Chilling the mixture will make it easier to shape into eggs.
Shaping the Peanut Butter Eggs
- After the mixture has chilled, remove it from the refrigerator. Using a small cookie scoop or your hands, take about 2 tablespoons of the peanut butter mixture and roll it into an egg shape. Aim for about 2-3 inches in length. Place the shaped eggs on a parchment-lined baking sheet.
- Repeat this process until all the peanut butter mixture is shaped into eggs. You should have around 12-15 eggs, depending on the size you make them.
- Once all the eggs are shaped, place the baking sheet back in the refrigerator for another 30 minutes. This will help them firm up even more, making them easier to dip in chocolate.
Melting the Chocolate
- While the peanut butter eggs are chilling, its time to melt the chocolate. In a microwave-safe bowl, add the milk chocolate chips. Microwave them in 30-second intervals, stirring in between, until the chocolate is completely melted and smooth. This usually takes about 1-2 minutes total.
- If the chocolate is too thick for dipping, you can add a tablespoon of vegetable oil to thin it out. Stir well until the oil is fully incorporated and the chocolate reaches a smooth, pourable consistency.
Dipping the Eggs in Chocolate
- Once the peanut butter eggs are firm and the chocolate is melted, its time to dip! Using a fork or a toothpick, pick up one peanut butter egg and dip it into the melted chocolate. Make sure to coat it completely, allowing any excess chocolate to drip off.
- Carefully place the chocolate-covered egg back onto the parchment-lined baking sheet. If you want to add colored sprinkles for decoration, sprinkle them on top of the chocolate while its still wet.
- Repeat this process for all the peanut butter eggs. If the chocolate starts to thicken, you can reheat it in the microwave for a few seconds to get it back to a dipping consistency.
Setting the Chocolate
- Once all the eggs are dipped and decorated, place the baking sheet in the refrigerator for about 30 minutes to allow the chocolate to set completely. This will ensure that the chocolate hardens and the eggs are ready to be enjoyed.
- After the chocolate has set, you can remove the eggs from the refrigerator. If you have any leftover chocolate, you can drizzle it over the eggs for an extra decorative touch.
Storing the Peanut Butter Easter Eggs
- Once the chocolate has fully set, you can store the peanut butter eggs in an airtight container. They can be kept at room temperature for up to a week or in the refrigerator for up to two weeks.
- If you want to keep them longer, you can freeze them. Just make sure to place them in a freezer-safe container or bag, separating layers with parchment paper to prevent

Conclusion:
In summary, these Peanut Butter Easter Eggs are an absolute must-try for anyone looking to indulge in a delightful treat that perfectly balances creamy peanut butter and rich chocolate. Not only are they incredibly easy to make, but they also offer a fun and festive way to celebrate the Easter season or simply satisfy your sweet tooth any time of the year. I love serving these eggs alongside a glass of cold milk or a warm cup of coffee, making for a delightful afternoon snack. You can also get creative with variationstry adding a sprinkle of sea salt on top for a sweet and salty twist, or mix in some crushed pretzels for an added crunch. If youre feeling adventurous, consider using different types of chocolate, like dark or white chocolate, to coat your eggs for a unique flavor experience. I encourage you to give this recipe a try and share your experience with friends and family. Whether youre making them for a holiday gathering or just for yourself, I promise these Peanut Butter Easter Eggs will be a hit. Dont forget to snap a picture and share it on social mediaI’d love to see your creations! Happy baking! Print
Peanut Butter Easter Eggs: Delicious Recipes and Creative Ideas for Your Holiday Treats
- Total Time: 70 minutes
- Yield: 12–15 pieces 1x
Description
Enjoy these homemade Peanut Butter Easter Eggs, featuring a creamy peanut butter filling coated in rich milk chocolate. Perfect for any occasion, these sweet treats can be decorated with colorful sprinkles and are sure to satisfy your cravings!
Ingredients
Scale- 1 cup creamy peanut butter
- 1/2 cup unsalted butter, softened
- 4 cups powdered sugar
- 1 teaspoon vanilla extract
- 1/4 teaspoon salt
- 2 cups milk chocolate chips
- 1 tablespoon vegetable oil (optional, for thinning chocolate)
- Colored sprinkles (optional, for decoration)
Instructions
- In a large mixing bowl, combine the creamy peanut butter and softened unsalted butter. Using a hand mixer or a spatula, mix them together until they are well blended and smooth (about 1-2 minutes).
- Add the powdered sugar, vanilla extract, and salt. Start mixing on low speed to prevent the sugar from flying everywhere, then gradually increase the speed until well combined. The mixture should be thick and slightly sticky.
- Knead the mixture gently in the bowl for about a minute to ensure even distribution of ingredients.
- Cover the bowl with plastic wrap and refrigerate for about 30 minutes.
- After chilling, remove the mixture from the refrigerator. Using a small cookie scoop or your hands, take about 2 tablespoons of the mixture and roll it into an egg shape (2-3 inches in length). Place on a parchment-lined baking sheet.
- Repeat until all the mixture is shaped into eggs (about 12-15 eggs).
- Refrigerate the shaped eggs for another 30 minutes to firm up.
- In a microwave-safe bowl, add the milk chocolate chips. Microwave in 30-second intervals, stirring in between, until melted and smooth (about 1-2 minutes).
- If the chocolate is too thick, add a tablespoon of vegetable oil to thin it out. Stir until smooth.
- Using a fork or toothpick, dip each peanut butter egg into the melted chocolate, coating completely. Allow excess chocolate to drip off.
- Place the chocolate-covered egg back on the parchment-lined baking sheet. If desired, add colored sprinkles while the chocolate is still wet.
- Repeat for all eggs, reheating chocolate if it thickens.
- Once all eggs are dipped, refrigerate for about 30 minutes to set the chocolate.
- After setting, you can drizzle any leftover chocolate over the eggs for decoration.
- Store the eggs in an airtight container at room temperature for up to a week or in the refrigerator for up to two weeks.
- For longer storage, freeze in a freezer-safe container or bag, separating layers with parchment paper for up to three months.
Notes
- Ensure the peanut butter is creamy for the best texture.
- Feel free to customize the decorations with different types of sprinkles or toppings.
- If you prefer dark chocolate, you can substitute the milk chocolate chips with dark chocolate chips.
- Prep Time: 30 minutes
- Cook Time: 10 minutes


Leave a Comment