
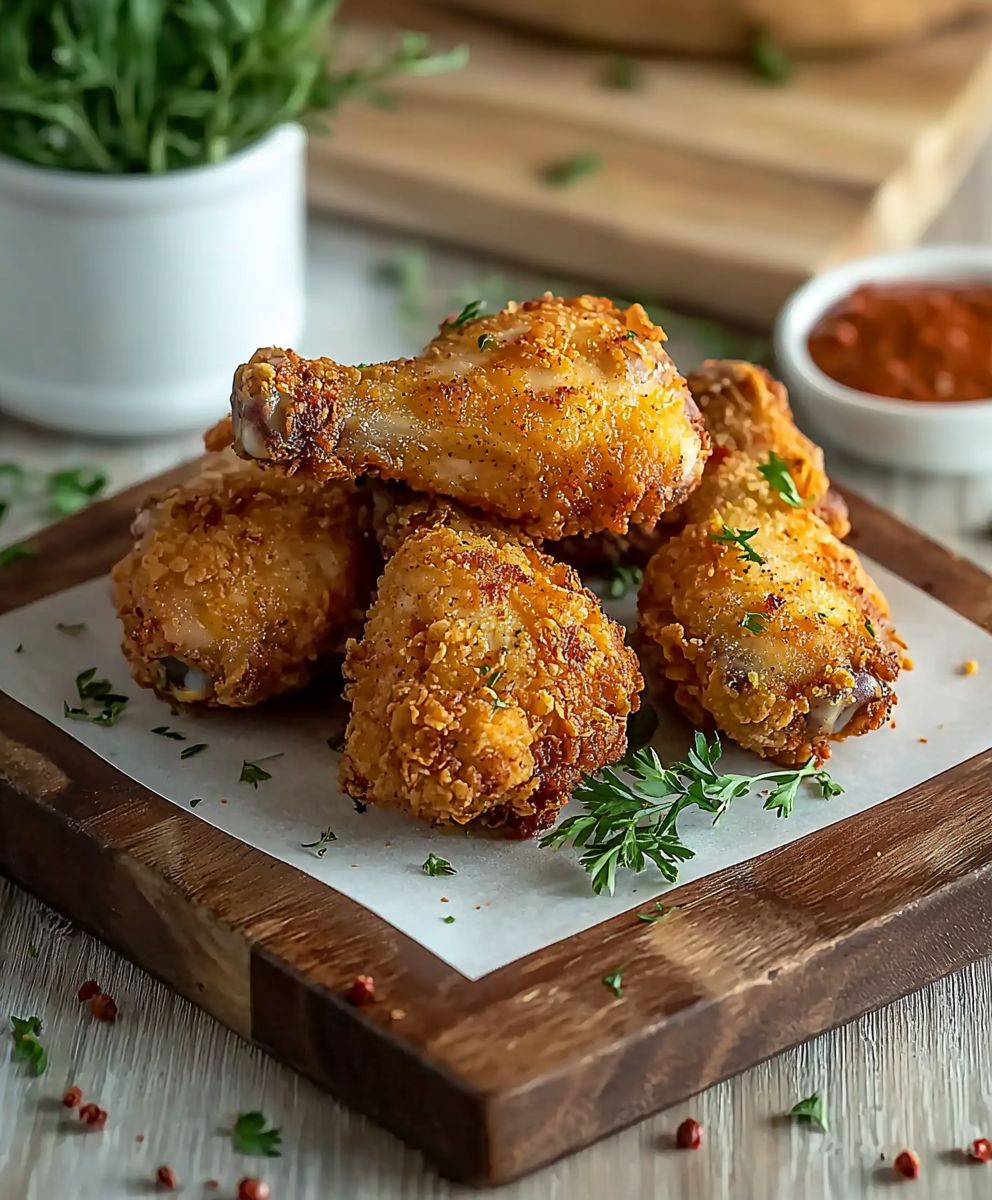
Oven Fried Chicken: Craving that crispy, golden-brown goodness of fried chicken but without the guilt and mess of deep-frying? You’ve come to the right place! I’m about to share a recipe that will revolutionize your weeknight dinners. Imagine sinking your teeth into juicy, flavorful chicken with a perfectly crunchy coating, all achieved effortlessly in your oven.
While the exact origins of fried chicken are debated, its roots are deeply intertwined with Southern American cuisine, evolving from traditions brought by Scottish and West African immigrants. It quickly became a staple, a symbol of comfort food, and a dish celebrated at family gatherings and special occasions. But let’s face it, traditional frying can be time-consuming and, well, a bit of a greasy affair.
That’s where this Oven Fried Chicken recipe shines! People adore it because it delivers that irresistible crispy texture and savory flavor we all crave, but with significantly less oil and cleanup. It’s a healthier alternative that doesn’t compromise on taste. Plus, it’s incredibly convenient simply coat the chicken, pop it in the oven, and let the magic happen. Get ready to experience the best of both worlds: the satisfying crunch of fried chicken and the ease of oven baking. Let’s get cooking!

Ingredients:
- Chicken: 3 lbs chicken pieces (bone-in, skin-on thighs, drumsticks, and breasts work best)
- Buttermilk Marinade:
- 2 cups buttermilk
- 1 tablespoon hot sauce (such as Frank’s RedHot)
- 1 teaspoon salt
- 1/2 teaspoon black pepper
- 1/2 teaspoon garlic powder
- 1/4 teaspoon paprika
- Dry Coating:
- 3 cups all-purpose flour
- 1 cup cornstarch
- 2 tablespoons paprika
- 2 tablespoons garlic powder
- 2 tablespoons onion powder
- 1 tablespoon dried thyme
- 1 tablespoon dried oregano
- 1 tablespoon salt
- 1 tablespoon black pepper
- 1 teaspoon cayenne pepper (optional, for extra heat)
- Oil: 1/2 cup vegetable oil or canola oil
Preparing the Chicken and Marinade:
- First, let’s get our chicken ready. Pat the chicken pieces dry with paper towels. This is important because it helps the coating adhere better. Excess moisture is our enemy here!
- Now, in a large bowl, whisk together the buttermilk, hot sauce, salt, pepper, garlic powder, and paprika. This is our flavorful buttermilk marinade that will tenderize the chicken and give it a tangy kick.
- Submerge the chicken pieces in the buttermilk marinade, making sure they are fully coated. You can use your hands to gently massage the marinade into the chicken.
- Cover the bowl with plastic wrap and refrigerate for at least 4 hours, or preferably overnight. The longer the chicken marinates, the more flavorful and tender it will become. I usually aim for at least 8 hours.
Preparing the Dry Coating:
- While the chicken is marinating (or just before you’re ready to bake), let’s prepare the dry coating. In a large, shallow dish (like a baking dish or a large pie plate), whisk together the flour, cornstarch, paprika, garlic powder, onion powder, dried thyme, dried oregano, salt, pepper, and cayenne pepper (if using).
- The cornstarch is key here because it helps create a crispy coating. The spices add tons of flavor, so don’t skimp on them! Make sure everything is well combined.
Coating the Chicken:
- Preheat your oven to 400°F (200°C). This high temperature is essential for achieving that crispy, oven-fried texture.
- Remove the chicken pieces from the buttermilk marinade, letting any excess drip off. You don’t want the chicken to be dripping wet, but a little marinade clinging to it is fine.
- One piece at a time, dredge the chicken in the flour mixture, making sure to coat it thoroughly on all sides. Press the flour mixture onto the chicken to ensure it adheres well. This is where you really want to pack that coating on!
- Place the coated chicken pieces on a wire rack set inside a baking sheet. The wire rack allows air to circulate around the chicken, which helps it crisp up evenly. If you don’t have a wire rack, you can place the chicken directly on the baking sheet, but the bottom might not be as crispy.
- Repeat the coating process with all the chicken pieces.
Baking the Chicken:
- Pour the vegetable oil or canola oil into a small bowl.
- Using a pastry brush, brush the tops of the coated chicken pieces with the oil. This helps the chicken brown and crisp up in the oven. Don’t be shy with the oil, but don’t completely saturate the chicken either. We’re aiming for a light coating of oil.
- Place the baking sheet with the chicken in the preheated oven.
- Bake for 45-55 minutes, or until the chicken is cooked through and the internal temperature reaches 165°F (74°C). Use a meat thermometer to check the internal temperature by inserting it into the thickest part of the chicken (avoiding the bone).
- Halfway through the baking time (around 25 minutes), flip the chicken pieces over and brush the other side with the remaining oil. This ensures even browning and crisping on both sides.
- If the chicken starts to brown too quickly, you can loosely tent it with aluminum foil to prevent it from burning.
- Once the chicken is cooked through and golden brown, remove it from the oven and let it rest for a few minutes before serving. This allows the juices to redistribute, resulting in a more tender and flavorful chicken.
Tips for the Best Oven-Fried Chicken:
- Don’t skip the buttermilk marinade! It’s essential for tenderizing the chicken and adding flavor.
- Use a wire rack for baking. This allows air to circulate around the chicken, resulting in a crispier coating.
- Don’t overcrowd the baking sheet. If necessary, bake the chicken in batches to ensure even cooking and browning.
- Use a meat thermometer to check for doneness. The chicken is cooked through when the internal temperature reaches 165°F (74°C).
- Let the chicken rest before serving. This allows the juices to redistribute, resulting in a more tender and flavorful chicken.
- Spice it up! Feel free to adjust the amount of cayenne pepper or add other spices to the dry coating to customize the flavor to your liking. Smoked paprika, chili powder, or even a touch of brown sugar can add interesting dimensions.
- Double dredge for extra crispiness. For an even thicker and crispier coating, you can dredge the chicken in the flour mixture, then dip it back into the buttermilk marinade, and then dredge it in the flour mixture again. This creates a double layer of coating that will be extra crunchy.
- Consider using panko breadcrumbs. For a different texture, you can substitute some of the flour in the dry coating with panko breadcrumbs. Panko breadcrumbs are larger and flakier than regular breadcrumbs, which will result in a crispier coating.
- Experiment with different cuts of chicken. While thighs, drumsticks, and breasts are the most common choices, you can also use wings or even a whole chicken cut into pieces. Just adjust the baking time accordingly.
- Make it ahead of time. You can prepare the chicken up to the point of baking and store it in the refrigerator for up to 24 hours. Just make sure to bring it to room temperature for about 30 minutes before baking.
Serving Suggestions:
Oven-fried chicken is delicious served with a variety of sides. Here are a few of my favorites:
- Mashed potatoes and gravy
- Coleslaw
- Corn on the cob
- Macaroni and cheese
- Green beans
- Biscuits
You can also serve oven-fried chicken as part of a picnic or potluck. It’s a crowd-pleasing dish that everyone will love.
Troubleshooting:
- Chicken is not crispy enough: Make sure you are using a wire rack for baking and that you are brushing the chicken with oil. You can also try increasing the oven temperature slightly.
- Chicken is burning: Loosely tent the chicken with aluminum foil to prevent it from burning. You can also try lowering the oven temperature slightly.
- Chicken is not cooked through: Use a meat thermometer to check the internal temperature of the chicken. If it is not cooked through, continue baking until it reaches 165°F (74°C).
- Coating is falling off: Make sure you are patting the chicken dry before coating it and that you are pressing the flour mixture onto the chicken firmly. You can also try using a double dredge method.
Variations:
- Spicy Oven-Fried Chicken: Add more cayenne pepper to the dry coating or use a spicier hot sauce in the buttermilk marinade.
- Honey Garlic Oven-Fried Chicken: Brush the chicken with a mixture of honey, garlic, and soy sauce during the last 10 minutes of baking.
- Lemon Herb Oven-Fried Chicken: Add lemon zest and fresh herbs (such as rosemary or thyme) to the dry coating.
- Parmesan Oven-Fried Chicken: Add grated Parmesan cheese to the dry coating.
I hope you enjoy this recipe for oven-fried chicken! It’s a healthier and easier way to
Conclusion:
So there you have it! This Oven Fried Chicken recipe is truly a game-changer, and I genuinely believe it deserves a spot in your regular dinner rotation. Forget the guilt and the mess of traditional frying; this method delivers all the crispy, juicy goodness you crave, but with significantly less fat and hassle. It’s a win-win! Why is this a must-try? Well, beyond the health benefits, it’s incredibly flavorful. The combination of spices in the breading creates a symphony of savory notes that will tantalize your taste buds. Plus, the oven-baking process ensures that the chicken cooks evenly, resulting in perfectly cooked, tender meat every single time. No more dry, overcooked chicken! And let’s be honest, who doesn’t love the satisfying crunch of perfectly crispy chicken skin? This recipe delivers that in spades, without the need for a deep fryer. But the best part? It’s so versatile! While I’ve shared my go-to recipe, feel free to experiment with different spice combinations to create your own signature flavor. A little smoked paprika for a smoky kick? Go for it! A dash of cayenne pepper for some heat? Absolutely! The possibilities are endless. Now, let’s talk serving suggestions. This Oven Fried Chicken is fantastic on its own, of course, but it also pairs beautifully with a variety of sides. For a classic Southern meal, serve it with creamy mashed potatoes and gravy, collard greens, and cornbread. If you’re looking for something a little lighter, try it with a fresh garden salad, roasted vegetables, or even a simple coleslaw.Serving Variations:
* Chicken Sandwiches: Slice the chicken and serve it on toasted buns with lettuce, tomato, and your favorite sauce. A spicy mayo or a tangy barbecue sauce would be delicious! * Chicken Salad: Dice the cooked chicken and use it to make a flavorful chicken salad. Add celery, grapes, walnuts, and a creamy dressing for a delightful lunch or snack. * Chicken and Waffles: A classic combination that’s always a crowd-pleaser. Serve the chicken with crispy waffles and a drizzle of maple syrup. * Chicken Tacos: Shred the chicken and use it as a filling for tacos. Top with your favorite taco toppings, such as salsa, guacamole, and sour cream. * Chicken Caesar Salad: Add sliced chicken to a classic Caesar salad for a protein-packed and satisfying meal. I truly hope you give this recipe a try. I’m confident that you’ll be amazed at how easy it is to make delicious, crispy, and healthy Oven Fried Chicken at home. It’s a recipe that’s sure to become a family favorite. And most importantly, I want to hear about your experience! Did you try the recipe? What variations did you make? What sides did you serve it with? Share your photos and stories in the comments below. I can’t wait to see what you create! Happy cooking! Let me know if you have any questions, I’m always here to help. Don’t forget to rate the recipe if you enjoyed it! Your feedback helps others discover this amazing way to enjoy fried chicken without the guilt. Print
Oven Fried Chicken: The Crispiest, Healthier Recipe You’ll Ever Make
- Total Time: 325 minutes
- Yield: 6–8 servings 1x
Description
Crispy, flavorful oven-fried chicken that’s healthier than traditional fried chicken but just as delicious! Marinated in buttermilk and coated in a blend of spices, this chicken is baked to golden-brown perfection.
Ingredients
- 3 lbs chicken pieces (bone-in, skin-on thighs, drumsticks, and breasts work best)
- 2 cups buttermilk
- 1 tablespoon hot sauce (such as Frank’s RedHot)
- 1 teaspoon salt
- 1/2 teaspoon black pepper
- 1/2 teaspoon garlic powder
- 1/4 teaspoon paprika
- 3 cups all-purpose flour
- 1 cup cornstarch
- 2 tablespoons paprika
- 2 tablespoons garlic powder
- 2 tablespoons onion powder
- 1 tablespoon dried thyme
- 1 tablespoon dried oregano
- 1 tablespoon salt
- 1 tablespoon black pepper
- 1 teaspoon cayenne pepper (optional, for extra heat)
- 1/2 cup vegetable oil or canola oil
Instructions
- Pat the chicken pieces dry with paper towels. In a large bowl, whisk together the buttermilk, hot sauce, salt, pepper, garlic powder, and paprika. Submerge the chicken pieces in the buttermilk marinade, ensuring they are fully coated. Cover and refrigerate for at least 4 hours, or preferably overnight.
- In a large, shallow dish, whisk together the flour, cornstarch, paprika, garlic powder, onion powder, dried thyme, dried oregano, salt, pepper, and cayenne pepper (if using).
- Preheat oven to 400°F (200°C). Remove the chicken pieces from the buttermilk marinade, letting excess drip off. Dredge each piece in the flour mixture, coating thoroughly on all sides and pressing to adhere. Place the coated chicken pieces on a wire rack set inside a baking sheet.
- Pour the vegetable oil or canola oil into a small bowl. Brush the tops of the coated chicken pieces with the oil. Place the baking sheet in the preheated oven. Bake for 45-55 minutes, or until the chicken is cooked through and the internal temperature reaches 165°F (74°C). Halfway through the baking time (around 25 minutes), flip the chicken pieces over and brush the other side with the remaining oil. If the chicken starts to brown too quickly, loosely tent it with aluminum foil. Let the chicken rest for a few minutes before serving.
Notes
- Don’t skip the buttermilk marinade! It’s essential for tenderizing the chicken and adding flavor.
- Use a wire rack for baking. This allows air to circulate around the chicken, resulting in a crispier coating.
- Don’t overcrowd the baking sheet. If necessary, bake the chicken in batches to ensure even cooking and browning.
- Use a meat thermometer to check for doneness. The chicken is cooked through when the internal temperature reaches 165°F (74°C).
- Let the chicken rest before serving. This allows the juices to redistribute, resulting in a more tender and flavorful chicken.
- Spice it up! Feel free to adjust the amount of cayenne pepper or add other spices to the dry coating to customize the flavor to your liking. Smoked paprika, chili powder, or even a touch of brown sugar can add interesting dimensions.
- Double dredge for extra crispiness. For an even thicker and crispier coating, you can dredge the chicken in the flour mixture, then dip it back into the buttermilk marinade, and then dredge it in the flour mixture again. This creates a double layer of coating that will be extra crunchy.
- Consider using panko breadcrumbs. For a different texture, you can substitute some of the flour in the dry coating with panko breadcrumbs. Panko breadcrumbs are larger and flakier than regular breadcrumbs, which will result in a crispier coating.
- Experiment with different cuts of chicken. While thighs, drumsticks, and breasts are the most common choices, you can also use wings or even a whole chicken cut into pieces. Just adjust the baking time accordingly.
- Make it ahead of time. You can prepare the chicken up to the point of baking and store it in the refrigerator for up to 24 hours. Just make sure to bring it to room temperature for about 30 minutes before baking.
- Prep Time: 20 minutes
- Cook Time: 45-55 minutes

Leave a Comment