
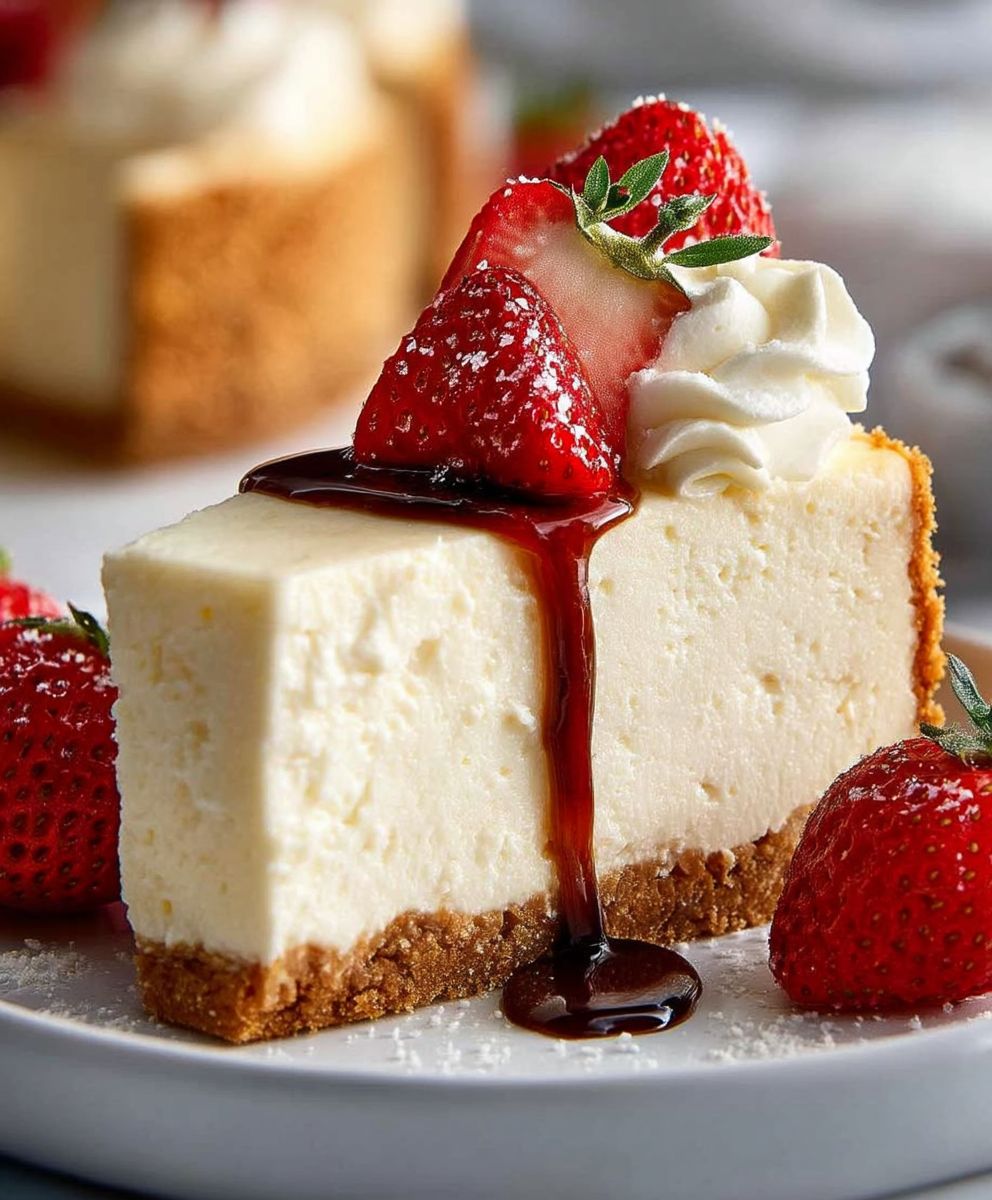
No bake cheesecake: the mere mention of it conjures images of creamy, dreamy decadence, doesn’t it? Forget slaving over a hot oven; this recipe is your express ticket to dessert heaven. Imagine sinking your fork into a velvety smooth filling, perfectly balanced between tangy and sweet, all nestled on a buttery, crumbly base. Its a symphony of textures and flavors that will have everyone begging for seconds.
While the exact origins of cheesecake are debated, its ancestor, a honey-sweetened cheese cake, dates back to ancient Greece. Over centuries, it evolved, traveling across continents and adapting to local ingredients and tastes. The “no bake” version, a more modern adaptation, gained popularity for its simplicity and convenience, especially in warmer climates where turning on the oven is less appealing.
What makes no bake cheesecake so irresistible? It’s the sheer ease of preparation, of course! But beyond that, it’s the incredibly satisfying texture that melt-in-your-mouth creaminess that’s simply divine. Plus, it’s endlessly customizable! You can add fruit, chocolate, caramel, or any other flavor you desire to create a truly personalized dessert. Whether you’re a seasoned baker or a kitchen novice, this recipe is guaranteed to impress. So, let’s get started and whip up this delightful treat!

Ingredients:
- For the Crust:
- 1 ½ cups graham cracker crumbs (about 12 full sheets)
- 5 tablespoons (70g) unsalted butter, melted
- ¼ cup (50g) granulated sugar
- Pinch of salt
- For the Cheesecake Filling:
- 2 (8 ounce) packages cream cheese, softened to room temperature
- 1 (14 ounce) can sweetened condensed milk
- ? cup (80ml) lemon juice, freshly squeezed
- 1 teaspoon vanilla extract
- Optional: Lemon zest from 1 lemon
- Optional Toppings:
- Fresh berries (strawberries, blueberries, raspberries)
- Whipped cream
- Chocolate shavings
- Fruit preserves or jam
- Graham cracker crumbs
Preparing the Graham Cracker Crust
Okay, let’s get started with the foundation of our no-bake cheesecake the graham cracker crust! This is super easy and sets the stage for that creamy, dreamy filling.
- Crush the Graham Crackers: First things first, we need to turn those graham crackers into fine crumbs. You have a couple of options here. You can use a food processor, which is the quickest and easiest method. Just toss the graham crackers in and pulse until you have fine crumbs. Alternatively, you can place the graham crackers in a large zip-top bag, seal it tightly, and use a rolling pin to crush them. Make sure you get them nice and fine no big chunks allowed!
- Combine the Crust Ingredients: In a medium bowl, combine the graham cracker crumbs, melted butter, granulated sugar, and a pinch of salt. Mix everything together really well until the crumbs are evenly moistened. The mixture should resemble wet sand. This is what will hold the crust together.
- Press into the Pan: Now, grab your 9-inch springform pan. If you don’t have a springform pan, you can use a regular pie dish, but it will be a little trickier to remove the cheesecake later. Pour the graham cracker mixture into the pan. Using the bottom of a measuring cup or your fingers, press the crumbs firmly and evenly into the bottom of the pan. Make sure the crust is compact and uniform in thickness. This will prevent it from crumbling when you slice the cheesecake. You can also press the crust slightly up the sides of the pan for a more defined edge, but this is optional.
- Chill the Crust: Once the crust is pressed into the pan, place it in the refrigerator to chill for at least 30 minutes. This will help the butter solidify and the crust to set properly. You can even chill it for longer, up to an hour or two, if you have the time. A well-chilled crust is key to a no-bake cheesecake that holds its shape.
Making the Cheesecake Filling
Alright, with the crust chilling, let’s move on to the star of the show the cheesecake filling! This is where the magic happens, and it’s surprisingly simple to create that classic cheesecake flavor without any baking.
- Soften the Cream Cheese: This is crucial! Make sure your cream cheese is softened to room temperature. This will ensure a smooth and creamy filling without any lumps. If your cream cheese is still cold, it will be difficult to mix properly and you’ll end up with a grainy texture. You can leave the cream cheese out at room temperature for about an hour or two, or you can microwave it in short bursts (15-20 seconds at a time) until it’s soft, but be careful not to melt it.
- Beat the Cream Cheese: In a large bowl, using an electric mixer (either a stand mixer or a hand mixer), beat the softened cream cheese until it’s smooth and creamy. This usually takes about 2-3 minutes. Make sure to scrape down the sides of the bowl occasionally to ensure that all the cream cheese is evenly mixed.
- Add the Sweetened Condensed Milk: Gradually add the sweetened condensed milk to the cream cheese, beating on low speed until well combined. Be careful not to overmix at this stage, as overmixing can incorporate too much air into the filling, which can cause it to crack later on.
- Incorporate the Lemon Juice and Vanilla: Add the lemon juice and vanilla extract to the mixture and beat on low speed until everything is just combined. The lemon juice not only adds a bright, tangy flavor but also helps to thicken the filling. If you’re using lemon zest, add it now as well.
- Taste and Adjust: Give the filling a taste and adjust the sweetness or tanginess to your liking. If you prefer a sweeter cheesecake, you can add a little more sweetened condensed milk. If you want a more pronounced lemon flavor, add a little more lemon juice.
Assembling and Chilling the Cheesecake
We’re almost there! Now it’s time to put everything together and let the cheesecake chill to perfection.
- Pour the Filling into the Crust: Remove the chilled graham cracker crust from the refrigerator. Pour the cheesecake filling evenly over the crust. Use a spatula to smooth the top of the filling.
- Chill the Cheesecake: Cover the cheesecake with plastic wrap and place it in the refrigerator to chill for at least 6 hours, or preferably overnight. This is essential for the cheesecake to set properly. The longer it chills, the firmer and more stable it will be.
- Release from the Pan: Once the cheesecake is fully chilled, carefully remove it from the springform pan. To do this, run a thin knife or spatula around the edge of the cheesecake to loosen it from the sides of the pan. Then, gently release the latch on the springform pan and carefully lift the sides of the pan away from the cheesecake.
Serving and Topping Suggestions
The moment we’ve been waiting for! It’s time to slice and enjoy your delicious no-bake cheesecake. Here are some topping ideas to make it even more special:
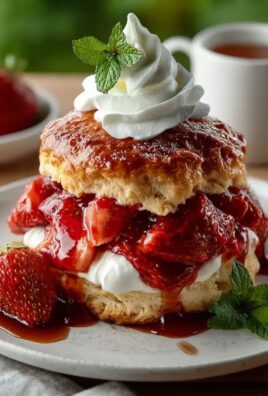
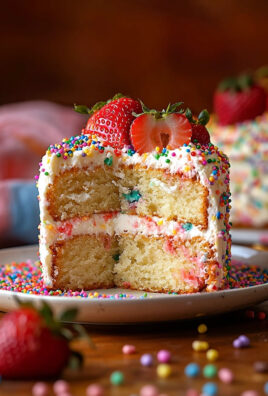
- Fresh Berries: A classic choice! Arrange fresh strawberries, blueberries, raspberries, or a combination of berries on top of the cheesecake for a burst of fresh flavor and color.
- Whipped Cream: A dollop of freshly whipped cream adds a touch of elegance and sweetness. You can use store-bought whipped cream or make your own.
- Chocolate Shavings: For chocolate lovers, sprinkle some chocolate shavings on top of the cheesecake. You can use dark chocolate, milk chocolate, or white chocolate.
- Fruit Preserves or Jam: A spoonful of your favorite fruit preserves or jam adds a sweet and fruity glaze to the cheesecake. Raspberry, strawberry, or blueberry jam are all great options.
- Graham Cracker Crumbs: Sprinkle some extra graham cracker crumbs on top of the cheesecake for added texture and visual appeal.
Tips for Success:
- Use Room Temperature Ingredients: As mentioned earlier, using softened cream cheese is crucial for a smooth and creamy filling.
- Don’t Overmix: Overmixing the filling can incorporate too much air, which can cause the cheesecake to crack.
- Chill Thoroughly: Make sure to chill the cheesecake for at least 6 hours, or preferably overnight, for the best results.
- Get Creative with Toppings: Feel free to experiment with different toppings to create your own unique cheesecake masterpiece.
Enjoy your homemade no-bake cheesecake! I hope you love it as much as I do!
Conclusion:
So, there you have it! This no bake cheesecake recipe is truly a game-changer, and I wholeheartedly believe it deserves a spot in your regular dessert rotation. Why? Because it delivers all the creamy, dreamy deliciousness of a traditional cheesecake without the fuss of baking, water baths, or the dreaded cracking! It’s the perfect solution for those hot summer days when you don’t want to turn on the oven, or for when you need a show-stopping dessert in a hurry.
But beyond its simplicity, the taste is what truly sets this recipe apart. The combination of the buttery graham cracker crust and the rich, tangy filling is simply irresistible. It’s a crowd-pleaser that’s guaranteed to impress, whether you’re serving it at a casual family gathering or a more formal dinner party.
And the best part? It’s incredibly versatile! Feel free to get creative with your toppings and serving suggestions. For a classic touch, top it with fresh berries like strawberries, raspberries, or blueberries. A drizzle of chocolate sauce or caramel adds a touch of decadence. If you’re feeling adventurous, try adding a layer of fruit compote or a sprinkle of chopped nuts.
Here are a few of my favorite variations to inspire you:
Serving Suggestions and Variations:
* Lemon No Bake Cheesecake: Add the zest and juice of one lemon to the filling for a bright and refreshing twist.
* Chocolate Chip No Bake Cheesecake: Fold in a cup of mini chocolate chips to the filling for a chocolatey delight.
* Oreo No Bake Cheesecake: Crush some Oreo cookies and mix them into the filling and sprinkle some on top for an extra special treat.
* Salted Caramel No Bake Cheesecake: Drizzle with homemade or store-bought salted caramel sauce and a sprinkle of sea salt.
* Individual No Bake Cheesecakes: Make individual cheesecakes in small jars or ramekins for a cute and convenient presentation.
Don’t be afraid to experiment and find your own favorite combinations! The possibilities are endless. You can even use different types of cookies for the crust, like chocolate wafers or gingersnaps.
I truly believe that this no bake cheesecake recipe is a must-try for anyone who loves cheesecake but doesn’t want the hassle of baking. It’s easy, delicious, and endlessly adaptable. It’s the kind of dessert that will have everyone asking for seconds (and the recipe!).
So, what are you waiting for? Gather your ingredients, follow the simple steps, and prepare to be amazed. I’m confident that you’ll love this recipe as much as I do.
And most importantly, I want to hear about your experience! Did you try this recipe? What variations did you make? What did your friends and family think? Share your photos and stories in the comments below. I can’t wait to see your creations and hear your feedback. Happy baking (or rather, no-baking!) and enjoy every delicious bite! Let me know if you have any questions, and I’ll be happy to help. I hope this becomes your go-to recipe for a quick and easy dessert.
No Bake Cheesecake: The Easiest Dessert Recipe Ever
Easy no-bake cheesecake with a graham cracker crust and creamy filling, perfect for a quick and delicious dessert. Top with your favorite berries, whipped cream, or chocolate shavings!
Ingredients
- 1 ½ cups graham cracker crumbs (about 12 full sheets)
- 5 tablespoons (70g) unsalted butter, melted
- ¼ cup (50g) granulated sugar
- Pinch of salt
- 2 (8 ounce) packages cream cheese, softened to room temperature
- 1 (14 ounce) can sweetened condensed milk
- ? cup (80ml) lemon juice, freshly squeezed
- 1 teaspoon vanilla extract
- Optional: Lemon zest from 1 lemon
- Fresh berries (strawberries, blueberries, raspberries)
- Whipped cream
- Chocolate shavings
- Fruit preserves or jam
- Graham cracker crumbs
Instructions
- Crush the Graham Crackers: Use a food processor or place graham crackers in a zip-top bag and crush with a rolling pin until fine crumbs.
- Combine Crust Ingredients: In a medium bowl, combine graham cracker crumbs, melted butter, granulated sugar, and salt. Mix until evenly moistened and resembles wet sand.
- Press into Pan: Press the graham cracker mixture firmly and evenly into the bottom of a 9-inch springform pan (or pie dish). You can press slightly up the sides.
- Chill the Crust: Refrigerate the crust for at least 30 minutes (up to 2 hours) to allow it to set.
- Soften the Cream Cheese: Ensure cream cheese is softened to room temperature.
- Beat the Cream Cheese: In a large bowl, beat the softened cream cheese with an electric mixer until smooth and creamy (2-3 minutes). Scrape down the sides of the bowl.
- Add Sweetened Condensed Milk: Gradually add the sweetened condensed milk to the cream cheese, beating on low speed until well combined.
- Incorporate Lemon Juice and Vanilla: Add lemon juice and vanilla extract (and lemon zest, if using) to the mixture and beat on low speed until just combined.
- Taste and Adjust: Taste the filling and adjust sweetness or tanginess to your liking.
- Pour Filling into Crust: Remove the chilled crust from the refrigerator and pour the cheesecake filling evenly over the crust. Smooth the top with a spatula.
- Chill the Cheesecake: Cover the cheesecake with plastic wrap and refrigerate for at least 6 hours, or preferably overnight, to set.
- Release from Pan: Once chilled, carefully remove the cheesecake from the springform pan by running a thin knife around the edge and releasing the latch.
- Serve and Top: Top with fresh berries, whipped cream, chocolate shavings, fruit preserves, or graham cracker crumbs.
Notes
- Use room temperature cream cheese for a smooth filling.
- Don’t overmix the filling to prevent cracking.
- Chill the cheesecake thoroughly for the best results.
- Get creative with your toppings!
Leave a Comment