
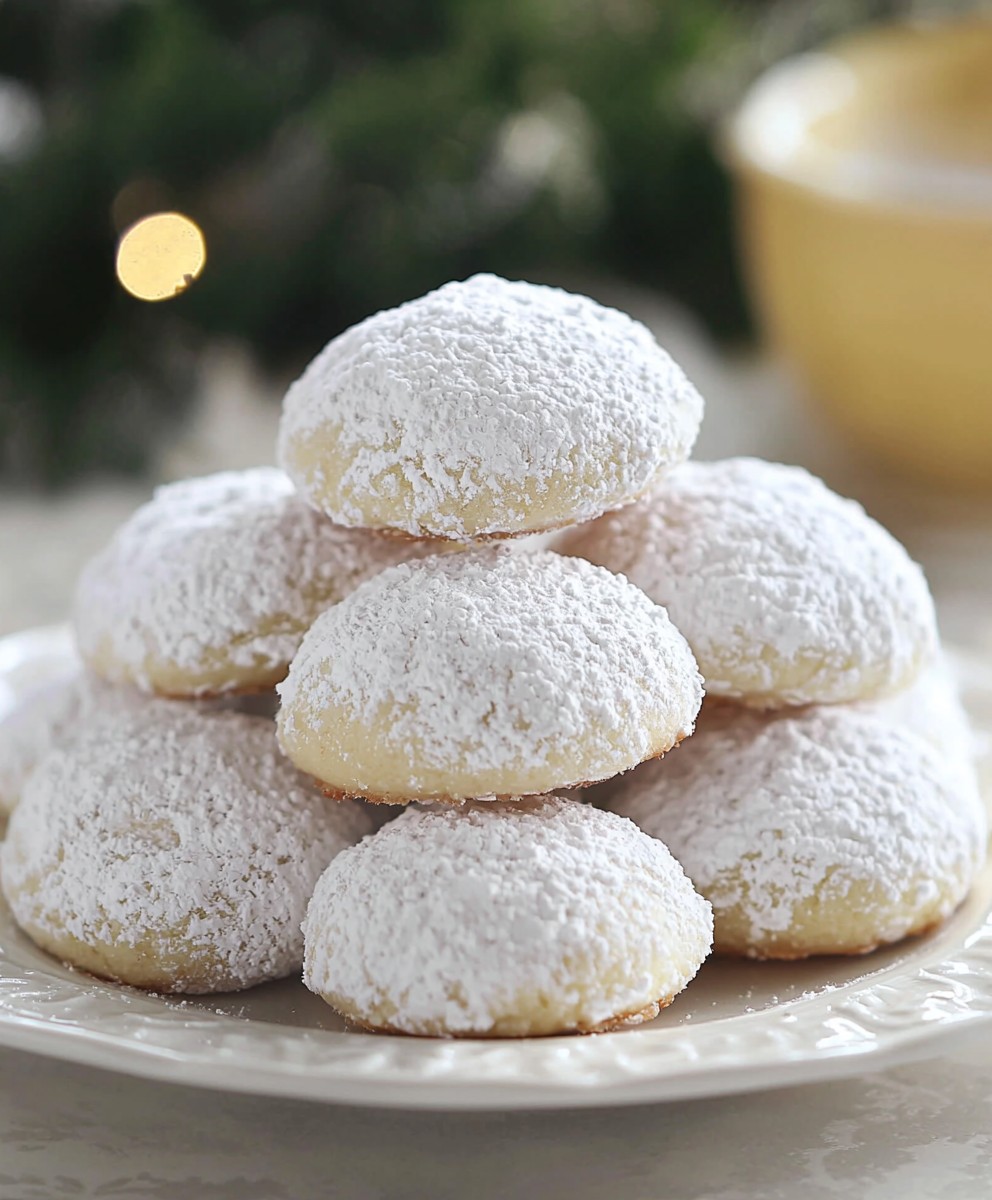
Mexican Wedding Cookies, those delicate, melt-in-your-mouth spheres of buttery goodness, are more than just a sweet treat; they’re a symbol of celebration and tradition. Have you ever wondered how something so simple could evoke such joy and nostalgia? I know I have! These cookies, also known as Russian Tea Cakes, Snowball Cookies, or Polvorones, boast a rich history that spans continents and cultures.
While their exact origins are debated, many believe these cookies evolved from medieval Arab recipes brought to Europe. In Mexico, they’ve become a staple at weddings and other festive occasions, representing good fortune and prosperity for the happy couple. The generous coating of powdered sugar symbolizes purity and the sweetness of the union. But you don’t need a wedding to enjoy them!
What makes Mexican Wedding Cookies so irresistible? It’s the perfect combination of a crumbly, almost sandy texture, the rich, nutty flavor (often from pecans or walnuts), and that cloud of sweet, powdery snow that coats every bite. They’re incredibly easy to make, requiring just a handful of ingredients and minimal effort. Plus, they’re the perfect make-ahead treat, as their flavor only improves with time. Whether you’re baking for a holiday gathering, a special occasion, or simply craving a comforting indulgence, these cookies are guaranteed to be a crowd-pleaser. So, let’s get baking and create some edible magic!

Ingredients:
- 1 cup (2 sticks) unsalted butter, softened
- 1/2 cup powdered sugar, plus more for coating
- 1 teaspoon vanilla extract
- 2 1/4 cups all-purpose flour
- 1/4 teaspoon salt
- 1 cup finely chopped pecans or walnuts (optional, but highly recommended!)
Preparing the Dough:
- Cream the Butter and Sugar: In a large bowl, using an electric mixer (or a sturdy whisk and some elbow grease!), cream together the softened butter and 1/2 cup of powdered sugar until light and fluffy. This usually takes about 3-5 minutes with an electric mixer. Don’t rush this step; it’s crucial for creating a tender cookie. You want the mixture to be pale and almost airy.
- Add Vanilla: Stir in the vanilla extract. Make sure it’s well combined. The vanilla enhances the overall flavor and adds a lovely warmth to the cookies.
- Combine Dry Ingredients: In a separate bowl, whisk together the flour and salt. This ensures the salt is evenly distributed throughout the flour, which is important for the flavor balance of the cookies.
- Gradually Add Dry Ingredients to Wet Ingredients: Gradually add the flour mixture to the butter mixture, mixing on low speed (or by hand) until just combined. Be careful not to overmix the dough. Overmixing can develop the gluten in the flour, resulting in tough cookies. Mix until the flour is just incorporated, and no streaks of flour remain.
- Incorporate Nuts (Optional): If you’re using nuts, gently fold them into the dough until evenly distributed. I personally love the texture and flavor that pecans or walnuts add, but you can definitely leave them out if you prefer.
- Chill the Dough: Wrap the dough tightly in plastic wrap and chill in the refrigerator for at least 30 minutes, or up to 2 hours. Chilling the dough is essential because it allows the butter to firm up, which prevents the cookies from spreading too much during baking. It also makes the dough easier to handle.
Shaping and Baking the Cookies:
- Preheat Oven and Prepare Baking Sheets: Preheat your oven to 350°F (175°C). Line baking sheets with parchment paper or silicone baking mats. This will prevent the cookies from sticking and make cleanup a breeze.
- Shape the Cookies: Remove the dough from the refrigerator. Roll the dough into 1-inch balls. You can use a small cookie scoop to ensure uniform size, which will help the cookies bake evenly. Place the balls onto the prepared baking sheets, leaving about 1 inch of space between each cookie.
- Bake the Cookies: Bake for 12-15 minutes, or until the cookies are set and lightly golden brown on the bottom. The tops of the cookies should still be pale. Be careful not to overbake them, as they will become dry and crumbly.
- Cool Slightly: Let the cookies cool on the baking sheets for a few minutes before transferring them to a wire rack to cool completely. This allows them to firm up a bit and prevents them from breaking.
Coating with Powdered Sugar:
- First Coating: While the cookies are still slightly warm (but not hot!), gently roll them in powdered sugar until they are completely coated. The warmth helps the powdered sugar adhere to the cookies.
- Second Coating (Optional but Recommended): Let the cookies cool completely. Once they are cool, roll them in powdered sugar again. This second coating creates a thicker, more beautiful layer of powdered sugar and ensures that the cookies are generously covered. This is what gives them that signature “wedding cookie” look.
- Storage: Store the cookies in an airtight container at room temperature. They will keep for several days, but they are best enjoyed within the first few days.
Tips for Perfect Mexican Wedding Cookies:
- Use High-Quality Butter: The flavor of the butter really shines through in these cookies, so use the best quality butter you can find.
- Don’t Overmix the Dough: Overmixing can lead to tough cookies. Mix until just combined.
- Chill the Dough: Chilling the dough is crucial for preventing the cookies from spreading too much.
- Don’t Overbake: Overbaked cookies will be dry and crumbly. Bake until they are set and lightly golden brown on the bottom.
- Coat While Warm: Coating the cookies while they are still slightly warm helps the powdered sugar adhere better.
- Double Coat for Extra Sweetness: For a truly decadent treat, double coat the cookies with powdered sugar.
- Experiment with Flavors: You can add other flavorings to the dough, such as almond extract, lemon zest, or orange zest.
- Nut Variations: Try different types of nuts, such as macadamia nuts or pistachios. Make sure they are finely chopped.
- Make Ahead: The dough can be made ahead of time and stored in the refrigerator for up to 2 days.
- Freezing: Baked cookies can be frozen for up to 2 months. Thaw completely before serving. You may want to dust them with fresh powdered sugar after thawing.
Troubleshooting:
- Cookies are Spreading Too Much: Make sure you chilled the dough for long enough. Also, make sure your oven temperature is accurate.
- Cookies are Dry: You may have overbaked them. Reduce the baking time slightly next time.
- Powdered Sugar Isn’t Sticking: Make sure the cookies are still slightly warm when you coat them.
- Dough is Too Crumbly: You may have added too much flour. Add a tablespoon or two of milk or cream to the dough to help it come together.
Variations:
- Chocolate Mexican Wedding Cookies: Add 1/4 cup of unsweetened cocoa powder to the dry ingredients.
- Lemon Mexican Wedding Cookies: Add 1 teaspoon of lemon zest to the dough.
- Orange Mexican Wedding Cookies: Add 1 teaspoon of orange zest to the dough.
- Almond Mexican Wedding Cookies: Add 1/2 teaspoon of almond extract to the dough.
These cookies are a classic for a reason. They’re simple to make, incredibly delicious, and perfect for any occasion. Enjoy!
Conclusion:
And there you have it! These aren’t just any cookies; they’re melt-in-your-mouth Mexican Wedding Cookies that will transport you to a world of buttery, nutty, and sugary bliss. I truly believe this recipe is a must-try for anyone who loves baking, appreciates a delicate treat, or simply wants to impress their friends and family. The simplicity of the ingredients belies the incredible flavor and texture they’re surprisingly easy to make, yet deliver a sophisticated and unforgettable experience.
What makes these cookies so special? It’s the combination of finely ground nuts, the richness of the butter, and the generous coating of powdered sugar that creates a symphony of textures and tastes. They’re crumbly, yet tender; sweet, yet subtly nutty; and utterly addictive. Trust me, you won’t be able to stop at just one!
But the best part about this recipe is its versatility. While the classic version is divine, there are so many ways to customize these little gems to suit your preferences. For a festive twist, try adding a pinch of cinnamon or nutmeg to the dough. Or, if you’re feeling adventurous, incorporate a teaspoon of orange or lemon zest for a bright, citrusy note. You could even experiment with different types of nuts pecans, hazelnuts, or even macadamia nuts would all be delicious alternatives to the traditional walnuts or almonds.
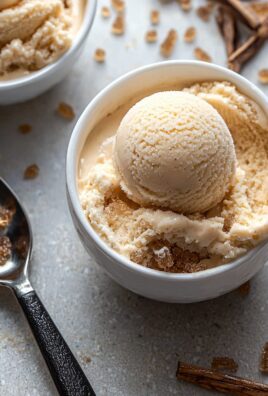
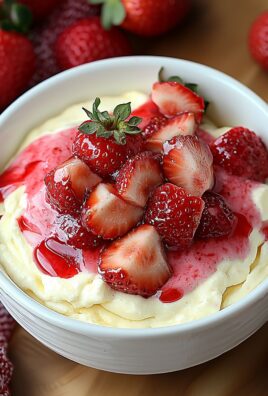
Serving suggestions? Oh, the possibilities are endless! These cookies are perfect on their own, enjoyed with a cup of coffee or tea. They also make a stunning addition to a dessert platter, adding a touch of elegance and charm. Imagine presenting a beautifully arranged plate of these cookies at your next holiday gathering they’re guaranteed to be a crowd-pleaser! For a truly decadent experience, try pairing them with a scoop of vanilla ice cream or a dollop of whipped cream. They also make a thoughtful and heartfelt gift for friends, neighbors, or anyone who deserves a little sweetness in their life. Package them in a pretty box or tin, and you’ll have a present that’s sure to be appreciated.
Variations to explore:
* Chocolate Chip Mexican Wedding Cookies: Add mini chocolate chips to the dough for a chocolatey surprise.
* Espresso Mexican Wedding Cookies: Mix in a teaspoon of instant espresso powder for a coffee-flavored kick.
* Spiced Mexican Wedding Cookies: Incorporate a blend of warm spices like cinnamon, ginger, and cloves for a cozy, autumnal flavor.
* Gluten-Free Mexican Wedding Cookies: Substitute the all-purpose flour with a gluten-free blend for a dietary-friendly option.
I’m so confident that you’ll love this recipe that I urge you to give it a try. Don’t be intimidated by the name these cookies are surprisingly simple to make, and the results are well worth the effort. Remember to use high-quality ingredients for the best flavor and texture. And most importantly, have fun! Baking should be a joyful experience, so relax, put on some music, and enjoy the process.
Once you’ve made these Mexican Wedding Cookies, I’d love to hear about your experience! Did you try any variations? What did your friends and family think? Share your photos and stories in the comments below I can’t wait to see your creations! Happy baking!
Mexican Wedding Cookies: A Delicious & Easy Recipe
Buttery, melt-in-your-mouth Mexican Wedding Cookies (or Russian Tea Cakes) coated in powdered sugar. Perfect for holidays, parties, or a sweet treat.
Ingredients
- 1 cup (2 sticks) unsalted butter, softened
- 1/2 cup powdered sugar, plus more for coating
- 1 teaspoon vanilla extract
- 2 1/4 cups all-purpose flour
- 1/4 teaspoon salt
- 1 cup finely chopped pecans or walnuts (optional, but highly recommended!)
Instructions
- Cream the Butter and Sugar: In a large bowl, using an electric mixer (or a sturdy whisk), cream together the softened butter and 1/2 cup of powdered sugar until light and fluffy (3-5 minutes).
- Add Vanilla: Stir in the vanilla extract until well combined.
- Combine Dry Ingredients: In a separate bowl, whisk together the flour and salt.
- Gradually Add Dry Ingredients: Gradually add the flour mixture to the butter mixture, mixing on low speed (or by hand) until just combined. Be careful not to overmix.
- Incorporate Nuts (Optional): If using, gently fold the chopped nuts into the dough until evenly distributed.
- Chill the Dough: Wrap the dough tightly in plastic wrap and chill in the refrigerator for at least 30 minutes, or up to 2 hours.
- Preheat Oven: Preheat your oven to 350°F (175°C). Line baking sheets with parchment paper or silicone baking mats.
- Shape the Cookies: Remove the dough from the refrigerator. Roll the dough into 1-inch balls. Place the balls onto the prepared baking sheets, leaving about 1 inch of space between each cookie.
- Bake the Cookies: Bake for 12-15 minutes, or until the cookies are set and lightly golden brown on the bottom. The tops of the cookies should still be pale.
- Cool Slightly: Let the cookies cool on the baking sheets for a few minutes before transferring them to a wire rack to cool completely.
- First Coating: While the cookies are still slightly warm, gently roll them in powdered sugar until completely coated.
- Second Coating (Optional): Let the cookies cool completely. Once cool, roll them in powdered sugar again.
- Storage: Store the cookies in an airtight container at room temperature.
Notes
- Use High-Quality Butter: The flavor of the butter really shines through in these cookies, so use the best quality butter you can find.
- Don’t Overmix the Dough: Overmixing can lead to tough cookies. Mix until just combined.
- Chill the Dough: Chilling the dough is crucial for preventing the cookies from spreading too much.
- Don’t Overbake: Overbaked cookies will be dry and crumbly. Bake until they are set and lightly golden brown on the bottom.
- Coat While Warm: Coating the cookies while they are still slightly warm helps the powdered sugar adhere better.
- Double Coat for Extra Sweetness: For a truly decadent treat, double coat the cookies with powdered sugar.
- Experiment with Flavors: You can add other flavorings to the dough, such as almond extract, lemon zest, or orange zest.
- Nut Variations: Try different types of nuts, such as macadamia nuts or pistachios. Make sure they are finely chopped.
- Make Ahead: The dough can be made ahead of time and stored in the refrigerator for up to 2 days.
- Freezing: Baked cookies can be frozen for up to 2 months. Thaw completely before serving. You may want to dust them with fresh powdered sugar after thawing.

Leave a Comment