
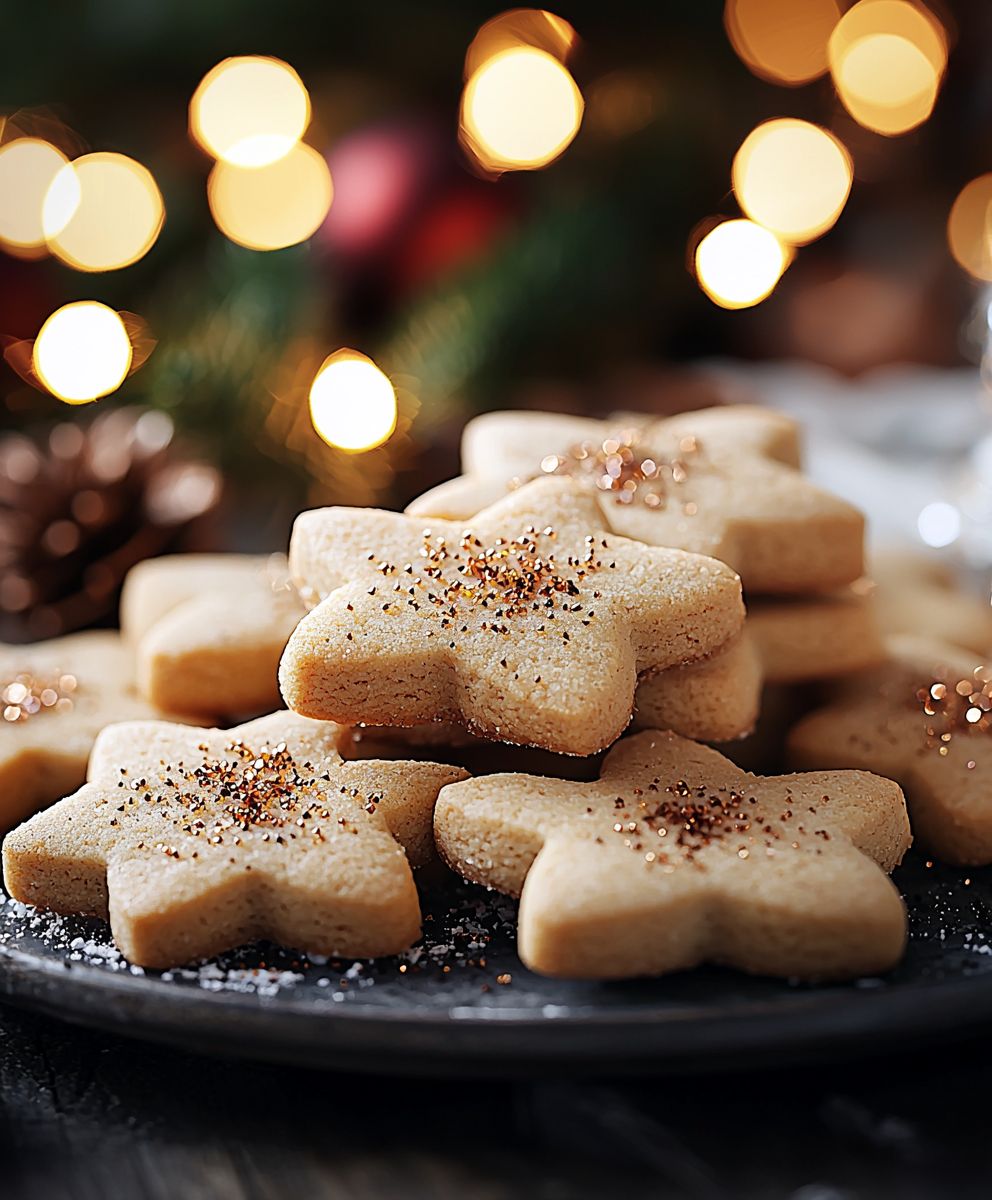
Mexican Christmas cookies, or Polvorones, are more than just a sweet treat; they’re a symbol of warmth, family, and festive cheer during the holiday season. Imagine biting into a delicate, crumbly cookie that melts in your mouth, leaving behind a subtle sweetness and a hint of cinnamon that’s the magic of a perfectly made Polvorón.
These delightful cookies have a rich history, deeply rooted in Spanish and Mexican culinary traditions. Brought over by Spanish colonists, the recipe evolved over centuries, incorporating local ingredients and flavors to become the beloved Mexican Christmas cookies we know and adore today. They are often prepared in large batches and shared amongst loved ones, embodying the spirit of generosity and togetherness that defines the Christmas season.
What makes Polvorones so irresistible? It’s the unique texture a delicate balance between crumbly and melt-in-your-mouth. The subtle sweetness, often enhanced with a dusting of powdered sugar, is never overpowering, making them the perfect accompaniment to a cup of coffee or hot chocolate. Plus, they are relatively simple to make, making them a fantastic baking project to share with family and friends. So, get ready to experience the joy of baking and sharing these traditional cookies your taste buds will thank you!

Ingredients:
- For the Cookies:
- 1 cup (2 sticks) unsalted butter, softened
- 1 cup granulated sugar
- 1 large egg
- 1 teaspoon vanilla extract
- 3 cups all-purpose flour
- 1 teaspoon baking powder
- 1/2 teaspoon salt
- 1/4 teaspoon ground cinnamon
- 1/4 teaspoon ground anise seed (optional, but highly recommended!)
- For the Icing:
- 4 cups powdered sugar
- 1/2 cup milk (plus more, if needed)
- 1 teaspoon vanilla extract
- Food coloring (red and green are traditional for Christmas)
- For the Decorations:
- Sprinkles (various colors and shapes)
- Chopped nuts (pecans, walnuts, or almonds)
- Candied cherries, halved
Preparing the Cookie Dough
- Cream the Butter and Sugar: In a large bowl, using an electric mixer, cream together the softened butter and granulated sugar until light and fluffy. This usually takes about 3-5 minutes. Don’t rush this step! A well-creamed mixture is key to a tender cookie. I like to scrape down the sides of the bowl a couple of times to make sure everything is evenly incorporated.
- Add the Egg and Vanilla: Beat in the egg and vanilla extract until well combined. Again, scrape down the sides of the bowl to ensure everything is mixed properly. You want a smooth, homogenous mixture at this stage.
- Combine Dry Ingredients: In a separate medium bowl, whisk together the flour, baking powder, salt, cinnamon, and anise seed (if using). Whisking ensures that the baking powder and spices are evenly distributed throughout the flour, which will help the cookies rise properly and have a consistent flavor.
- Gradually Add Dry Ingredients to Wet Ingredients: Gradually add the dry ingredients to the wet ingredients, mixing on low speed until just combined. Be careful not to overmix! Overmixing can develop the gluten in the flour, resulting in tough cookies. I usually add the dry ingredients in three additions, mixing until just incorporated after each addition. The dough should be soft and slightly sticky.
- Chill the Dough: Wrap the dough in plastic wrap and flatten it into a disc. This helps it chill more evenly. Refrigerate for at least 2 hours, or preferably overnight. Chilling the dough is crucial because it allows the gluten to relax, which prevents the cookies from spreading too much during baking. It also makes the dough easier to handle and roll out. I find that overnight chilling yields the best results.
Rolling, Cutting, and Baking the Cookies
- Preheat Oven and Prepare Baking Sheets: Preheat your oven to 375°F (190°C). Line baking sheets with parchment paper or silicone baking mats. Parchment paper prevents the cookies from sticking and makes cleanup a breeze. Silicone mats provide even heat distribution, which helps the cookies bake evenly.
- Roll Out the Dough: On a lightly floured surface, roll out the chilled dough to about 1/4 inch thickness. Work with a portion of the dough at a time, keeping the rest refrigerated. If the dough is too cold and hard to roll, let it sit at room temperature for a few minutes to soften slightly.
- Cut Out Shapes: Use cookie cutters to cut out desired shapes. Traditional Mexican Christmas cookies often include stars, bells, trees, and other festive shapes. Dip the cookie cutters in flour before each cut to prevent them from sticking to the dough.
- Place Cookies on Baking Sheets: Carefully transfer the cut-out cookies to the prepared baking sheets, leaving about 1 inch of space between each cookie. This allows for proper air circulation and prevents the cookies from sticking together during baking.
- Bake the Cookies: Bake for 8-10 minutes, or until the edges are lightly golden brown. The baking time will vary depending on the size and thickness of the cookies, so keep a close eye on them.
- Cool the Cookies: Let the cookies cool on the baking sheets for a few minutes before transferring them to a wire rack to cool completely. This prevents them from breaking while they are still warm and delicate.
Making the Icing
- Combine Ingredients: In a large bowl, whisk together the powdered sugar, milk, and vanilla extract until smooth. Start with 1/2 cup of milk and add more, 1 tablespoon at a time, until you reach your desired consistency. The icing should be thick enough to coat the cookies but thin enough to spread easily.
- Divide and Color the Icing: Divide the icing into separate bowls, depending on how many colors you want to use. Add food coloring to each bowl and stir until the desired color is achieved. Red and green are traditional for Christmas, but you can use any colors you like. I like to use gel food coloring because it’s more concentrated and doesn’t thin out the icing as much as liquid food coloring.
- Adjust Consistency (if needed): If the icing is too thick, add a little more milk, 1 teaspoon at a time, until it reaches the desired consistency. If the icing is too thin, add a little more powdered sugar, 1 tablespoon at a time, until it thickens up.
Decorating the Cookies
- Ice the Cookies: Once the cookies are completely cool, spread the icing evenly over the tops of the cookies. You can use a spoon, a knife, or a piping bag to apply the icing. If you’re using a piping bag, make sure the icing is smooth and free of lumps.
- Add Decorations: Immediately sprinkle the cookies with sprinkles, chopped nuts, and candied cherries while the icing is still wet. This will ensure that the decorations adhere properly. Get creative with your decorations! You can use different colors and shapes of sprinkles to create unique designs.
- Let the Icing Set: Let the icing set completely before storing the cookies. This usually takes about 1-2 hours. You can speed up the process by placing the cookies in the refrigerator for a shorter period of time.
Tips and Variations
- Anise Seed: Don’t skip the anise seed! It adds a unique and delicious flavor that is characteristic of Mexican Christmas cookies. If you don’t have anise seed, you can substitute it with a pinch of nutmeg or cardamom.
- Citrus Zest: For a brighter flavor, add the zest of one orange or lemon to the cookie dough.
- Chocolate Chips: Add 1/2 cup of mini chocolate chips to the cookie dough for a chocolatey twist.
- Spiced Icing: Add a pinch of cinnamon or nutmeg to the icing for a warm and festive flavor.
- Royal Icing: For a more professional look, use royal icing instead of regular icing. Royal icing is made with egg whites and powdered sugar and dries to a hard, glossy finish.
- Storage: Store the cookies in an airtight container at room temperature for up to 5 days. You can also freeze the cookies for up to 2 months. Thaw the cookies at room temperature before serving.
- Make Ahead: The cookie dough can be made ahead of time and stored in the refrigerator for up to 3 days. You can also freeze the dough for up to 2 months. Thaw the dough in the refrigerator overnight before rolling and cutting.
- Gluten-Free Option: To make these cookies gluten-free, substitute the all-purpose flour with a gluten-free all-purpose flour blend. Make sure the blend contains xanthan gum, which will help bind the ingredients together.
- Vegan Option: To make these cookies vegan, substitute the butter with vegan butter, the egg with a flax egg (1 tablespoon of ground flaxseed mixed with 3 tablespoons of water), and the milk with plant-based milk.
Troubleshooting
- Cookies Spreading Too Much: If your cookies are spreading too much during baking, it could be due to a few reasons. First, make sure your butter is not too soft. It should be softened but still cool to the touch. Second, make sure you are not overmixing the dough. Overmixing develops the gluten in the flour, which can cause the cookies to spread. Third, make sure your oven is at the correct temperature. An oven that is too hot can cause the cookies to spread. Finally, try chilling the dough for a longer period of time.
- Cookies Too Dry: If your cookies are too dry, it could be because you are using too much flour. Make sure you are measuring the flour correctly. The best way to measure flour is to use
Conclusion:
This isn’t just another cookie recipe; it’s a passport to a fiesta of flavors, a warm hug in every bite, and a guaranteed crowd-pleaser. These Mexican Christmas cookies are a must-try because they perfectly balance the comforting familiarity of a classic cookie with the vibrant, exciting tastes of Mexican cuisine. The subtle warmth of cinnamon, the nutty richness of pecans, and the delicate sweetness of powdered sugar create a symphony of textures and tastes that will leave you wanting more. Trust me, once you try them, they’ll become a staple in your holiday baking repertoire.
But the magic doesn’t stop there! These cookies are incredibly versatile. Serve them alongside a steaming mug of Mexican hot chocolate for the ultimate cozy experience. Or, for a more sophisticated touch, pair them with a glass of aged tequila or a rich, dark coffee. They also make a beautiful and thoughtful homemade gift. Package them in festive tins or cellophane bags tied with colorful ribbons, and you’ll be spreading holiday cheer with every delicious bite.
Looking for variations? Get creative! Try adding a pinch of cayenne pepper to the dough for a subtle kick. Or, incorporate some finely grated orange zest for a bright, citrusy note. For a chocolatey twist, dip the cooled cookies in melted dark chocolate and sprinkle with chopped pecans or sea salt. You could even experiment with different nuts, like walnuts or almonds, to create your own unique flavor profile. The possibilities are endless!
I truly believe that these Mexican Christmas cookies are special. They’re more than just a treat; they’re a celebration of culture, flavor, and the joy of sharing good food with loved ones. The recipe is straightforward, the ingredients are readily available, and the results are simply divine. So, what are you waiting for? Gather your ingredients, preheat your oven, and get ready to embark on a baking adventure that will tantalize your taste buds and warm your heart.
I’m so excited for you to try this recipe and experience the magic of these cookies for yourself. I’ve poured my heart into perfecting this recipe, and I’m confident that you’ll love them as much as I do. Don’t be afraid to experiment with different variations and make them your own. Baking should be fun and creative, so let your imagination run wild!
And now, for the most important part: I want to hear from you! Once you’ve baked these Mexican Christmas cookies, please share your experience. Did you make any modifications? What did your family and friends think? Post a picture of your creations on social media and tag me! I can’t wait to see your beautiful cookies and hear your stories. Let’s spread the joy of baking and share the deliciousness of these amazing cookies with the world. Happy baking, and may your holidays be filled with warmth, laughter, and plenty of delicious treats! I am sure this recipe will become a family favorite.
Mexican Christmas Cookies: Recipes, Traditions, and Baking Tips
Festive and flavorful Mexican Christmas cookies (Polvorones) perfect for the holidays! These buttery, tender cookies are spiced with cinnamon and anise, then decorated with colorful icing and sprinkles.
Ingredients
- 1 cup (2 sticks) unsalted butter, softened
- 1 cup granulated sugar
- 1 large egg
- 1 teaspoon vanilla extract
- 3 cups all-purpose flour
- 1 teaspoon baking powder
- 1/2 teaspoon salt
- 1/4 teaspoon ground cinnamon
- 1/4 teaspoon ground anise seed (optional, but highly recommended!)
- 4 cups powdered sugar
- 1/2 cup milk (plus more, if needed)
- 1 teaspoon vanilla extract
- Food coloring (red and green are traditional for Christmas)
- Sprinkles (various colors and shapes)
- Chopped nuts (pecans, walnuts, or almonds)
- Candied cherries, halved
Instructions
- Cream the Butter and Sugar: In a large bowl, using an electric mixer, cream together the softened butter and granulated sugar until light and fluffy (3-5 minutes). Scrape down the sides of the bowl.
- Add the Egg and Vanilla: Beat in the egg and vanilla extract until well combined. Scrape down the sides of the bowl.
- Combine Dry Ingredients: In a separate medium bowl, whisk together the flour, baking powder, salt, cinnamon, and anise seed (if using).
- Gradually Add Dry Ingredients to Wet Ingredients: Gradually add the dry ingredients to the wet ingredients, mixing on low speed until just combined. Be careful not to overmix. The dough should be soft and slightly sticky.
- Chill the Dough: Wrap the dough in plastic wrap and flatten it into a disc. Refrigerate for at least 2 hours, or preferably overnight.
- Preheat Oven and Prepare Baking Sheets: Preheat your oven to 375°F (190°C). Line baking sheets with parchment paper or silicone baking mats.
- Roll Out the Dough: On a lightly floured surface, roll out the chilled dough to about 1/4 inch thickness. Work with a portion of the dough at a time, keeping the rest refrigerated.
- Cut Out Shapes: Use cookie cutters to cut out desired shapes. Dip the cookie cutters in flour before each cut to prevent them from sticking to the dough.
- Place Cookies on Baking Sheets: Carefully transfer the cut-out cookies to the prepared baking sheets, leaving about 1 inch of space between each cookie.
- Bake the Cookies: Bake for 8-10 minutes, or until the edges are lightly golden brown.
- Cool the Cookies: Let the cookies cool on the baking sheets for a few minutes before transferring them to a wire rack to cool completely.
- Combine Icing Ingredients: In a large bowl, whisk together the powdered sugar, milk, and vanilla extract until smooth. Start with 1/2 cup of milk and add more, 1 tablespoon at a time, until you reach your desired consistency.
- Divide and Color the Icing: Divide the icing into separate bowls, depending on how many colors you want to use. Add food coloring to each bowl and stir until the desired color is achieved.
- Adjust Consistency (if needed): If the icing is too thick, add a little more milk, 1 teaspoon at a time, until it reaches the desired consistency. If the icing is too thin, add a little more powdered sugar, 1 tablespoon at a time, until it thickens up.
- Ice the Cookies: Once the cookies are completely cool, spread the icing evenly over the tops of the cookies.
- Add Decorations: Immediately sprinkle the cookies with sprinkles, chopped nuts, and candied cherries while the icing is still wet.
- Let the Icing Set: Let the icing set completely before storing the cookies. This usually takes about 1-2 hours.
Notes
- Don’t skip the anise seed! It adds a unique and delicious flavor.
- For a brighter flavor, add the zest of one orange or lemon to the cookie dough.
- Add 1/2 cup of mini chocolate chips to the cookie dough for a chocolatey twist.
- Add a pinch of cinnamon or nutmeg to the icing for a warm and festive flavor.
- For a more professional look, use royal icing instead of regular icing.
- Store the cookies in an airtight container at room temperature for up to 5 days. You can also freeze the cookies for up to 2 months. Thaw the cookies at room temperature before serving.
- The cookie dough can be made ahead of time and stored in the refrigerator for up to 3 days. You can also freeze the dough for up to 2 months. Thaw the dough in the refrigerator overnight before rolling and cutting.
- To make these cookies gluten-free, substitute the all-purpose flour with a gluten-free all-purpose flour blend. Make sure the blend contains xanthan gum, which will help bind the ingredients together.
- To make these cookies vegan, substitute the butter with vegan butter, the egg with a flax egg (1 tablespoon of ground flaxseed mixed with 3 tablespoons of water), and the milk with plant-based milk.


Leave a Comment