
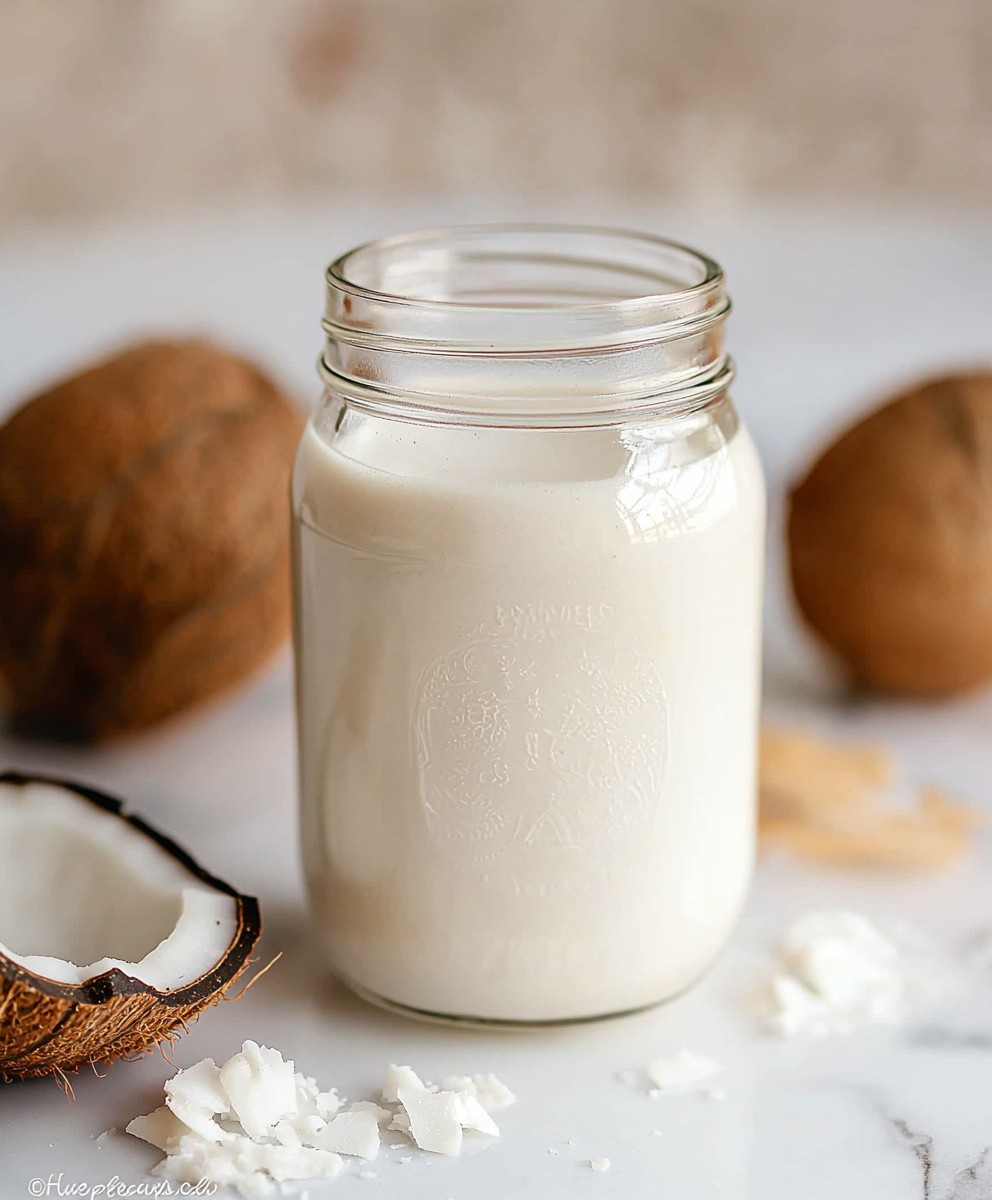
Homemade Coconut Milk: It’s richer, creamier, and surprisingly easier to make than you might think! Forget the watery, preservative-laden cartons from the store. Imagine the pure, unadulterated taste of fresh coconut transforming into a luscious, velvety milk that elevates your smoothies, curries, and desserts to a whole new level. Have you ever wondered how the vibrant flavors of Southeast Asian cuisine are so deeply satisfying? Often, the secret lies in the quality of the coconut milk.
Coconut milk has been a staple in tropical regions for centuries, deeply woven into the culinary traditions of countries like Thailand, India, and the Philippines. It’s more than just an ingredient; it’s a symbol of abundance and nourishment. Passed down through generations, the art of extracting coconut milk was once a communal activity, a shared experience that strengthened family and community bonds. The creamy texture and subtly sweet flavor of homemade coconut milk is something truly special.
People adore coconut milk for its versatility and health benefits. It’s naturally dairy-free, making it a fantastic option for those with lactose intolerance or dairy sensitivities. Plus, its rich, creamy texture adds a luxurious mouthfeel to any dish. But beyond its dietary advantages, it’s the taste that truly captivates. The delicate sweetness and subtle coconut flavor enhance both sweet and savory dishes, creating a symphony of flavors that dance on your palate. So, are you ready to ditch the store-bought stuff and experience the pure bliss of homemade? Let’s get started!

Ingredients:
- 2 cups unsweetened shredded coconut
- 4 cups hot water (not boiling, around 170-180°F or 77-82°C)
- Optional: Pinch of sea salt (enhances the flavor)
Preparing the Coconut Mixture:
- Combine Coconut and Water: In a high-speed blender, combine the 2 cups of unsweetened shredded coconut with the 4 cups of hot water. It’s crucial that the water is hot, but not boiling. Boiling water can sometimes cook the coconut slightly, which can affect the flavor and texture of the milk. Hot water helps to release the coconut’s oils and flavors more effectively.
- Blend Thoroughly: Secure the lid of your blender tightly. Blend the coconut and water on high speed for approximately 2-3 minutes. The goal is to break down the coconut as much as possible, creating a milky, opaque mixture. You should see the mixture becoming quite frothy and the coconut particles becoming very fine. If your blender struggles, you may need to stop and scrape down the sides a couple of times to ensure everything is properly incorporated.
- Check the Consistency: After blending, take a peek. The mixture should look like a thick, creamy liquid with very small coconut particles suspended throughout. If you still see large pieces of coconut, blend for another minute or so. The finer the coconut is blended, the more milk you’ll extract.
Straining the Coconut Milk:
- Prepare Your Straining Setup: This is a crucial step for achieving smooth, creamy coconut milk. You’ll need a nut milk bag, cheesecloth (several layers), or a fine-mesh sieve lined with cheesecloth. Place your chosen straining method over a large bowl or pitcher. Make sure the bowl is large enough to hold all the liquid. I personally prefer using a nut milk bag because it’s reusable and easy to clean.
- Pour the Mixture: Carefully pour the blended coconut mixture into the prepared straining setup. Do this slowly to avoid overflowing. If you’re using a nut milk bag, you might want to do this in batches.
- Extract the Milk: Once all the mixture is in the strainer, gently gather the edges of the nut milk bag or cheesecloth. Twist the top closed and begin squeezing the bag or cheesecloth to extract the milk. Squeeze firmly but gently, working your way down the bag. You’ll notice the milk flowing into the bowl below. Continue squeezing until you’ve extracted as much liquid as possible. The remaining coconut pulp will be quite dry.
- Don’t Over-Squeeze: While you want to extract as much milk as possible, avoid squeezing too hard at the very end. Over-squeezing can force some of the finer coconut particles through the strainer, resulting in a slightly gritty texture.
- Repeat if Necessary: If you want an even smoother milk, you can strain the milk a second time using the same method. This will remove any remaining fine particles.
Optional Flavor Enhancements:
- Add a Pinch of Salt: A small pinch of sea salt can really enhance the natural sweetness and flavor of the coconut milk. Add it to the strained milk and stir well to dissolve.
- Sweeten (Optional): If you prefer a sweeter coconut milk, you can add a touch of your favorite sweetener. Maple syrup, agave nectar, or even a few drops of stevia work well. Start with a small amount and adjust to your taste.
- Vanilla Extract (Optional): A tiny splash of vanilla extract can add a lovely aroma and flavor to your homemade coconut milk. Use pure vanilla extract for the best results.
Storing Your Homemade Coconut Milk:
- Transfer to a Container: Pour the strained coconut milk into a clean, airtight container. Glass jars or BPA-free plastic containers work well.
- Refrigerate Immediately: It’s important to refrigerate the coconut milk immediately after straining. This will help to prevent spoilage.
- Storage Time: Homemade coconut milk will typically last for 3-5 days in the refrigerator. Be sure to check for any signs of spoilage before using it. If it smells sour or looks discolored, discard it.
- Separation is Normal: Over time, the coconut milk may separate in the refrigerator. This is perfectly normal. The cream will rise to the top, and the water will settle at the bottom. Simply shake or stir the milk well before using it to recombine the layers.
- Freezing (Optional): You can also freeze coconut milk for longer storage. Pour the milk into ice cube trays or freezer-safe containers, leaving some headspace for expansion. Frozen coconut milk can be stored for up to 2-3 months. When you’re ready to use it, thaw it in the refrigerator overnight. Keep in mind that the texture may change slightly after freezing and thawing.
Using the Coconut Pulp:
Don’t throw away the leftover coconut pulp! It’s a valuable ingredient that can be used in a variety of ways.
- Dehydrate for Coconut Flour: Spread the coconut pulp thinly on a baking sheet and bake it in a low oven (around 170°F or 77°C) until it’s completely dry. This can take several hours. Once dry, grind the coconut in a food processor or blender to make coconut flour.
- Add to Smoothies: The coconut pulp can be added directly to smoothies for extra fiber and flavor.
- Use in Baking: Incorporate the coconut pulp into muffins, cakes, or cookies. It will add moisture and a subtle coconut flavor.
- Make Coconut Butter: Blend the coconut pulp in a food processor until it becomes smooth and creamy. This may take some time, but eventually, the oils will release and create a delicious coconut butter.
- Compost It: If you can’t use the coconut pulp right away, you can add it to your compost pile.
Troubleshooting:
- Milk is Too Thin: If your coconut milk is too thin, it could be because you used too much water or didn’t blend the coconut long enough. Next time, try using less water or blending for a longer period.
- Milk is Gritty: If your coconut milk is gritty, it means that some of the coconut particles made it through the strainer. Try straining the milk a second time using a finer strainer.
- Milk Tastes Bland: If your coconut milk tastes bland, try adding a pinch of sea salt to enhance the flavor. You can also experiment with adding a touch of sweetener or vanilla extract.
- Milk Spoiled Quickly: If your coconut milk spoiled quickly, it could be because it wasn’t stored properly. Make sure to refrigerate it immediately after straining and store it in a clean, airtight container.
Variations:
- Toasted Coconut Milk: For a richer, nuttier flavor, toast the shredded coconut in a dry skillet over medium heat until it’s lightly golden brown. Let it cool completely before blending it with the hot water.
- Chocolate Coconut Milk: Add a tablespoon or two of cocoa powder to the blender along with the coconut and water. You may also want to add a touch of sweetener to balance the bitterness of the cocoa.
- Spiced Coconut Milk: Add a pinch of cinnamon, nutmeg, or cardamom to the blender for a warm, spiced flavor.
- Vanilla Bean Coconut Milk: Scrape the seeds from a vanilla bean and add them to the blender along with the coconut and water.
Why Make Your Own Coconut Milk?
Making your own coconut milk is not only easy, but it also allows you to control the ingredients and avoid any unwanted additives or preservatives that are often found in store-bought versions. Plus, it tastes so much fresher and more flavorful! You’ll be surprised at how much better homemade coconut milk is compared to the canned stuff.
Health Benefits of Coconut Milk
Coconut milk is a good source of healthy fats, including medium-chain triglycerides (MCTs), which are easily digested and can provide a quick source of energy. It also contains vitamins and minerals like iron, magnesium, and potassium. However, it’s important to consume coconut milk in moderation as it is high in calories.
Enjoy Your Homemade Coconut Milk!
I hope you enjoy making your own coconut milk! It’s a simple and rewarding process that will allow you to enjoy the fresh, delicious flavor of coconut in a variety of ways. From smoothies to curries to desserts, homemade coconut milk is a versatile ingredient that you’ll find yourself using again and again.
Conclusion:
So there you have it! Making your own homemade coconut milk is not only incredibly easy, but it’s also a game-changer in terms of flavor and freshness. Forget the canned stuff once you taste the difference, you’ll never go back. The creamy, subtly sweet taste of freshly made coconut milk is simply unparalleled, and knowing exactly what ingredients are going into your food is always a win.
But why is this recipe a must-try? Well, beyond the superior taste, it’s also incredibly versatile. Think about all the ways you can use coconut milk! From enriching your morning smoothies and adding a tropical twist to your coffee, to creating luscious curries and decadent desserts, the possibilities are truly endless. And let’s not forget the health benefits! By making it yourself, you avoid all the unnecessary additives and preservatives often found in store-bought versions. You’re getting pure, unadulterated coconut goodness.
Serving Suggestions and Variations:
Now, let’s talk about how you can enjoy your freshly made coconut milk. For a simple and refreshing drink, chill it thoroughly and enjoy it straight from the fridge. You can also add a touch of honey or maple syrup for extra sweetness, or a pinch of cinnamon or nutmeg for a warm, comforting flavor.
For a more substantial meal, use it as the base for a vibrant Thai green curry or a creamy coconut lentil soup. It’s also fantastic in baked goods! Try substituting it for regular milk in your favorite cake or muffin recipe for a moist and flavorful treat. And don’t forget about desserts! Coconut milk is the key ingredient in many delicious desserts, such as coconut rice pudding, coconut panna cotta, and even vegan ice cream.
Want to get creative? Here are a few variations to try:
- Toasted Coconut Milk: Toast the shredded coconut in a dry pan before blending for a richer, nuttier flavor.
- Vanilla Infused Coconut Milk: Add a vanilla bean to the coconut and water mixture before blending for a delicate vanilla aroma.
- Spiced Coconut Milk: Add a pinch of cardamom, ginger, or cloves to the mixture for a warm and aromatic twist.
- Chocolate Coconut Milk: Blend in a tablespoon or two of cocoa powder for a decadent chocolate treat.
The beauty of this recipe is that it’s completely customizable to your own taste preferences. Don’t be afraid to experiment and find your perfect combination!
I truly believe that making your own homemade coconut milk is one of those simple pleasures in life that everyone should experience. It’s a small effort that yields a huge reward in terms of flavor, freshness, and overall satisfaction. Plus, it’s a great way to reduce your reliance on processed foods and take control of what you’re putting into your body.
So, what are you waiting for? Gather your ingredients, dust off your blender, and get ready to embark on a coconut milk-making adventure! I’m confident that you’ll be amazed at how easy and delicious it is. And most importantly, I want to hear about your experience! Did you try any of the variations? Did you use it in a particularly delicious dish? Share your thoughts, tips, and photos in the comments below. I can’t wait to see what you create!
Happy blending!
Print
Homemade Coconut Milk: The Ultimate Guide to Making Your Own
- Total Time: 8 minutes
- Yield: 4 cups 1x
Description
Fresh, creamy homemade coconut milk with just coconut and water! Healthier, tastier, and more versatile than store-bought.
Ingredients
- 2 cups unsweetened shredded coconut
- 4 cups hot water (170-180°F or 77-82°C)
- Optional: Pinch of sea salt
Instructions
- Combine Coconut and Water: In a high-speed blender, combine the shredded coconut and hot water.
- Blend Thoroughly: Blend on high speed for 2-3 minutes, until the mixture is milky and opaque. Stop and scrape down the sides if needed.
- Prepare Straining Setup: Place a nut milk bag, cheesecloth (several layers), or a fine-mesh sieve lined with cheesecloth over a large bowl or pitcher.
- Pour the Mixture: Carefully pour the blended coconut mixture into the prepared strainer.
- Extract the Milk: Gently squeeze the bag or cheesecloth to extract the milk. Avoid over-squeezing at the end.
- Repeat if Necessary: For smoother milk, strain a second time.
- Add Salt (Optional): Add a pinch of sea salt and stir well.
- Sweeten (Optional): Add your favorite sweetener to taste.
- Vanilla Extract (Optional): Add a tiny splash of vanilla extract for the best results.
- Transfer to a Container: Pour the strained coconut milk into a clean, airtight container.
- Refrigerate Immediately: It’s important to refrigerate the coconut milk immediately after straining.
- Storage Time: Homemade coconut milk will typically last for 3-5 days in the refrigerator. Be sure to check for any signs of spoilage before using it. If it smells sour or looks discolored, discard it.
- Separation is Normal: Over time, the coconut milk may separate in the refrigerator. This is perfectly normal. The cream will rise to the top, and the water will settle at the bottom. Simply shake or stir the milk well before using it to recombine the layers.
- Freezing (Optional): You can also freeze coconut milk for longer storage. Pour the milk into ice cube trays or freezer-safe containers, leaving some headspace for expansion. Frozen coconut milk can be stored for up to 2-3 months. When you’re ready to use it, thaw it in the refrigerator overnight. Keep in mind that the texture may change slightly after freezing and thawing.
Notes
- Use hot (but not boiling) water to release the coconut’s oils and flavors.
- Don’t discard the leftover coconut pulp! Use it to make coconut flour, add it to smoothies, use it in baking, make coconut butter, or compost it.
- Separation is normal; shake or stir before using.
- Adjust sweetness and flavor to your preference.
- For toasted coconut milk, toast the shredded coconut in a dry skillet over medium heat until it’s lightly golden brown. Let it cool completely before blending it with the hot water.
- For chocolate coconut milk, add a tablespoon or two of cocoa powder to the blender along with the coconut and water. You may also want to add a touch of sweetener to balance the bitterness of the cocoa.
- For spiced coconut milk, add a pinch of cinnamon, nutmeg, or cardamom to the blender for a warm, spiced flavor.
- For vanilla bean coconut milk, scrape the seeds from a vanilla bean and add them to the blender along with the coconut and water.
- Prep Time: 5 minutes
- Cook Time: 3 minutes


Leave a Comment