
Healthy oat cookies, a delightful treat that marries wholesome goodness with irresistible flavor, are about to become your new favorite indulgence. Forget those overly processed, sugar-laden snacks! We’re diving into a world where you can enjoy a satisfying cookie without the guilt. Have you ever dreamt of a cookie that fuels your body while tantalizing your taste buds? Well, dream no more!
Oat cookies, in their various forms, have been a comforting staple in many cultures for generations. From the Scottish oatcakes that sustained travelers to the Anzac biscuits baked for soldiers during World War I, oats have long been recognized for their nutritional value and ability to provide sustained energy. These humble grains have evolved into countless delicious recipes, and today, we’re putting a healthy spin on a classic.
What makes healthy oat cookies so universally loved? It’s the perfect combination of chewy texture, subtle sweetness, and the satisfying feeling of knowing you’re making a good choice for your body. They’re incredibly versatile, easily adaptable to different dietary needs and preferences, and wonderfully convenient for a quick breakfast, a post-workout snack, or a guilt-free dessert. Get ready to experience the joy of baking and savoring a cookie that’s both delicious and good for you!

Ingredients:
- 1 ½ cups rolled oats (not instant)
- 1 cup whole wheat flour (or all-purpose flour)
- ½ cup chopped walnuts or pecans (optional)
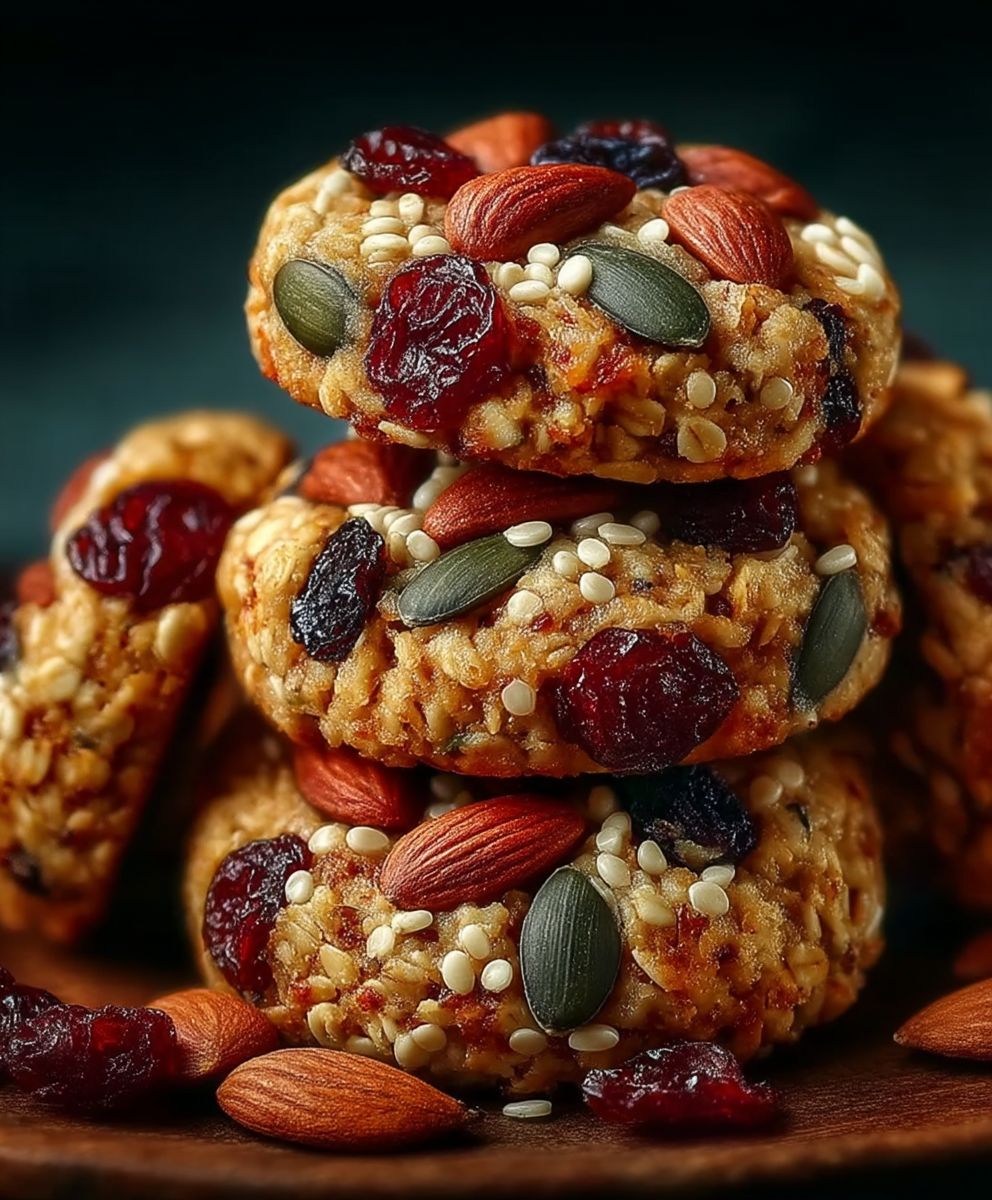
- ½ cup raisins or dried cranberries (optional)
- 1 teaspoon baking soda
- ½ teaspoon ground cinnamon
- ¼ teaspoon salt
- ½ cup unsalted butter, softened
- ½ cup packed brown sugar
- ¼ cup granulated sugar
- 1 large egg
- 1 teaspoon vanilla extract
- 2 tablespoons milk (any kind)
Preparing the Dough:
- Combine the dry ingredients: In a large bowl, whisk together the rolled oats, whole wheat flour (or all-purpose flour), chopped nuts (if using), raisins or dried cranberries (if using), baking soda, ground cinnamon, and salt. Make sure everything is evenly distributed. This ensures that the baking soda and spices are properly incorporated throughout the cookies.
- Cream the butter and sugars: In a separate large bowl, cream together the softened butter, brown sugar, and granulated sugar using an electric mixer (or a sturdy spoon if you’re feeling ambitious!). Beat until the mixture is light and fluffy. This usually takes about 3-5 minutes with an electric mixer. The creaming process is crucial for incorporating air into the dough, which will result in lighter and chewier cookies. Don’t rush this step! Scrape down the sides of the bowl occasionally to ensure even mixing.
- Add the egg and vanilla: Beat in the egg until well combined. Then, stir in the vanilla extract. The egg helps to bind the ingredients together and adds richness to the cookies, while the vanilla extract enhances the overall flavor.
- Gradually add the dry ingredients to the wet ingredients: Slowly add the dry ingredients to the wet ingredients, mixing on low speed (or by hand) until just combined. Be careful not to overmix the dough, as this can develop the gluten in the flour and result in tough cookies. Mix until the flour is just incorporated, and then stop. A few streaks of flour are okay at this point.
- Add the milk: Stir in the milk until the dough comes together. The milk adds moisture to the dough and helps to create a softer cookie. The dough should be slightly sticky but still hold its shape. If the dough seems too dry, add another tablespoon of milk. If it seems too wet, add another tablespoon of flour.
- Chill the dough (optional but recommended): Cover the bowl with plastic wrap and chill the dough in the refrigerator for at least 30 minutes, or up to 2 hours. Chilling the dough allows the flavors to meld together and prevents the cookies from spreading too much during baking. This step is especially important if you live in a warm climate or if your butter was not completely softened.
Baking the Cookies:
- Preheat the oven: Preheat your oven to 375°F (190°C). Line a baking sheet with parchment paper or a silicone baking mat. Parchment paper prevents the cookies from sticking to the baking sheet and makes cleanup a breeze. A silicone baking mat provides even heat distribution and helps to prevent the cookies from burning on the bottom.
- Drop the dough onto the baking sheet: Drop rounded tablespoons of dough onto the prepared baking sheet, leaving about 2 inches between each cookie. You can use a cookie scoop for uniform cookies, or simply use two spoons to portion out the dough.
- Slightly flatten the cookies (optional): If you prefer thinner cookies, you can gently flatten the dough balls with the back of a spoon or your fingers. This will also help the cookies to bake more evenly.
- Bake the cookies: Bake for 10-12 minutes, or until the edges are golden brown and the centers are set. The baking time will vary depending on your oven, so keep a close eye on the cookies. They should be lightly golden brown around the edges and slightly soft in the center.
- Cool the cookies: Remove the baking sheet from the oven and let the cookies cool on the baking sheet for a few minutes before transferring them to a wire rack to cool completely. This allows the cookies to firm up slightly and prevents them from breaking when you try to move them.
Tips and Variations:
- Nut variations: Feel free to experiment with different types of nuts, such as almonds, hazelnuts, or macadamia nuts. You can also toast the nuts before adding them to the dough for a more intense flavor.
- Dried fruit variations: Instead of raisins or dried cranberries, try using chopped dates, dried apricots, or dried cherries.
- Spice variations: Add a pinch of nutmeg, ginger, or cardamom to the dough for a different flavor profile.
- Chocolate chips: For a more decadent treat, add ½ cup of chocolate chips to the dough.
- Make them vegan: Substitute the butter with vegan butter, the egg with a flax egg (1 tablespoon ground flaxseed mixed with 3 tablespoons water), and the milk with plant-based milk.
- Add protein: Incorporate a scoop of your favorite protein powder to boost the nutritional value. You might need to adjust the amount of flour or milk to maintain the right consistency.
- Storage: Store the cooled cookies in an airtight container at room temperature for up to 5 days. You can also freeze the cookies for up to 2 months.
- For chewier cookies: Use melted butter instead of softened butter. This will result in a flatter, chewier cookie.
- For cakier cookies: Use shortening instead of butter. This will result in a thicker, cakier cookie.
- Don’t overbake: Overbaked cookies will be dry and crumbly. It’s better to slightly underbake them, as they will continue to bake on the hot baking sheet after you remove them from the oven.
- Adjust sweetness: If you prefer less sweet cookies, reduce the amount of sugar by ¼ cup.
- High Altitude Adjustments: At higher altitudes, you may need to adjust the recipe slightly. Try reducing the amount of baking soda by ¼ teaspoon and increasing the amount of liquid by 1-2 tablespoons. You may also need to bake the cookies at a slightly higher temperature for a shorter amount of time.
Troubleshooting:
Why are my cookies spreading too much?
There are several reasons why your cookies might be spreading too much. One common reason is that the butter was too soft or melted. Make sure your butter is softened but still cool to the touch. Another reason could be that the oven temperature is too low. Use an oven thermometer to ensure that your oven is properly calibrated. Finally, overmixing the dough can also cause the cookies to spread too much. Be careful not to overmix the dough, and chill it for at least 30 minutes before baking.
Why are my cookies dry and crumbly?
Dry and crumbly cookies are often the result of overbaking. Be sure to bake the cookies until they are just set around the edges and slightly soft in the center. They will continue to bake on the hot baking sheet after you remove them from the oven. Another reason could be that you used too much flour. Measure the flour carefully, using a kitchen scale for the most accurate results. You can also try adding a tablespoon or two of milk to the dough to add moisture.
Why are my cookies tough?
Tough cookies are usually caused by overmixing the dough. Overmixing develops the gluten in the flour, which can result in a tough texture. Mix the dough until the flour is just incorporated, and then stop. Another reason could be that you used too much flour. Measure the flour carefully, using a kitchen scale for the most accurate results.
Why are my cookies not browning?
If your cookies are not browning, it could be due to a few factors. First, make sure your oven is properly preheated. Second, check the expiration date on your baking soda. Old baking soda can lose its effectiveness. Third, the type of baking sheet you are using can also affect browning. Dark baking sheets tend to brown cookies more quickly than light baking sheets. Finally, adding a little bit of milk or brushing the tops of the cookies with milk before baking can help them to brown.
Conclusion:
This isn’t just another cookie recipe; it’s a gateway to guilt-free indulgence! These healthy oat cookies are a must-try because they perfectly balance wholesome ingredients with irresistible flavor. We’ve taken the classic comfort of a cookie and elevated it with the goodness of oats, creating a treat that satisfies your sweet tooth without compromising your well-being. The chewy texture, the subtle sweetness, and the nutty aroma it all comes together in a symphony of deliciousness that will leave you wanting more.
But the best part? This recipe is incredibly versatile! Feel free to experiment with different mix-ins to create your own signature version. Craving something extra decadent? Add a handful of dark chocolate chips or chopped walnuts. Want a burst of fruity flavor? Dried cranberries or raisins are fantastic additions. For a hint of spice, try a dash of cinnamon or nutmeg. And if you’re feeling adventurous, a sprinkle of sea salt on top will enhance the sweetness and create a truly unforgettable cookie experience.
These cookies are perfect for any occasion. Enjoy them warm from the oven with a glass of cold milk for a classic treat. Pack them in your lunchbox for a healthy and satisfying snack. Serve them at your next gathering and watch them disappear in minutes. Or, crumble them over yogurt or ice cream for a delightful dessert topping. You can even get creative and use them as the base for mini cheesecakes or parfaits. The possibilities are endless!
Beyond the deliciousness and versatility, these cookies are also incredibly easy to make. The recipe requires minimal ingredients and simple steps, making it perfect for both beginner and experienced bakers. You don’t need any fancy equipment or special skills just a bowl, a spoon, and a little bit of love. And the best part? The aroma that fills your kitchen as these cookies bake is simply divine. It’s a sensory experience that will warm your heart and soul.
I truly believe that these healthy oat cookies will become a staple in your baking repertoire. They’re a delicious, wholesome, and versatile treat that everyone will love. So, what are you waiting for? Preheat your oven, gather your ingredients, and get ready to bake a batch of these amazing cookies.
And once you’ve tried them, I’d love to hear about your experience! Share your photos, your variations, and your feedback in the comments below. Let me know what you think of the recipe and how you made it your own. Did you add any special ingredients? Did you serve them in a unique way? I’m always eager to learn from my readers and see how they’re enjoying my recipes. Your feedback is invaluable and helps me create even better content in the future. So, don’t be shy share your cookie creations with the world! Happy baking!
Healthy Oat Cookies: The Ultimate Guide to Baking Deliciously
Wholesome and delicious oatmeal cookies packed with oats, whole wheat flour, and your choice of nuts and dried fruit. A perfect treat for any occasion!
Ingredients
- 1 ½ cups rolled oats (not instant)
- 1 cup whole wheat flour (or all-purpose flour)
- ½ cup chopped walnuts or pecans (optional)
- ½ cup raisins or dried cranberries (optional)
- 1 teaspoon baking soda
- ½ teaspoon ground cinnamon
- ¼ teaspoon salt
- ½ cup unsalted butter, softened
- ½ cup packed brown sugar
- ¼ cup granulated sugar
- 1 large egg
- 1 teaspoon vanilla extract
- 2 tablespoons milk (any kind)
Instructions
- Combine Dry Ingredients: In a large bowl, whisk together the rolled oats, whole wheat flour (or all-purpose flour), chopped nuts (if using), raisins or dried cranberries (if using), baking soda, ground cinnamon, and salt.
- Cream Butter and Sugars: In a separate large bowl, cream together the softened butter, brown sugar, and granulated sugar using an electric mixer (or a sturdy spoon) until light and fluffy (3-5 minutes). Scrape down the sides of the bowl occasionally.
- Add Egg and Vanilla: Beat in the egg until well combined. Then, stir in the vanilla extract.
- Gradually Add Dry Ingredients: Slowly add the dry ingredients to the wet ingredients, mixing on low speed (or by hand) until just combined. Be careful not to overmix.
- Add Milk: Stir in the milk until the dough comes together. The dough should be slightly sticky but still hold its shape. If the dough seems too dry, add another tablespoon of milk. If it seems too wet, add another tablespoon of flour.
- Chill Dough (Optional): Cover the bowl with plastic wrap and chill the dough in the refrigerator for at least 30 minutes, or up to 2 hours.
- Preheat Oven: Preheat your oven to 375°F (190°C). Line a baking sheet with parchment paper or a silicone baking mat.
- Drop Dough onto Baking Sheet: Drop rounded tablespoons of dough onto the prepared baking sheet, leaving about 2 inches between each cookie.
- Slightly Flatten (Optional): If you prefer thinner cookies, you can gently flatten the dough balls with the back of a spoon or your fingers.
- Bake: Bake for 10-12 minutes, or until the edges are golden brown and the centers are set.
- Cool: Remove the baking sheet from the oven and let the cookies cool on the baking sheet for a few minutes before transferring them to a wire rack to cool completely.
Notes
- Experiment with different nuts like almonds, hazelnuts, or macadamia nuts. Toasting the nuts enhances their flavor.
- Try chopped dates, dried apricots, or dried cherries instead of raisins or dried cranberries.
- Add a pinch of nutmeg, ginger, or cardamom for a different flavor profile.
- Add ½ cup of chocolate chips for a more decadent treat.
- Substitute the butter with vegan butter, the egg with a flax egg (1 tablespoon ground flaxseed mixed with 3 tablespoons water), and the milk with plant-based milk.
- Incorporate a scoop of your favorite protein powder to boost the nutritional value. You might need to adjust the amount of flour or milk to maintain the right consistency.
- Store cooled cookies in an airtight container at room temperature for up to 5 days. Freeze for up to 2 months.
- Use melted butter instead of softened butter.
- Use shortening instead of butter.
- Overbaked cookies will be dry and crumbly.
- Reduce the amount of sugar by ¼ cup for less sweet cookies.
- Reduce baking soda by ¼ teaspoon and increase liquid by 1-2 tablespoons. May need to bake at a slightly higher temperature for a shorter time.


Leave a Comment