
Dairy Free Lemon Bars are a delightful treat that perfectly balance tartness and sweetness, making them an irresistible dessert for any occasion. As someone who has always had a passion for baking, I can confidently say that these lemon bars are a game-changer, especially for those who are lactose intolerant or following a dairy-free lifestyle. The history of lemon bars dates back to the early 20th century, with their roots often traced to American kitchens where they became a staple for potlucks and family gatherings.
What I love most about Dairy Free Lemon Bars is their bright, zesty flavor combined with a buttery, crumbly crust that melts in your mouth. The texture is simply divine, offering a refreshing contrast to heavier desserts. Plus, they are incredibly easy to make, which is why they have become a favorite among friends and family. Whether youre serving them at a summer picnic or enjoying them as a sweet treat after dinner, Dairy Free Lemon Bars are sure to impress and satisfy your sweet tooth!

Ingredients:
- 1 cup all-purpose flour
- 1/4 cup powdered sugar
- 1/4 teaspoon salt
- 1/2 cup coconut oil, melted (or dairy-free butter)
- 1 cup granulated sugar
- 1/4 cup cornstarch
- 1/2 cup fresh lemon juice (about 2-3 lemons)
- 1 tablespoon lemon zest
- 1/2 teaspoon baking powder
- 1/4 teaspoon turmeric (for color, optional)
- Powdered sugar for dusting (optional)
Preparing the Crust
1. Preheat your oven to 350°F (175°C). This is an important step to ensure that your lemon bars bake evenly and come out perfectly set. 2. In a medium mixing bowl, combine 1 cup of all-purpose flour, 1/4 cup of powdered sugar, and 1/4 teaspoon of salt. Whisk these dry ingredients together until they are well mixed. This will help to ensure that the powdered sugar and salt are evenly distributed throughout the flour. 3. Pour in 1/2 cup of melted coconut oil (or dairy-free butter) into the dry mixture. Use a fork or pastry cutter to blend the oil into the flour mixture until it resembles coarse crumbs. You want to make sure there are no large clumps of oil left. 4. Once the mixture is crumbly, press it firmly into the bottom of a greased 8×8-inch baking dish. Make sure to spread it evenly across the bottom, creating a solid crust. You can use the back of a measuring cup to help press it down evenly. 5. Bake the crust in the preheated oven for about 15-20 minutes, or until it is lightly golden. Keep an eye on it to prevent over-baking. Once done, remove it from the oven and let it cool slightly while you prepare the filling.Preparing the Lemon Filling
6. In a large mixing bowl, combine 1 cup of granulated sugar and 1/4 cup of cornstarch. Whisk these together until they are well combined. This will help to prevent any lumps in your filling. 7. Add in 1/2 cup of fresh lemon juice and 1 tablespoon of lemon zest. The zest adds a wonderful burst of lemon flavor, so dont skip this step! Whisk everything together until smooth. 8. Next, add in 1/2 teaspoon of baking powder and 1/4 teaspoon of turmeric (if using). The turmeric is optional but can give your filling a lovely yellow color, making your lemon bars look even more appetizing. Mix until everything is well combined. 9. Pour the lemon filling over the pre-baked crust, spreading it evenly with a spatula. This will create a beautiful layer of lemon goodness on top of your crust.Baking the Lemon Bars
10. Return the baking dish to the oven and bake for an additional 20-25 minutes. Youll know they are done when the filling is set and the edges are slightly puffed. The center may still have a slight jiggle, but it will firm up as it cools. 11. Once baked, remove the lemon bars from the oven and let them cool in the pan on a wire rack. This cooling process is crucial as it allows the filling to set properly. I usually let them cool for about 30 minutes at room temperature. 12. After they have cooled, transfer the baking dish to the refrigerator and chill for at least 2 hours. Chilling helps to firm up the bars, making them easier to cut into squares.Assembling and Serving
13. Once the lemon bars are thoroughly chilled, its time to cut them! Use a sharp knife to slice them into squares or rectangles, depending on your preference. I like to wipe the knife with a damp cloth between cuts to keep the edges clean. 14. If desired, dust the tops of the lemon bars with powdered sugar for a beautiful presentation. This adds a nice touch and a little extra sweetness to balance the tartness of the lemon. 15. Serve the lemon bars chilled or at room temperature. They make a perfect dessert for any occasion, and I love how refreshing they are, especially on a warm day! 16. Store any leftovers in an airtight container in the refrigerator for up to a week. They can also be frozen for longer storage; just make sure to wrap them well to prevent freezer burn. Enjoy your delicious dairy-free lemon bars! They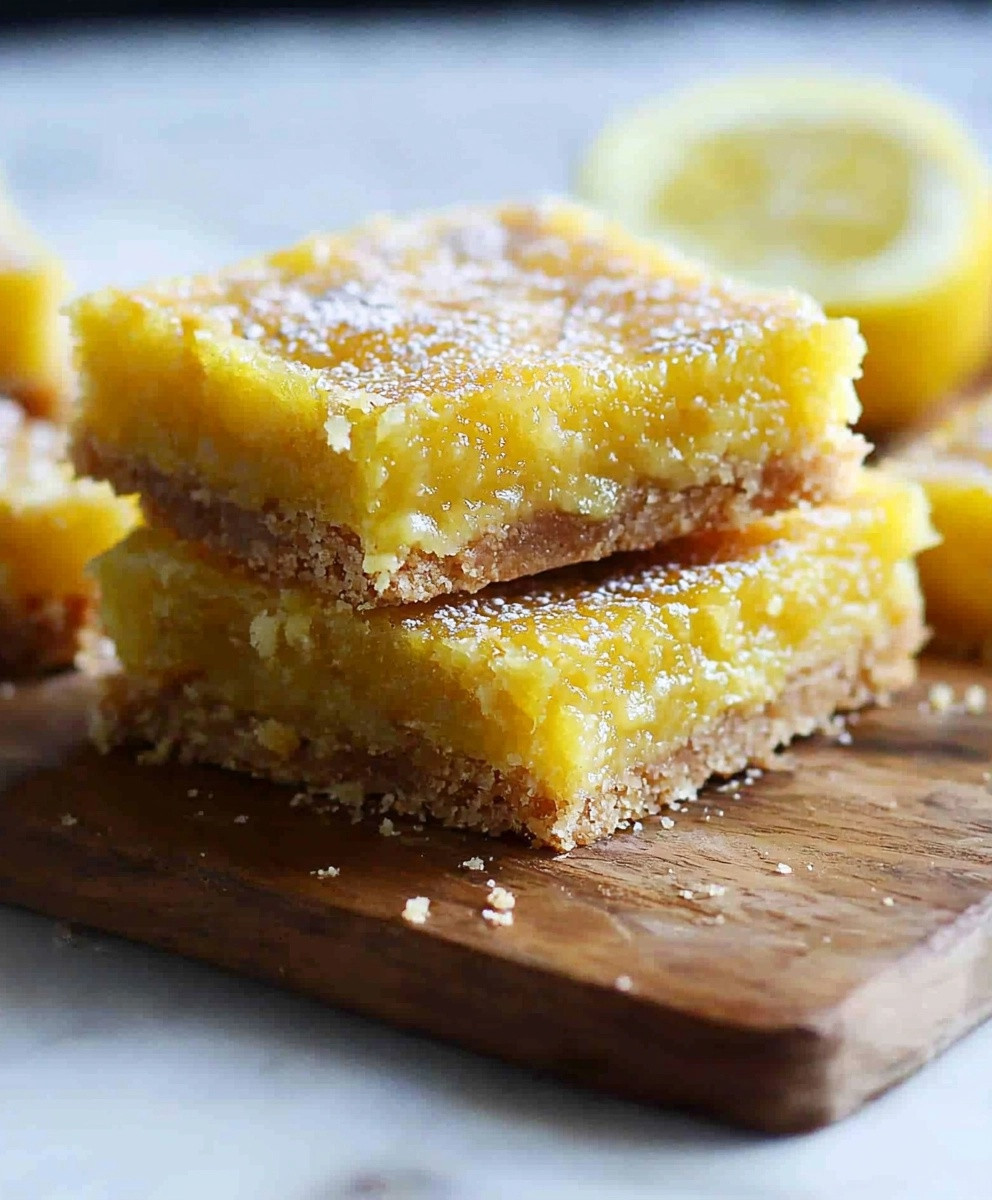
Leave a Comment