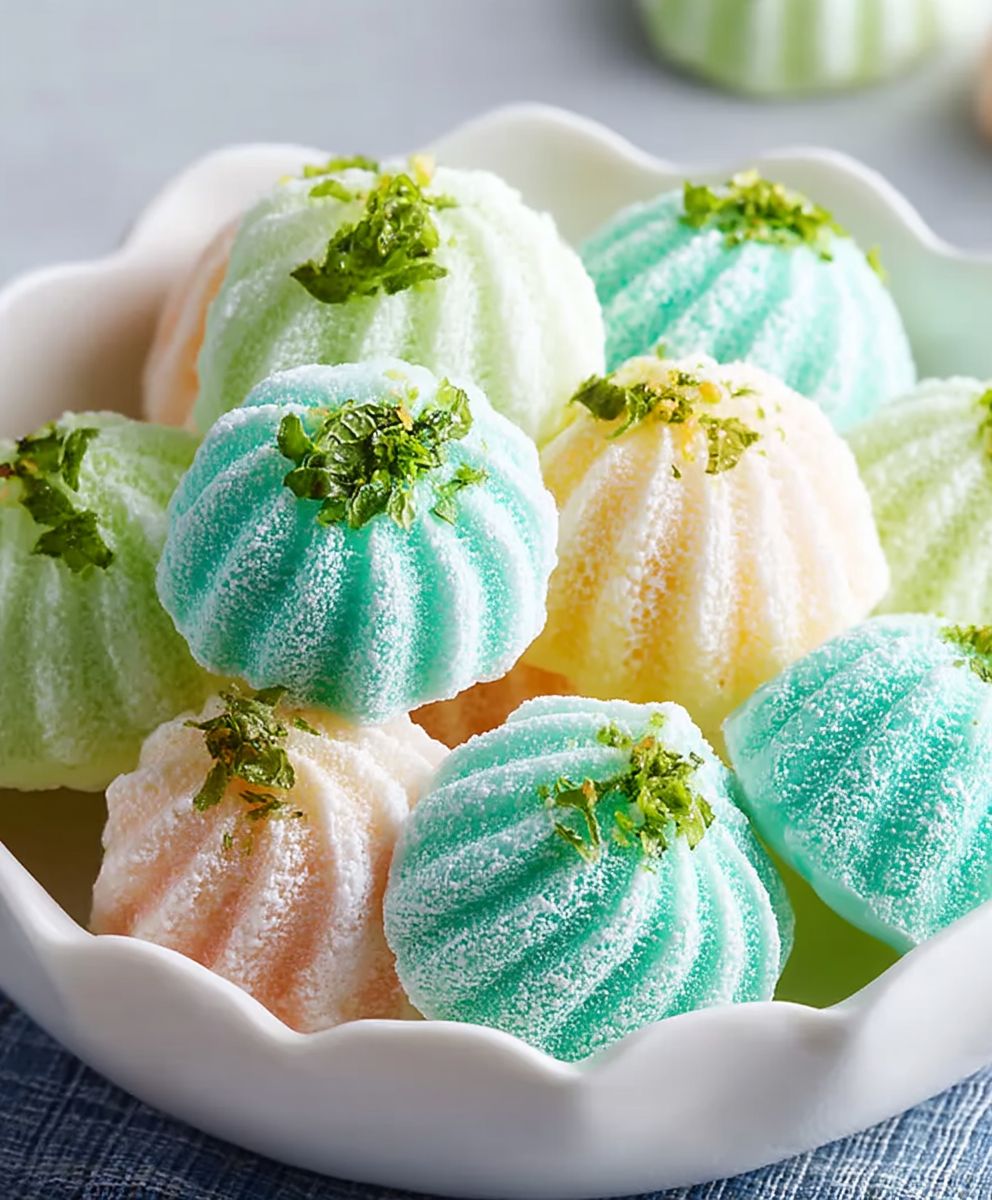
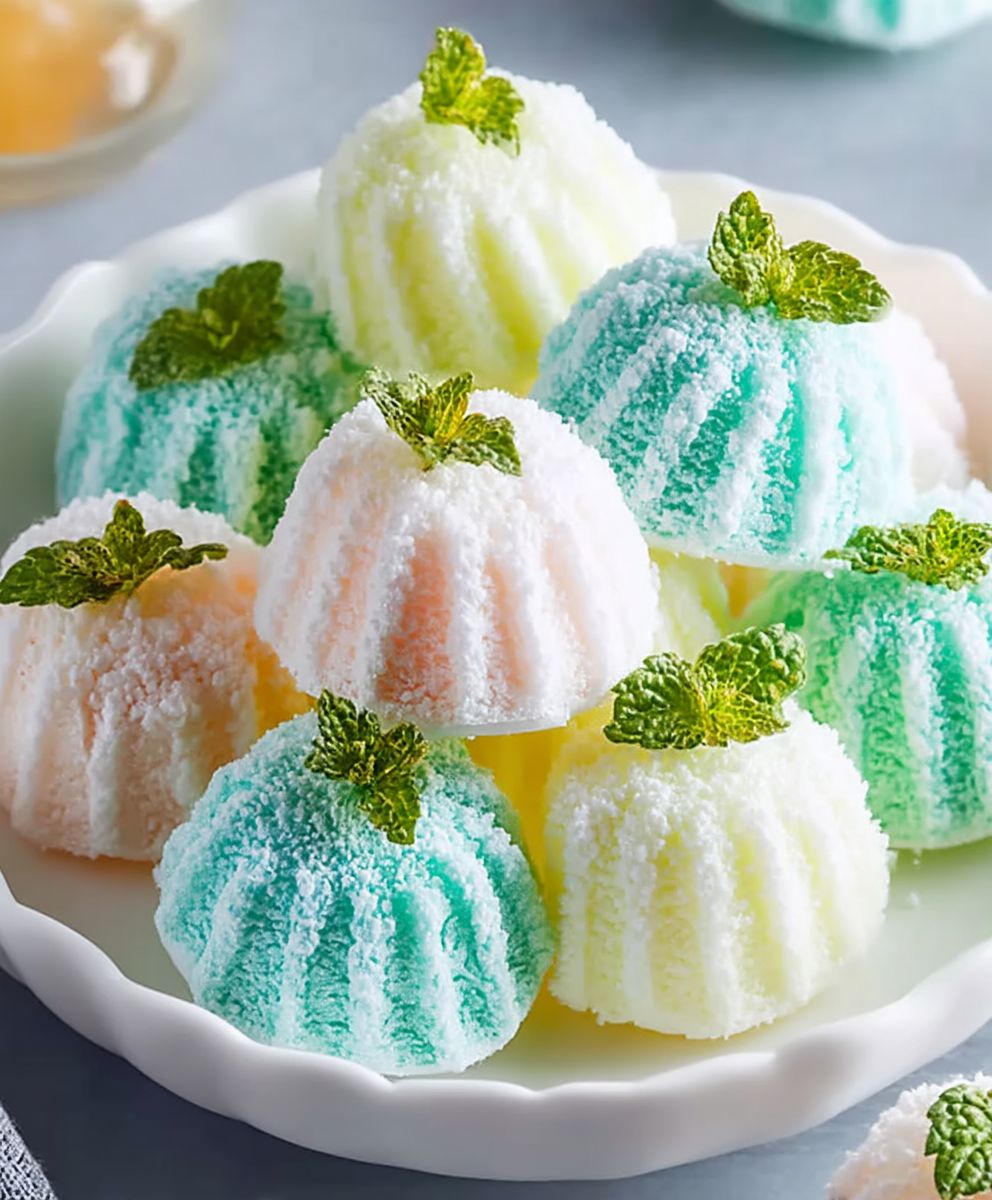
Cream Cheese Mints, those melt-in-your-mouth morsels of sweetness, are more than just a candy; they’re a nostalgic trip down memory lane for many. Have you ever wondered how to create these delightful treats at home? I’m here to guide you through the process of making these classic confections, perfect for any occasion.
While the exact origins of cream cheese mints are a bit hazy, they’ve been a staple at Southern gatherings, weddings, and baby showers for generations. Their delicate pastel hues and intricate shapes, often molded into flowers or shells, add a touch of elegance to any dessert table. They represent a tradition of homemade goodness and shared celebrations.
But what makes these little candies so irresistible? It’s the perfect combination of creamy texture, subtle sweetness, and a hint of mint that dances on your tongue. They’re incredibly easy to make, requiring only a handful of ingredients and minimal effort. Plus, they can be customized with different colors and flavors to suit your preferences. Whether you’re looking for a simple treat to satisfy your sweet tooth or a charming addition to your next event, these mints are sure to be a crowd-pleaser. Let’s get started!
Ingredients:
- 8 ounces cream cheese, softened
- 4 cups powdered sugar, sifted
- 1/4 cup (4 tablespoons) butter, softened
- 1 teaspoon peppermint extract (or other flavoring, such as vanilla, lemon, or almond)
- Food coloring (optional, gel food coloring recommended)
- Granulated sugar, for coating (optional)
Preparing the Cream Cheese Mixture
Alright, let’s get started! The key to perfect cream cheese mints is a smooth and well-combined mixture. Don’t rush this part; it’s where the magic happens.
- Soften the Cream Cheese and Butter: This is crucial! Make sure your cream cheese and butter are truly softened. I usually leave them out at room temperature for at least an hour, maybe even two, depending on how warm your kitchen is. They should be soft enough that you can easily press them with your finger, but not melted. If you’re in a hurry, you can microwave them in short bursts (5-10 seconds at a time), but be extremely careful not to melt them. Melted cream cheese or butter will ruin the texture of your mints.
- Cream Together: In a large bowl, using an electric mixer (either a stand mixer or a hand mixer), cream together the softened cream cheese and butter until they are light and fluffy. This usually takes about 2-3 minutes. Scrape down the sides of the bowl occasionally to ensure everything is evenly incorporated. You want a smooth, homogenous mixture with no lumps.
- Add the Peppermint Extract: Now, add your peppermint extract (or whatever flavoring you’ve chosen). Start with 1 teaspoon, and then taste the mixture. If you want a stronger flavor, you can add a little more, but be careful not to overdo it. Remember, a little goes a long way! I find that peppermint extract can sometimes have a slightly bitter aftertaste if you use too much.
- Gradually Add the Powdered Sugar: This is where patience comes in handy. Sift your powdered sugar before adding it to the mixture. This helps prevent lumps and ensures a smoother final product. Add the powdered sugar one cup at a time, mixing on low speed after each addition. It’s important to mix on low speed to prevent a powdered sugar cloud from erupting in your kitchen! After each cup is added, scrape down the sides of the bowl to make sure everything is well combined.
- Mix Until Smooth: Continue adding the powdered sugar until all 4 cups are incorporated. The mixture will become quite thick and stiff. Keep mixing until it is smooth and forms a cohesive dough. It should pull away from the sides of the bowl. If the mixture seems too dry, you can add a tiny splash of milk or cream (start with 1/2 teaspoon) to moisten it. If it seems too wet, add a little more powdered sugar (1 tablespoon at a time).
Coloring the Dough (Optional)
If you want to add some color to your mints, now is the time! Gel food coloring is highly recommended because it’s more concentrated and won’t add extra liquid to the dough. Liquid food coloring can sometimes make the dough too wet.
- Divide the Dough: If you want to make multiple colors, divide the dough into separate bowls. The number of bowls will depend on how many colors you want to use.
- Add Food Coloring: Add a small amount of gel food coloring to each bowl. Start with just a tiny drop, and then mix it in thoroughly with your hands or a spatula. Remember, you can always add more color, but you can’t take it away!
- Knead the Color In: Knead the dough until the color is evenly distributed. Be careful not to over-knead, as this can make the dough tough.
Shaping the Mints
Now for the fun part! There are several ways to shape your cream cheese mints. You can use a mold, a fork, or simply roll them into balls.
- Using a Mold: If you have a candy mold (silicone or plastic), lightly dust it with powdered sugar. Press the dough firmly into the mold, making sure to fill all the crevices. Then, gently flex the mold to release the mint.
- Using a Fork: This is a classic method. Roll a small amount of dough into a ball (about 1/2 inch in diameter). Place the ball on a plate and gently flatten it with the tines of a fork, creating a criss-cross pattern. You can dip the fork in powdered sugar between each mint to prevent sticking.
- Rolling into Balls: Simply roll small amounts of dough into balls (about 1/2 inch in diameter). You can leave them as is, or you can gently flatten them slightly.
Coating the Mints (Optional)
Coating the mints in granulated sugar adds a little extra sweetness and a nice sparkle. This is totally optional, but I think it makes them look extra fancy.
- Prepare the Sugar: Place some granulated sugar in a shallow dish.
- Roll the Mints: Gently roll each mint in the granulated sugar, making sure it’s evenly coated.
Setting the Mints
This is the final step! The mints need to set up and firm up before you can enjoy them.
- Arrange on a Baking Sheet: Place the shaped mints on a baking sheet lined with parchment paper or wax paper. This will prevent them from sticking.
- Refrigerate: Refrigerate the mints for at least 2 hours, or preferably overnight. This will allow them to firm up and set properly.
Storage
Once the mints are set, store them in an airtight container in the refrigerator. They will keep for several weeks (if they last that long!). You can also freeze them for longer storage. Just make sure they are well-wrapped to prevent freezer burn.
Tips for Success
- Don’t Overmix: Overmixing the dough can make the mints tough. Mix just until the ingredients are combined.
- Use Softened Ingredients: Make sure your cream cheese and butter are truly softened. This is essential for a smooth and creamy texture.
- Sift the Powdered Sugar: Sifting the powdered sugar helps prevent lumps and ensures a smoother final product.
- Experiment with Flavors: Don’t be afraid to experiment with different flavorings! Vanilla, lemon, almond, and even chocolate extract all work well.
- Get Creative with Colors: Have fun with the colors! You can make pastel mints, bright and bold mints, or even ombre mints.
Troubleshooting
- Mints are too soft: Add more powdered sugar, 1 tablespoon at a time, until the dough reaches the desired consistency.
- Mints are too dry: Add a tiny splash of milk or cream (start with 1/2 teaspoon) to moisten the dough.
- Mints are sticking to the mold: Lightly dust the mold with powdered sugar before pressing in the dough.

Conclusion:
This Cream Cheese Mints recipe isn’t just another confection; it’s a gateway to creating sweet memories and delightful treats that everyone will adore. From the incredibly smooth texture to the burst of refreshing mint, these little candies are a guaranteed crowd-pleaser. I truly believe that once you experience the melt-in-your-mouth goodness of these homemade mints, you’ll never reach for store-bought again.
Why is this recipe a must-try? It’s simple: the ingredients are readily available, the process is straightforward, and the results are simply divine. Forget complicated baking projects that require hours in the kitchen. This recipe is perfect for busy individuals who crave a homemade touch without the fuss. Plus, the satisfaction of creating something so delicious from scratch is incredibly rewarding. These mints are perfect for holidays, parties, or even just a little something sweet to brighten your day.
But the best part? The versatility! While the classic mint flavor is always a winner, don’t be afraid to experiment. Try adding a drop or two of lemon extract for a zesty twist, or a hint of almond extract for a more sophisticated flavor profile. For a visual upgrade, use different food colorings to create a rainbow of mints. Imagine a pastel assortment for Easter or festive red and green for Christmas! You can even press edible glitter into the tops for an extra touch of sparkle.
Serving Suggestions and Variations:
* Serve these Cream Cheese Mints as an after-dinner treat alongside coffee or tea.
* Package them in small cellophane bags tied with ribbon for adorable party favors.
* Use them to decorate cakes or cupcakes for a touch of elegance.
* Crumble them over ice cream for a refreshing minty topping.
* Get creative with shapes! Use different cookie cutters to create fun and festive designs.
* For a richer flavor, use a high-quality vanilla extract.
* If you prefer a less sweet mint, reduce the amount of powdered sugar slightly.
* Consider adding a pinch of salt to balance the sweetness.
I’m confident that you’ll find this recipe as enjoyable and rewarding as I do. It’s a fantastic way to impress your friends and family with your culinary skills, even if you’re a beginner in the kitchen. The process is so simple that even kids can get involved, making it a fun family activity.
So, what are you waiting for? Gather your ingredients, preheat your oven (just kidding, no baking required!), and get ready to create some magic. I’m absolutely certain that you’ll love these Cream Cheese Mints as much as I do.
And now, for the most important part: I want to hear about your experience! Did you try the recipe? Did you make any variations? What did your friends and family think? Please, share your thoughts, photos, and tips in the comments below. Your feedback is invaluable, and I can’t wait to see what delicious creations you come up with. Happy mint-making! Let me know if you have any questions, and I’ll do my best to help. I’m excited to see your minty masterpieces!
Cream Cheese Mints: The Ultimate Guide to Making Perfect Mints
Easy, delicious cream cheese mints, perfect for holidays, parties, or a sweet treat. Customize with your favorite flavors and colors!
Ingredients
- 8 ounces cream cheese, softened
- 4 cups powdered sugar, sifted
- 1/4 cup (4 tablespoons) butter, softened
- 1 teaspoon peppermint extract (or other flavoring, such as vanilla, lemon, or almond)
- Food coloring (optional, gel food coloring recommended)
- Granulated sugar, for coating (optional)
Instructions
- Ensure cream cheese and butter are softened at room temperature for at least an hour, or microwave in short bursts (5-10 seconds) with caution.
- In a large bowl, cream together the softened cream cheese and butter with an electric mixer until light and fluffy (2-3 minutes). Scrape down the sides.
- Add peppermint extract (or other flavoring). Start with 1 teaspoon and adjust to taste.
- Sift powdered sugar and add one cup at a time, mixing on low speed after each addition. Scrape down the sides.
- Continue adding powdered sugar until fully incorporated. The mixture should be thick and pull away from the bowl. If too dry, add 1/2 teaspoon of milk or cream. If too wet, add 1 tablespoon of powdered sugar at a time.
- Divide the dough into separate bowls for multiple colors. Add a small amount of gel food coloring to each bowl and knead until evenly distributed.
- Dust mold with powdered sugar. Press dough firmly into the mold and release.
- Roll dough into small balls. Flatten with a fork, creating a criss-cross pattern. Dip fork in powdered sugar to prevent sticking.
- Roll dough into small balls and flatten slightly.
- Roll each mint in granulated sugar.
- Place mints on a baking sheet lined with parchment paper. Refrigerate for at least 2 hours, or preferably overnight.
- Store in an airtight container in the refrigerator for several weeks or freeze for longer storage.
Notes
- Don’t overmix the dough.
- Use softened ingredients for a smooth texture.
- Sift the powdered sugar to prevent lumps.
- Experiment with different flavorings and colors.
- If mints are too soft, add more powdered sugar.
- If mints are too dry, add a splash of milk or cream.
- If mints are sticking to the mold, dust with powdered sugar.


Leave a Comment