
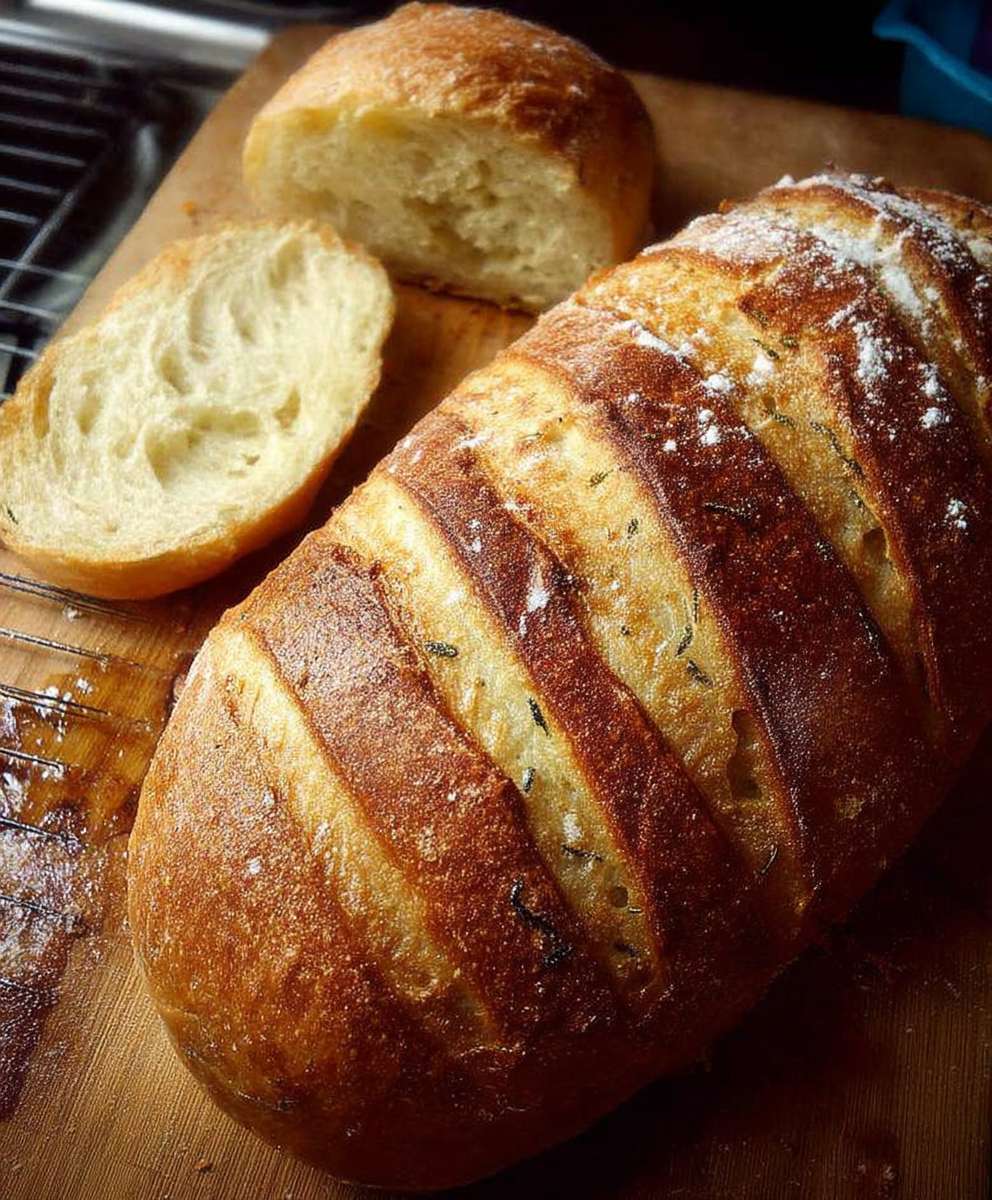
Country French Bread: the aroma alone is enough to transport you to a quaint village bakery, filled with the promise of crusty, chewy goodness. Have you ever dreamed of recreating that authentic, rustic loaf in your own kitchen? Well, dream no more! This recipe unlocks the secrets to baking a truly exceptional Country French Bread, one that will impress your family and friends with its incredible flavor and texture.
French bread, in its various forms, has been a staple of French cuisine for centuries. Its simple ingredients flour, water, yeast, and salt belie the artistry involved in achieving that perfect balance of a crisp, golden crust and a soft, airy interior. This particular style, often referred to as pain de campagne, is known for its slightly tangy flavor, developed through a longer fermentation process. It’s a bread that speaks of tradition, of slow living, and of savoring the simple pleasures in life.
People adore Country French Bread for so many reasons. The satisfying crunch of the crust gives way to a delightfully chewy crumb, making it perfect for sandwiches, dipping in olive oil, or simply enjoying with a pat of butter. Its subtle tang adds depth of flavor that complements a wide range of dishes. Plus, the act of baking your own bread is incredibly rewarding, filling your home with a warm, inviting scent and providing a sense of accomplishment that’s hard to beat. So, let’s get baking and create some magic!

Ingredients:
- For the Levain (Sourdough Starter):
- 100g active sourdough starter (100% hydration)
- 100g bread flour
- 100g water (lukewarm, about 85°F)
- For the Dough:
- 400g bread flour
- 100g whole wheat flour
- 350g water (lukewarm, about 85°F)
- 10g salt
- All of the levain from above
- Equipment:
- Large mixing bowl
- Dough scraper
- Kitchen scale
- Banneton basket (or a bowl lined with a floured kitchen towel)
- Dutch oven (or baking stone with a roasting pan)
- Lame or sharp knife
Preparing the Levain (Sourdough Starter)
The levain is the heart of this bread, giving it its characteristic flavor and rise. It’s crucial to have an active and bubbly starter before you begin. If your starter has been in the fridge, take it out a few days beforehand and feed it regularly to wake it up.
- Combine Ingredients: In a clean jar or bowl, combine the 100g of active sourdough starter, 100g of bread flour, and 100g of lukewarm water. Mix well until there are no dry clumps of flour remaining.
- Ferment: Cover the jar loosely with a lid or plastic wrap. Let it sit at room temperature (ideally around 70-75°F) for 4-6 hours, or until it has doubled in size and is bubbly. The levain is ready when it floats in water. This indicates it’s full of gas and ready to leaven the dough.
Making the Dough
Now that our levain is active and ready, we can move on to making the main dough. This process involves mixing the ingredients, allowing the dough to bulk ferment, and then shaping it for its final proof.
- Combine Flour and Water (Autolyse): In a large mixing bowl, combine the 400g of bread flour and 100g of whole wheat flour. Add the 350g of lukewarm water. Mix with your hands or a dough scraper until just combined. You don’t want to knead it at this point, just make sure all the flour is hydrated. This process, called autolyse, allows the flour to fully absorb the water, resulting in a more extensible and flavorful dough. Cover the bowl and let it rest for 30-60 minutes.
- Add Levain and Salt: After the autolyse, add the entire levain to the bowl. Using your hands, gently incorporate the levain into the flour and water mixture. Once the levain is mostly incorporated, add the 10g of salt.
- Mix the Dough: Now it’s time to really mix the dough. There are several methods you can use:
- Hand Mixing: Use the pincer method (pinching the dough between your thumb and fingers) or the slap and fold method (slapping the dough onto the counter and folding it over itself) for about 5-10 minutes until the dough starts to come together and feels smoother.
- Stand Mixer: If you’re using a stand mixer, use the dough hook attachment and mix on low speed for about 5-7 minutes, or until the dough starts to pull away from the sides of the bowl. Be careful not to overmix.
The dough will still be somewhat sticky, but it should be stronger and more elastic than before.
Bulk Fermentation
Bulk fermentation is the first rise of the dough, and it’s where a lot of the flavor development happens. During this stage, the yeast in the levain is actively fermenting, producing carbon dioxide and organic acids that give the bread its characteristic sourdough tang.
- First Rise: Place the dough in a lightly oiled bowl, turning to coat. Cover the bowl with plastic wrap or a damp towel. Let the dough rise at room temperature (ideally around 70-75°F) for 3-5 hours, or until it has almost doubled in size.
- Stretch and Folds: During the bulk fermentation, perform stretch and folds every 30-60 minutes for the first 2-3 hours. To do a stretch and fold, gently grab one side of the dough, stretch it upwards, and fold it over onto itself. Rotate the bowl 90 degrees and repeat. Do this until you’ve stretched and folded all four sides of the dough. This helps to develop the gluten structure and strengthen the dough.
- Check for Readiness: The dough is ready for shaping when it has increased in volume, feels light and airy, and has some visible bubbles on the surface. You can also perform the poke test: gently poke the dough with a floured finger. If the indentation slowly springs back, the dough is ready. If it springs back immediately, it needs more time. If it doesn’t spring back at all, it’s over-proofed.
Shaping and Proofing
Shaping the dough gives it its final form and prepares it for baking. Proofing is the final rise, where the dough develops its structure and becomes light and airy.
- Pre-Shape: Gently turn the dough out onto a lightly floured surface. Shape it into a loose round or oval. Cover with a damp towel and let it rest for 20-30 minutes. This allows the gluten to relax, making it easier to shape the final loaf.
- Final Shape: After the rest, gently shape the dough into its final shape. For a boule (round loaf), gently pull the edges of the dough towards the center, creating tension on the surface. For a batard (oval loaf), gently roll the dough into a log shape, tapering the ends.
- Proofing: Place the shaped dough in a well-floured banneton basket (or a bowl lined with a floured kitchen towel). Cover with plastic wrap or a damp towel. Let the dough proof in the refrigerator for 12-24 hours. This slow, cold proofing develops flavor and allows for better oven spring.
Baking
Baking is the final step, where the dough transforms into a beautiful, crusty loaf of bread. Using a Dutch oven helps to create a steamy environment, which is essential for achieving a good crust.
- Preheat Oven: Preheat your oven to 450°F (232°C) with a Dutch oven inside for at least 30 minutes. The Dutch oven needs to be very hot to create the steam needed for a good crust.
- Score the Dough: Carefully remove the hot Dutch oven from the oven. Gently invert the dough from the banneton basket into the Dutch oven. Use a lame or sharp knife to score the top of the dough. Scoring allows the bread to expand properly in the oven and prevents it from bursting in unpredictable places. You can use a simple straight slash or get creative with your scoring pattern.
- Bake Covered: Cover the Dutch oven and bake for 20 minutes. This creates a steamy environment that allows the bread to expand fully.
- Bake Uncovered: Remove the lid of the Dutch oven and continue baking for another 25-35 minutes, or until the crust is a deep golden brown and the internal temperature of the bread reaches 205-210°F (96-99°C).
- Cooling: Carefully remove the bread from the Dutch oven and place it on a wire rack to cool completely before slicing. This is crucial! Cutting into the bread while it’s still hot will result in a gummy texture. Let it cool for at least 2 hours, or even longer if you can resist.
Tips for Success
- Use a Kitchen Scale: Baking is a science, and accurate measurements are essential for consistent results. A kitchen scale is your best friend.
- Water Temperature: Pay attention to the water temperature. Lukewarm water (around 85°F) is ideal for activating the yeast.
- Don’t Overmix: Overmixing can develop the gluten too much, resulting in a tough bread.
- Be Patient: Sourdough baking takes time and patience. Don’t rush the process.
- Experiment: Once you
Conclusion:
This Country French Bread recipe isn’t just another bread recipe; it’s an invitation to experience the simple joy of baking and the unparalleled satisfaction of creating something truly delicious from scratch. From the intoxicating aroma that fills your kitchen as it bakes to the perfectly crusty exterior and soft, airy interior, this bread is a sensory delight that will elevate any meal. It’s a must-try for anyone who appreciates the art of baking and the pleasure of sharing homemade goodness with loved ones.
Why is this recipe a must-try? Because it delivers on its promise of authentic, rustic flavor without demanding hours of complicated work. The process is straightforward, the ingredients are simple, and the results are consistently impressive. You’ll be amazed at how easily you can create a loaf of bread that rivals anything you’d find in a high-end bakery. Plus, the active time is minimal, allowing you to focus on other things while the dough works its magic. It’s the perfect recipe for busy weeknights or leisurely weekend baking sessions.
But the beauty of this Country French Bread doesn’t stop at its simplicity and flavor. It’s also incredibly versatile. Serve it warm with a pat of butter and a sprinkle of sea salt for a classic treat. Use it to create gourmet sandwiches piled high with your favorite fillings. Toast it and top it with avocado and a poached egg for a satisfying breakfast. Or, cube it and use it to make delicious croutons for your salads and soups.
Looking for variations? Try adding a handful of chopped herbs, such as rosemary or thyme, to the dough for an extra layer of flavor. Incorporate some whole wheat flour for a nuttier taste and a slightly denser texture. Or, sprinkle the loaf with sesame seeds or poppy seeds before baking for added visual appeal and a subtle crunch. You can even experiment with different scoring patterns on the surface of the dough to create unique and beautiful loaves.
Beyond the classic applications, this bread shines as a companion to hearty soups and stews. Imagine dipping a crusty slice into a bowl of French onion soup or using it to soak up the rich broth of a beef bourguignon. It’s also fantastic served alongside a cheese board, providing the perfect canvas for showcasing your favorite artisanal cheeses. And don’t forget about using it to make bruschetta simply toast slices, rub them with garlic, and top them with fresh tomatoes, basil, and a drizzle of olive oil.
I truly believe that this recipe will become a staple in your kitchen. It’s more than just a recipe; it’s an experience. It’s about connecting with the tradition of bread baking, creating something tangible with your own hands, and sharing the warmth and comfort of homemade bread with those you care about.
So, what are you waiting for? Gather your ingredients, preheat your oven, and embark on this delicious baking adventure. I’m confident that you’ll be thrilled with the results. And most importantly, I want to hear about your experience! Share your photos, your tips, and your variations in the comments below. Let’s build a community of bread bakers and celebrate the joy of creating this incredible Country French Bread together. Happy baking!
Country French Bread: A Guide to Baking Authentic Loaves
A classic sourdough bread recipe using a levain (sourdough starter) for a tangy flavor and beautiful crust. This recipe guides you through each step, from creating the levain to baking the perfect loaf in a Dutch oven.
Ingredients
- 100g active sourdough starter (100% hydration)
- 100g bread flour
- 100g water (lukewarm, about 85°F)
- 400g bread flour
- 100g whole wheat flour
- 350g water (lukewarm, about 85°F)
- 10g salt
- All of the levain from above
Instructions
- Combine Ingredients: In a clean jar or bowl, combine the 100g of active sourdough starter, 100g of bread flour, and 100g of lukewarm water. Mix well until there are no dry clumps of flour remaining.
- Ferment: Cover the jar loosely with a lid or plastic wrap. Let it sit at room temperature (ideally around 70-75°F) for 4-6 hours, or until it has doubled in size and is bubbly. The levain is ready when it floats in water. This indicates it’s full of gas and ready to leaven the dough.
- Combine Flour and Water (Autolyse): In a large mixing bowl, combine the 400g of bread flour and 100g of whole wheat flour. Add the 350g of lukewarm water. Mix with your hands or a dough scraper until just combined. You don’t want to knead it at this point, just make sure all the flour is hydrated. Cover the bowl and let it rest for 30-60 minutes.
- Add Levain and Salt: After the autolyse, add the entire levain to the bowl. Using your hands, gently incorporate the levain into the flour and water mixture. Once the levain is mostly incorporated, add the 10g of salt.
- Mix the Dough: Use the pincer method (pinching the dough between your thumb and fingers) or the slap and fold method (slapping the dough onto the counter and folding it over itself) for about 5-10 minutes until the dough starts to come together and feels smoother. If you’re using a stand mixer, use the dough hook attachment and mix on low speed for about 5-7 minutes, or until the dough starts to pull away from the sides of the bowl. Be careful not to overmix.
- First Rise: Place the dough in a lightly oiled bowl, turning to coat. Cover the bowl with plastic wrap or a damp towel. Let the dough rise at room temperature (ideally around 70-75°F) for 3-5 hours, or until it has almost doubled in size.
- Stretch and Folds: During the bulk fermentation, perform stretch and folds every 30-60 minutes for the first 2-3 hours. To do a stretch and fold, gently grab one side of the dough, stretch it upwards, and fold it over onto itself. Rotate the bowl 90 degrees and repeat. Do this until you’ve stretched and folded all four sides of the dough.
- Check for Readiness: The dough is ready for shaping when it has increased in volume, feels light and airy, and has some visible bubbles on the surface. You can also perform the poke test: gently poke the dough with a floured finger. If the indentation slowly springs back, the dough is ready. If it springs back immediately, it needs more time. If it doesn’t spring back at all, it’s over-proofed.
- Pre-Shape: Gently turn the dough out onto a lightly floured surface. Shape it into a loose round or oval. Cover with a damp towel and let it rest for 20-30 minutes.
- Final Shape: After the rest, gently shape the dough into its final shape. For a boule (round loaf), gently pull the edges of the dough towards the center, creating tension on the surface. For a batard (oval loaf), gently roll the dough into a log shape, tapering the ends.
- Proofing: Place the shaped dough in a well-floured banneton basket (or a bowl lined with a floured kitchen towel). Cover with plastic wrap or a damp towel. Let the dough proof in the refrigerator for 12-24 hours.
- Preheat Oven: Preheat your oven to 450°F (232°C) with a Dutch oven inside for at least 30 minutes.
- Score the Dough: Carefully remove the hot Dutch oven from the oven. Gently invert the dough from the banneton basket into the Dutch oven. Use a lame or sharp knife to score the top of the dough.
- Bake Covered: Cover the Dutch oven and bake for 20 minutes.
- Bake Uncovered: Remove the lid of the Dutch oven and continue baking for another 25-35 minutes, or until the crust is a deep golden brown and the internal temperature of the bread reaches 205-210°F (96-99°C).
- Cooling: Carefully remove the bread from the Dutch oven and place it on a wire rack to cool completely before slicing. Let it cool for at least 2 hours, or even longer if you can resist.
Notes
- Use a Kitchen Scale: Baking is a science, and accurate measurements are essential for consistent results. A kitchen scale is your best friend.
- Water Temperature: Pay attention to the water temperature. Lukewarm water (around 85°F) is ideal for activating the yeast.
- Don’t Overmix: Overmixing can develop the gluten too much, resulting in a tough bread.
- Be Patient: Sourdough baking takes time and patience. Don’t rush the process.
- Experiment: Once you are comfortable with the recipe, feel free to experiment with different flours, hydration levels, and scoring patterns to create your own unique sourdough loaf.


Leave a Comment